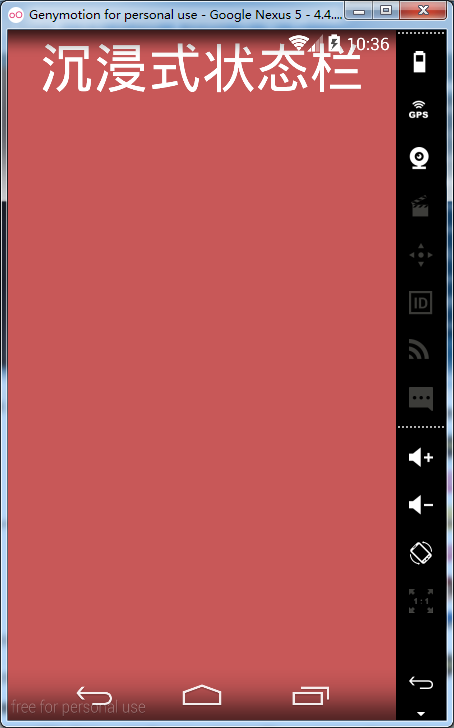
相信用过iPhone的人,都会觉得iPhone的那种沉浸式状态栏比Android那种硬邦邦的黑色状态栏要好看多了,以前的Android版本是不能进行修改了,或者说修改比较麻烦,但是4.4之后我们可以非常简单的进行状态栏颜色的修改了。只需要简单的几行的代码就可以进行修改了。
首先我们来看看效果:
实现状态栏颜色修改有两种方法可以实现:
第一种:
getWindow().addFlags(WindowManager.LayoutParams.FLAG_TRANSLUCENT_STATUS);
将状态栏设置为透明,然后在你的根布局文件里面设置一个背景颜色,这样就可以实现沉浸式状态栏了,不过我们会看到这样的效果:

你会发现布局已经填充到状态栏里面了,这样是因为我们设置透明以后默认就不会自动间距状态栏的高度了,这个时候我们只需要在你的根布局上面添加这两行代码:
android:fitsSystemWindows="true"
android:clipToPadding="true"
就可以了,好,我们再运行一下:
不过,在5.0的模拟器上面用这种方法进行状态栏设置时,是无效的,不是知道是不是模拟器的问题,没有真机5.0的系统,测试不了。这里如果有测试过的朋友,可以在下面留言给我哦!
以上就是第一种方式状态栏设置颜色
第二种:
这种方式是利用github上面一个开源项目来实现的,地址不记得了,这里就不贴了,对不起原创啦!
先贴上代码:
/**
 * Class to manage status and navigation bar tint effects when using KitKat
 * translucent system UI modes.
 *
 */
public class SystemBarTintManager {


    static {
        // Android allows a system property to override the presence of the navigation bar.
        // Used by the emulator.
        // See https://github.com/android/platform_frameworks_base/blob/master/policy/src/com/android/internal/policy/impl/PhoneWindowManager.java#L1076
        if (Build.VERSION.SDK_INT >= Build.VERSION_CODES.KITKAT) {
            try {
                Class c = Class.forName("android.os.SystemProperties" );
                Method m = c.getDeclaredMethod("get" , String.class);
                m.setAccessible(true);
                sNavBarOverride = (String) m.invoke(null, "qemu.hw.mainkeys" );
            } catch (Throwable e) {
                sNavBarOverride = null;
            }
        }
    }


    /**
     * The default system bar tint color value.
     */
    public static final int DEFAULT_TINT_COLOR = 0x99000000;

    private static String sNavBarOverride;

    private final SystemBarConfig mConfig;
    private boolean mStatusBarAvailable;
    private boolean mNavBarAvailable;
    private boolean mStatusBarTintEnabled;
    private boolean mNavBarTintEnabled;
    private View mStatusBarTintView;
    private View mNavBarTintView;

    /**
     * Constructor. Call this in the host activity onCreate method after its
     * content view has been set. You should always create new instances when
     * the host activity is recreated.
     *
     * @param activity The host activity.
     */
    @TargetApi(19)
    public SystemBarTintManager(Activity activity) {

        Window win = activity.getWindow();
        ViewGroup decorViewGroup = (ViewGroup) win.getDecorView();

        if (Build.VERSION.SDK_INT >= Build.VERSION_CODES.KITKAT) {
            // check theme attrs
            int[] attrs = {android.R.attr.windowTranslucentStatus,
                    android.R.attr.windowTranslucentNavigation};
            TypedArray a = activity.obtainStyledAttributes(attrs);
            try {
                mStatusBarAvailable = a.getBoolean(0, false );
                mNavBarAvailable = a.getBoolean( 1, false);
            } finally {
                a.recycle();
            }

            // check window flags
            WindowManager.LayoutParams winParams = win.getAttributes();
            int bits = WindowManager.LayoutParams.FLAG_TRANSLUCENT_STATUS;
            if ((winParams.flags & bits) != 0) {
                mStatusBarAvailable = true;
            }
            bits = WindowManager.LayoutParams.FLAG_TRANSLUCENT_NAVIGATION;
            if ((winParams.flags & bits) != 0) {
                mNavBarAvailable = true;
            }
        }

        mConfig = new SystemBarConfig(activity, mStatusBarAvailable, mNavBarAvailable);
        // device might not have virtual navigation keys
        if (!mConfig.hasNavigtionBar()) {
            mNavBarAvailable = false;
        }

        if (mStatusBarAvailable) {
            setupStatusBarView(activity, decorViewGroup);
        }
        if (mNavBarAvailable) {
            setupNavBarView(activity, decorViewGroup);
        }

    }

    /**
     * Enable tinting of the system status bar.
     *
     * If the platform is running Jelly Bean or earlier, or translucent system
     * UI modes have


 本文介绍了在Android 4.4及更高版本中如何实现沉浸式状态栏,包括两种方法:通过设置透明状态栏并调整布局,以及使用开源库。虽然在Android 5.0模拟器上第一种方法可能无效,但第二种方法提供了更好的扩展性,适合作为BaseActivity的基础。作者期待未来Android能提供更简单的API来直接修改状态栏颜色。


 最低0.47元/天 解锁文章


 256
256

 被折叠的 条评论
为什么被折叠?


