


一、前言
之前以 Java 为主要的开发语言,后台、爬虫 都是使用 Java 语言
近来,开发时逐步使用 Python 取代 Java,换种口味~
本文根据之前 Java 爬虫涉及到方法为导向,以 Python 来实现,
包括 模拟浏览器、代理ip、开启日志、超时处理、异常处理、Get/Post请求 等
1、Java 爬虫常规操作:
[Java爬虫] 使用 Jsoup+HttpClient 爬取网站基本信息
[Java爬虫] 使用 Jsoup + HttpClient 爬取网页图片
[Java爬虫] 使用 Xpath + HtmlUnit 爬取网页基本信息
[Java爬虫] 使用 HtmlUnit + Xpath 模拟点击、动态获取信息
2、参考资料:
《精通Python网络爬虫》韦玮 著
多功能的 Requests
二、代码
2.1.urllib.request 模块
① 常规操作
# 注意:因为python3.X有时候不会将子模块自动导入进去,所以改成import url.request问题就解决了
import urllib.request

# 1、读取网页信息
file=urllib.request.urlopen('https://blog.csdn.net/larger5')
# ① 读取全部内容,赋予一个字符串
# print(file.read())
# ② 读取一行内容,赋予一个字符串
# print(file.readline())
# ③ 读取全部内容,赋予一个列表,一行一个元素
print(file.readlines())

# 2、获取其他信息
# ① 环境
print(file.info())
# ② 状态码
print(file.getcode())
# ③ 获取 URL
print(file.geturl())

# 3、URL 编码、解码
# ① 编码
print(urllib.request.quote('https://blog.csdn.net/larger5')) # https%3A//blog.csdn.net/larger5
# ② 解码
print(urllib.request.unquote('https%3A//blog.csdn.net/larger5')) # https://blog.csdn.net/larger5

# 4、写到本地
# ① 使用 传统文件:
file=urllib.request.urlopen('https://blog.csdn.net/larger5')
with open('C:/Users/linhongcun/Desktop/cun.html','wb')as fhandle:
    fhandle.write(file.read())
# ② 使用 urllib 库:
fhandle2=urllib.request.urlretrieve('https://blog.csdn.net/larger5',filename='C:/Users/linhongcun/Desktop/cun.html')

# 5、模拟浏览器
# ① 使用 build_opener() 修改报头
headers=('User-Agent','Mozilla/5.0 (Windows NT 10.0; WOW64) AppleWebKit/537.36 (KHTML, like Gecko) Chrome/63.0.3239.132 Safari/537.36')
opener=urllib.request.build_opener()
opener.addheaders=[headers]
print(opener.open('https://blog.csdn.net/larger5').read())
# ② 使用 add_header ✔
req=urllib.request.Request('https://blog.csdn.net/larger5')
req.add_header('User-Agent','Mozilla/5.0 (Windows NT 10.0; WOW64) AppleWebKit/537.36 (KHTML, like Gecko) Chrome/63.0.3239.132 Safari/537.36')
print(urllib.request.urlopen(req).read())

# 6、设置超时
try:
    file = urllib.request.urlopen('https://blog.csdn.net/larger5',timeout=1)
    print('正常爬取')
    print(file.read())
except Exception as e:
    print('爬取失败')
    print(str(e))

# 7、使用代理 ip
proxy=urllib.request.ProxyHandler({
    'http':'202.93.128.98:3128'
})
opener=urllib.request.build_opener(proxy,urllib.request.HTTPHandler)
urllib.request.install_opener(opener)
url='https://blog.csdn.net/larger5'
data=urllib.request.urlopen(url).read().decode('utf-8')
print(len(data))

# 8、开启日志
httphd=urllib.request.HTTPHandler(debuglevel=1)
httpshd=urllib.request.HTTPSHandler(debuglevel=1)
opener=urllib.request.build_opener(httphd,httpshd)
urllib.request.install_opener(opener)
url='https://blog.csdn.net/larger5/article/details/79946353'
data=urllib.request.urlopen(url)

# 9、通用爬虫异常处理
try:
    urllib.request.urlopen('https://blog.csdn.net/larger5')
except urllib.error.URLError as e:
    if hasattr(e,'code'):
        print(e.code)
    if hasattr(e,'reason'):
        print(e.reason)
② Get/Post 请求实战
import urllib.request
import urllib.parse
# 1、Get 请求示例
url='http://www.baidu.com/s?wd='
wd='爬虫'
wd_code=urllib.request.quote(wd) # 注意含中文,要编码
fullurl=url+wd_code
fhandle=urllib.request.urlretrieve(fullurl,filename='C:/Users/linhongcun/Desktop/cun.html')
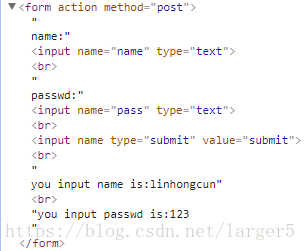
# 2、Post 请求示例
url='http://www.iqianyue.com/mypost'
postdata=urllib.parse.urlencode({
'name':'linhongcun',
'pass':'123'
}).encode('utf-8')
req=urllib.request.Request(url,postdata)
req.add_header('User-Agent','Mozilla/5.0 (Windows NT 10.0; WOW64) AppleWebKit/537.36 (KHTML, like Gecko) Chrome/63.0.3239.132 Safari/537.36')
data=urllib.request.urlopen(req).read()
with open('C:/Users/linhongcun/Desktop/cun.html','wb') as fhandle2:
fhandle2.write(data)Post 请求涉及到的网页源码
2.2.requests 模块
①登录
# pip3 install requests
import requests
# 登录
session = requests.Session()
payload = {'username': 'Morvan', 'password': 'password'}
r = session.post('http://pythonscraping.com/pages/cookies/welcome.php', data=payload)
print(r.content)
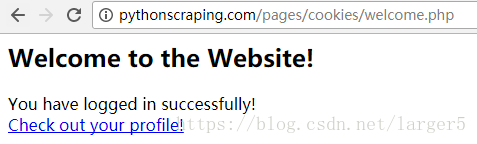
r = session.get("http://pythonscraping.com/pages/cookies/welcome.php")
print(r.content)登录成功
登录页
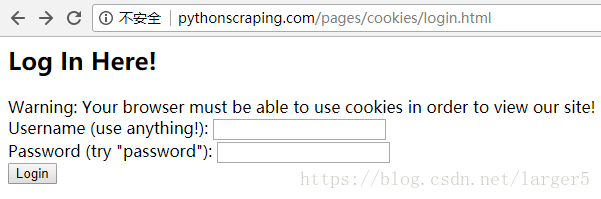
登录失败

效果:
先进入登录失败页,
后面的都是成功页了

②下载图片
# pip3 install requests
import requests
IMAGE_URL="https://www.baidu.com/img/bd_logo1.png?where=super"
r = requests.get(IMAGE_URL, stream=True)    # stream loading
SAVE_URL="C://LLLLLLLLLLLLLLLLLLL/image3.png"
with open(SAVE_URL, 'wb') as f:
    for chunk in r.iter_content(chunk_size=32):
        f.write(chunk)


 876
876


 被折叠的 条评论
为什么被折叠?
被折叠的 条评论
为什么被折叠?
 到【灌水乐园】发言


