


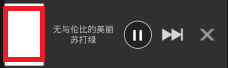
最近的项目中,需要用到Notification。上一下效果图:
首先,学习一下关于Notification的基本知识。
状态通知栏主要涉及到2个类: Notification 和 NotificationManager 。
Notification为通知信息类,它里面对应了通知栏的各个属性。
NotificationManager : 是状态栏通知的管理类,负责发通知、清除通知等操作。
注意:NotificationManager 是一个系统Service,必须通过 getSystemService(NOTIFICATION_SERVICE)方法来获取:
mNotificationManager = (NotificationManager) getSystemService(NOTIFICATION_SERVICE);自定义Notification大致分为以下几步:
- 自定义布局;
- 使用NotificationCompat.Builder创建Notification。使用RemoteViews填充自定义布局,然后通过setContent()添加到Builder中;
- 使用广播,添加按钮点击事件;
- NotificationManager.notify()将Notification显示到手机状态栏。
下面结合代码进行说明。
第一步,对应于Notification的布局文件:
<?xml version="1.0" encoding="utf-8"?>
<LinearLayout xmlns:android="http://schemas.android.com/apk/res/android"
    android:layout_width="match_parent"
    android:layout_height="match_parent"
    android:gravity="center"
    android:orientation="horizontal">

    <ImageView
        android:id="@+id/music_cover"
        android:layout_width="64dp"
        android:layout_height="wrap_content"
        android:scaleType="centerCrop"
        android:src="@drawable/mia" />

    <LinearLayout
        android:layout_width="0dp"
        android:layout_height="match_parent"
        android:layout_weight="1"
        android:gravity="center"
        android:orientation="vertical">

        <TextView
            android:id="@+id/music_name"
            android:layout_width="wrap_content"
            android:layout_height="wrap_content"
            android:ellipsize="end"
            android:singleLine="true"
            android:text="无与伦比的美丽" />

        <TextView
            android:id="@+id/singer_name"
            android:layout_width="wrap_content"
            android:layout_height="wrap_content"
            android:ellipsize="end"
            android:singleLine="true"
            android:text="苏打绿" />
    </LinearLayout>

    <ImageView
        android:id="@+id/pause"
        android:layout_width="48dp"
        android:layout_height="wrap_content"
        android:scaleType="centerCrop"
        android:src="@drawable/button_pause" />

    <ImageView
        android:id="@+id/play"
        android:layout_width="48dp"
        android:layout_height="wrap_content"
        android:scaleType="centerCrop"
        android:src="@drawable/button_play"
        android:visibility="gone" />

    <ImageView
        android:id="@+id/next"
        android:layout_width="48dp"
        android:layout_height="wrap_content"
        android:layout_marginLeft="8dp"
        android:scaleType="centerCrop"
        android:src="@drawable/btn_next" />

    <ImageView
        android:id="@+id/delete"
        android:layout_width="48dp"
        android:layout_height="wrap_content"
        android:layout_marginLeft="8dp"
        android:layout_marginRight="8dp"
        android:scaleType="centerCrop"
        android:src="@drawable/search_delete" />


</LinearLayout>
布局文件很简单,不做过多叙述。
再来看到Notification的创建。
public class PlayerService extends Service {
    // 广播Action
    private final static String NOTIFICATION_PLAY_ACTION = "com.notifications.intent.action.PlayClick";
    private final static String NOTIFICATION_PAUSE_ACTION = "com.notifications.intent.action.PauseClick";
    private final static String NOTIFICATION_NEXT_ACTION = "com.notifications.intent.action.NextClick";
    private final static String NOTIFICATION_DELETE_ACTION = "com.notifications.intent.action.DeleteClick";
    // 自定义Notification
    private NotificationManager mNotificationManager = null;
    private PendingIntent contentIntent;
    private NotificationCompat.Builder builder;
    private Notification notification;
    private RemoteViews contentView; // 自定义Notification,接收布局
    private PlayerService service = this;
    private BroadcastReceiver onClickReceiver; // 注册广播接收点击事件

    @Override
    public void onCreate() {
        mNotificationManager = (NotificationManager) getSystemService(NOTIFICATION_SERVICE);
        contentIntent = PendingIntent.getActivity(this, 0, new Intent(this, MusicPlayActivity.class), 0);
        contentView = new RemoteViews(getPackageName(), R.layout.custom_notification);
        builder = new NotificationCompat.Builder(this);
        notification = builder
                .setContentIntent(contentIntent)
                .setWhen(System.currentTimeMillis())
                .setSmallIcon(R.drawable.mia)
                .setContent(contentView)
                .build();
        notification.flags = Notification.FLAG_NO_CLEAR; // 注意Flag,会影响是否能cancel

        // 播放
        Intent playIntent = new Intent(NOTIFICATION_PLAY_ACTION);
        PendingIntent play = PendingIntent.getBroadcast(this, 0, playIntent, 0);
        contentView.setOnClickPendingIntent(R.id.play, play);
        // 暂停
        Intent pauseIntent = new Intent(NOTIFICATION_PAUSE_ACTION);
        PendingIntent pause = PendingIntent.getBroadcast(this, 0, pauseIntent, 0);
        contentView.setOnClickPendingIntent(R.id.pause, pause);
        // 下一首
        Intent nextIntent = new Intent(NOTIFICATION_NEXT_ACTION);
        PendingIntent next = PendingIntent.getBroadcast(this, 0, nextIntent, 0);
        contentView.setOnClickPendingIntent(R.id.next, next);
        // 关闭
        Intent deleteIntent = new Intent(NOTIFICATION_DELETE_ACTION);
        final PendingIntent delete = PendingIntent.getBroadcast(this, 0, deleteIntent, 0);
        contentView.setOnClickPendingIntent(R.id.delete, delete);

        // Notification中按钮点击事件需注册广播
        onClickReceiver = new BroadcastReceiver() {
            @Override
            public void onReceive(Context context, Intent intent) {
                String action = intent.getAction();
                switch (action) {
                    case NOTIFICATION_PLAY_ACTION:
                        contentView.setViewVisibility(R.id.play, View.GONE);
                        contentView.setViewVisibility(R.id.pause, View.VISIBLE);
                        if (!service.isPlaying()) {
                            service.resume(); // 继续播放
                        }
                        mNotificationManager.notify(PLAYING_NOTIFY_ID, notification);
                        break;
                    case NOTIFICATION_PAUSE_ACTION:
                        contentView.setViewVisibility(R.id.pause, View.GONE);
                        contentView.setViewVisibility(R.id.play, View.VISIBLE);
                        if (service.isPlaying()) {
                            service.pause(); // 暂停
                        }
                        mNotificationManager.notify(PLAYING_NOTIFY_ID, notification);
                        break;
                    case NOTIFICATION_NEXT_ACTION:
                        service.next(); // 下一首
                        break;
                    case NOTIFICATION_DELETE_ACTION:
                        service.stop();
                        break;
                    default:
                        break;
                }
            }
        };
        IntentFilter filter = new IntentFilter();
        filter.addAction(NOTIFICATION_PLAY_ACTION);
        filter.addAction(NOTIFICATION_PAUSE_ACTION);
        filter.addAction(NOTIFICATION_NEXT_ACTION);
        filter.addAction(NOTIFICATION_DELETE_ACTION);
        registerReceiver(onClickReceiver, filter);
    }
播放音乐使用的自然是Service了。于是我定义了PlayerService继承自Service,声明相应的变量,然后在onCreate()中进行初始化。
我们可以看到,代码中使用RemoteViews填充了布局,并将其设置到Notification创建的Builder中。
RemoteViews不同于View,它不能通过findViewById()来获取View控件。它里面的控件的点击事件必须通过setOnClickPendingIntent()来进行设置。它有2个参数,1个是控件ID,另外1个是进行处理的PendingIntent。PendingIntent的创建必须通过广播的方式来实现。重复下上面的代码:
Intent playIntent = new Intent(NOTIFICATION_PLAY_ACTION);
PendingIntent play = PendingIntent.getBroadcast(this, 0, playIntent, 0);
contentView.setOnClickPendingIntent(R.id.play, play);
然后在广播的onReceive()方法中,判断是哪个控件被点击。然后执行相应的逻辑。
记得广播一定要先注册才能使用。
最后,便是将Notification显示到手机了。
final Track track = getCurrentEntry().getTrack();
ImageLoader.getInstance().loadImage(track.getUrl(), new SimpleImageLoadingListener() {
                @Override
                public void onLoadingComplete(String imageUri, View view, Bitmap loadedImage) {
                    contentView.setImageViewBitmap(R.id.music_cover, loadedImage);
                    contentView.setTextViewText(R.id.music_name, track.getName());
                    contentView.setTextViewText(R.id.singer_name, track.getSinger());
                    mNotificationManager.notify(PLAYING_NOTIFY_ID, notification);
                }
});Track是我进行音乐播放的一个Model类。包含一些播放音乐的基本信息。这里我是通过的Universal-Image-Loader进行图片加载。在其加载成功后的回调中,通过setTextViewText()等类似方法给控件设值。也是有2个参数,第1个是控件Id,第二个便是要设置的值。
最后通过mNotificationManager.notify(PLAYING_NOTIFY_ID, notification)将Notification显示到手机。
经过上述几个步骤,自定义Notification便能显示到手机了,并且具备点击事件。
Tips:
- 自定义布局仅支持FrameLayout、LinearLayout、RelativeLayout三种布局控件和AnalogClock、Chronometer、Button、ImageButton、ImageView、ProgressBar、TextView、ViewFlipper、ListView、GridView、StackView和AdapterViewFlipper这些显示控件,不支持这些类的子类或Android提供的其他控件,否则会引起ClassNotFoundException异常。
之前播放的按钮打算用ToggleButton,使用之后发现显示不了,后面才找到原因。 - Notification属于系统级别的组件,使用了RemoteViews的setViewVisibility()、setTextViewText()等方法后,必须通知系统重绘才能更新UI,最简单的方式就是重新notify一下。只要传入的Id一样,就会覆盖掉之前的通知。
在播放、暂停按钮切换的时候,就碰到这个问题,一直不能显示,加上notify语句后就能正常执行了。 - 关于Notification的取消。
使用mNotificationManager.cancel(PLAYING_NOTIFY_ID)即可。但是一定要注意Notification的flag。这里补充下Notification的标识符。
提醒标志符成员:
Notification.FLAG_SHOW_LIGHTS //三色灯提醒,在使用三色灯提醒时候必须加该标志符
Notification.FLAG_ONGOING_EVENT //发起正在运行事件(活动中)
Notification.FLAG_INSISTENT //让声音、振动无限循环,直到用户响应 (取消或者打开)
Notification.FLAG_ONLY_ALERT_ONCE //发起Notification后,铃声和震动均只执行一次
Notification.FLAG_AUTO_CANCEL //用户单击通知后自动消失
Notification.FLAG_NO_CLEAR //只有全部清除时,Notification才会清除 ,不清楚该通知(QQ的通知无法清除,就是用的这个)
Notification.FLAG_FOREGROUND_SERVICE //表示正在运行的服务
我当时使用的FLAG_FOREGROUND_SERVICE,导致cancel一直关闭不了Notification,更换flag后就能关闭了。


 98
98


 被折叠的 条评论
为什么被折叠?
被折叠的 条评论
为什么被折叠?
 到【灌水乐园】发言


