


Toolbar的使用,及一些需要的小知识点在使用Google或Baidu可以搜索出来。所以,仅做下简单记录。Toolbar是ActionBar的替代使用。使用Toolbar可以更加的灵活,更容易编写顶部的布局。以前都是使用
自定义的布局作为Actionbar,Toolbar也是如此。如果顶部过于复杂,则也还是要回到自定义布局上。
Toolbar集成自ViewGroup,并做了一些封装。下面看如何使用:首先是要设置窗口为noActionBar, noTitle;我们在全局的style.xml中设置。
        <!-- Base application theme. -->
    <style name="AppTheme" parent="Theme.AppCompat.Light.DarkActionBar">
        <!-- Customize your theme here. -->
        <item name="colorPrimary">@color/colorPrimary</item>
        <item name="colorPrimaryDark">@color/colorPrimaryDark</item>
        <item name="colorAccent">@color/colorAccent</item>

        <item name="windowActionBar">false</item>
        <item name="windowNoTitle">true</item>
    </style>
然后在xml布局上使用:
<?xml version="1.0" encoding="utf-8"?>
<LinearLayout xmlns:android="http://schemas.android.com/apk/res/android"
    xmlns:tools="http://schemas.android.com/tools"
    android:layout_width="match_parent"
    android:layout_height="match_parent"
    xmlns:app="http://schemas.android.com/apk/res-auto"
    android:orientation="vertical"
    tools:context="cn.tofly.mis.waterusermanager.testmodule.TestActivity">

    <android.support.v7.widget.Toolbar
        android:id="@+id/toolbar"
        android:layout_width="match_parent"
        android:layout_height="?attr/actionBarSize"
        android:background="?attr/colorPrimary"
        app:popupTheme="@style/ThemeOverlay.AppCompat.Light"
        android:theme="@style/ToolbarStyle">

        <TextView
            android:layout_width="wrap_content"
            android:layout_height="wrap_content"
            android:layout_gravity="center"
            android:text="我是标题" />

    </android.support.v7.widget.Toolbar>

    <FrameLayout
        android:id="@+id/fragment_container"
        android:layout_width="match_parent"
        android:layout_height="match_parent" />

</LinearLayout>
这是个简单的布局。这里是使title居中的布局。默认的Toolbar布局并不是这样。android:background属性是设置底色;
app:popupTheme属性是使点击over flow弹出的框的背景和字体为白底黑字;android:theme是设置了图标的颜色。style里的写法是这样的:
    <style name="ToolbarStyle" parent="ThemeOverlay.AppCompat.Dark.ActionBar">
        <item name="colorControlNormal">@android:color/white</item>
    </style>
最后,我们要做Activity中做一些设置,就几行代码:
      Toolbar toolbar = (Toolbar) findViewById(R.id.toolbar);
        toolbar.setTitle("xxxsss");

        setSupportActionBar(toolbar);

        ActionBar ab = getSupportActionBar();
        ab.setDisplayHomeAsUpEnabled(true);
        ab.setDisplayShowHomeEnabled(true);
要使用默认的导航,这样设置:
    private void setUpToolbar() {
        Toolbar toolbar = (Toolbar) findViewById(R.id.toolbar);
        toolbar.setTitle(R.string.label_arrearsinquiry);

        setSupportActionBar(toolbar);

        ActionBar ab = getSupportActionBar();

        if (ab != null) {
            ab.setDisplayHomeAsUpEnabled(true);
        }

    }
设置logo,
     Toolbar toolbar = (Toolbar) findViewById(R.id.toolbar);
        toolbar.setTitle(R.string.main_label);

        setSupportActionBar(toolbar);

        ActionBar ab = getSupportActionBar();
        if (ab != null) {
            ab.setHomeAsUpIndicator(R.drawable.ic_launcher);
            ab.setDisplayHomeAsUpEnabled(true);
}监听当点击了导航返回时的回调事件,只需要覆盖重写onSupportNavigateUp方法:
    @Override
    public boolean onSupportNavigateUp() {
        onBackPressed();
        return true;
    }
设置menu菜单,和以前的用法一样,监听也是。如果是在fragment中使用时,则要加上这样一句:
setHasOptionsMenu(true);同理在以下的两个函数中设置和监听:
    @Override
    public boolean onOptionsItemSelected(MenuItem item) {
        switch (item.getItemId()) {
            case R.id.menu_edit:
                LogUtils.toastShortMsg(mActivity, "edit");

                return true;
            case R.id.menu_setting45:
                LogUtils.toastShortMsg(mActivity, "setting45");

                return true;
            case android.R.id.home:
                LogUtils.toastShortMsg(mActivity, "home");

                return true;
            default:
        }

        return false;
    }


    @Override
    public void onCreateOptionsMenu(Menu menu, MenuInflater inflater) {
        inflater.inflate(R.menu.menu_test, menu);
    }
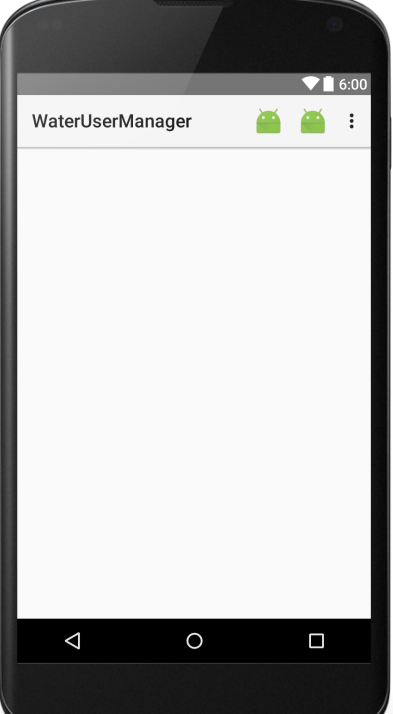
最后贴个menu_test.xml的代码:
<?xml version="1.0" encoding="utf-8"?>
<menu xmlns:android="http://schemas.android.com/apk/res/android"
    xmlns:tools="http://schemas.android.com/tools"
    tools:context=".HomeActivity">
    <item xmlns:app="http://schemas.android.com/apk/res-auto"
        android:id="@+id/menu_edit"
        android:icon="@drawable/ic_launcher"
        android:title="编辑"
        android:orderInCategory="80"
        app:showAsAction="ifRoom" />

    <item xmlns:app="http://schemas.android.com/apk/res-auto"
        android:id="@+id/menu_setting3"
        android:icon="@drawable/ic_launcher"
        android:title="设置xxxxxx"
        android:orderInCategory="90"
        app:showAsAction="always" />

    <item xmlns:app="http://schemas.android.com/apk/res-auto"
        android:id="@+id/menu_setting4"
        android:icon="@drawable/ic_launcher"
        android:title="设置2222"
        android:orderInCategory="90"
        app:showAsAction="never" />


    <item xmlns:app="http://schemas.android.com/apk/res-auto"
        android:id="@+id/menu_setting45"
        android:icon="@drawable/ic_launcher"
        android:title="设置442"
        android:orderInCategory="90"
        app:showAsAction="never" />


</menu>
就这样吧,参考资料:
1.http://www.jcodecraeer.com/a/anzhuokaifa/androidkaifa/2014/1118/2006.html
2.http://blog.csdn.net/mchenys/article/details/51533689
3.http://www.codeceo.com/article/android-toolbar-develop.html
4.http://blog.csdn.net/Picasso_L/article/details/50159095


 410
410


 被折叠的 条评论
为什么被折叠?
被折叠的 条评论
为什么被折叠?
 到【灌水乐园】发言


