


背景:
分屏一般在手机上都是都是从桌面的最近任务卡片进入的,一般来说手机用户都是这样操作的,但是有一些场景或者情况就不一定可以顺利用上这个桌面的多任务卡片进入。
比如以下场景:
1、可能不是桌面的多任务的场景,因为桌面进入相对来说流程较多选着较多,有的场景可能想要一键直接进入
2、有可能没有aosp的手机桌面,设备可能是车机,广告机等其他设备,这个时候不一定用的就是手机的桌面
3、经常开发有的可能需要使用命令进行调试等,或者自动化测试等
这个时候就需要有一个可以直接通过命令行拉起分屏的需求是最好的
相关命令
进入分屏相关的命令相关稳定性较差,基本上属于经常会变化情况,所以大家一定要注意查看最新的,具体查看方式可以看如下:
基于aosp13 r6版本命令:
help命令
相关命令一般都是基于WMShell下面进行的具体先看看WMShell命令支持哪些命令,这个需要输入help
test@test:~/disk2/aosp14$ adb shell dumpsys activity service SystemUIService  WMShell help
SERVICE com.android.systemui/.SystemUIService 71a3e0e pid=752 user=0
  Client:

    com.android.systemui.wmshell.WMShell:
    ----------------------------------------------------------------------------
    Window Manager Shell commands:
      help
          Print this help text.
      <no arguments provided>
        Dump Window Manager Shell internal state
      pair <taskId1> <taskId2>
      unpair <taskId>
        Pairs/unpairs tasks with given ids.
      moveToSideStage <taskId> <SideStagePosition>
        Move a task with given id in split-screen mode.
      removeFromSideStage <taskId>
        Remove a task with given id in split-screen mode.
      setSideStageOutline <true/false>
        Enable/Disable outline on the side-stage.
      setSideStagePosition <SideStagePosition>
        Sets the position of the side-stage.

    Dump took 0ms
pair命令
这里可以看到支持pair,moveToSideStage这两个核心的部分,具体这里进行解释一下:
pair
代表成对显示的意识,即吧taskId1和taskId2进行成对显示,即分屏,但是这个分屏和桌面进入的分屏是不一样的,核心不一样的点就是层级结构树都不一样,具体看如下实战。
第一步:
打开两个可以分屏的应用,然后通过命令查看task1和task2的id
test@test:~/disk2/aosp14$ adb shell am stack list
RootTask id=234 bounds=[0,0][1440,2960] displayId=0 userId=0
 configuration={1.0 310mcc260mnc [en_US] ldltr sw411dp w411dp h773dp 560dpi nrml long port finger qwerty/v/v dpad/v winConfig={ mBounds=Rect(0, 0 - 1440, 2960) mAppBounds=Rect(0, 0 - 1440, 2792) mMaxBounds=Rect(0, 0 - 1440, 2960) mDisplayRotation=ROTATION_0 mWindowingMode=fullscreen mDisplayWindowingMode=fullscreen mActivityType=standard mAlwaysOnTop=undefined mRotation=ROTATION_0} s.24 fontWeightAdjustment=0}
  taskId=234: com.android.dialer/com.android.dialer.main.impl.MainActivity bounds=[0,0][1440,2960] userId=0 visible=true topActivity=ComponentInfo{com.android.dialer/com.android.dialer.main.impl.MainActivity}

RootTask id=1 bounds=[0,0][1440,2960] displayId=0 userId=0
 configuration={1.0 310mcc260mnc [en_US] ldltr sw411dp w411dp h773dp 560dpi nrml long port finger qwerty/v/v dpad/v winConfig={ mBounds=Rect(0, 0 - 1440, 2960) mAppBounds=Rect(0, 0 - 1440, 2792) mMaxBounds=Rect(0, 0 - 1440, 2960) mDisplayRotation=ROTATION_0 mWindowingMode=fullscreen mDisplayWindowingMode=fullscreen mActivityType=home mAlwaysOnTop=undefined mRotation=ROTATION_0} s.24 fontWeightAdjustment=0}
  taskId=232: com.android.launcher3/com.android.launcher3.uioverrides.QuickstepLauncher bounds=[0,0][1440,2960] userId=0 visible=false topActivity=ComponentInfo{com.android.launcher3/com.android.launcher3.uioverrides.QuickstepLauncher}

RootTask id=233 bounds=[0,0][1440,2960] displayId=0 userId=0
 configuration={1.0 310mcc260mnc [en_US] ldltr sw411dp w411dp h773dp 560dpi nrml long port finger qwerty/v/v dpad/v winConfig={ mBounds=Rect(0, 0 - 1440, 2960) mAppBounds=Rect(0, 0 - 1440, 2792) mMaxBounds=Rect(0, 0 - 1440, 2960) mDisplayRotation=ROTATION_0 mWindowingMode=fullscreen mDisplayWindowingMode=fullscreen mActivityType=standard mAlwaysOnTop=undefined mRotation=ROTATION_0} s.24 fontWeightAdjustment=0}
  taskId=233: com.android.messaging/com.android.messaging.ui.conversationlist.ConversationListActivity bounds=[0,0][1440,2960] userId=0 visible=false topActivity=ComponentInfo{com.android.messaging/com.android.messaging.ui.conversationlist.ConversationListActivity}

RootTask id=2 bounds=[0,0][1440,2960] displayId=0 userId=0
 configuration={1.0 310mcc260mnc [en_US] ldltr sw411dp w411dp h773dp 560dpi nrml long port finger qwerty/v/v dpad/v winConfig={ mBounds=Rect(0, 0 - 1440, 2960) mAppBounds=Rect(0, 0 - 1440, 2792) mMaxBounds=Rect(0, 0 - 1440, 2960) mDisplayRotation=ROTATION_0 mWindowingMode=fullscreen mDisplayWindowingMode=fullscreen mActivityType=undefined mAlwaysOnTop=undefined mRotation=ROTATION_0} s.24 fontWeightAdjustment=0}
  taskId=2: unknown bounds=[0,0][1440,2960] userId=0 visible=false

RootTask id=3 bounds=[0,0][1440,2960] displayId=0 userId=0
 configuration={1.0 310mcc260mnc [en_US] ldltr sw411dp w411dp h773dp 560dpi nrml long port finger qwerty/v/v dpad/v winConfig={ mBounds=Rect(0, 0 - 1440, 2960) mAppBounds=Rect(0, 0 - 1440, 2792) mMaxBounds=Rect(0, 0 - 1440, 2960) mDisplayRotation=ROTATION_0 mWindowingMode=fullscreen mDisplayWindowingMode=fullscreen mActivityType=undefined mAlwaysOnTop=undefined mRotation=ROTATION_0} s.24 fontWeightAdjustment=0}
  taskId=4: unknown bounds=[0,0][1440,2960] userId=0 visible=false
  taskId=5: unknown bounds=[0,0][1440,2960] userId=0 visible=false
可以看到这里的 短信taskId是233 电话的taskId是234
执行如下命令:
adb shell dumpsys activity service SystemUIService WMShell pair 233 234
看看现象:
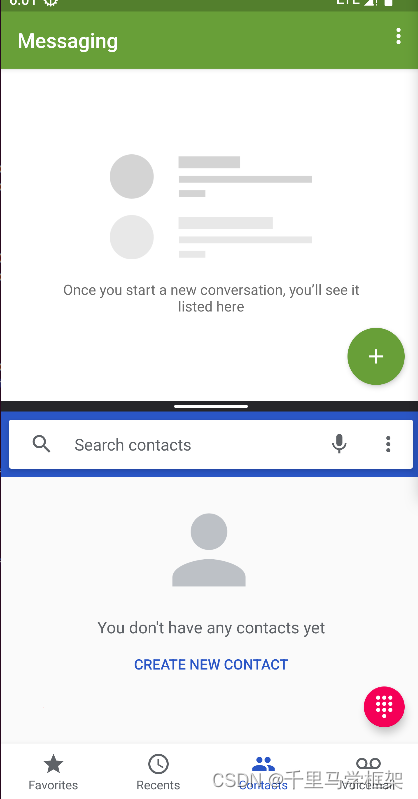
看着是不是和桌面进入分屏一样,但是操作还有有一些区别:
1、分割线双击无法互换上下两个分屏
2、分割线拖拉没有对应屏幕的icon,有黑屏产生
3、对应的层级结构树不一样差异如下:
pair模式进入分屏,发现只有一个task1和task2居然直接挂载同一个父节点

桌面正常分屏模式

相当于多了一层挂载点哈,task1和task2有自己main和side 容器task
ps:注意一下版本差异,新版本已经没有了这个命令
moveToSideStage命令
moveToSideStage <taskId> <SideStagePosition>
明显可以看出这个代表移动taskId到分屏的sideStagePosition,注意了,这个命令只需要指定一个taskId和他的position既可以,那么这里大家会有疑问那么另一个分屏该显示谁?
哈哈,这个其实没有指定当然就没办法按照你想要的task显示,这里系统源码展现的规则是:
当前task层级结构树的最顶部符合分屏要求的task,一般就是最顶端的task
具体使用:
查看短信taskid
taskId=236: com.android.messaging/com.android.messaging.ui.conversationlist.ConversationListActivity bounds=[0,0][1440,2960] userId=0 visible=false topActivity=ComponentInfo{com.android.messaging/com.android.messaging.ui.conversationlist.ConversationListActivity}
然后把短信放到分屏上部分即0,下部分1
adb shell dumpsys activity service SystemUIService WMShell moveToSideStage 236 0
这里看看现象:
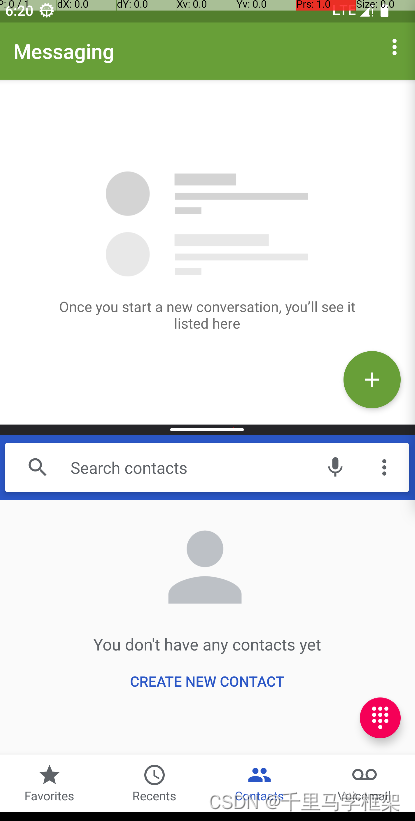
分屏另一个显示电话app,但是一定电话么?当然不是,如果我们打开相册情况下,执行命令那么下部分就是相册
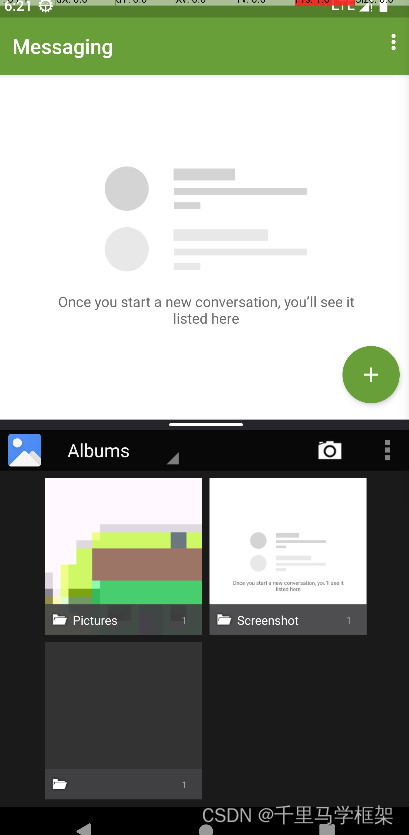
可以看出来又变成图库在下面了,所以这个命令其实不太灵活,没办法准确启动分屏两个task具体显示什么。
ps:高版本这个moveToSideStage命令还有使用差异
aosp14版本如下:
adb shell dumpsys activity service SystemUIService WMShell help
SERVICE com.android.systemui/.SystemUIService 494dc62 pid=736 user=0
  Client:

    com.android.systemui.wmshell.WMShell:
    ----------------------------------------------------------------------------
    Window Manager Shell commands:
      compatui
        restartDialogEnabled [0|false|1|true]
          Enable/Disable the restart education dialog for Size Compat Mode
        reachabilityEducationEnabled [0|false|1|true]
          Enable/Disable the restart education dialog for letterbox reachability
          Disable the restart education dialog for letterbox reachability
      protolog
        status
          Get current ProtoLog status.
        start
          Start proto logging.
        stop
          Stop proto logging and flush to file.
        enable [group...]
          Enable proto logging for given groups.
        disable [group...]
          Disable proto logging for given groups.
        enable-text [group...]
          Enable logcat logging for given groups.
        disable-text [group...]
          Disable logcat logging for given groups.
        save-for-bugreport
          Flush proto logging to file, only if it's enabled.
      splitscreen
        moveToSideStage <taskId> <SideStagePosition>
          Move a task with given id in split-screen mode.
        removeFromSideStage <taskId>
          Remove a task with given id in split-screen mode.
        setSideStagePosition <SideStagePosition>
          Sets the position of the side-stage.
      transitions
        tracing
          start
            Start tracing the transitions.
          stop
            Stop tracing the transitions.
          save-for-bugreport
            Flush in memory transition trace to file.
      help
          Print this help text.
      <no arguments provided>
        Dump all Window Manager Shell internal state
明显可以看到多个参数splitsreen,而且也没有pair命令
所以使用需要变成如下
adb shell dumpsys activity service SystemUIService WMShell splitscreen moveToSideStage 585 0
扩展一个startTask命令(代码只针对相关课程学员开源)
针对上面moveToSideStage无法确定另一个分屏的task情况,这里自己补充了startTask,使用方式如下:
adb shell dumpsys activity service SystemUIService WMShell splitscreen startTask taskId1 position1 taskId2 position2
具体实战使用如下:
taskId查看
taskId=590: com.android.dialer/com.android.dialer.main.impl.MainActivity
taskId=589: com.android.messaging/com.android.messaging.ui.conversationlist.ConversationListActivity
有了taskId就可以执行了
adb shell dumpsys activity service SystemUIService WMShell splitscreen startTask 589 0 590 1

本文章更多详细代码和资料需要购买课程获取
hal+perfetto+surfaceflinger
https://mp.weixin.qq.com/s/LbVLnu1udqExHVKxd74ILg

私聊作者+v(androidframework007)
其他课程七件套专题:
点击这里
https://mp.weixin.qq.com/s/Qv8zjgQ0CkalKmvi8tMGaw


 997
997


 被折叠的 条评论
为什么被折叠?
被折叠的 条评论
为什么被折叠?
 到【灌水乐园】发言


