


感觉好久没写东西了,今天记录一下困惑我多时的关于状态栏变色的问题。
1. 从Android4.4开始,才可以实现状态栏着色。
2. 从5.0开始系统更加完善了这一功能,可直接在主题中设置@color/colorPrimaryDark或者getWindow().setStatusBarColor(color)来实现。
3. 但毕竟4.4+的机器还有很大的占比,所以就有必要寻求其它的解决方案。
接下来一步步的来,在Android studio中新建一个module,最小API为19,自动生成的MainActivity使用的theme是这样的。
//values文件夹下styles.xml
 <style name="AppTheme" parent="Theme.AppCompat.Light.NoActionBar">
        <!-- Customize your theme here. -->
        <item name="colorPrimary">@color/colorPrimary</item>
        <item name="colorPrimaryDark">@color/colorPrimaryDark</item>
        <item name="colorAccent">@color/colorAccent</item>
</style>
activity_main.xml在给外层的布局设置一个背景色,方便观察
<?xml version="1.0" encoding="utf-8"?>
<RelativeLayout xmlns:android="http://schemas.android.com/apk/res/android"
    android:id="@+id/activity_main"
    android:layout_width="match_parent"
    android:layout_height="match_parent"
    android:background="#ff3344">
</RelativeLayout>
在API23,和API19上的运行效果
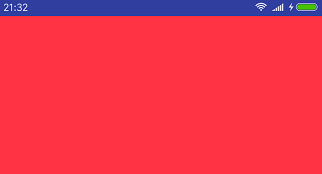

可以看到theme中的@color/colorPrimaryDark在API19上没起作用。
开始实现状态栏着色
第一种方案:
1、首先将手机手机状态栏透明化:可以在代码中或者通过设置Activity 的theme来实现。
通过代码实现:在Activity 的onCreate方法中
@Override
    protected void onCreate(Bundle savedInstanceState) {
        super.onCreate(savedInstanceState);
        setContentView(R.layout.activity_main);
		  //把状态栏透明化
        if (Build.VERSION.SDK_INT >= Build.VERSION_CODES.LOLLIPOP) {//5.0及以上
            View decorView = getWindow().getDecorView();
            int option = View.SYSTEM_UI_FLAG_LAYOUT_FULLSCREEN
                    | View.SYSTEM_UI_FLAG_LAYOUT_STABLE;
            decorView.setSystemUiVisibility(option);
            getWindow().setStatusBarColor(Color.TRANSPARENT);
        } else if (Build.VERSION.SDK_INT >= Build.VERSION_CODES.KITKAT) {//4.4到5.0
            WindowManager.LayoutParams localLayoutParams = getWindow().getAttributes();
            localLayoutParams.flags = (WindowManager.LayoutParams.FLAG_TRANSLUCENT_STATUS | localLayoutParams.flags);
        }
    }
在API23,和API19上的运行效果,状态栏透明了,并且布局延伸到了状态栏上

可以看到API19的效果是状态栏渐变色

通过给Activity设置theme实现上面的效果,在values、values-v19、values-v21目录下分别创建相应的主题:TranslucentTheme
//values
<style name="TranslucentTheme" parent="AppTheme">
</style>

//values-v19
<style name="TranslucentTheme" parent="Theme.AppCompat.Light.NoActionBar">
        <item name="android:windowTranslucentStatus">true</item>
        <item name="android:windowTranslucentNavigation">false</item>
</style>

//values-v21
<style name="TranslucentTheme" parent="Theme.AppCompat.Light.NoActionBar">
        <item name="android:windowTranslucentStatus">true</item>
        <item name="android:windowTranslucentNavigation">false</item>
        <item name="android:statusBarColor">@android:color/transparent</item>
</style>
然后给去掉Activity中设置透明状态栏那部分代码,然后在AndroidManifest.xml给Activity设置相应的theme。
<activity
            android:name=".MainActivity"
            android:theme="@style/TranslucentTheme"></activity>
实现效果是一样的,就不贴图了。
2:给状态栏着色:先做一些准备工作,在values、values-v19目录添加如下尺寸:
//values
<dimen name="padding_top">0dp</dimen>

//values-v19
<dimen name="padding_top">25dp</dimen>
注意:这个25dp就是状态栏的高度,通过测量状态栏的高度是50px,直接转换成25dp,还是差不多的,
我们发现,经过第一步设置以后,我们发现布局延伸到了状态栏上,状态栏颜色就是布局的背景色,这就是最简单的给状态栏着色的方法,给你的根部局设置背景色为状态栏需要的颜色
<?xml version="1.0" encoding="utf-8"?>
<RelativeLayout xmlns:android="http://schemas.android.com/apk/res/android"
    android:id="@+id/activity_main"
    android:layout_width="match_parent"
    android:layout_height="match_parent"
    android:background="#ff3344">//状态栏需要的颜色
</RelativeLayout>
2.1 页面顶部使用Toolbar(或自定义title),一般情况状态栏的颜色和Toolbar的颜色相同,既然状态栏透明化后,布局页面延伸到了状态栏,给Toolbar加上一个状态栏高度的顶部padding就可以了,这个padding的高度就是上面的25dp。
<?xml version="1.0" encoding="utf-8"?>
<RelativeLayout xmlns:android="http://schemas.android.com/apk/res/android"
    android:id="@+id/activity_main"
    android:layout_width="match_parent"
    android:layout_height="match_parent"
    android:background="#ff3344">

    <android.support.v7.widget.Toolbar
        android:id="@+id/toolbar"
        android:layout_width="match_parent"
        android:layout_height="wrap_content"
        android:background="@color/colorPrimary"
        android:paddingTop="25dp"
        android:theme="@style/AppTheme.AppBarOverlay" />
</RelativeLayout>
然后在Activity的onCreate()方法中
Toolbar toolbar= (Toolbar) findViewById(R.id.toolbar);
setSupportActionBar(toolbar);
在API23,和API19上的运行效果


2.2、 DrawerLayout + NavigationView + Toolbar的情况
在Android studio 中新建一个Navigation drawer Activity,然后把布局文件中的android:fitsSystemWindows="true"属性去掉,因为这个属性,让布局文件无法延伸到状态栏,使用透明状态栏
 <activity
            android:name=".Main2Activity"
            android:label="@string/title_activity_main2"
            android:theme="@style/TranslucentTheme"></activity>
在API23,和API19上的运行效果,API19的NavigationView竟然没延伸到状态栏


继续修改:当系统版本小于5.0时,进行如下设置:在onCreate方法中加入下面的代码就可以了。
 if (Build.VERSION.SDK_INT < Build.VERSION_CODES.LOLLIPOP) {
        drawer.setFitsSystemWindows(true);
        drawer.setClipToPadding(false);
}
2.3、页面顶部是一张图片这种其实是最简单的,因为使用TranslucentTheme后,状态栏透明化后,布局已经延伸到状态,所以不需要其它额外操作:
<?xml version="1.0" encoding="utf-8"?>
<RelativeLayout xmlns:android="http://schemas.android.com/apk/res/android"
    xmlns:tools="http://schemas.android.com/tools"
    android:id="@+id/activity_main4"
    android:layout_width="match_parent"
    android:layout_height="match_parent"
    android:background="#ff4433"
    tools:context="com.humanheima.statebartintdemo.Main4Activity">

    <ImageView
        android:layout_width="match_parent"
        android:layout_height="200dp"
        android:scaleType="centerCrop"
        android:src="@mipmap/sun_main" />
</RelativeLayout>
运行效果

第二种方案:在方案一中,我们没有使用android:fitsSystemWindows="true"属性,而是将布局延伸到状态栏来处理,这次我们使用android:fitsSystemWindows="true"属性,不让布局延伸到状态栏,这时状态栏就是透明的,然后添加一个和状态栏高、宽相同的指定颜色View来覆盖被透明化的状态栏
<?xml version="1.0" encoding="utf-8"?>
<RelativeLayout xmlns:android="http://schemas.android.com/apk/res/android"
    xmlns:tools="http://schemas.android.com/tools"
    xmlns:app="http://schemas.android.com/apk/res-auto"
    android:id="@+id/activity_main5"
    android:layout_width="match_parent"
    android:layout_height="match_parent"
    android:fitsSystemWindows="true"
    tools:context="com.humanheima.statebartintdemo.Main5Activity">

    <android.support.v7.widget.Toolbar
        android:id="@+id/toolbar"
        app:title="第二种方案"
        android:layout_width="match_parent"
        android:layout_height="wrap_content"
        android:background="@color/colorPrimary"
        android:theme="@style/AppTheme.AppBarOverlay" />
</RelativeLayout>
创建View并添加到状态栏
 @Override
    protected void onCreate(Bundle savedInstanceState) {
        super.onCreate(savedInstanceState);
        setContentView(R.layout.activity_main5);
        Toolbar toolbar = (Toolbar) findViewById(R.id.toolbar);
        setSupportActionBar(toolbar);
        addStatusBarView();
    }

    private void addStatusBarView() {
        View view = new View(this);
        view.setBackgroundColor(getResources().getColor(R.color.colorPrimary));
        LinearLayout.LayoutParams params = new LinearLayout.LayoutParams(ViewGroup.LayoutParams.MATCH_PARENT,
                getStatusBarHeight(this));
        ViewGroup decorView = (ViewGroup) findViewById(android.R.id.content);
        decorView.addView(view, params);
    }

    private int getStatusBarHeight(Main5Activity main5Activity) {
        /**
         * 获取状态栏高度——方法1
         * */
        int statusBarHeight1 = -1;
//获取status_bar_height资源的ID
        int resourceId = getResources().getIdentifier("status_bar_height", "dimen", "android");
        if (resourceId > 0) {
            //根据资源ID获取响应的尺寸值
            statusBarHeight1 = getResources().getDimensionPixelSize(resourceId);
        }
        Log.e("WangJ", "状态栏-方法1:" + statusBarHeight1);
        return statusBarHeight1;
    }
效果一样一样的。不贴图。
第三种方案:和方案二类似,同样使用android:fitsSystemWindows="true"属性,再修改布局文件的根布局为需要的状态栏颜色,因根布局的颜色被修改,所以你需要在里边多嵌套一层布局,来指定界面的主背景色,比如白色等等,否则就和状态栏颜色一样了。说起来有点抽象,还是看具体的例子吧:
1、先将状态栏透明化,方法同上。使用代码设置,或者TranslucentTheme
2、修改布局文件:
<?xml version="1.0" encoding="utf-8"?>
<RelativeLayout xmlns:android="http://schemas.android.com/apk/res/android"
    xmlns:app="http://schemas.android.com/apk/res-auto"
    android:layout_width="match_parent"
    android:layout_height="match_parent"
    android:background="#ff9900"
    android:fitsSystemWindows="true">

    <LinearLayout
        android:layout_width="match_parent"
        android:layout_height="match_parent"
        android:background="#ffffff"
        android:orientation="vertical">

        <android.support.v7.widget.Toolbar
            android:id="@+id/toolbar"
            android:layout_width="match_parent"
            android:layout_height="wrap_content"
            android:background="#ff9900"
            android:theme="@style/AppTheme.AppBarOverlay"
            app:title="第三种方案" />
    </LinearLayout>
</RelativeLayout>
效果如下

结尾:今天差不多了,就到这里。
参考链接


 655
655

 被折叠的 条评论
为什么被折叠?
被折叠的 条评论
为什么被折叠?
 到【灌水乐园】发言


