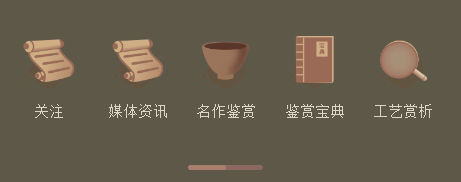
效果:

1.封装组件:
<template>
  <div class="scroll-list">
    <div
      class="scroll-list-content"
      :style="{ background, color, fontSize: size }"
      ref="scrollListContent"
      >
      <div class="scroll-list-group" v-for="(item, index) in list" :key="index">
        <div class="scroll-list-item" v-for="menuItem in item" :style="getItemStyle">
          <img class="scroll-list-item-img"  :style=iconSize alt="" v-lazy="menuItem[icon]"
            @click="navigateToRoute(menuItem.path)"/>
            <!--<van-image-->
            <!--		lazy-load-->
            <!--		fit="cover"-->
            <!--		class="scroll-list-item-img" :src="menuItem[icon]" :style=iconSize alt=""-->
            <!--		@click="navigateToRoute(menuItem.path)"-->
            <!--/>-->
            <span class="scroll-list-item-text" :style="menuItemName[0]">{{ menuItem[name] }}</span>
          </div>
      </div>
    </div>
    <div v-if="isScrollBar && indicator" class="scroll-list-indicator">
      <div
        class="scroll-list-indicator-bar"
        :style="{ width: width }"
        ref="scrollListIndicatorBar"
        >
        <span
          :style="{ height: height }"
          class="scroll-list-indicator-slider"
          ></span>
      </div>
    </div>
  </div>
</template>

<script>

  import {
    defineComponent,
    onMounted,
    onBeforeUnmount,
    reactive,
    ref,
    toRefs,
    nextTick,
    watch,
  } from "vue";
  import {useRouter} from "vue-router";

  export default defineComponent({
    props: {
      list: {
        type: Array,
        default: () => [], // 数据
      },
      indicator: {
        type: Boolean,
        default: true, // 是否显示面板指示器
      },
      indicatorColor: {
        type: String,
        default: "rgba(250,250,250,0.56)", // 指示器非激活颜色  (暂不支持)
      },
      indicatorActiveColor: {
        type: String,
        default: "rgba(250,250,250,0.56)", // 指示器滑块颜色  (暂不支持)
      },
      indicatorWidth: {
        type: String,
        default: "", // 指示器 宽度
      },
      indicatorBottom: {
        type: String,
        default: "", // 指示器 距离内容底部的距离 (设置 0 会隐藏指示器)
      },
      background: {
        type: String,
        default: "", // 内容区域背景色
      },
      color: {
        type: String,
        default: "", // 内容区域文本颜色
      },
      size: {
        type: String,
        default: "", // 内容区域文本字体大小
      },
      indicatorStyle: {
        type: String,
        default: "", // 指示器 样式 (暂不支持)
      },
      icon: {
        type: String,
        default: "icon", // 图标字段
      },
      name: {
        type: String,
        default: "name", // 文本字段
      },
      iconSize: {
        type: Object,
        default:
          {
            width:"40px", height:"40px"
          }
      }, // 设置默认的 icon 大小

      iconNum: {
        type: String,
        default: "4", // 设置默认的 icon 数量
      },

      menuItemName: {
        type: Array,
        //			font-size: 12px;
        //color: #6B5B50;
        default: () => [
          {
            fontSize: "12px",
            color: "#6B5B50",
          }
        ],
        // 设置默认的 icon 数量
      }
    },
    computed: {
      getItemStyle() {
        const widthPercent = 100 / this.iconNum;
        return {
          width: `${widthPercent}%`,
        };
      },

      getNameStyle() {
        return {
          // 在这里添加样式属性,根据 menuItemName 的值来设置
          fontSize: this.menuItemName[0].size,
          color: this.menuItemName[0].color,
          //margin-top: this.menuItemName[0].top;

        }
      }	,
    },
    setup(props) {
      const router = useRouter(); // 获取 Vue Router 的实例

      const width = ref("");
      const height = ref("");
      const {indicatorWidth, indicatorBottom, indicator} = props;
      watch(
      () => [indicatorWidth, indicatorBottom],
      (newVal) => {
      //console.log(newVal);
      const _width = newVal[0].includes("px") ? newVal[0] : newVal[0] + "px";
      const _height = newVal[1].includes("px") ? newVal[1] : newVal[1] + "px";
      width.value = _width;
      height.value = _height;
    },
      {immediate: true}
      );

      const state = reactive({
      scrollListContent: null, // 内容区域 dom
      scrollListIndicatorBar: null, // 底部指示器 dom
      isScrollBar: false,
    });

      onMounted(() => {
      nextTick(() => {
      state.isScrollBar = hasScrollbar();
      if (!indicator || !state.isScrollBar) return;
      state.scrollListContent.addEventListener("scroll", handleScroll);
    });
    });

      onBeforeUnmount(() => {
      if (!indicator || !state.isScrollBar) return;
      // 页面卸载,移除监听事件
      state.scrollListContent.removeEventListener("scroll", handleScroll);
    });

      function handleScroll() {
      /**
      * 使用滚动比例来实现同步滚动
      * tips: 这里时一道数学题, 不同的可以把下面的几个参数都打印处理看看
      * 解析一下 这里的实现
      * state.scrollListContent.scrollWidth  内容区域的宽度
      * state.scrollListContent.clientWidth  当前内容所占的可视区宽度
      * state.scrollListIndicatorBar.scrollWidth  指示器的宽度
      * state.scrollListIndicatorBar.clientWidth  当前指示器所占的可视区宽度
      *
      * 内容区域的宽度 - 当前内容所占的可视区宽度 = 内容区域可滚动的最大距离
      * 指示器的宽度 - 当前指示器所占的可视区宽度 = 指示器可滚动的最大距离
      *
      * 内容区域可滚动的最大距离 / 指示器可滚动的最大距离 = 滚动比例 (scale)
      *
      * 最后通过滚动比例 来算出 指示器滚动的 距离 (state.scrollListIndicatorBar.scrollLeft)
      *
      * 指示器滚动的距离 = 容器滚动的距离 / 滚动比例 (对应下面的公式)
      *
      * state.scrollListIndicatorBar.scrollLeft = state.scrollListContent.scrollLeft / scale
      */

      const scale =
      (state.scrollListContent.scrollWidth -
      state.scrollListContent.clientWidth) /
      (state.scrollListIndicatorBar.scrollWidth -
      state.scrollListIndicatorBar.clientWidth);

      state.scrollListIndicatorBar.scrollLeft =
      state.scrollListContent.scrollLeft / scale;
    }

      // 导航到目标路由的方法
      function navigateToRoute(menuItem) {
      // 在这里根据 menuItem 或其他条件构建目标路由的路径
      //const targetRoute = `/your-target-route/${menuItem.id}`; // 示例:根据 menuItem 的 id 构建目标路由
      //console.log(menuItem)
      //JSON.parse(menuItem)
      // 使用 Vue Router 导航到目标路由
      //跳转页面
      router.push(JSON.parse(menuItem));
    }

      function hasScrollbar() {
      return (
      state.scrollListContent.scrollWidth >
      state.scrollListContent.clientWidth ||
      state.scrollListContent.offsetWidth >
      state.scrollListContent.clientWidth
      );
    }

      return {...toRefs(state), width, height, handleScroll, hasScrollbar, navigateToRoute};
    },
    });
      </script>

      <style lang="less" scoped>
      .scroll-list {
      &-content {
      width: 100%;
      overflow-y: hidden;
      overflow-x: scroll;
      // white-space: nowrap;
      display: flex;
      flex-wrap: nowrap;
      /*滚动条整体样式*/

      &::-webkit-scrollbar {
      width: 0;
      height: 0;

    }
    }

      &-group {
      display: flex;
      flex-wrap: wrap;
      // margin-bottom: 16px;
      min-width: 100%;


      &:nth-child(2n) {
      margin-bottom: 0;
    }
    }

      &-item {
      // display: inline-block;
      margin-bottom: 16px;
      text-align: center;
      width: calc(100% / 5);


      &-img {

      width: 44px;
      height: 44px;
      object-fit: cover;
    }

      &-text {
      display: block;
      //font-size: 12px;
      //color: #6B5B50;
      font-family: "Source Han Serif CN", "思源宋体 CN", serif;
      font-weight: normal;
    }

      &:nth-child(n + 5) {
      margin-bottom: 0;
    }
    }

      &-indicator {
      width: 100%;
      display: flex;
      align-items: center;
      justify-content: center;
      pointer-events: none; // 禁用滑动指示灯时 滑块滚动
      &-bar {
      width: 40px; // 指示器的默认宽度
      overflow-y: hidden;
      overflow-x: auto;
      white-space: nowrap;
      /*滚动条整体样式*/

      &::-webkit-scrollbar {
      width: 0;
      height: 4px;
    }

      /* 滚动条里面小滑块 样式设置 */

      &::-webkit-scrollbar-thumb {
      border-radius: 50px; /* 滚动条里面小滑块 - radius */
      background: #9b6a56; /* 滚动条里面小滑块 - 背景色 */
    }

      /* 滚动条里面轨道 样式设置 */

      &::-webkit-scrollbar-track {
      border-radius: 50px; /* 滚动条里面轨道 - radius */
      background: #C29E94FF; /* 滚动条里面轨道 - 背景色 */
    }
    }

      &-slider {
      height: 10px;
      min-width: 120px;
      display: block;
    }
    }
    }
      </style>
组件还没完善,但是可以使用,需要增加属性增加的可以自己添加。
2.引入
import ScrollList from "@/components/ScrollList/index.vue";
3.注册
	components: {
		ScrollList
	},
4.使用
	<div class="scrollList-1">
				<ScrollList :list="data" :indicator="true" :indicatorWidth="scrollListWidth" :indicatorBottom="scrollListBottom"
				            iconNum="5"
				            :iconSize="iconSizeKnowledge"/>
			</div>
我是vue3:
  	const data = [
			[

				{
					icon: require('../assets/pic/mtzx@2x.png'),
					name: "关注",
					path: JSON.stringify({name: "test", params: {type: 1}})
				},
				{
					icon: require('../assets/pic/mtzx@2x.png'),
					name: "媒体资讯",
					path: JSON.stringify({name: "test", params: {type: 1}})
				},
				{
					icon: require('../assets/pic/mzjs@2x.png'),
					name: "名作鉴赏",
					path: JSON.stringify({name: "test", params: {type: "famous"}})
				},
				{
					icon: require('../assets/pic/jxbd@2x.png'),
					name: "鉴赏宝典",
					path: JSON.stringify({name: "test", params: {type: 5}})
				},
				{
					icon: require('../assets/pic/gyjx@2x.png'),
					name: "工艺赏析",
					path: JSON.stringify({name: "test", params: {type: 3}})
				},

				// 更多项...
			],
			[
				{
					icon: require('../assets/pic/whls@2x.png'),
					name: "文化历史",
					path: JSON.stringify({name: "test", params: {type: 7}})
				},
				{
					icon: require('../assets/pic/rmzs@2x.png'),
					name: "入门知识",
					path: JSON.stringify({name: "test", params: {type: 7}})
				},
				{
					icon: require('../assets/pic/activity.png'),
					name: "活动资讯",
					path: JSON.stringify({name: "test", params: {type: 7}})
				},
				{
					icon: require('../assets/pic/government_information.png'),
					name: "官方公告",
					path: JSON.stringify({name: "test", params: {type: 8}})
				},
				{
					icon: require('../assets/pic/other@2x.png'),
					name: "产业信息",
					path: JSON.stringify({name: "test", params: {type: test}})
				},
				// 更多项...
			],
			// 更多分组...
		];

  const scrollListWidth = "60px";// 传递给 ScrollList 的宽度
		const scrollListBottom = "20px"; // 传递给 ScrollList 的指示器底部距离

		const iconSizeKnowledge = ref({
			width: "60px", height: "60px"
		})


return {
			data,
			scrollListWidth,
			scrollListBottom,
			keyword,
			isSearchBoxFixed, famousLampStyle, masterStyle, iconSize, iconSizeJz, iconSizeKnowledge

		};


 482
482


 被折叠的 条评论
为什么被折叠?


