


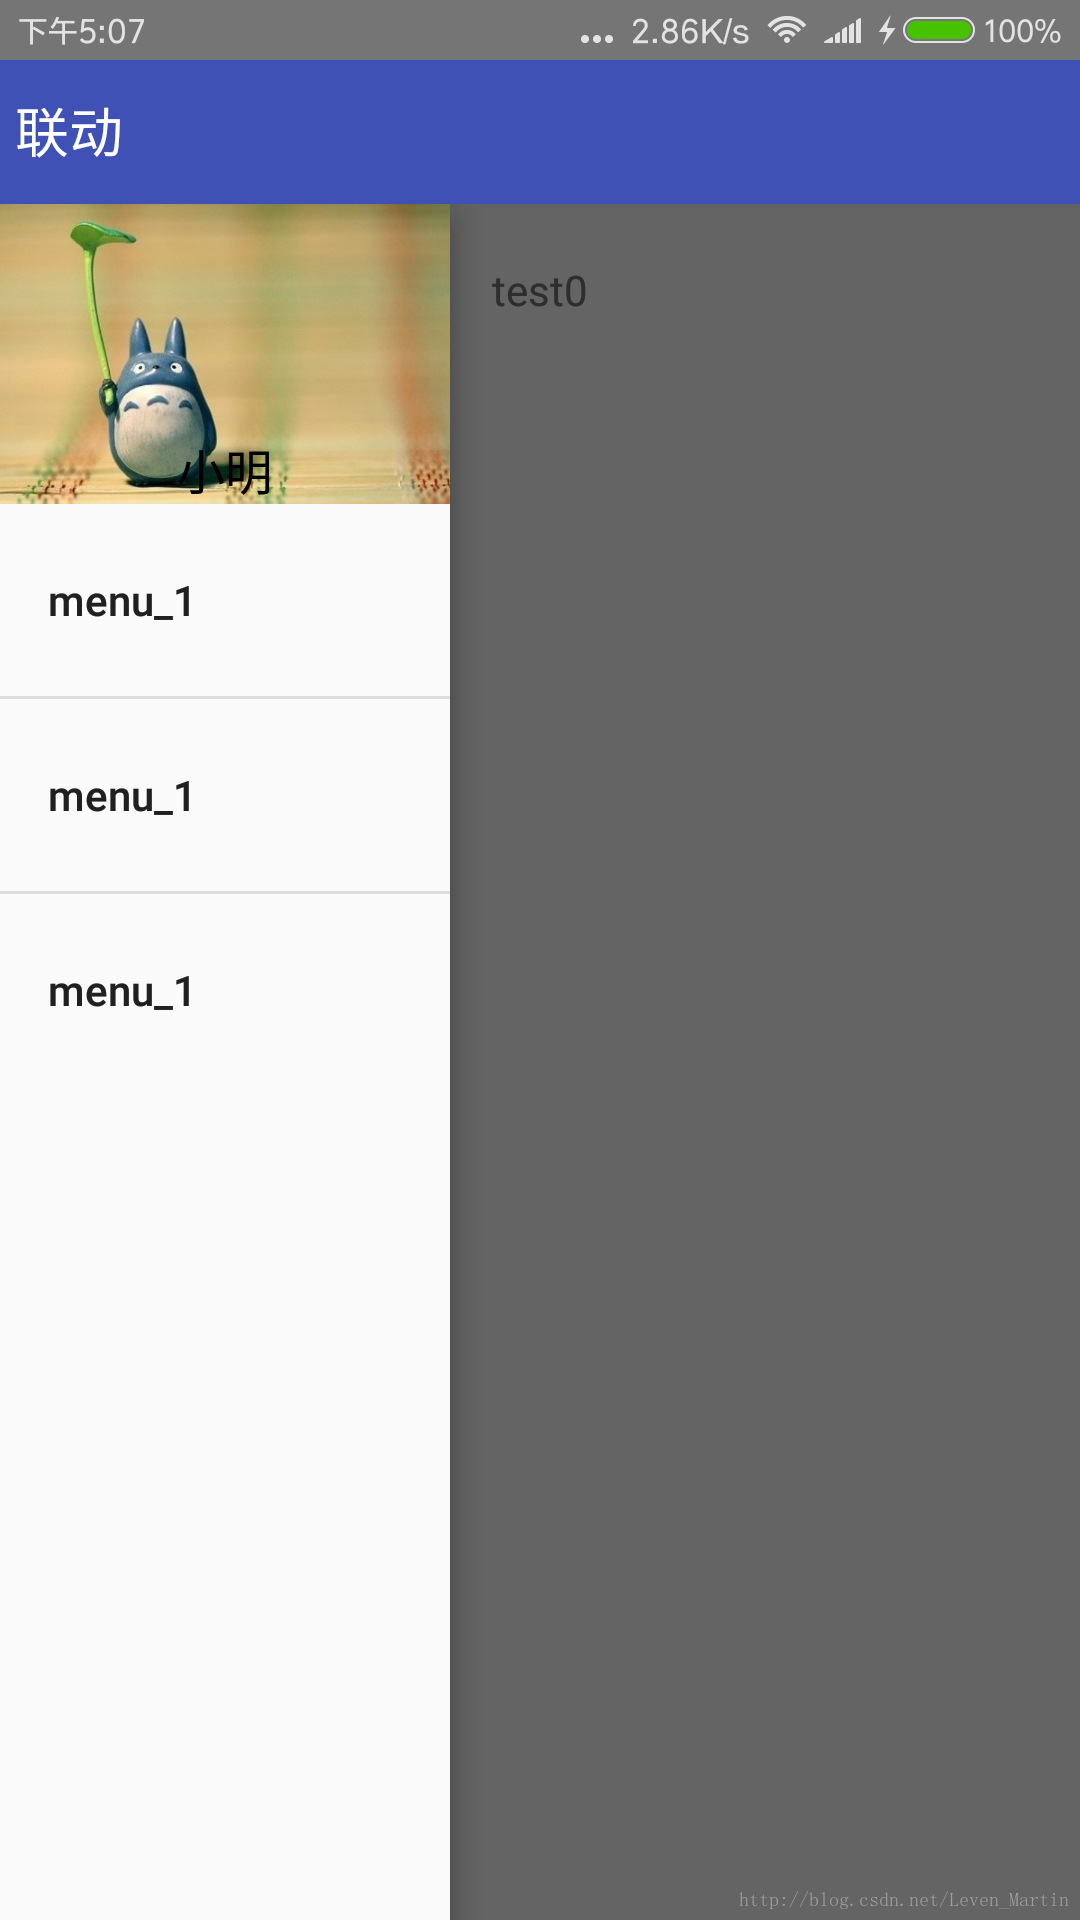
目前市面上大部分app都有使用侧边栏,假如的app还没有该功能,该让你的产品经理加班了哦。。
一、侧边栏一般包括header和menu,header一般包括背景图、用户名等一些东东,切图如下
下面贴出activity的布局文件
<?xml version="1.0" encoding="utf-8"?>
<LinearLayout xmlns:android="http://schemas.android.com/apk/res/android"
    xmlns:app="http://schemas.android.com/apk/res-auto"
    xmlns:tools="http://schemas.android.com/tools"
    android:id="@+id/drawer_layout"
    android:layout_width="match_parent"
    android:layout_height="match_parent"
    android:orientation="vertical"
    android:fitsSystemWindows="true"
    tools:openDrawer="start">
    <RelativeLayout
        android:layout_width="match_parent"
        android:layout_height="48dp"
        android:background="@color/colorPrimary">
        <TextView
            android:layout_width="wrap_content"
            android:layout_height="wrap_content"
            android:id="@+id/tv_left"
            android:textSize="18sp"
            android:text="联动"
            android:layout_centerVertical="true"
            android:padding="5dp"
            android:textColor="#ffffffff"/>
    </RelativeLayout>
    <android.support.v4.widget.DrawerLayout
        android:layout_width="match_parent"
        android:layout_height="match_parent"
        android:id="@+id/drawer"
        android:fitsSystemWindows="true"
        tools:openDrawer="start">
        <include layout="@layout/layout_my_fragment" />
        <android.support.design.widget.NavigationView
            android:id="@+id/nav_view"
            android:layout_width="150dp"
            android:layout_height="match_parent"
            android:layout_gravity="start"
            android:fitsSystemWindows="true"
            app:headerLayout="@layout/nav_header" />
    </android.support.v4.widget.DrawerLayout>
</LinearLayout>
2下面贴出在activity中的具体操作,其中包括动态添加navigation中的menu,及其点击事件;点击不同的menu在主页面中显示不同的fragment:
public class Main2Activity extends FragmentActivity {

    @Bind(R.id.nav_view)
    NavigationView navView;
    @Bind(R.id.tv_left)
    TextView tvLeft;
    @Bind(R.id.drawer)
    DrawerLayout drawer;

    private List<TaskSceneFragment> fragments = new ArrayList<>();

    @Override
    protected void onCreate(Bundle savedInstanceState) {
        super.onCreate(savedInstanceState);
        setContentView(R.layout.activity_main2);
        ButterKnife.bind(this);

        navView.setItemIconTintList(null);//此处是设置menu图标的颜色为图标本身的颜色
        navView.getMenu().add(1, 1, 1, "menu_1");//动态添加menu
        navView.getMenu().add(2, 2, 2, "menu_1");
        navView.getMenu().add(3, 3, 3, "menu_1");
        //菜单的点击事件
        navView.setNavigationItemSelectedListener(new NavigationView.OnNavigationItemSelectedListener() {
            @Override
            public boolean onNavigationItemSelected(@NonNull MenuItem item) {
                switch (item.getOrder()) {
                    case 1:
                        switchFragment(fragments.get(0));
                        Toast.makeText(Main2Activity.this, "点击menu1", Toast.LENGTH_SHORT).show();
                        break;
                    case 2:
                        switchFragment(fragments.get(1));
                        Toast.makeText(Main2Activity.this, "点击menu2", Toast.LENGTH_SHORT).show();
                        break;
                    case 3:
                        switchFragment(fragments.get(2));
                        Toast.makeText(Main2Activity.this, "点击menu3", Toast.LENGTH_SHORT).show();
                        break;
                }
                return true;
            }
        });

        System.out.println("navHeaderCount:" + navView.getHeaderCount());
        navView.getHeaderView(0).setOnClickListener(new View.OnClickListener() {
            @Override
            public void onClick(View view) {
                Toast.makeText(Main2Activity.this, "click_head", Toast.LENGTH_SHORT).show();
            }
        });

        initFragment();


    }

    private void switchFragment(TaskSceneFragment fragment) {
        if (fragment.isAdded()) {
            fm.beginTransaction().hide(currentFragment).show(fragment).commit();
        } else {
            fm.beginTransaction().add(R.id.frame_layout, fragment).hide(currentFragment).show(fragment).commit();
        }
        currentFragment = fragment;
    }

    FragmentManager fm;
    TaskSceneFragment currentFragment;

    private void initFragment() {
        fm = getSupportFragmentManager();
        for (int i = 0; i < 3; i++) {
            TaskSceneFragment fragment = TaskSceneFragment.newInstance(i, "");
            fragments.add(fragment);
        }
        fm.beginTransaction().add(R.id.frame_layout, fragments.get(0)).commit();
        currentFragment = fragments.get(0);
    }

    @OnClick(R.id.tv_left)
    public void onClick() {
        //此处是点击联动按钮打开或者关闭侧边栏
        if(drawer.isDrawerOpen(GravityCompat.START)){
            drawer.closeDrawer(GravityCompat.START);
        }else {
            drawer.openDrawer(GravityCompat.START);
        }
    }
}
简单实现侧边栏就是这么的简单,欢迎大家积极留言,点赞,您的鼓励会给予我非常大的动力,非常感谢!!!!!。下一篇将会给大家带来Fragment的嵌套使用,还是基于当前demo,欢迎大家积极指正错误。。


 6360
6360


 被折叠的 条评论
为什么被折叠?
被折叠的 条评论
为什么被折叠?
 到【灌水乐园】发言


