


饿饿,好久没写android了,最近看到数字价格键盘挺有意思的就写来玩玩,省的做游戏java方面都要手生了!(话不多说,开始了)
首先给图吧(绅士礼仪0。0)
数字随机键盘

价格数字键盘
全键盘

一、画键盘的xml
首先我们要在
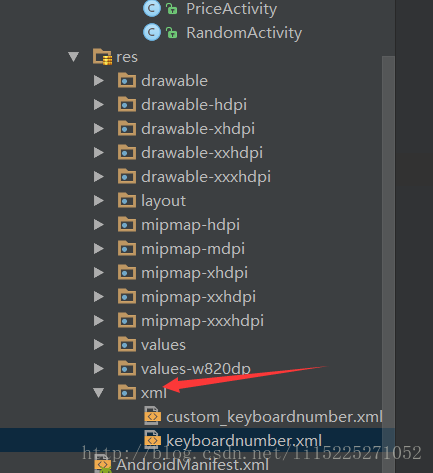
创建一个xml
<?xml version="1.0" encoding="utf-8"?>
<Keyboard
    xmlns:android="http://schemas.android.com/apk/res/android"
    android:horizontalGap="0px"
    android:keyHeight="9%p"
    android:keyWidth="25%p"
    android:verticalGap="0px"
    >

    <Row>

        <Key
            android:codes="49"
            android:keyLabel="1"/>

        <Key
            android:codes="50"
            android:keyLabel="2"/>

        <Key
            android:codes="51"
            android:keyLabel="3"/>

        <Key
            android:codes="-5"
            android:isRepeatable="true"
            android:keyEdgeFlags="right"
            android:keyHeight="18%p"
            android:keyIcon="@drawable/icon_delete_32dp"/>

    </Row>

    <Row>

        <Key
            android:codes="52"
            android:keyLabel="4"/>

        <Key
            android:codes="53"
            android:keyLabel="5"/>

        <Key
            android:codes="54"
            android:keyLabel="6"/>


    </Row>

    <Row>

        <Key
            android:codes="55"
            android:keyLabel="7"/>

        <Key
            android:codes="56"
            android:keyLabel="8"/>

        <Key
            android:codes="57"
            android:keyLabel="9"/>

        <Key
            android:codes="-4"
            android:keyEdgeFlags="right"
            android:keyHeight="18%p"
            android:keyLabel="确定"
            android:keyIcon="@drawable/icon_enter_32dp"/>

    </Row>

    <Row>

        <Key
            android:codes="46"
            android:keyLabel="."/>

        <Key
            android:codes="48"
            android:keyLabel="0"/>

        <Key
            android:codes="-3"
            android:keyIcon="@drawable/icon_hide_keyboard"/>

    </Row>
</Keyboard>
如代码所示,上面是一个数字键盘。
这里数字对应的都是ASCII码,这里就不多说了。
二、写展示键盘的帮助类
我上面有了xml,下面我们就要写显示键盘的帮助类KeyboardUtil。
这个帮助类主要是就是绑定edittext和我们自定义的键盘的,并且要隐藏系统自带的键盘。
首先隐藏系统自带键盘
 /**
     * 隐藏系统键盘
     *
     * @param editText
     */
    public static void hideSystemSofeKeyboard(Context context, EditText editText) {
        int sdkInt = Build.VERSION.SDK_INT;
        if (sdkInt >= 11) {
            try {
                Class<EditText> cls = EditText.class;
                Method setShowSoftInputOnFocus;
                setShowSoftInputOnFocus = cls.getMethod("setShowSoftInputOnFocus", boolean.class);
                setShowSoftInputOnFocus.setAccessible(true);
                setShowSoftInputOnFocus.invoke(editText, false);

            } catch (SecurityException e) {
                e.printStackTrace();
            } catch (NoSuchMethodException e) {
                e.printStackTrace();
            } catch (Exception e) {
                e.printStackTrace();
            }
        } else {
            editText.setInputType(InputType.TYPE_NULL);
        }
        // 如果软键盘已经显示,则隐藏
        InputMethodManager imm = (InputMethodManager) context.getSystemService(Context.INPUT_METHOD_SERVICE);
        imm.hideSoftInputFromWindow(editText.getWindowToken(), 0);
    }
这里是显示和绑定键盘
 public void showSoftKeyboard() {
        if (mKeyboardNumber == null) {
            mKeyboardNumber = new Keyboard(mActivity, R.xml.keyboardnumber);
        }
        if (mKeyboardView == null) {
            mKeyboardView = (MyKeyBoardView) mActivity.findViewById(R.id.keyboard_view);
        }
        if (mIfRandom) {
            randomKeyboardNumber();
        } else {
            mKeyboardView.setKeyboard(mKeyboardNumber);
        }
        mKeyboardView.setEnabled(true);
        mKeyboardView.setPreviewEnabled(false);
        mKeyboardView.setVisibility(View.VISIBLE);
        mKeyboardView.setOnKeyboardActionListener(mOnKeyboardActionListener);

    }
主要用到的是这两个方法
mKeyboardNumber = new Keyboard(mActivity, R.xml.keyboardnumber);
mKeyboardView.setKeyboard(mKeyboardNumber);
这里是点击事件的处理
private KeyboardView.OnKeyboardActionListener mOnKeyboardActionListener = new KeyboardView.OnKeyboardActionListener() {
        @Override
        public void onPress(int primaryCode) {

        }

        @Override
        public void onRelease(int primaryCode) {

        }

        @Override
        public void onKey(int primaryCode, int[] keyCodes) {
            Editable editable = mEditText.getText();
            int start = mEditText.getSelectionStart();
            if (primaryCode == Keyboard.KEYCODE_DELETE) {// 回退
                if (editable != null && editable.length() > 0) {
                    if (start > 0) {
                        editable.delete(start - 1, start);
                    }
                }
            } else if (primaryCode == Keyboard.KEYCODE_CANCEL) {// 隐藏键盘
                hideKeyboard();
                if (mOnCancelClick != null) {
                    mOnCancelClick.onCancellClick();
                }
            } else if (primaryCode == Keyboard.KEYCODE_DONE) {// 隐藏键盘
                hideKeyboard();
                if (mOnOkClick != null) {
                    mOnOkClick.onOkClick();
                }
            } else {
                editable.insert(start, Character.toString((char) primaryCode));
            }
        }

        @Override
        public void onText(CharSequence text) {

        }

        @Override
        public void swipeLeft() {

        }

        @Override
        public void swipeRight() {

        }

        @Override
        public void swipeDown() {

        }

        @Override
        public void swipeUp() {

        }
    };
然后我们定义了一下随即数字键盘
    private void randomKeyboardNumber() {
        List<Keyboard.Key> keyList = mKeyboardNumber.getKeys();
        // 查找出0-9的数字键
        List<Keyboard.Key> newkeyList = new ArrayList<Keyboard.Key>();
        for (int i = 0; i < keyList.size(); i++) {
            if (keyList.get(i).label != null
                    && isNumber(keyList.get(i).label.toString())) {
                newkeyList.add(keyList.get(i));
            }
        }
        // 数组长度
        int count = newkeyList.size();
        // 结果集
        List<KeyModel> resultList = new ArrayList<KeyModel>();
        // 用一个LinkedList作为中介
        LinkedList<KeyModel> temp = new LinkedList<KeyModel>();
        // 初始化temp
        for (int i = 0; i < count; i++) {
            temp.add(new KeyModel(48 + i, i + ""));
        }
        // 取数
        Random rand = new Random();
        for (int i = 0; i < count; i++) {
            int num = rand.nextInt(count - i);
            resultList.add(new KeyModel(temp.get(num).getCode(),
                    temp.get(num).getLable()));
            temp.remove(num);
        }
        for (int i = 0; i < newkeyList.size(); i++) {
            newkeyList.get(i).label = resultList.get(i).getLable();
            newkeyList.get(i).codes[0] = resultList.get(i)
                    .getCode();
        }

        mKeyboardView.setKeyboard(mKeyboardNumber);
    }
实际上就是对Keyboard中存在的表进行转换更改。
这些基本上够了,但是我们要对确定按钮特殊处理,因为确定按钮一般颜色不一样么
现在我们重新写MyKeyBoardView继承KeyboardView
package com.example.admin.mykeyboardview;

import android.content.Context;
import android.graphics.Canvas;
import android.graphics.Color;
import android.graphics.Paint;
import android.graphics.Rect;
import android.graphics.Typeface;
import android.graphics.drawable.Drawable;
import android.inputmethodservice.Keyboard;
import android.inputmethodservice.Keyboard.Key;
import android.inputmethodservice.KeyboardView;
import android.util.AttributeSet;

import java.lang.reflect.Field;
import java.util.List;

public class MyKeyBoardView extends KeyboardView {
    private Context  mContext;
    private Keyboard mKeyBoard;

    public MyKeyBoardView(Context context, AttributeSet attrs) {
        super(context, attrs);
        this.mContext = context;
    }

    public MyKeyBoardView(Context context, AttributeSet attrs, int defStyle) {
        super(context, attrs, defStyle);
        this.mContext = context;
    }

    /**
     * 重新画一些按键
     */
    @Override
    public void onDraw(Canvas canvas) {
        super.onDraw(canvas);
        mKeyBoard = this.getKeyboard();
        List<Key> keys = null;
        if (mKeyBoard != null) {
            keys = mKeyBoard.getKeys();
        }

        if (keys != null) {
            for (Key key : keys) {
                // 数字键盘的处理
                if (key.codes[0] == -4) {
                    //重画确定键
                    drawKeyBackground(R.drawable.bg_keyboardview_yes, canvas, key);
                    drawText(canvas, key);
                }
            }
        }
    }

    private void drawKeyBackground(int drawableId, Canvas canvas, Key key) {
        Drawable npd = mContext.getResources().getDrawable(
                drawableId);
        int[] drawableState = key.getCurrentDrawableState();
        if (key.codes[0] != 0) {
            npd.setState(drawableState);
        }
        npd.setBounds(key.x, key.y, key.x + key.width, key.y
                + key.height);
        npd.draw(canvas);
    }

    private void drawText(Canvas canvas, Key key) {
        Rect bounds = new Rect();
        Paint paint = new Paint();
        paint.setTextAlign(Paint.Align.CENTER);


        paint.setAntiAlias(true);

        paint.setColor(Color.WHITE);
        if (key.label != null) {
            String label = key.label.toString();

            Field field;

            if (label.length() > 1 && key.codes.length < 2) {
                int labelTextSize = 0;
                try {
                    field = KeyboardView.class.getDeclaredField("mLabelTextSize");
                    field.setAccessible(true);
                    labelTextSize = (int) field.get(this);
                } catch (NoSuchFieldException e) {
                    e.printStackTrace();
                } catch (IllegalAccessException e) {
                    e.printStackTrace();
                }
                paint.setTextSize(labelTextSize);
                paint.setTypeface(Typeface.DEFAULT_BOLD);
            } else {
                int keyTextSize = 0;
                try {
                    field = KeyboardView.class.getDeclaredField("mLabelTextSize");
                    field.setAccessible(true);
                    keyTextSize = (int) field.get(this);
                } catch (NoSuchFieldException e) {
                    e.printStackTrace();
                } catch (IllegalAccessException e) {
                    e.printStackTrace();
                }
                paint.setTextSize(keyTextSize);
                paint.setTypeface(Typeface.DEFAULT);
            }

            paint.getTextBounds(key.label.toString(), 0, key.label.toString()
                    .length(), bounds);
            canvas.drawText(key.label.toString(), key.x + (key.width / 2),
                    (key.y + key.height / 2) + bounds.height() / 2, paint);
        } else if (key.icon != null) {
            key.icon.setBounds(key.x + (key.width - key.icon.getIntrinsicWidth()) / 2, key.y + (key.height - key.icon.getIntrinsicHeight()) / 2,
                    key.x + (key.width - key.icon.getIntrinsicWidth()) / 2 + key.icon.getIntrinsicWidth(), key.y + (key.height - key.icon.getIntrinsicHeight()) / 2 + key.icon.getIntrinsicHeight());
            key.icon.draw(canvas);
        }

    }
}
ok了基本准备差不多, 下面开始调用了。
public class RandomActivity extends AppCompatActivity {

    private EditText mEtRondom;

    @Override
    protected void onCreate(@Nullable Bundle savedInstanceState) {
        super.onCreate(savedInstanceState);
        setContentView(R.layout.activity_random);
        mEtRondom = (EditText) findViewById(R.id.et_rondom);
        final KeyboardUtil keyboardUtil = new KeyboardUtil(RandomActivity.this,true);

        mEtRondom.setOnClickListener(new View.OnClickListener() {
            @Override
            public void onClick(View v) {
                keyboardUtil.attachTo(mEtRondom);
            }
        });
    }
}
(这里我就给出了随机数字键盘的调用)是不是很简单好调用
但是别忘了你的布局要写成这个样子
<?xml version="1.0" encoding="utf-8"?>
<RelativeLayout xmlns:android="http://schemas.android.com/apk/res/android"
                android:layout_width="match_parent"
                android:layout_height="match_parent"
                android:orientation="vertical">

    <EditText
        android:id="@+id/et_rondom"
        android:layout_width="match_parent"
        android:layout_height="wrap_content"/>

    <include
        layout="@layout/include_keyboardview"
        android:layout_width="match_parent"
        android:layout_height="wrap_content"
        android:layout_alignParentBottom="true"/>
</RelativeLayout>
好了,这里我就简单的介绍到这里。当然还有其他的代码没展示出来,因为我觉得那些都不重要。
(但是不给完整的就太损了-。-)
这里是链接
这里写链接内容


 1247
1247

 被折叠的 条评论
为什么被折叠?
被折叠的 条评论
为什么被折叠?
 到【灌水乐园】发言


