


简单的介绍一种Fragment+RadioGroup来搭建一下简单的页面架构
首先先看一下主界面的Activity代码
import android.os.Bundle;
import android.support.v4.app.Fragment;
import android.support.v4.app.FragmentActivity;
import android.support.v4.app.FragmentManager;
import android.support.v4.app.FragmentTransaction;
import android.view.View;
import android.view.View.OnClickListener;
import android.view.Window;
import android.widget.RadioButton;
import android.widget.RadioGroup;
import android.widget.Toast;

import com.example.fragmenttest.Fragment.FourFragment;
import com.example.fragmenttest.Fragment.OneFragment;
import com.example.fragmenttest.Fragment.ThreeFragment;
import com.example.fragmenttest.Fragment.TwoFragment;

public class MainActivity extends FragmentActivity implements  OnClickListener {
    /**
     * Fragment 全是v4包
     */
    private Fragment[] mFragments;
    private FragmentManager manager;
    private FragmentTransaction fragmentTransaction;

    /**
     * 初始化下部控件
     */
    private RadioGroup rg;
    private RadioButton radio1, radio2, radio3, radio4;
    /**
     * 上下文
     */
    private FragmentActivity mContext;

    @Override
    protected void onCreate(Bundle savedInstanceState) {
        super.onCreate(savedInstanceState);
        requestWindowFeature(Window.FEATURE_NO_TITLE);
        setContentView(R.layout.activity_main);
        mContext = this;
        // 初始化视图
        initViews();
        // 设置监听
        setListener();
    }

    /**
     * 初始化试图
     */
    private void initViews() {
        // 设置下部导航
        rg = (RadioGroup) findViewById(R.id.rg);
        radio1 = (RadioButton) findViewById(R.id.radio1);
        radio2 = (RadioButton) findViewById(R.id.radio2);
        radio3 = (RadioButton) findViewById(R.id.radio3);
        radio4 = (RadioButton) findViewById(R.id.radio4);

        // 设置Fragment
        mFragments = new Fragment[4];
        mFragments[0] = new OneFragment();// 页面一添加到集合中
        mFragments[1] = new TwoFragment();// 页面二添加到集合中
        mFragments[2] = new ThreeFragment();// 页面三添加到集合中
        mFragments[3] = new FourFragment();// 页面四添加到集合中

        manager = mContext.getSupportFragmentManager();// 获得FragmentManager
        fragmentTransaction = manager.beginTransaction();// 获得事务
        fragmentTransaction.add(R.id.fl, mFragments[0], mFragments[0] .getClass().getName());// 添加到FragmentLayout中
        fragmentTransaction.add(R.id.fl, mFragments[1], mFragments[1] .getClass().getName());// 添加到FragmentLayout中
        fragmentTransaction.add(R.id.fl, mFragments[2], mFragments[2] .getClass().getName());// 添加到FragmentLayout中
        fragmentTransaction.add(R.id.fl, mFragments[3], mFragments[3] .getClass().getName());// 添加到FragmentLayout中

        // 默认显示页面一,隐藏页面二
        fragmentTransaction.show(mFragments[0]);
        fragmentTransaction.hide(mFragments[1]);
        fragmentTransaction.hide(mFragments[2]);
        fragmentTransaction.hide(mFragments[3]);
        fragmentTransaction.commitAllowingStateLoss();// 提交
    }

    /**
     * 设置监听
     */
    private void setListener() {
        radio1.setOnClickListener(this);
        radio2.setOnClickListener(this);
        radio3.setOnClickListener(this);
        radio4.setOnClickListener(this);
    }

    @Override
    public void onClick(View view) {
        FragmentTransaction transaction = mContext.getSupportFragmentManager() .beginTransaction();
        switch (view.getId()) {
        case R.id.radio1:
            transaction.show(mFragments[0]);
            transaction.hide(mFragments[1]).hide(mFragments[2]) .hide(mFragments[3]);
            transaction.commitAllowingStateLoss();
            Toast.makeText(mContext, "选择页面1", 0).show();
            break;
        case R.id.radio2:
            transaction.show(mFragments[1]);
            transaction.hide(mFragments[0]).hide(mFragments[2]) .hide(mFragments[3]);
            transaction.commitAllowingStateLoss();
            Toast.makeText(mContext, "选择页面2", 0).show();
            break;
        case R.id.radio3:
            transaction.show(mFragments[2]);
            transaction.hide(mFragments[0]).hide(mFragments[1]) .hide(mFragments[3]);
            transaction.commitAllowingStateLoss();
            Toast.makeText(mContext, "选择页面3", 0).show();
            break;
        case R.id.radio4:
            transaction.show(mFragments[3]);
            transaction.hide(mFragments[1]).hide(mFragments[2]) .hide(mFragments[0]);
            transaction.commitAllowingStateLoss();
            Toast.makeText(mContext, "选择页面4", 0).show();
            break;

        default:
            break;
        }

    }

}
1、管理Fragment
要在activity中管理fragment,需要使用FragmentManager. 通过调用activity的getFragmentManager()取得它的实例.
•可以通过FragmentManager做一些事情, 包括: 使用findFragmentById()(用于在activity layout中提供一个UI的fragment)或findFragmentByTag()(适用于有或没有UI的fragment)获取activity中存在的fragment。
2、处理Fragment事务
关于在activity中使用fragment的很强的一个特性是:根据用户的交互情况,对fragment进行添加、移除、替换以及执行其他动作。提交给activity的每一套变化被称为一个事务,可以使用在FragmentTransaction中的 API 处理。我们也可以保存每一个事务到一个activity管理的backstack,允许用户经由fragment的变化往回导航(类似于通过 activity往后导航)。
从 FragmentManager 获得一个FragmentTransaction实例:
每一个事务都是同时要执行的一套变化。可以在一个给定的事务中设置你想执行的所有变化,使用诸如 add()、remove()和 replace()。然后, 要给activity应用事务,必须调用 commit()。
3.add和replace的区别:
第一种添加,这种就好比我把几个Fragment添加到FragmentLayout中。然后根据我下面导航的点击监听,来让其页面显示和隐藏,执行效率高,不用再从新加载数据设置页面,
第二种替换,这种是让每次点击的时候都让页面重新替换到此页面,需要每次切换都需要联网请求数据来设置页面,
总结:两种模式在实际开放当中都有用到,具体用那个,需要看你的项目所要求的功能是怎样的.
下面是MainActivity.Xml
<LinearLayout xmlns:android="http://schemas.android.com/apk/res/android"
    xmlns:tools="http://schemas.android.com/tools"
    android:layout_width="match_parent"
    android:layout_height="match_parent"
    android:orientation="vertical" >

    <TextView
        android:layout_width="match_parent"
        android:layout_height="40dp"
        android:background="#000000"
        android:gravity="center"
        android:text="标题"
        android:textColor="#EADAA9"
        android:textSize="20sp" />

    <FrameLayout
        android:id="@+id/fl"
        android:layout_width="match_parent"
        android:layout_height="0dp"
        android:layout_weight="0.7" >
    </FrameLayout>

    <RadioGroup
        android:id="@+id/rg"
        android:layout_width="match_parent"
        android:layout_height="60dp"
        android:background="#000000"
        android:gravity="center"
        android:orientation="horizontal" >

        <RadioButton
            android:id="@+id/radio1"
            android:layout_width="wrap_content"
            android:layout_height="wrap_content"
            android:checked="true"
            android:text="页面一"
            android:textColor="#EADAA9" />

        <RadioButton
            android:id="@+id/radio2"
            android:layout_width="wrap_content"
            android:layout_height="wrap_content"
            android:text="页面二"
            android:textColor="#EADAA9" />

        <RadioButton
            android:id="@+id/radio3"
            android:layout_width="wrap_content"
            android:layout_height="wrap_content"
            android:text="页面三"
            android:textColor="#EADAA9" />

        <RadioButton
            android:id="@+id/radio4"
            android:layout_width="wrap_content"
            android:layout_height="wrap_content"
            android:text="页面四"
            android:textColor="#EADAA9" />
    </RadioGroup>

</LinearLayout>
最后写一个Fragment的代码
import android.os.Bundle;
import android.support.v4.app.Fragment;
import android.view.LayoutInflater;
import android.view.View;
import android.view.ViewGroup;

import com.example.fragmenttest.R;


/**
 * 页面四
 * @author admin
 *
 */
public class FourFragment extends Fragment{

    @Override
    public void onCreate(Bundle savedInstanceState) {
        super.onCreate(savedInstanceState);
    }


    @Override
    public View onCreateView(LayoutInflater inflater, ViewGroup container,
            Bundle savedInstanceState) {
        return inflater.inflate(R.layout.fragment_four, container, false);
    }
}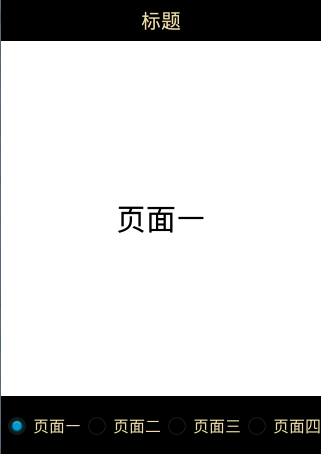

简单的架构已经成型了,随后我会再写 Fragment+FragmentTabHost实现仿新浪微博底部菜单栏 搭配使用的效果。


 4317
4317

 被折叠的 条评论
为什么被折叠?
被折叠的 条评论
为什么被折叠?
 到【灌水乐园】发言


