


ploymer (一) 第一个demo
安装node
安装bower
npm install -g bower
初始项目
创建文件夹demo
bower install polymer
增加index.html
<head> <meta charset="UTF-8"> <title>Document</title> <!-- 这是一个基础版的兼容库 --> <script src="./bower_components/webcomponentsjs/webcomponents-lite.min.js"></script> <!-- 将rel修改为import可以引入另外一个HTML,它将会被执行 --> <link rel="import" href="./template/template.html"> <link rel="import" href="./template/pictureFrame.html"> </head> <body> <proto-element></proto-element> <picture-frame> <p>听说你要学前端。</p> </picture-frame> </body>- 增加template和pictureFrame
template.html
<link rel="import" href="../bower_components/polymer/polymer.html">
<script>
  Polymer({
    is: "proto-element",
    ready: function() {
      this.textContent = "I'm ploymer!"
    }
  });
</script>
pictureFrame.html
<link rel="import" href="../bower_components/polymer/polymer.html">
<dom-module id="picture-frame">

  <template>
    <style>
      div {
        display: inline-block;
        background-color: #ccc;
        border-radius: 8px;
        padding: 4px;
      }
    </style>
    <div>
      <content></content>
    </div>
  </template>

  <script>
    Polymer({
      is: "picture-frame",
    });
  </script>

</dom-module>
项目文件结构
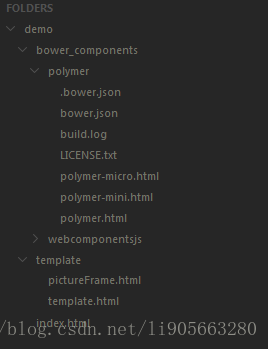
发布项目到tomcat
修改tomcat的conf/server.xml
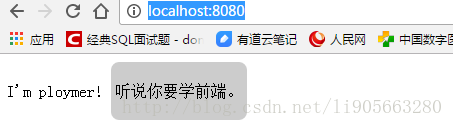
<Host appBase="webapps" autoDeploy="true" name="localhost" unpackWARs="true">
    <Context docBase="E:/help/work/ploymer/demo" path="" debug="0"  reloadable="true"/>
  </Host>
运行tomcat


 1035
1035

 被折叠的 条评论
为什么被折叠?
被折叠的 条评论
为什么被折叠?
 到【灌水乐园】发言


