


提示:文章写完后,目录可以自动生成,如何生成可参考右边的帮助文档
前言
上次讲到了es6新语法中的拷贝,新语法可以帮助我们进行代码的简化,那么这节讲的vue框架则可以更加简洁化代码,实现我们想要的功能,本节用vue框架实现对数据的基本渲染
一、搭建Vue框架
先准备一个成绩登记页面(包含样式和基本元素),该页面包含两个部分,一个是成绩显示表格,另一个是添加成绩表单,表格里分为三个部分,表头,两个主体,一个主体是包含数据是显示的,另一个主体是没有数据时显示的。还有一个尾部,显示平均分和总分。代码如下:
 <style>
        #app {
            width: 1000px;
            margin: 50px auto;
            display: flex;
        }

        #app .table {
            flex: 4;
        }

        #app .table table {
            width: 100%;
            border-spacing: 0;
            border-top: 1px solid #ccc;
            border-left: 1px solid #ccc;
        }

        #app .table table th {
            background: #f5f5f5;
        }

        #app .table table tr:hover td {
            background: #f5f5f5;
        }

        #app .table table td,
        #app .table table th {
            border-bottom: 1px solid #ccc;
            border-right: 1px solid #ccc;
            text-align: center;
            padding: 10px;
        }

        #app .tform {
            flex: 1;
            padding: 20px;
        }

        #app .tform .form-item {
            display: flex;
            margin-bottom: 20px;
            align-items: center;
        }

        #app .tform .form-item .label {
            width: 60px;
            text-align: right;
            font-size: 14px;
        }

        #app .tform .form-item .input {
            flex: 1;
        }

        #app .tform .form-item input {
            appearance: none;
            outline: none;
            border: 1px solid #ccc;
            width: 200px;
            height: 40px;
            box-sizing: border-box;
            padding: 10px;
            color: #666;
        }

        #app .tform .form-item input::placeholder {
            color: #666;
        }

        #app .tform .form-item .submit {
            appearance: none;
            outline: none;
            border: 1px solid #ccc;
            border-radius: 4px;
            padding: 4px 10px;
            margin-right: 10px;
            font-size: 12px;
            background: #ccc;
        }

        #app .tform .form-item .submit {
            border-color: #069;
            background: #069;
            color: #fff;
        }
    </style>
</head>

<body>
    <div id="app">
        <div class="table">
            <table>
                <thead>
                    <th>编号</th>
                    <th>科目</th>
                    <th>成绩</th>
                    <th>操作</th>
                </thead>
                <tbody>
                    <tr>
                        <td>1</td>
                        <td>语文</td>
                        <td>120</td>
                        <td><button>删除</button></td>
                    </tr>
                    <tr>
                        <td>2</td>
                        <td>数学</td>
                        <td>130</td>
                        <td><button>删除</button></td>
                    </tr>
                </tbody>
                <tbody>
                    <tr>
                        <td colspan="4">
                            <span class="none">
                                没有数据
                            </span>
                        </td>
                    </tr>
                </tbody>
                <tfoot>
                    <tr>
                        <td colspan="5">
                            <span>总分:100 </span>
                            <span style="margin-left: 50px">平均分:70 </span>
                        </td>
                    </tr>
                </tfoot>
            </table>
        </div>
        <div class="tform">
            <div class="form-item">
                <div class="label">科目:</div>
                <div class="input">
                    <input type="text" placeholder="请输入科目" />
                </div>
            </div>
            <div class="form-item">
                <div class="label">分数:</div>
                <div class="input">
                    <input type="text" placeholder="请输入分数" />
                </div>
            </div>
            <div class="form-item">
                <div class="label"></div>
                <div class="input">
                    <button class="submit">添加</button>
                </div>
            </div>
        </div>
    </div>
</body>
有了容器以后,就可以开始搭建框架 ,先导入vue包,再创建实例对象
    <script src="https://cdn.jsdelivr.net/npm/vue@2/dist/vue.js"></script>
    <script>
        const app = new Vue({
            el: '#app',
            data: {

            }
        })
    </script>
二、渲染步骤
1.v-for数据渲染
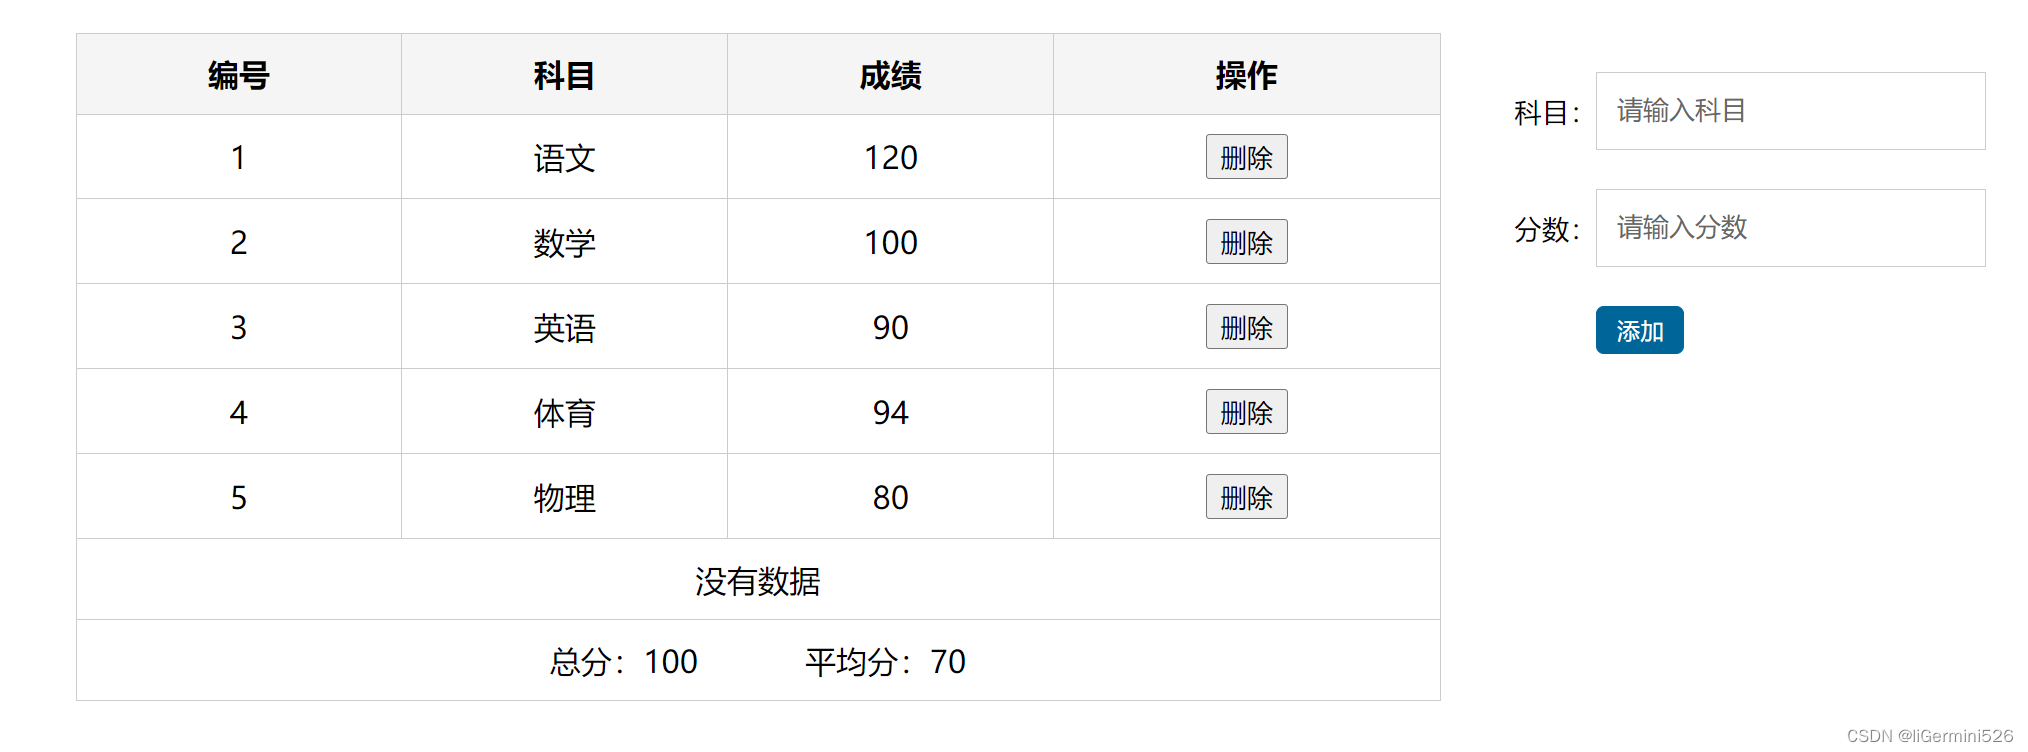
将准备好的成绩数组依次渲染再对应的表格中,这样就只有一个tr元素,大大提高了代码的复用性
代码如下(示例):
                <tbody>
                    <!-- 利用v-for将数组数据渲染在页面中 -->
                    <tr v-for="(item,index) in scoreList" :key="item.id">
                        <td>{{index+1}}</td>
                        <td>{{item.subject}}</td>
                        <td>{{item.score}}</td>
                        <td><button>删除</button></td>
                    </tr>
                </tbody>
对应数组数据
    <script>
        const app = new Vue({
            el: '#app',
            data: {
                scoreList: [
                    { id: 21, subject: '语文', score: 120 },
                    { id: 72, subject: '数学', score: 100 },
                    { id: 36, subject: '英语', score: 90 },
                    { id: 42, subject: '体育', score: 94 },
                    { id: 62, subject: '物理', score: 80 }
                ]
            }
        })
    </script>
效果:
2.增加功能
渲染数据最基础的就是增加功能了,利用v-model拿到输入框的科目与成绩,再给添加按钮注册点击事件,在methods属性中写add方法,实现数据与视图的双向更新
        <div class="tform">
            <div class="form-item">
                <div class="label">科目:</div>
                <div class="input">
                    <!-- v-model实现数据双向绑定 -->
                    <input type="text" placeholder="请输入科目" v-model.trim="subject" />
                </div>
            </div>
            <div class="form-item">
                <div class="label">分数:</div>
                <div class="input">
                    <!-- v-model实现数据双向绑定 -->
                    <input type="text" placeholder="请输入分数" v-model.number="score" />
                </div>
            </div>
            <div class="form-item">
                <div class="label"></div>
                <!-- 注册点击事件 -->
                <div class="input">
                    <button class="submit" @click="add">添加</button>
                </div>
            </div>
        </div>
在vue实例中:
    <script>
        const app = new Vue({
            el: '#app',
            data: {
                scoreList: [
                    { id: 21, subject: '语文', score: 120 },
                    { id: 72, subject: '数学', score: 100 },
                    { id: 36, subject: '英语', score: 90 },
                    { id: 42, subject: '体育', score: 94 },
                    { id: 62, subject: '物理', score: 80 }
                ],
                subject: '',
                score: ''
            },
            methods: {
                add() {
                    // 先判断信息是否输入有误
                    if (!this.subject) {
                        alert('请输入科目')
                        return;
                    }
                    if (typeof this.score !== 'number') {
                        alert('请输入正确的成绩')
                        return;
                    }
                    // 用unshift方法
                    this.scoreList.unshift({
                        // 用时间戳来定义ID,防止重复
                        id: +new Date(),
                        subject: this.subject,
                        score: this.score
                    })
                    // 添加完后清空文本框内数据
                    this.subject = ''
                    this.score = ''
                }
            }
        })
    </script>
效果展示:
代码如下(示例):
3.删除功能
删除功能最主要的是拿到ID号,根据ID号将该数组元素删除
                <tbody>
                    <!-- 利用v-for将数组数据渲染在页面中 -->
                    <tr v-for="(item,index) in scoreList" :key="item.id">
                        <td>{{index+1}}</td>
                        <td>{{item.subject}}</td>
                        <td>{{item.score}}</td>
                        <!-- 注册删除点击事件 -->
                        <td><button @click="del(item.id)">删除</button></td>
                    </tr>
                </tbody>
<script>
const app = new Vue({
el: '#app',
data: {
scoreList: [
{ id: 21, subject: '语文', score: 120 },
{ id: 72, subject: '数学', score: 100 },
{ id: 36, subject: '英语', score: 90 },
{ id: 42, subject: '体育', score: 94 },
{ id: 62, subject: '物理', score: 80 }
],
subject: '',
score: ''
},
methods: {
add() {
// 先判断信息是否输入有误
if (!this.subject) {
alert('请输入科目')
return;
}
if (typeof this.score !== 'number') {
alert('请输入正确的成绩')
return;
}
// 用unshift方法
this.scoreList.unshift({
// 用时间戳来定义ID,防止重复
id: +new Date(),
subject: this.subject,
score: this.score
})
// 添加完后清空文本框内数据
this.subject = ''
this.score = ''
},
del(id) {
// 用filter过滤的方法得到删除后的新数组
this.scoreList = this.scoreList.filter(item => item.id !== id)
}
}
})效果展示:
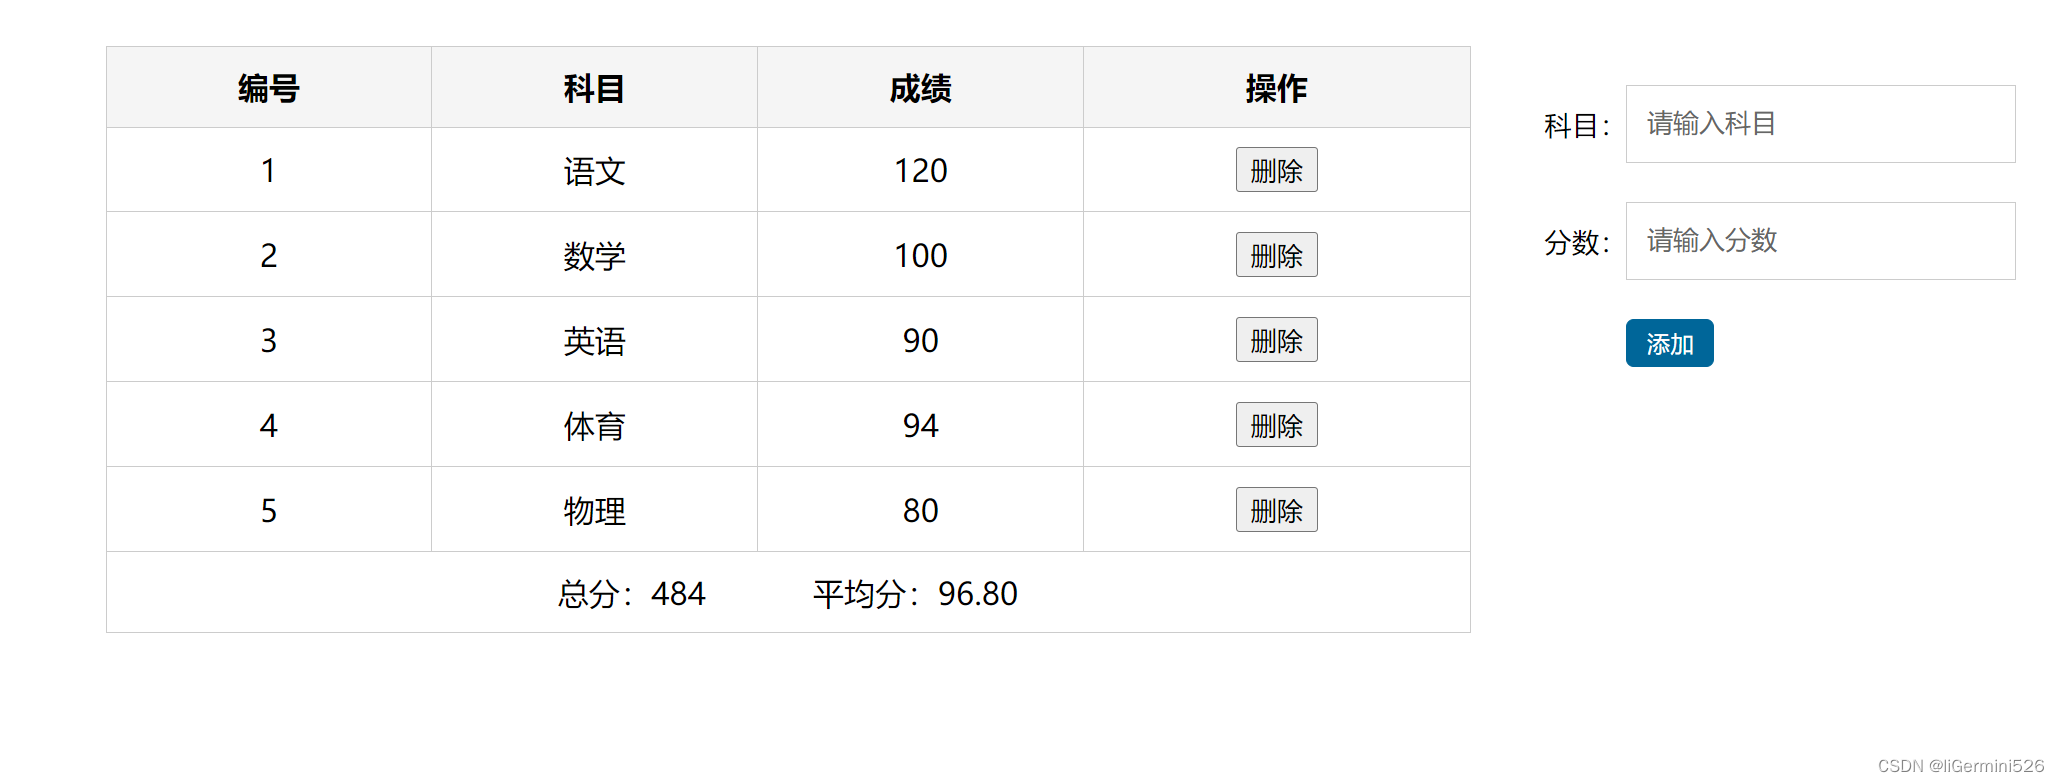
4.总计功能
针对于尾部,但对于这种累加求和的数据一般都写在computed属性中,在这里需要求平均分和总分两个属性,一个属性配备一个函数
            computed: {
                totalScore() {
                    // 用reduce累加方法
                    return this.scoreList.reduce((sum, item) => sum + item.score, 0)
                },
                avarageScore() {
                    if (this.totalScore == 0) {
                        return 0
                    }
                    return (this.totalScore / this.scoreList.length).toFixed(2)
                }
            },
<tfoot>
<tr>
<td colspan="5">
<span>总分:{{totalScore}} </span>
<span style="margin-left: 50px">平均分:{{avarageScore}}</span>
</td>
</tr>
</tfoot>最后两个主体部分不能同时出现,因此用v-if解决,判断条件为数组长度是否为零 ,为最终结果展示
总结
用vue框架简单渲染了一个成绩案例,其中主要包括了对vue指令的运用以及computed属性的应用,利用指令和js的方法搭配,就能达到我们想要的效果。


 583
583

 被折叠的 条评论
为什么被折叠?
被折叠的 条评论
为什么被折叠?
 到【灌水乐园】发言


