


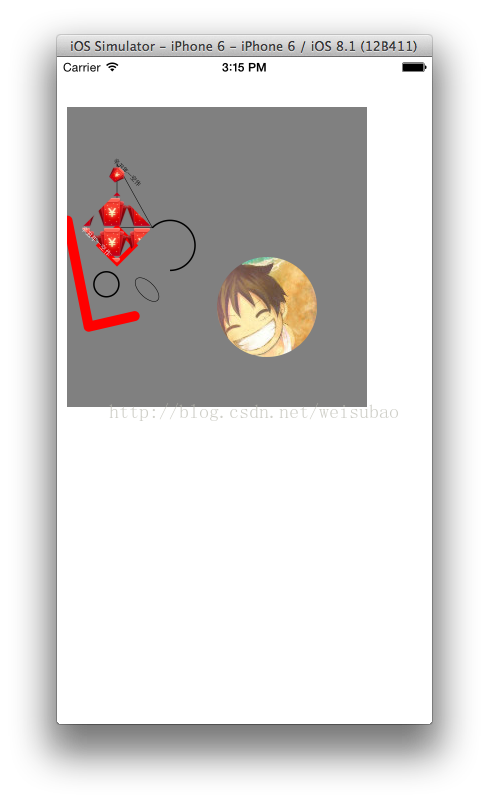
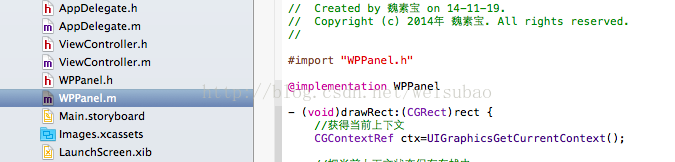
- - (void)drawRect:(CGRect)rect {
- //获得当前上下文
- CGContextRef ctx=UIGraphicsGetCurrentContext();
- //把当前上下文状态保存在栈中
- CGContextSaveGState(ctx);
- //缩放、移动处理(需要放在画图之前进行设置)
- CGContextScaleCTM(ctx, 0.5, 0.5);
- CGContextTranslateCTM(ctx, 100, 100);
- CGContextRotateCTM(ctx, M_PI_4);
- //描点
- CGContextMoveToPoint(ctx, 10, 10);
- CGContextAddLineToPoint(ctx, 100, 100);
- CGContextAddLineToPoint(ctx, 150, 50);
- //以下两种方式均可闭环
- //CGContextAddLineToPoint(ctx, 10, 10);
- CGContextClosePath(ctx);
- //渲染绘图,实心和空心
- CGContextStrokePath(ctx);
- //CGContextFillPath(ctx);
- //把当前上下文状态保存在栈中
- CGContextSaveGState(ctx);
- //画正方形
- CGContextAddRect(ctx, CGRectMake(100, 100, 50, 50));
- //设置线宽(一定要在CGContextStrokePath之前)
- //因为之前有过一次渲染绘图,所以这个属性设置不影响上面的那个三角形,以下颜色设置同理
- //所以,如果想分别设置两个或多个图形的属性,就分别渲染绘图一次
- CGContextSetLineWidth(ctx, 10);
- //设置颜色(同理,属性设置的代码都要在绘图的代码之前)
- CGContextSetRGBStrokeColor(ctx, 1, 0, 0, 1);
- CGContextStrokePath(ctx);
- //设置样式
- CGContextMoveToPoint(ctx, 20, 160);
- CGContextAddLineToPoint(ctx, 200, 280);
- CGContextAddLineToPoint(ctx, 250, 200);
- CGContextSetLineWidth(ctx, 20);
- //设置头尾样式
- CGContextSetLineCap(ctx, kCGLineCapRound);
- //设置转角样式
- CGContextSetLineJoin(ctx, kCGLineJoinRound);
- CGContextStrokePath(ctx);
- //把保存在栈中的上下文状态取出来,恢复。上面那段代码设置的样式不会影响其他
- CGContextRestoreGState(ctx);
- //画椭圆
- CGContextAddEllipseInRect(ctx, CGRectMake(200, 130, 60, 30));
- //以下等价
- //CGContextStrokePath(ctx);
- CGContextDrawPath(ctx, kCGPathStroke);
- //画圆形
- CGContextAddEllipseInRect(ctx, CGRectMake(140, 170, 50, 50));
- CGContextSetLineWidth(ctx, 3);
- CGContextStrokePath(ctx);
- //画圆弧
- CGContextAddArc(ctx, 200, 50, 50, M_PI_4, M_PI, 1);
- CGContextStrokePath(ctx);
- //画1/4圆,以及颜色的设置新方法
- CGContextMoveToPoint(ctx, 10, 230);
- CGContextAddLineToPoint(ctx, 10, 280);
- CGContextAddLineToPoint(ctx, 60, 280);
- CGContextAddArc(ctx, 10, 280, 50, 0, -M_PI_2, 1);
- [[UIColor greenColor] setStroke];
- CGContextStrokePath(ctx);
- //画图片和文字(不需要手动取得上下文)
- NSString *str1=@"辛丑年一空作";
- [str1 drawAtPoint:CGPointZero withAttributes:nil];
- UIImage *img=[UIImage imageNamed:@"001"];
- [img drawAtPoint:CGPointMake(10, 10)];
- //在一个框框里重叠图片并署名
- CGRect rect1=CGRectMake(50, 50, 100, 100);
- [img drawAsPatternInRect:rect1];
- NSMutableDictionary *attr=[[NSMutableDictionary alloc]init];
- attr[NSForegroundColorAttributeName]=[UIColor whiteColor];
- attr[NSFontAttributeName]=[UIFont systemFontOfSize:13];
- [str1 drawInRect:CGRectMake(50, 140, 100, 100) withAttributes:attr];
- //把保存在栈中的上下文状态取出来,恢复。上面那段代码设置的样式不会影响其他
- CGContextRestoreGState(ctx);
- //裁剪圆形头像
- CGContextAddEllipseInRect(ctx, CGRectMake(150, 150, 100 , 100));
- //按照圆形剪裁出一个上下文区域,以后的内容就填充在这个圆形上下文中
- CGContextClip(ctx);
- UIImage *img1=[UIImage imageNamed:@"me"];
- [img1 drawAtPoint:CGPointMake(150, 150)];
- }
转载自:http://blog.csdn.net/weisubao/article/details/41282457?utm_source=tuicool&utm_medium=referral


 1522
1522

 被折叠的 条评论
为什么被折叠?
被折叠的 条评论
为什么被折叠?
 到【灌水乐园】发言


