


详情可见
1.安装 sequelize-cli
npm install sequelize-cli
2.在项目根目录下编写.sequelizerc 配置文件
'use strict';
const path = require('path');
module.exports = {
  config: path.join(__dirname, 'database/config.json'),
  'migrations-path': path.join(__dirname, 'database/migrations'),
  'seeders-path': path.join(__dirname, 'database/seeders'),
  'models-path': path.join(__dirname, 'app/model'),
};
3.初始化配置文件
npx sequelize init:config
4.修改配置文件database/config.json
根据要求设置数据库 目前由于是开发阶段所以只设置开发阶段 ,需要其他就修改
development:开发阶段
test:测试阶段
production:上线阶段
{
  "development": {
    "username": "root",
    "password": "",
    "database": "lihui666",
    "host": "127.0.0.1",
    "dialect": "mysql"
  },
  "test": {
    "username": "root",
    "password": null,
    "database": "database_test",
    "host": "127.0.0.1",
    "dialect": "mysql"
  },
  "production": {
    "username": "root",
    "password": null,
    "database": "database_production",
    "host": "127.0.0.1",
    "dialect": "mysql"
  }
}
5.初始化配置目录
npx sequelize init:migrations
6.创建配置文件
npx sequelize migration:generate --name=users
7.修改迁移文件为TS语法 直接修改database/migration下的创建的js文件重命名为.ts文件
'use strict';
import { QueryInterface } from 'sequelize';

module.exports = {
  // 在执行数据库升级时调用的函数,创建 users 表
  up: async (queryInterface:QueryInterface, Sequelize) => {
    const { INTEGER, DATE, STRING } = Sequelize;
    await queryInterface.createTable('users', {
      id: {
        type: INTEGER,
        primaryKey: true,
        autoIncrement: true,
      },
      username: {
        type: STRING(255),
        allowNull: true,
        unique: true,
      },
      email: {
        type: STRING(255),
        allowNull: true,
        unique: true,
      },
      phone: {
        type: STRING(255),
        allowNull: true,
        unique: true,
      },
      password: {
        type: STRING(255), // varchar(255)
        allowNull: false,
        unique: false,
      },
      created_at: {
        type: DATE,
      },
      updated_at: {
        type: DATE,
      },
    });
  },
  // 在执行数据库降级时调用的函数,删除 users 表
  down: async (queryInterface:QueryInterface) => {
    await queryInterface.dropTable('users');
  },
};
8.在package.json中新增执行TS迁移文件脚本
  "scripts": {
    "sequelize-cli-ts": "node -r ts-node/register ./node_modules/sequelize-cli/lib/sequelize"
  },
9.执行迁移文件
npm run sequelize-cli-ts db:migrate
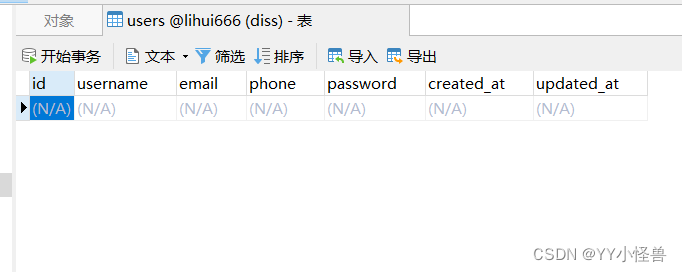
10.数据库users创建成功


 700
700


 被折叠的 条评论
为什么被折叠?
被折叠的 条评论
为什么被折叠?
 到【灌水乐园】发言


