


在下面将会通过几个例子进行分析Thread的各个方法的使用,和实现Thread的方法
1、Thread 通过继承Thread 重写run方法 和 实现Runnable 实现run方法
package com.abc.test1;

/**
 * @author 别说难忘记
 *
 */
public class Tester {

	/**
	 * @param args
	 */
	public static void main(String[] args) {

		PrinterThread pt =new PrinterThread();
		Thread t =new Thread(new SayThread());
		t.start();
		pt.start();
	}

}

class PrinterThread extends Thread{

	@Override
	public void run() {
		for(int i=0;i<10;i++) {
			System.out.println("打印一条提示!");
			try {
				Thread.sleep(500);
			} catch (InterruptedException e) {
				e.printStackTrace();
			}

		}
	}
}

class SayThread implements Runnable{

	@Override
	public void run() {
		for(int i=0;i<10;i++) {
			System.out.println("打印一条欢迎词!");
			try {
				Thread.sleep(800);
			} catch (InterruptedException e) {
				e.printStackTrace();
			}
		}
	}
}2、在下面这个例子中,两个线程调用同一个对象,如果没有对addCnt方法用synchronized锁,将会出现数据没有同步而造成的的数据增量丢失。(本例需要自行切换run方法当中count对象的addCnt方法)
并且通过以下两种方法同步:
- synchronized块的数据同步
- synchronized方法数据同步
package com.abc.test2;

/**
 * @author 别说难忘记
 *
 */
public class Tester {

	/**
	 * @param args
	 */
	public static void main(String[] args) {
		Count cnt = new Count();
		PrinterThread pt1 =new PrinterThread(cnt);
		PrinterThread pt2 =new PrinterThread(cnt);
		pt1.start();
		pt2.start();
	}
}
class PrinterThread extends Thread{

	private Count cnt;

	public PrinterThread(Count cnt){
		this.cnt = cnt;
	}

	@Override
	public void run() {
		for(int i=0;i<10;i++) {
			cnt.addCntK();
			try {
				Thread.sleep(300);
			} catch (InterruptedException e) {
				e.printStackTrace();
			}
		}
	}
}

class Count{

	private int cnt =1;

	public int getCnt() {
		return cnt;
	}

	public void setCnt(int cnt) {
		this.cnt = cnt;
	}

	/**
	 * 没有使用synchronized的情况
	 */
	public void addCnt() {
		System.out.println("当前cnt的值为:"+cnt);
		cnt++;
	}
	/**
	 * 使用synchronize方法的写法
	 */
	public synchronized void addCntF() {
		System.out.println("当前cnt的值为:"+cnt );
		cnt++;
	}
	/**
	 * 使用synchronize块的写法
	 */
	public synchronized void addCntK() {
		synchronized (this) {
			System.out.println("当前cnt的值为:"+cnt);
			cnt++;

		}
	}
}
代码执行结果:
1.执行addCnt方法:

2、执行addCntK方法:

3、执行addCntF方法:

3、下面这个例子使用了wait方法使得一个线程进入阻塞状态等待唤醒,另一个线程执行结束在通过notifyAll方法将所有阻塞状态的线程唤醒。
package com.abc.test3;

/**
 * @author 别说难忘记
 *
 */
public class Tester {

	/**
	 * @param args
	 */
	public static void main(String[] args) {
		// TODO Auto-generated method stub
		Count cnt = new Count();
		PrinterThreadA pt1 = new PrinterThreadA(cnt);
		PrinterThreadB pt2 = new PrinterThreadB(cnt);
		pt1.start();
		pt2.start();
	}
}

class PrinterThreadA extends Thread {

	private Count cnt;

	public PrinterThreadA(Count cnt) {
		this.cnt = cnt;
	}

	@Override
	public void run() {
		cnt.addCntK();
	}
}

class PrinterThreadB extends Thread {

	private Count cnt;

	public PrinterThreadB(Count cnt) {
		this.cnt = cnt;
	}

	@Override
	public void run() {
		cnt.addCntF();
	}
}

class Count {
	private int cnt = 1;

	/**
	 * 使用synchronize块的写法
	 */
	public synchronized void addCntF() {
		for (int i = 0; i < 10; i++) {
			System.out.println("当前cnt的值为:" + cnt + "当前Thread:B");
			cnt++;
			try {
				Thread.sleep(300);
			} catch (InterruptedException e) {
				e.printStackTrace();
			}
		}
		notifyAll();
		System.out.println("唤醒其他阻塞状态的线程!");
	}

	/**
	 * 使用synchronize块的写法
	 */
	public void addCntK() {
		synchronized (this) {
			for (int i = 0; i < 10; i++) {
				System.out.println("当前cnt的值为:" + cnt + "当前Thread:A");
				cnt++;
				if (i == 5) {
					try {
						System.out.println("把当前A线程强制进入阻塞状态!");
						wait();
					} catch (InterruptedException e) {
						e.printStackTrace();
					}
				}
				try {
					Thread.sleep(300);
				} catch (InterruptedException e) {
					e.printStackTrace();
				}
			}
		}

	}
}
代码执行结果:

4、本例会使用yield方法让线程自动放弃当前CPU时间
package com.abc.test4;

/**
 * @author 别说难忘记
 *
 */
public class Tester {

	/**
	 * @param args
	 */
	public static void main(String[] args) {

		new Thread(new Runnable() {

			@Override
			public void run() {
				for(int i =1;i<=20;i++) {

					System.out.println("this is one play A !"+i);
					if(i%5==0) {
						//System.out.println("在这里自动放弃当前CPU时间");//虽然自动放弃了CPU时间,还是有概率再次继续获得CPU时间
						Thread.yield();

					}

				}
			}
		}).start();
		new Thread(new Runnable() {
			@Override
			public void run() {
				for(int i =1;i<=20;i++) {
					System.out.println("this is one play B !"+i);

				}
			}
		}).start();
	}

}
代码执行结果:

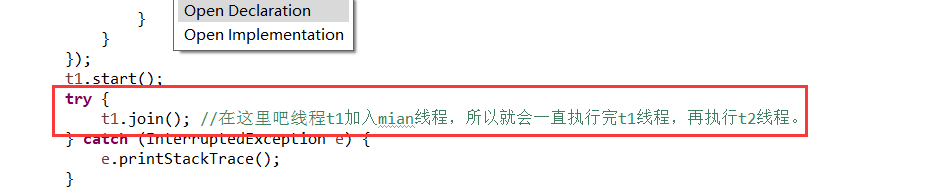
5、 这个例子将会使用join方法让线程嵌入main线程
package com.test.test5;

/**
 * @author 别说难忘记
 *
 */
public class Tesyer {

	/**
	 * @param args
	 */
	public static void main(String[] args) {
		// TODO Auto-generated method stub
		Thread t1 = new Thread(new Runnable() {

			@Override
			public void run() {

				for(int i =1;i<=20;i++) {
					System.out.println("this is one play A !"+i);
					if(i%5==0) {
						Thread.yield(); //在这里自动放弃当前CPU时间,虽然自动放弃了CPU时间,还是有概率再次继续获得CPU时间
					}
				}

			}
		});
		Thread t2 = new Thread(new Runnable() {
			@Override
			public void run() {
				for(int i =1;i<=20;i++) {
					System.out.println("this is one play B !"+i);

				}
			}
		});
		t1.start();
		try {
			t1.join(); //在这里吧线程t1加入mian线程,所以就会一直执行完t1线程,再执行t2线程。
		} catch (InterruptedException e) {
			e.printStackTrace();
		}
		t2.start();

	}

}
代码执行结果:


 1427
1427


 被折叠的 条评论
为什么被折叠?
被折叠的 条评论
为什么被折叠?
 到【灌水乐园】发言


