


本文是在这篇博客的基础上开发的so。
另外,也可以自己从头开发Native C++应该更简单一些,不会有这么多坑。
JNI(Java Native Interface),他是java平台的特性,不是安卓系统提供的。他定义了一些JNI函数,来让开发者可以通过调用这些函数来实现java代码调用C/C++代码。
C++实现
新建java 类文件:src\main\java\com\lilongsy\TestJNI.java,用Java实现逻辑。
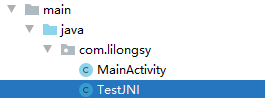
package com.lilongsy;

public class TestJNI {
    static {
        System.loadLibrary("JniTest");
    }
    public static native String sayHello();
}
在java目录下,运行javah命令,生成com_lilongsy_TestJNI.h头文件:
D:\java-test\MyApplication\app\src\main\java>javah com.lilongsy.TestJNI
/* DO NOT EDIT THIS FILE - it is machine generated */
#include <jni.h>
/* Header for class com_lilongsy_TestJNI */

#ifndef _Included_com_lilongsy_TestJNI
#define _Included_com_lilongsy_TestJNI
#ifdef __cplusplus
extern "C" {
#endif
/*
 * Class:     com_lilongsy_TestJNI
 * Method:    sayHello
 * Signature: ()Ljava/lang/String;
 */
JNIEXPORT jstring JNICALL Java_com_lilongsy_TestJNI_sayHello
  (JNIEnv *, jclass);

#ifdef __cplusplus
}
#endif
#endif
在main下新建jni文件夹

把com_lilongsy_TestJNI.h头文件剪切到jni文件夹下,并新建main.cpp文件,其代码如下:
#include "com_lilongsy_TestJNI.h"
JNIEXPORT jstring JNICALL Java_com_lilongsy_TestJNI_sayHello
        (JNIEnv *env, jclass obj) {
  return env->NewStringUTF((char *)"登录成功_JNI");
};
设置CMake编译环境
在AndroidStudio File > Settings > Android SDK > SDK Tools下,安装NDK、CMake、LLDB(国内需要单独下载到cmake同级目录,并用lldb小写)。


另外一种方法是手动下载NDK,下载地址:https://developer.android.google.cn/ndk/downloads/,然后在项目目录下的local.properties设置ndk.dir,我这里设置如下:
ndk.dir=D\:\\android\\android-ndk-r21b
sdk.dir=D\:\\android\\android-sdk
查看SDK是否设置成功:

在APP下新建CMakeLists.txt文件:

其内容如下:
# For more information about using CMake with Android Studio, read the
# documentation: https://d.android.com/studio/projects/add-native-code.html

# Sets the minimum version of CMake required to build the native library.
#CMakeLists.txt
cmake_minimum_required(VERSION 3.4.1)

# Creates and names a library, sets it as either STATIC
# or SHARED, and provides the relative paths to its source code.
# You can define multiple libraries, and CMake builds them for you.
# Gradle automatically packages shared libraries with your APK.

add_library( # Sets the name of the library.
        # 设置so文件名称.
        JniTest

        # Sets the library as a shared library.
        SHARED
        # 设置这个so文件为共享.

        # Provides a relative path to your source file(s).
        # 设置这个so文件为共享.
        src/main/jni/main.cpp)

# Searches for a specified prebuilt library and stores the path as a
# variable. Because CMake includes system libraries in the search path by
# default, you only need to specify the name of the public NDK library
# you want to add. CMake verifies that the library exists before
# completing its build.

find_library( # Sets the name of the path variable.
        log-lib

        # Specifies the name of the NDK library that
        # you want CMake to locate.
        log )

# Specifies libraries CMake should link to your target library. You
# can link multiple libraries, such as libraries you define in this
# build script, prebuilt third-party libraries, or system libraries.

target_link_libraries( # Specifies the target library.
        # 制定目标库.
        JniTest

        # Links the target library to the log library
        # included in the NDK.
        ${log-lib} )
配置build.gradle
为了自动构建时,调用cmake,在APP>build.gradle的android加入如下代码:
externalNativeBuild {
    cmake {
        path file('CMakeLists.txt')
    }
}
为了让cmake生成多个abi下的so文件,在在APP>build.gradle的defaultConfig加入如下代码:
externalNativeBuild {
    cmake {
        cppFlags ""
        //生成多个版本的so文件
        abiFilters 'arm64-v8a','armeabi-v7a','x86','x86_64'
    }
}
重构(rebuild project)
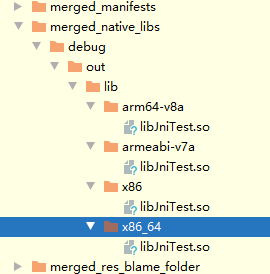
在build下,rebuild project:

会在\app\build\intermediates\merged_native_libs目录下生成不同abi的so文件。
调用so
在app\src\main目录下新建jniLIB文件夹,并把上文生成的lib下的所有内容都复制到jniLIB下:

在MainActivity,加入如下代码,测试TestJNI.sayHello()的返回值:
Toast.makeText(MainActivity.this, TestJNI.sayHello(), Toast.LENGTH_SHORT).show();
运行APK,登录成功会有Toast提示:登录成功_JNI。


 1274
1274


 被折叠的 条评论
为什么被折叠?
被折叠的 条评论
为什么被折叠?
 到【灌水乐园】发言


