


问题一:


二、安装logstash-input-jdbc插件
1.修改logstash 文件夹下Gemfile文件
将source改为:https://gems.ruby-china.org
2.进入bin目录
执行logstash-plugin install logstash-input-jdbc
报错
Could not verify the SSL certificate for https://gems.ruby-china.org/.
There is a chance you are experiencing a man-in-the-middle attack, but most likely your system doesn't have the CA certificates needed for verification. For information about OpenSSL certificates, see http://bit.ly/ruby-ssl. To connect without using SSL, edit your Gemfile sources and change 'https' to 'http'.
正确配置:

正确的运行命令
logstash-plugin install --no-verify logstash-input-jdbc
结果:

-===================================================================================
三、安装:logstash-output-elasticsearch 输出插件
命令:logstash-plugin install --no-verify logstash-output-elasticsearch
结果

kibana启动(双击)


四、Windows下搭建elasticsearch集群案例

3、具体的配置信息参考如下:
节点1的配置信息:
cluster.name: my-esLearn #集群名称,保证唯一
node.name: node-1 #节点名称,必须不一样
network.host: 192.168.13.198 #必须为本机的ip地址
http.port: 9200 #服务端口号,在同一机器下必须不一样
transport.tcpport: 9300 #集群间通信端口号,在同一机器下必须不一样
#设置集群自动发现机器ip集合
discovery.zen.ping.unicast.hosts: ["192.168.13.198:9300", "192.168.13.198:9301", "192.168.13.198:9302"]
节点2的配置信息:
cluster.name: my-esLearn #集群名称,保证唯一
node.name: node-2 #节点名称,必须不一样
network.host: 192.168.13.198 #必须为本机的ip地址
http.port: 9201 #服务端口号,在同一机器下必须不一样
transport.tcp.port: 9301 #集群间通信端口号,在同一机器下必须不一样
#设置集群自动发现机器ip集合
discovery.zen.ping.unicast.hosts: ["192.168.13.198:9300", "192.168.13.198:9301", "192.168.13.198:9302"]
节点3的配置信息:
cluster.name: my-esLearn #集群名称,保证唯一
node.name: node-3 #节点名称,必须不一样
network.host: 192.168.13.198 #必须为本机的ip地址
http.port: 9202 #服务端口号,在同一机器下必须不一样
transport.tcp.port:: 9302 #集群间通信端口号,在同一机器下必须不一样
#设置集群自动发现机器ip集合
discovery.zen.ping.unicast.hosts: ["192.168.13.198:9300", "192.168.13.198:9301", "192.168.13.198:9302"]

五、ik分词插件(注意版本一致,不然报错)

链接: https://blog.csdn.net/weixin_42273782/article/details/86536530


六、springboot整合 ES(注意版本对应,下面图由官网提供)
版本一致出现报错:

springboot与ES版本关系图

解决:
springboot引入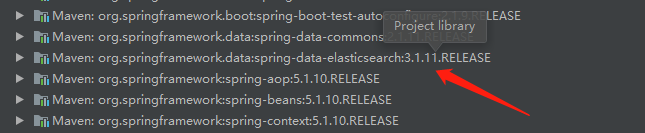
es项目应为5.50以上,即可OK
结果:


 2396
2396


 被折叠的 条评论
为什么被折叠?
被折叠的 条评论
为什么被折叠?
 到【灌水乐园】发言


