


1、动态数据源【分库】
分库有两种选择方案:
- 用dao接口注解+切面实现动态数据源
- 利用表字段分库策略实现
此处采用第一种方案,第二种方案我将在分表是实现;
1.1 环境搭建
- 引入以下依赖
     <dependency>
            <groupId>org.mybatis.spring.boot</groupId>
            <artifactId>mybatis-spring-boot-starter</artifactId>
            <version>2.1.3</version>
        </dependency>
        <dependency>
            <groupId>mysql</groupId>
            <artifactId>mysql-connector-java</artifactId>
        </dependency>
         <dependency>
            <groupId>org.springframework.boot</groupId>
            <artifactId>spring-boot-starter-aop</artifactId>
        </dependency>
- 启动类配置:
// 关闭数据源自动配置
@SpringBootApplication(exclude = {DataSourceAutoConfiguration.class})
public class DemoApplication {}
创建两个库, user_master\user_slave库,并在库中分表建立一个表:
DROP TABLE IF EXISTS `user`;
CREATE TABLE `user`  (
  `id` int NOT NULL,
  `name` varchar(255) NULL DEFAULT NULL,
  `age` int NOT NULL DEFAULT 0 COMMENT '年龄',
  PRIMARY KEY (`id`),
  INDEX `c_index`(`name`)
) ENGINE = InnoDB CHARACTER SET = utf8mb4;
1.2 数据准备
- 配置数据源
spring.datasource.master.jdbc-url = jdbc:mysql://localhost:3306/user_master?useUnicode=true&characterEncoding=UTF-8&serverTimezone=Asia/Shanghai
spring.datasource.master.username = ***
spring.datasource.master.password = ***
spring.datasource.master.driver-class-name=com.mysql.cj.jdbc.Driver
spring.datasource.slave.jdbc-url = jdbc:mysql://localhost:3306/user_slave?useUnicode=true&characterEncoding=UTF-8&serverTimezone=Asia/Shanghai
spring.datasource.slave.username = ***
spring.datasource.slave.password =***
spring.datasource.slave.driver-class-name=com.mysql.cj.jdbc.Driver
- 自定义数据源
@Configuration
@MapperScan(basePackages = "com.lonk.demo.template.dao", sqlSessionFactoryRef = "SqlSessionFactory")
public class DynamicDataSourceConfig {

    @Bean
    public  org.apache.ibatis.session.Configuration configuration() {
        configuration.setMapUnderscoreToCamelCase(true);
        configuration.setLogImpl(StdOutImpl.class);
        configuration.setUseColumnLabel(true);
        return configuration;
    }


    @Bean(name = "master")
    @Primary
    @ConfigurationProperties(prefix = "spring.datasource.master")
    public DataSource getDateSource1() {
        return DataSourceBuilder.create().build();
    }

    @Bean(name = "slave")
    @ConfigurationProperties(prefix = "spring.datasource.slave")
    public DataSource getDateSource2() {
        return DataSourceBuilder.create().build();
    }

    @Bean(name = "dynamicDataSource")
    public DynamicDataSource DataSource(@Qualifier("master") DataSource masterDataSource,
                                        @Qualifier("slave") DataSource slaveDataSource) {
        //这个地⽅是⽐较核⼼的targetDataSource 集合是我们数据库和名字之间的映射
        Map<Object, Object> targetDataSource = new HashMap<>();
        targetDataSource.put(DataSourceType.DataBaseType.Master, masterDataSource);
        targetDataSource.put(DataSourceType.DataBaseType.Slave, slaveDataSource);

        DynamicDataSource dataSource = new DynamicDataSource();
        dataSource.setTargetDataSources(targetDataSource);
        dataSource.setDefaultTargetDataSource(masterDataSource);
        return dataSource;
    }


    @Bean(name = "SqlSessionFactory")
    public SqlSessionFactory SqlSessionFactory(@Qualifier("dynamicDataSource") DataSource dynamicDataSource)
            throws Exception {
        SqlSessionFactoryBean bean = new SqlSessionFactoryBean();
        // jdbc数据源整合mybatis的SqlSessionFactory
        bean.setDataSource(dynamicDataSource);
        // 设置配置: 类似mybatis-config.xml
        bean.setConfiguration(configuration());
        bean.setTypeAliasesPackage("com.lonk.demo.template.entity");
        // bean.setPlugins();
        bean.setMapperLocations(
                new PathMatchingResourcePatternResolver().getResources("classpath:mapper/*.xml"));
        return bean.getObject();
    }

    @Bean
    public SqlSessionTemplate sqlSessionTemplate(SqlSessionFactory sqlSessionFactory) throws Exception {
        return new SqlSessionTemplate(sqlSessionFactory);
    }

    @Bean
    public DataSourceTransactionManager transactionManager(@Qualifier("dynamicDataSource") DataSource dynamicDataSource){
        return new DataSourceTransactionManager(dynamicDataSource);
    }
}
public class DataSourceType {

    private static final ThreadLocal<DataBaseType> TYPE = new ThreadLocal<DataBaseType>();


    public static void setDataBaseType(DataBaseType dataBaseType) {
        if (dataBaseType == null) {
            throw new NullPointerException();
        }
        TYPE.set(dataBaseType);
    }

    public static DataBaseType getDataBaseType() {
        DataBaseType dataBaseType = TYPE.get() == null ? DataBaseType.Master : TYPE.get();
        return dataBaseType;
    }

    public static void clearDataBaseType() {
        TYPE.remove();
    }


    public enum DataBaseType {
        Master("master"),
        Slave("slave");

        private String name;

        private DataBaseType(String name) {
          this.name = name;
        }

        public String getName() {
          return name;
        }
    }
}
1.3 动态数据源
上面配置数据源默认为master, 如何实现动态切换数据源?
可以实现AbstractRoutingDataSource,确定数据源路由策略:
public class DynamicDataSource extends AbstractRoutingDataSource {

    @Override
    protected Object determineCurrentLookupKey() {
        DataSourceType.DataBaseType dataBaseType = DataSourceType.getDataBaseType();
        return dataBaseType;
    }
}
此处,采用注解+aop实现动态切换,配置不同的数据源调用不同的库:
@Target({ElementType.METHOD, ElementType.TYPE, ElementType.PARAMETER})
@Retention(RetentionPolicy.RUNTIME)
@Documented
public @interface SharedDataSource {

    String value() default "master";
}


@Aspect
@Component
public class DataSourceAop {


    @Before("@annotation(dataSource)")
    public void changeDataSource(JoinPoint point, SharedDataSource dataSource) {
        String type = dataSource.value();
        if (DataSourceType.DataBaseType.Master.getName().equals(type)){
            DataSourceType.setDataBaseType(DataSourceType.DataBaseType.Master);
        } else if (DataSourceType.DataBaseType.Slave.getName().equals(type)){
            DataSourceType.setDataBaseType(DataSourceType.DataBaseType.Slave);
        } else {
            DataSourceType.setDataBaseType(DataSourceType.DataBaseType.Master);
        }
    }

    @After("@annotation(dataSource)")
    public void restoreDataSource(JoinPoint point, SharedDataSource dataSource) {
    	// 注意清除,不影响其他使用默认数据源master
        DataSourceType.clearDataBaseType();
    }

}
1.4 示例
@RestController
@RequestMapping("/v1/api/user")
@Slf4j
public class UserController {
@Resource
private UserService userService;
@GetMapping("/{id}")
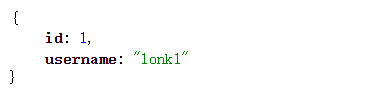
public User GetUser(@PathVariable("id") Integer id){
User user = userService.getUserById(id);
log.info("user: {}", user);
return user;
}
}
@Repository
public interface UserDao {
// 未配置默认为master
@SharedDataSource("master")
User getUserById(Integer id);
}
  <select id="getUserById" parameterType="java.lang.Integer" resultMap="UserMap">
        select * from user where id = #{id}
    </select>
2、分表的简单实现
在1的基础上我们来实现一个简单分表案例, 这里自定义mybatis插件,根据主键id实现分表查询:
2.1 数据表配置
在user_master、user_slave同时创建两张表:
CREATE TABLE `t_user_0`  (
  `id` int NOT NULL,
  `name` varchar(255) NULL DEFAULT NULL,
  `age` int NOT NULL DEFAULT 0 COMMENT '年龄',
  PRIMARY KEY (`id`),
  INDEX `c_index`(`name`)
) ENGINE = InnoDB CHARACTER SET = utf8mb4;

CREATE TABLE `t_user_1`  (
  `id` int NOT NULL,
  `name` varchar(255) NULL DEFAULT NULL,
  `age` int NOT NULL DEFAULT 0 COMMENT '年龄',
  PRIMARY KEY (`id`),
  INDEX `c_index`(`name`)
) ENGINE = InnoDB CHARACTER SET = utf8mb4;
2.2 自定义分表插件
这个我以简单id查询为例,对于对象类型需要使用时需修改:
@Intercepts(@Signature(
            type = StatementHandler.class,
            method = "prepare",
            args = {Connection.class, Integer.class}))
public class TableShardInterceptor implements Interceptor {

    private static final String logicTable = "user";
    private static final List<String> actualTable = new ArrayList();
    static {
        actualTable.add("t_user_0");
        actualTable.add("t_user_1");
    }

    @Override
    public Object intercept(Invocation invocation) throws Throwable {
        StatementHandler statementHandler = (StatementHandler) invocation.getTarget();
        MetaObject metaObject = MetaObject.forObject(statementHandler, SystemMetaObject.DEFAULT_OBJECT_FACTORY,
                SystemMetaObject.DEFAULT_OBJECT_WRAPPER_FACTORY, new DefaultReflectorFactory());

        MappedStatement mappedStatement = (MappedStatement) metaObject.getValue("delegate.mappedStatement");
        String statementId = mappedStatement.getId();

        String sql = (String) metaObject.getValue("delegate.boundSql.sql");

        ParameterHandler parameterHandler = (ParameterHandler) metaObject.getValue("delegate.parameterHandler");;
        // Object parameterObject1 = statementHandler.getBoundSql().getParameterObject();
        Object parameterObject = parameterHandler.getParameterObject();
        sql = replaceSql(logicTable, parameterObject, sql);

        metaObject.setValue("delegate.boundSql.sql", sql);
        return invocation.proceed();
    }

    private String replaceSql(String logic, Object parameterObject, String sql) {
        if (parameterObject instanceof Integer) {
            // 分表策略: 根据ID取模
            Integer index = (Integer) parameterObject % actualTable.size();
            String actual = "t_" + logic + "_" + index ;
            return sql.replaceAll(logic, actual);
        } else {
            // 默认表
            String actual = actualTable.get(0);
            return sql.replaceAll(logic, actual);
        }
    }

    // 复杂参数对象处理
    private void paramProcess() {
        // 配置分表字段
//        String sharedField = "id";
//        String sharedTable = "order";
//        if (parameterObject instanceof MapperMethod.ParamMap) {
//            MapperMethod.ParamMap parameterMap = (MapperMethod.ParamMap) parameterObject;
//            Object valueObject = parameterMap.get(sharedField);
//            if (valueObject == null) {
//                throw new RuntimeException(String.format("入参字段%s无匹配", sharedField));
//            }
//
//            replaceSql(sharedTable, valueObject, sql);
//        } else {
//            if (isBaseType(parameterObject)) {
//
//            }
//            if (parameterObject instanceof Map){
//                Map<String,Object>  parameterMap =  (Map<String,Object>)parameterObject;
//                Object valueObject = parameterMap.get(sharedField);
//
//                replaceSql(sharedTable, valueObject, sql);
//            } else {
//                //非基础类型对象
//                Class<?> parameterObjectClass = parameterObject.getClass();
//                Field declaredField = parameterObjectClass.getDeclaredField(sharedField);
//                declaredField.setAccessible(true);
//                Object valueObject = declaredField.get(parameterObject);
//                //替换sql
//                replaceSql(sharedTable, valueObject, sql);
//            }
//        }
    }

    private boolean isBaseType(Object object) {
        if (object.getClass().isPrimitive()
                || object instanceof String
                || object instanceof Integer
                || object instanceof Double
                || object instanceof Float
                || object instanceof Long
                || object instanceof Boolean
                || object instanceof Byte
                || object instanceof Short) {
            return true;
        } else {
            return false;
        }
    }


    public static Object getValueByReflect(Object model, String paraName) throws Exception {
        Object value = new Object();
        Field[] fields = model.getClass().getDeclaredFields();
        for (Field field : fields) {
            field.setAccessible(true);
            if (field.getName().equals(paraName)) {
                value =  field.get(model);
                break;
            }
        }
        return value;
    }

}
将分表插件加到数据源:
修改DynamicDataSourceConfig的configuration
@Bean
    public  org.apache.ibatis.session.Configuration configuration() {
        TableShardInterceptor pagePlugin = new TableShardInterceptor();
        org.apache.ibatis.session.Configuration configuration = new org.apache.ibatis.session.Configuration();
        configuration.setMapUnderscoreToCamelCase(true);
        configuration.setLogImpl(StdOutImpl.class);
        configuration.setUseColumnLabel(true);
        configuration.addInterceptor(pagePlugin);
        return configuration;
    }
以上是根据表字段进行分表查询,类似也可实现分库查询,此处不再举例。


 572
572


 被折叠的 条评论
为什么被折叠?
被折叠的 条评论
为什么被折叠?
 到【灌水乐园】发言


