


很早就听说自定义View,但是一直没有自己动手做一个,今天,终于开始。
下面,做一个比较简单的饼状进度条,展示自定义View的几个步骤。
首先,总结下自定义View的步骤:
1、定义自定义View的属性;
2、在View的构造方法中获得我们自定义的属性;
3、重写onMeasure() ;
4、重写onDraw()。
其次,我们需要将目标定义清楚:
1,目标是饼状进度条,那么,基础的canvas画图是需要了解的。
2,既然是提供一个进度条,那么,是需要自定义View的用户来动态设置进度值的。
3,还有用户可设置属性,包括背景色、前景色,还有一个是view的大小,可以用直径来表示。
最后,要展示进度条如何使用,我用了一个定时器,每秒推进一次进度。
下面来具体实现:
1、定义自定义View的属性
在values下面新建一个attr.xml,现在里面定义我们的属性,
<?xml version="1.0" encoding="utf-8"?>
<resources>

    <attr name="diameter" format="dimension" />
    <attr name="backColor" format="color" />
    <attr name="frontColor" format="color" />

    <declare-styleable name="PieProgressView">
        <attr name="backColor" />
        <attr name="frontColor" />
        <attr name="diameter" />
    </declare-styleable>

</resources>
2、在View的构造方法中获得我们自定义的属性
    public PieProgressView(Context context, AttributeSet attrs, int defStyle)
    {
        super(context, attrs, defStyle);
        /**
         * 获得我们所定义的自定义样式属性
         */
        TypedArray a = context.getTheme().obtainStyledAttributes(attrs, R.styleable.PieProgressView, defStyle, 0);
        int n = a.getIndexCount();
        for (int i = 0; i < n; i++)
        {
            int attr = a.getIndex(i);
            switch (attr)
            {
            case R.styleable.PieProgressView_backColor:
                // 默认背景颜色设置为黑色
                mBackColor = a.getColor(attr, Color.BLACK);
                Log.i("log","mBackColor="+Integer.toHexString(mBackColor));
                break;
            case R.styleable.PieProgressView_frontColor:
                // 默认前景颜色设置为蓝色
                mFrontColor = a.getColor(attr, Color.BLUE);
                Log.i("log","mFrontColor="+Integer.toHexString(mFrontColor));
                break;
            case R.styleable.PieProgressView_diameter:
                // 默认设置为40dp
                mDiameter = a.getDimensionPixelSize(attr, (int) TypedValue.applyDimension(
                        TypedValue.COMPLEX_UNIT_SP, 40, getResources().getDisplayMetrics()));
                break;
            }

        }
        a.recycle();
        /**
         * 获得绘制文本的宽和高
         */
        mPaint = new Paint();
        mBound = new Rect();
        progressValue=0;

    }
3、重写onMeasure
    protected void onMeasure(int widthMeasureSpec, int heightMeasureSpec)
    {
        int width = 0;
        int height = 0;

        /**
         * 设置宽度
         */
        int specMode = MeasureSpec.getMode(widthMeasureSpec);
        int specSize = MeasureSpec.getSize(widthMeasureSpec);
        switch (specMode)
        {
        case MeasureSpec.EXACTLY:// 明确指定了
            width = getPaddingLeft() + getPaddingRight() + specSize;
            break;
        case MeasureSpec.AT_MOST:// 一般为WARP_CONTENT
            width = getPaddingLeft() + getPaddingRight() + mBound.width();
            break;
        }

        /**
         * 设置高度
         */
        specMode = MeasureSpec.getMode(heightMeasureSpec);
        specSize = MeasureSpec.getSize(heightMeasureSpec);
        switch (specMode)
        {
        case MeasureSpec.EXACTLY:// 明确指定了
            height = getPaddingTop() + getPaddingBottom() + specSize;
            break;
        case MeasureSpec.AT_MOST:// 一般为WARP_CONTENT
            height = getPaddingTop() + getPaddingBottom() + mBound.height();
            break;
        }

        //设置直径的最小值
        if(mDiameter<=40){
            mDiameter=40;
        }
        height=mDiameter;
        width=mDiameter;

        Log.i("log","w="+width+" h="+height);
        setMeasuredDimension(width, height);

    }
4、重写onDraw
    protected void onDraw(Canvas canvas)
    {
        mPaint.setColor(Color.YELLOW);
        int width = getMeasuredWidth();
        int height = getMeasuredHeight();
        RectF rect = new RectF(0, 0, width, height);//200, 200);
//      Log.i("log","w="+width+" h="+height);

        mPaint.setColor(mBackColor);
        canvas.drawArc(rect, 0, 360, true, mPaint);

        mPaint.setColor(mFrontColor);
        canvas.drawArc(rect, 0, progressValue*360/100, true, mPaint);

    }
5、提供对外接口
这是一个很重要的对外接口,用于获取新的进度值:
    public void setInputData(int inputData){
        progressValue = inputData;
    }
6、在布局文件中定义
在布局文件中我定义了2个view,用于测试各项自定义属性:
<RelativeLayout xmlns:android="http://schemas.android.com/apk/res/android"
xmlns:tools="http://schemas.android.com/tools"
xmlns:custom="http://schemas.android.com/apk/res/com.customview"
android:layout_width="match_parent"
android:layout_height="match_parent" >
<com.customview.view.PieProgressView
android:id="@+id/pie_progress_view1"
android:layout_width="wrap_content"
android:layout_height="wrap_content"
android:layout_centerInParent="true"
android:padding="10dp"
custom:backColor="#ff205030"
custom:frontColor="#ff60E0E0"
custom:diameter="200dp"
/>
<com.customview.view.PieProgressView
android:id="@+id/pie_progress_view2"
android:layout_width="wrap_content"
android:layout_height="wrap_content"
android:layout_toLeftOf="@id/pie_progress_view1"
android:layout_alignBottom="@id/pie_progress_view1"
android:padding="10dp"
custom:backColor="#ff503040"
custom:frontColor="#fff080E0"
custom:diameter="40dp"
/>
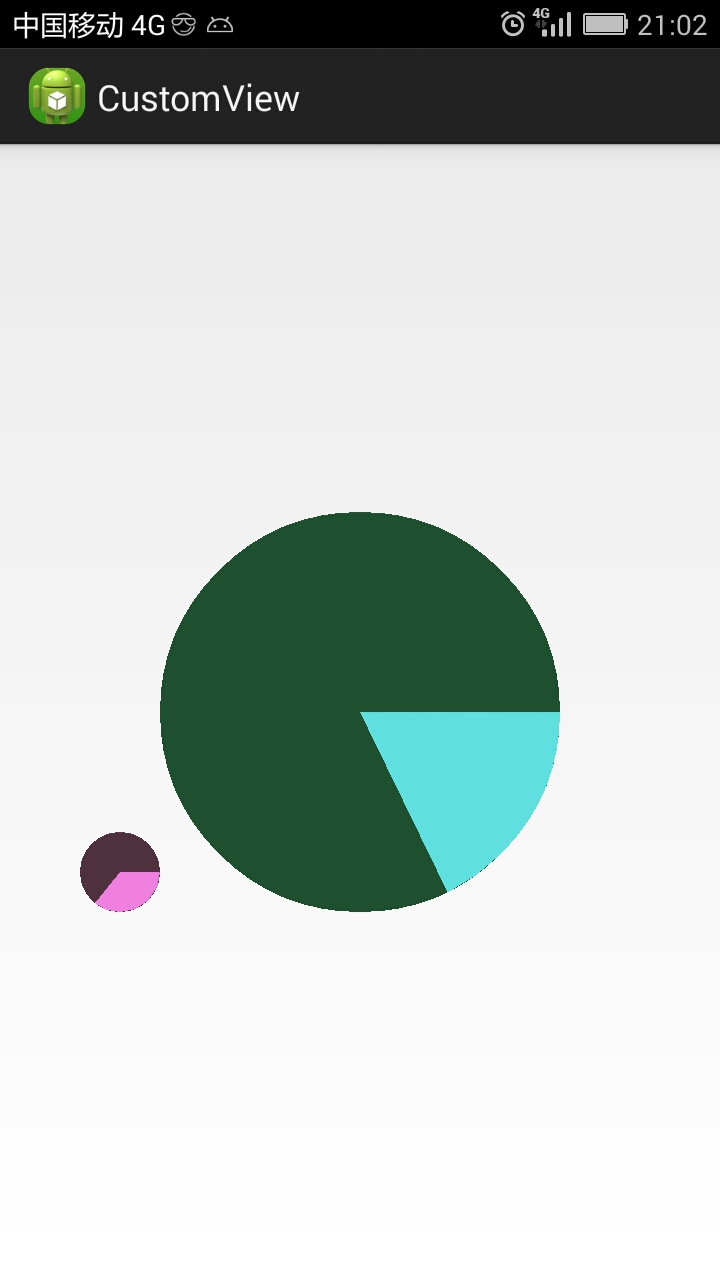
</RelativeLayout>7、在Activity中使用
主要是一个定时器的使用,用于动态更新进度条:
package com.customview;

import android.os.Bundle;
import android.os.Handler;
import android.os.Message;
import android.util.Log;
import java.util.Timer;
import java.util.TimerTask;
import com.customview.view.PieProgressView;
import android.app.Activity;
import android.widget.TextView;

public class MainActivity extends Activity
{
    TextView textView;
    PieProgressView pie_progress_view1;
    PieProgressView pie_progress_view2;
    int progressValue=0;

    @Override
    protected void onCreate(Bundle savedInstanceState)
    {
        super.onCreate(savedInstanceState);
        setContentView(R.layout.activity_main);

        pie_progress_view1 = (PieProgressView)findViewById(R.id.pie_progress_view1);
        pie_progress_view2 = (PieProgressView)findViewById(R.id.pie_progress_view2);

        timer.schedule(task, 1000, 1000); // 1s后执行task,经过1s再次执行
    }

    Handler handler = new Handler() {
        public void handleMessage(Message msg) {
            if (msg.what == 1) {
                Log.i("log","handler : progressValue="+progressValue);

                //通知view,进度值有变化
                pie_progress_view1.setInputData(progressValue);
                pie_progress_view1.postInvalidate();

                pie_progress_view2.setInputData(progressValue*2);
                pie_progress_view2.postInvalidate();

                progressValue++;
                if(progressValue>100){
                    timer.cancel();
                }
            }
            super.handleMessage(msg);
        };
    };

    Timer timer = new Timer();
    TimerTask task = new TimerTask() {

        @Override
        public void run() {
            // 需要做的事:发送消息
            Message message = new Message();
            message.what = 1;
            handler.sendMessage(message);
        }
    };

}
至此,完美收工,效果如下:


 1万+
1万+

 被折叠的 条评论
为什么被折叠?
被折叠的 条评论
为什么被折叠?
 到【灌水乐园】发言


