nginx学习笔记:nginx+php
nginx连接php可以使nginx支持更多的应用。接下来我们搭建nginx和php
之间的架构。
安装前准备
(1)php的安装需要多种组件,使用yum安装:
[root@rsync ~]# yum install gcc make gd-devel libjpeg-devel libpng-devel libxml2-devel bzip2-devel libcurl-devel freetype-devel -y(2)在官方网站下载php5.5的最新版本php5.5.38:
(3)确保nginx已经源码编译安装,笔者将nginx安装在/usr/local/nginx目录
安装步骤
(1)解压php源码包:
[root@rsync php]# tar xvf php-5.5.38.tar.gz (2)进入安装目录进行配置选择:
[root@rsync php]# cd php-5.5.38
[root@rsync php-5.5.38]# ./configure --prefix=/usr/local/php --with-config-file-path=/usr/local/php/etc --with-bz2 --with-curl --enable-ftp --enable-sockets --disable-ipv6 --with-gd --with-jpeg-dir=/usr/local/ --with-png-dir=/usr/local --with-freetype-dir=/usr/local --enable-gd-native-ttf --with-iconv-dir=/usr/local --enable-mbstring --enable-calendar --with-gettext --with-libxml-dir=/usr/local --with-zlib --with-pdo-mysql=mysqlnd --with-mysqli=mysqlnd --with-mysql=mysqlnd --enable-dom --enable-xml --enable-fpm --with-libdir=lib64这里选择了安装目录为/usr/local/php,–with-和–enable-都是php支持的各种模块。读者可以通过输入 “./configure –help”选择自己需要的模块进行配置。如果上述操作报错,应该是缺少相关库的安装,使用yum命令安装即可。
(3)配置完后进行编译安装:
[root@rsync php-5.5.38]# make && make install(4)编译完成后再/usr/local/php目录下将会得到php的各种组件,拷贝配置文件:
//这个是php的配置文件模板
[root@rsync php-5.5.38]# cp php.ini-production  /usr/local/php/etc/php.ini
//这个是php-fpm的配置文件
[root@rsync php-5.5.38]# cp /usr/local/php/etc/php-fpm.conf.default /usr/local/php/etc/php-fpm.conf
(5)将php-fpm的启动脚本拷贝到/etc/init.d/目录中:
[root@rsync fpm]# cp /php/php-5.5.38/sapi/fpm/init.d.php-fpm /etc/init.d/php-fpm(6)启动php-fpm服务并且查看端口:
[root@rsync fpm]# /etc/init.d/php-fpm start
[root@rsync fpm]# netstat -anutlp | grep 9000
tcp        0      0 127.0.0.1:9000              0.0.0.0:*                   LISTEN      2700/php-fpm
看到9000端口,说明php-fpm已经开启!
nginx中添加php-fpm
这需要我们修改nginx的配置文件nginx.conf:
[root@rsync conf]# vim /usr/local/nginx/conf/nginx.conf在默认server的location中添加php的设置:
location ~ \.php$ {
            root           html;    #默认路径
            fastcgi_pass   127.0.0.1:9000;
            fastcgi_index  index.php;   #默认首页
            fastcgi_param  SCRIPT_FILENAME  /scripts$fastcgi_script_name;
            #include        fastcgi_params;
            include        fastcgi.conf;   #使用fastcgi.conf作为配置文件
        }
上述配置中的fastcgi_params也是fastcgi.conf的配置文件,但是fastcgi.conf更新一些,他比fastcgi_params多了如下内容:
fastcgi_param SCRIPT_FILENAME $document_root$fastcgi_script_name; #脚本文件请求的路径在nginx的默认发布目录/usr/local/nginx/html下添加新的php文件:
[root@rsync html]# cat index.php
<?php
    phpinfo();
?>
启动nginx服务并查看端口:
[root@rsync conf]# /usr/local/nginx/sbin/nginx
[root@rsync conf]# netstat -anutlp |grep 80
tcp        0      0 0.0.0.0:80                  0.0.0.0:*                   LISTEN      2776/nginx
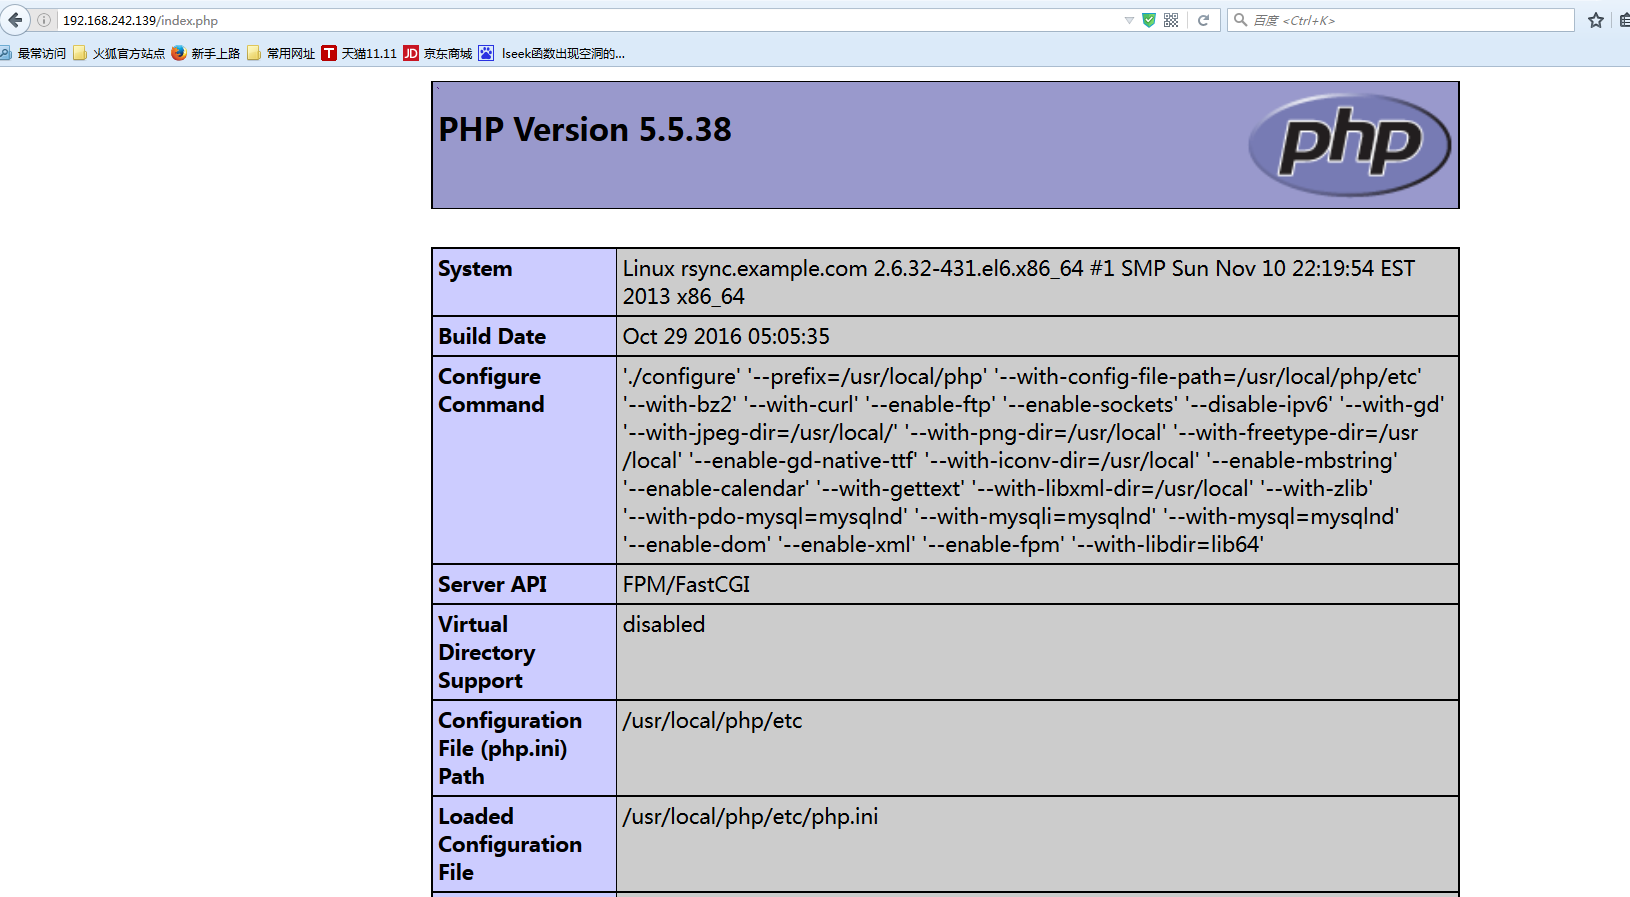
使用浏览器访问默认该节点的nginx服务:
访问成功说明nginx已经支持了php应用。


 403
403

 被折叠的 条评论
为什么被折叠?


