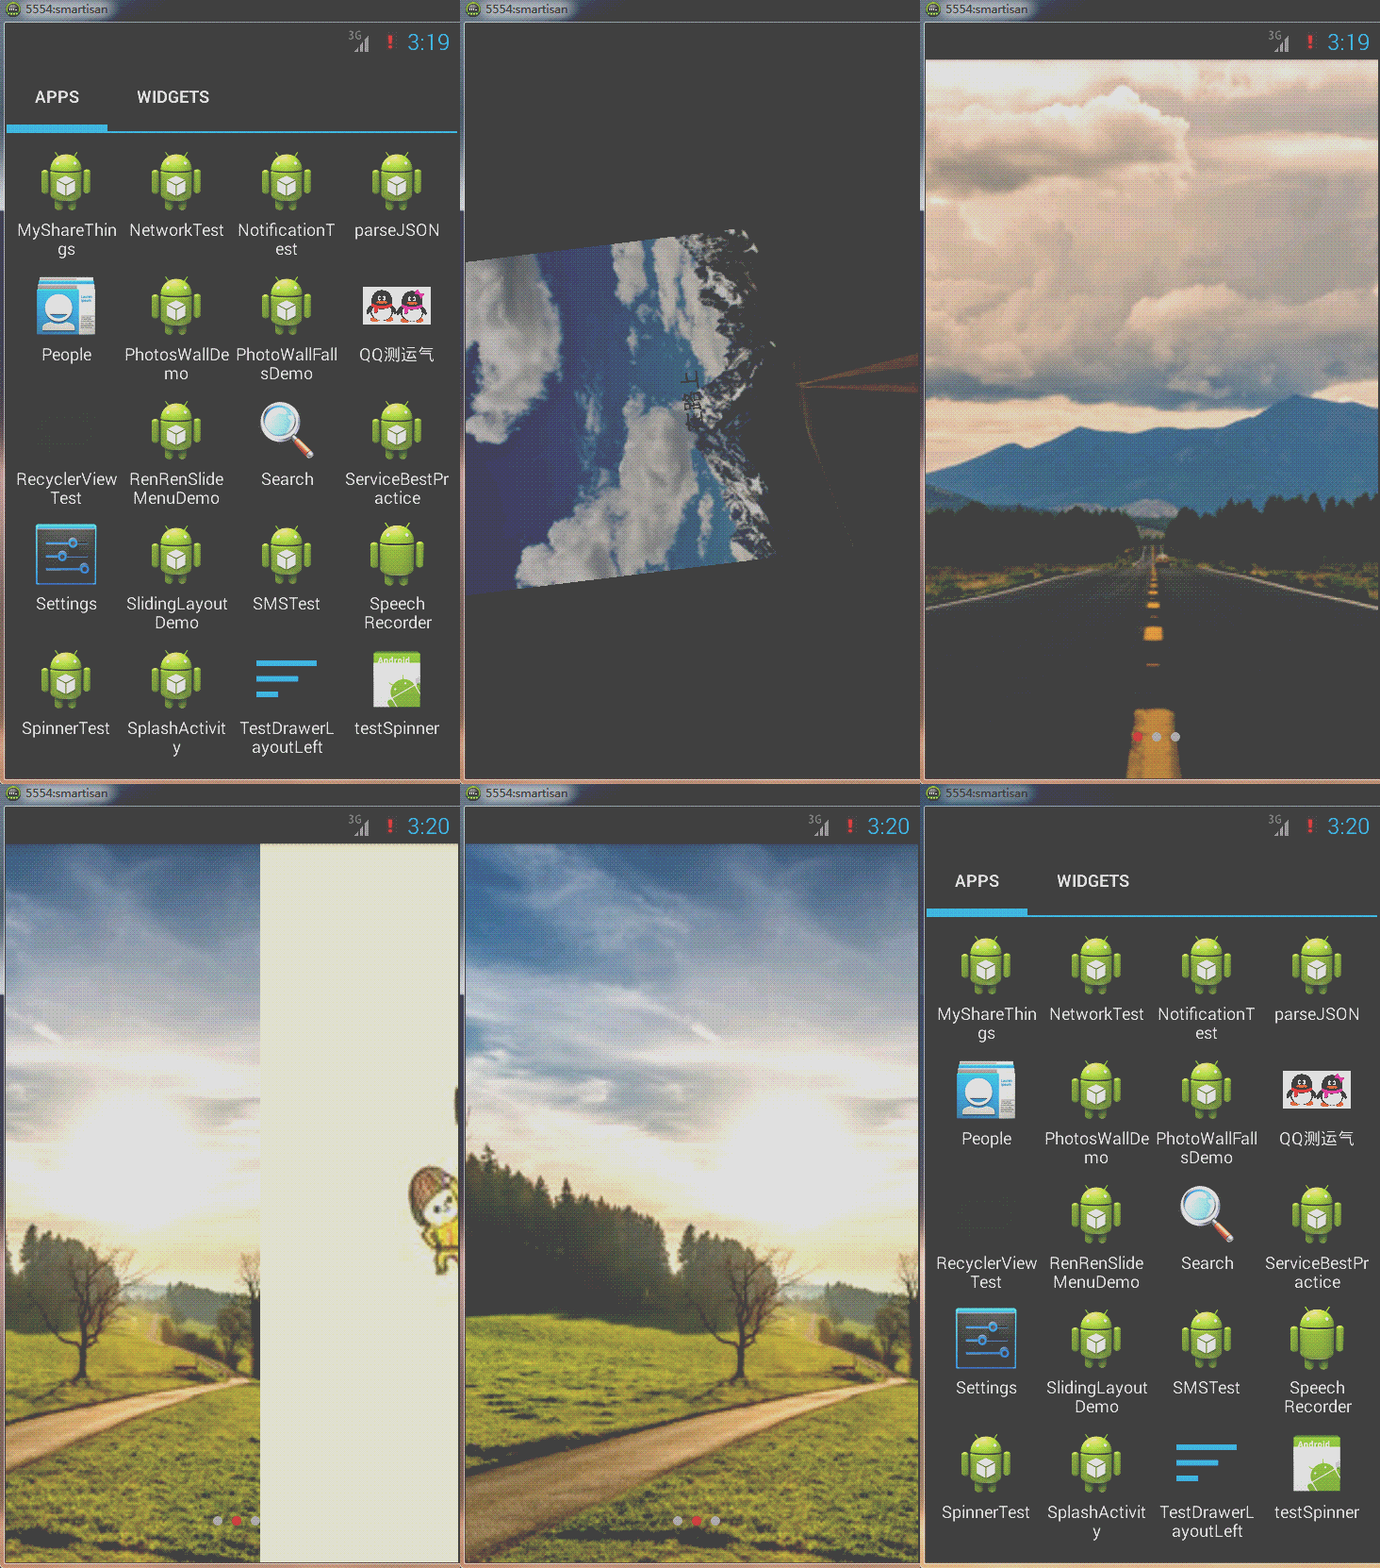
每个安卓的应用都会有欢迎界面和引导页,引导页一般只是在第一次进入或者更新应用进入的时候才会出现。我这里使用另外一种更加灵活和扩展性的方式来写这个小Demo,首先看一下效果图:
这个Demo可扩展的地方在于:引导页和底部的小圆点可以在不更改布局文件的情况下随时增加和减少,这还是比较省心的,以下分欢迎页面和引导页面来展开。
第一部分是欢迎页面,布局文件很简单,我这里就是一个带一张图片背景的相对布局和一个TextView:
<RelativeLayout xmlns:android="http://schemas.android.com/apk/res/android"
    xmlns:tools="http://schemas.android.com/tools"
    android:id="@+id/rl_splash"
    android:layout_width="match_parent"
    android:layout_height="match_parent"
    android:background="@drawable/splash"
    tools:context=".SplashActivity" >

    <TextView
        android:layout_width="wrap_content"
        android:layout_height="wrap_content"
        android:layout_centerInParent="true"
        android:text="在路上"
        android:textColor="#bb000000"
        android:textSize="20sp" />

</RelativeLayout>
在SplashActivity类中找到布局id,然后给它设置了缩放、透明、旋转三种动画,代码如下:
//由于是使用了三种动画效果合在一起,所以要使用AnimationSet动画集
AnimationSet set = new AnimationSet(false);
        RotateAnimation rtAnimation = new RotateAnimation(0, 360,
                Animation.RELATIVE_TO_SELF, 0.5f, Animation.RELATIVE_TO_SELF,
                0.5f);
        rtAnimation.setDuration(2000);
        rtAnimation.setFillAfter(true);

        ScaleAnimation scAnimation = new ScaleAnimation(0, 1, 0, 1,
                Animation.RELATIVE_TO_SELF, 0.5f, Animation.RELATIVE_TO_SELF,
                0.5f);
        scAnimation.setDuration(2000);
        scAnimation.setFillAfter(true);

        AlphaAnimation alAnimation = new AlphaAnimation(0, 1);
        alAnimation.setDuration(2000);
        alAnimation.setFillAfter(true);

        set.addAnimation(rtAnimation);
        set.addAnimation(scAnimation);
        set.addAnimation(alAnimation);
        //执行动画
        rlSplash.startAnimation(set);
首先是旋转动画,传入的6个参数的含义是让整个布局相对于自己的中心点360度旋转;接着是缩放动画,参数的含义是让布局相对于自己的中心点由无到布局设定的屏幕大小显示出来;最后一个是透明动画,就是由完全不可见到完全显现(0到1)。
因为欢迎界面动画完成以后就要跳到引导页,所以这里给动画添加一个监听事件:
set.setAnimationListener(new AnimationListener() {
            //动画开始之前会执行方法体里面的事件
            @Override
            public void onAnimationStart(Animation arg0) {

            }
            //动画重复的过程中执行方法体里面的事件
            @Override
            public void onAnimationRepeat(Animation arg0) {

            }
            //动画执行完成会执行方法里面的事件
            @Override
            public void onAnimationEnd(Animation arg0) {
                startActivity(new Intent(SplashActivity.this,
                        GuideActivity.class));
                finish();
            }
        });
里面的三个方法依次是动画执行前、执行过程中和执行完成后会调用的,因为这里要在动画完后进入到引导页,所以在onAnimationEnd中写入跳转逻辑,然后finish掉欢迎页面。
这样的话欢迎页面就写完了,接下来就是引导页的罗杰了。
同样的,贴出布局文件代码:
<?xml version="1.0" encoding="utf-8"?>
<RelativeLayout xmlns:android="http://schemas.android.com/apk/res/android"
    android:id="@+id/rl_guide"
    android:layout_width="match_parent"
    android:layout_height="match_parent"
    android:orientation="vertical" >

    <android.support.v4.view.ViewPager
        android:id="@+id/vp_guide"
        android:layout_width="match_parent"
        android:layout_height="match_parent" >
    </android.support.v4.view.ViewPager>

     <LinearLayout
        android:id="@+id/ll_guide"
        android:layout_width="wrap_content"
        android:layout_height="wrap_content"
        android:layout_alignParentBottom="true"
        android:layout_centerHorizontal="true"
        android:layout_marginBottom="26dp"
        android:orientation="horizontal" >
    </LinearLayout>

</RelativeLayout>
一个相对布局下面包含着support-v4包中的ViewPager控件和一个LinearLayout布局,目前看到ViewPager和LinearLayout都不包含有子控件,这是因为我们会在代码中new出来这些对象,这样的话相对来说比较灵活。
接下来就是GuideActivity中逻辑代码了,首先我们找到ViewPager和LinearLayout对应的id,然后准备了三张图片用来设置给ImageView做背景的。
imageViewList = new ArrayList<ImageView>();
        for (int i = 0; i < imagesId.length; i++) {
            ImageView imageView = new ImageView(this);
            imageView.setBackgroundResource(imagesId[i]);
            imageViewList.add(imageView);
        }
这里我们定义了一个全局的保存ImageView的集合,然后根据图片的数量,我们new出相应个数的ImageView对象,最后把这些ImageView(也就是3个)添加到集合中去。
然后我们给滑动页面添加适配器PagerAdapter,有点类似于ListView中的适配器。
private class myGuideAdapter extends PagerAdapter {

        //ViewPager的页数
        @Override
        public int getCount() {
            return imagesId.length;
        }
        //判断是否由instantiateItem中获得的对象生成页面
        @Override
        public boolean isViewFromObject(View arg0, Object arg1) {
            return arg0 == arg1;
        }
        //初始化ViewPager中的每个页面
        @Override
        public Object instantiateItem(View container, int position) {
            ((ViewGroup) container).addView(imageViewList.get(position));
            return imageViewList.get(position);
        }
        //当页面滑出视野时销毁ViewPager中的页面
        @Override
        public void destroyItem(View container, int position, Object object) {
            ((ViewGroup) container).removeView((View) object);
        }
    }
上面方法中也有相应的注释,主要是最后两个方法,一个是初始化ViewPager项,添加到ViewPager的容器中去,这里也就是把三个ImageView添加到ViewPager中去,另外一个是销毁item项,当页面滑出视野时可以从ViewPager容器中销毁掉这个ImageView。
最后把适配器设置给ViewPager即可,这样的话就能实现三张图片页面间的滑动了。
接下来去实现底部小圆点,类似的,我们的小圆点view也是在代码中new出的对象,如下:
for (int i = 0; i < imagesId.length; i++) {
            View view = new View(this);
            view.setBackgroundResource(R.drawable.guide_point_shape);
            //当不是第一个圆点的时候设置左边距为10个像素
            if (i > 0) {
                layoutParams.leftMargin = 10;
            }
            view.setLayoutParams(layoutParams);

            llGuide.addView(view);
        }
这里我们看到给view设置的背景资源是一个shape文件,我们看看这个文件的内容:
<?xml version="1.0" encoding="utf-8"?>
<shape xmlns:android="http://schemas.android.com/apk/res/android"
    android:shape="oval" >

    <solid android:color="@android:color/darker_gray" />

</shape>
原来就是一个简单的固体小圆点,颜色设置为深灰色。
还有我们看到有一个layoutParams对象,接下来我们看看这里面的代码逻辑:
class MyLayoutParams extends android.widget.LinearLayout.LayoutParams {

        public MyLayoutParams(int arg0, int arg1) {
            super(arg0, arg1);
        }
    }
这是定义的一个内部类,用来设置view(底部圆点)的宽和高的:
MyLayoutParams layoutParams = new MyLayoutParams(10, 10);这里设置圆点的宽和高都为10个像素。
这些属性设置完成以后,把圆点view添加到我们布局文件中的LinearLayout布局中去。
到此,就剩下滑动的时候小圆点变色的逻辑没有实现了。我们给页面滑动设置一个监听事件,并且设定它当前的选中的圆点是第一个圆点,然后根据页面滑动到下一页来更变圆点的颜色,这样就能够让小圆点跟随着页面的滑动而变颜色了。以下是代码逻辑:
//这里定义的是一个成员变量
currIndex = 0;
        //这里默认让第一个圆点的颜色处于选中状态,是用一个shape来实现的
        vpGuide.setCurrentItem(currIndex);
        llGuide.getChildAt(0)
                .setBackgroundResource(R.drawable.move_point_shape);
        vpGuide.setOnPageChangeListener(new OnPageChangeListener() {
            //当滑动到下一个页面的时候,根据页面的索引来更改对应的圆点shape
            @Override
            public void onPageSelected(int arg0) {
                switch (arg0) {
                case 0:
                    //第一个页面时候,第一个圆点是红色,其他是灰色
                    llGuide.getChildAt(0).setBackgroundResource(
                            R.drawable.move_point_shape);
                    llGuide.getChildAt(1).setBackgroundResource(
                            R.drawable.guide_point_shape);
                    llGuide.getChildAt(2).setBackgroundResource(
                            R.drawable.guide_point_shape);
                    break;
                case 1:
                    //第二个页面时候,第二个圆点是红色,其他是灰色
                    llGuide.getChildAt(0).setBackgroundResource(
                            R.drawable.guide_point_shape);
                    llGuide.getChildAt(1).setBackgroundResource(
                            R.drawable.move_point_shape);
                    llGuide.getChildAt(2).setBackgroundResource(
                            R.drawable.guide_point_shape);
                    break;
                case 2:
                    //第三个页面时候,第三个圆点是红色,其他是灰色
                    llGuide.getChildAt(0).setBackgroundResource(
                            R.drawable.guide_point_shape);
                    llGuide.getChildAt(1).setBackgroundResource(
                            R.drawable.guide_point_shape);
                    llGuide.getChildAt(2).setBackgroundResource(
                            R.drawable.move_point_shape);

                    break;

                default:
                    break;
                }
                //把页面的索引值赋给定义的成员指向变量
                currIndex = arg0;
            }

            @Override
            public void onPageScrolled(int arg0, float arg1, int arg2) {
            }

            @Override
            public void onPageScrollStateChanged(int arg0) {

            }
        });
看一下小圆点选中状态的shape文件内容:
<?xml version="1.0" encoding="utf-8"?>
<shape xmlns:android="http://schemas.android.com/apk/res/android"
    android:shape="oval" >

    <solid android:color="@android:color/holo_red_dark" />

</shape>
和上面的一样,只有颜色变成了红色,这就可以看到滑动的圆点改变了状态了。
这样的话就完成了小圆点跟随着页面滑动变化颜色的逻辑了,我们看到这是通过父布局LinearLayout来获取它的三个子布局(小圆点),给它设置背景来实现选中状态的改变。
效果图如首页所见,点击这里下载源码。如有错误,欢迎指正出来!


 3200
3200

 被折叠的 条评论
为什么被折叠?


