


源码下载地址:http://download.csdn.net/detail/liu537192/8512127
效果图:
图1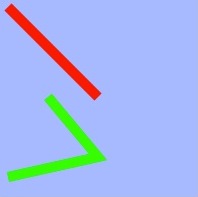
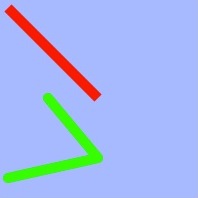
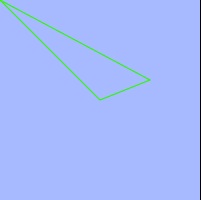
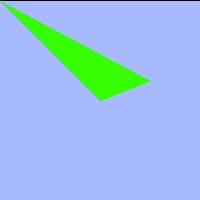
图5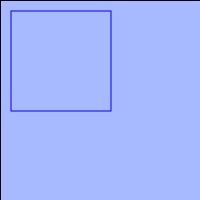
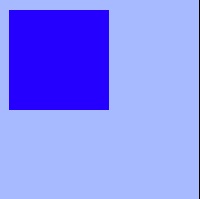

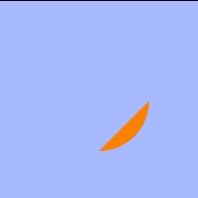
图9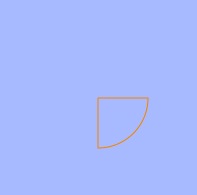

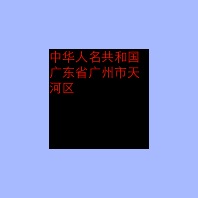
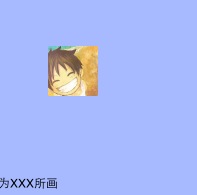
图13
核心代码:
//
// JLView.m
// 01-基本图形绘制
//
// Created by XinYou on 15-3-18.
// Copyright (c) 2015年 vxinyou. All rights reserved.
//
#import "JLView.h"
@implementation JLView
- (id)initWithFrame:(CGRect)frame
{
self = [super initWithFrame:frame];
if (self) {
// Initialization code
}
return self;
}
- (void)drawRect:(CGRect)rect
{
// [self drawLine];
// [self drawTriangle];
// [self draw4Rect];
// [self drawCircle];
// [self drawArc];
// [self drawSector];
// [self drawText];
[self drawImage];
}
/**
* 画图
*/
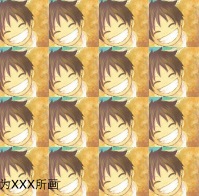
- (void)drawImage{
// 1.取得图片
UIImage *image = [UIImage imageNamed:@"me"];
// 2.画
// [image drawAtPoint:CGPointMake(50, 50)];//①
// [image drawInRect:CGRectMake(0, 0, 150, 150)];//②
[image drawAsPatternInRect:CGRectMake(0, 0, 200, 200)];//③
// 3.画文字
NSString *str = @"为XXX所画";
[str drawInRect:CGRectMake(0, 180, 100, 30) withAttributes:nil];
// ①②③对应的效果图分别为图12、13、14
}
/**
* 画文字
*/
- (void) drawText{
// 1.获得上下文
CGContextRef ctx = UIGraphicsGetCurrentContext();
// 2.画矩形
CGRect cubeRect = CGRectMake(50, 50, 100, 100);
CGContextAddRect(ctx, cubeRect);
// 3.显示所绘制的东西
CGContextFillPath(ctx);
// 4.画文字
NSString *str = @"中华人名共和国广东省广州市天河区";
// [str drawAtPoint:CGPointZero withAttributes:nil];
NSMutableDictionary *attrs = [NSMutableDictionary dictionary];
// NSForegroundColorAttributeName : 文字颜色
// NSFontAttributeName : 字体
attrs[NSForegroundColorAttributeName] = [UIColor redColor];
attrs[NSFontAttributeName] = [UIFont systemFontOfSize:13];
[str drawInRect:cubeRect withAttributes:attrs];
// 效果图如图11所示
}
/**
* 画扇形
*/
- (void)drawSector{
// 1.获得上下文
CGContextRef ctx = UIGraphicsGetCurrentContext();
// 2,画一个1/4圆(扇形)
CGContextMoveToPoint(ctx, 100, 100);
CGContextAddLineToPoint(ctx, 150, 100);
CGContextAddArc(ctx, 100, 100, 50, 0, M_PI_2, 0);
CGContextClosePath(ctx);
[[UIColor orangeColor] set];
// 3.渲染(显示)到view上面
// CGContextStrokePath(ctx);//①
CGContextFillPath(ctx);//②
// ①和②对应的效果图如图9、10所示
}
/**
* 画圆弧
*/
- (void)drawArc{
// 1.获得上下文
CGContextRef ctx = UIGraphicsGetCurrentContext();
// 2,画圆弧
// x\y : 圆心
// radius : 半径
// startAngle : 开始角度
// endAngle : 结束角度
// clockwise : 圆弧的伸展方向(0:顺时针, 1:逆时针)
CGContextAddArc(ctx, 100, 100, 50, 0, M_PI_2, 0);
[[UIColor orangeColor] set];
// 3.渲染(显示)到view上面
// CGContextStrokePath(ctx);
CGContextFillPath(ctx);
// 效果图如图8所示
}
/**
* 画圆
*/
- (void)drawCircle{
// 1.获得上下文
CGContextRef ctx = UIGraphicsGetCurrentContext();
// 2.画圆(用矩形的四条边来控制圆的范围,如果矩形的长宽不相等,画出来的是一个椭圆)
CGContextAddEllipseInRect(ctx, CGRectMake(50, 10, 100, 100));
// 设置线宽。画圆的时候如果设置了线宽,画出来的是一个圆环
// CGContextSetLineWidth(ctx, 10);
// 3.渲染(显示)到view上面
CGContextStrokePath(ctx);
// 效果图如图7所示
}
/**
* 画矩形
*/
- (void)draw4Rect{
// 1,获得图形上下文
CGContextRef ctx = UIGraphicsGetCurrentContext();
// 2,画一个矩形
CGContextAddRect(ctx, CGRectMake(10, 10, 100, 100));
// 这里介绍颜色的另一种设置方式
// [[UIColor blueColor] setStroke];//①
[[UIColor blueColor] setFill];//②
// [[UIColor blueColor] set];//这句代码既可以设置stroke颜色也可以设置fill颜色
// 3,渲染(显示)到view上面
// CGContextStrokePath(ctx);//③
CGContextFillPath(ctx);//④
// ①和③ 或者 ②和④ 要么同时打开,要么同时注释,
// 如果我们设置的是stroke的颜色,而用CGContextFillPath(ctx)的方式来渲染,设置的颜色是无效的。
// 效果图如图5、6所示
}
/**
* 画三角形
*/
- (void)drawTriangle{
// 1,获得图形上下文
CGContextRef ctx = UIGraphicsGetCurrentContext();
// 2.画三角形
CGContextMoveToPoint(ctx, 0, 0);
CGContextAddLineToPoint(ctx, 100, 100);
CGContextAddLineToPoint(ctx, 150, 80);
// 关闭路径(连接起点和最后一个点)
CGContextClosePath(ctx);
// CGContextSetRGBStrokeColor(ctx, 0, 1, 0, 1);//①
CGContextSetRGBFillColor(ctx, 0, 1, 0, 1);//②
// 3,渲染(显示)到view上面
// CGContextStrokePath(ctx);//③
CGContextFillPath(ctx);//④
// stroke:这里我们可以理解为空心的意思。
// 结论:
// 1,如果打开①③,注释②④,效果图如图3所示
// 2,如果打开②④,注释①③,效果图如图4所示
}
/**
* 画线
*/
- (void)drawLine{
// 1,获得图形上下文
CGContextRef ctx = UIGraphicsGetCurrentContext();
// 2,拼接图形(路径)
// 第1条线
// 设置线宽
CGContextSetLineWidth(ctx, 10);
// 设置一个起点
CGContextMoveToPoint(ctx, 10, 10);
// 从起点位置到(100,100)添加一条线
CGContextAddLineToPoint(ctx, 100, 100);
// 设置线的颜色
CGContextSetRGBStrokeColor(ctx, 1, 0, 0, 1);
// 渲染一次
// 为什么这里要渲染一次呢?因为只有在渲染的时候才会去加载该线段具体要显示什么颜色,
// 如果这里不渲染一次,会以渲染之前最后一次设置的颜色为准。
CGContextStrokePath(ctx);
// 第2条线
// 设置一个起点
CGContextMoveToPoint(ctx, 10, 180);
// 从起点位置到(100,160)添加一条线
CGContextAddLineToPoint(ctx, 100, 160);
// 从(100,160)到(50,100)添加一条线,注意:不是从起点到(50,100)添加一条线
CGContextAddLineToPoint(ctx, 50, 100);
// 设置线的颜色
CGContextSetRGBStrokeColor(ctx, 0, 1, 0, 1);
// 以上代码的效果图,如图1所示
// 设置线段头尾的样式
CGContextSetLineCap(ctx, kCGLineCapRound);
// 设置线段转折点的样式
CGContextSetLineJoin(ctx, kCGLineJoinRound);
// 加上上面这两句代码之后的效果图,如图2所示
// 3,渲染(显示)到view上面
CGContextStrokePath(ctx);
}
@end


 1491
1491

 被折叠的 条评论
为什么被折叠?
被折叠的 条评论
为什么被折叠?
 到【灌水乐园】发言


