


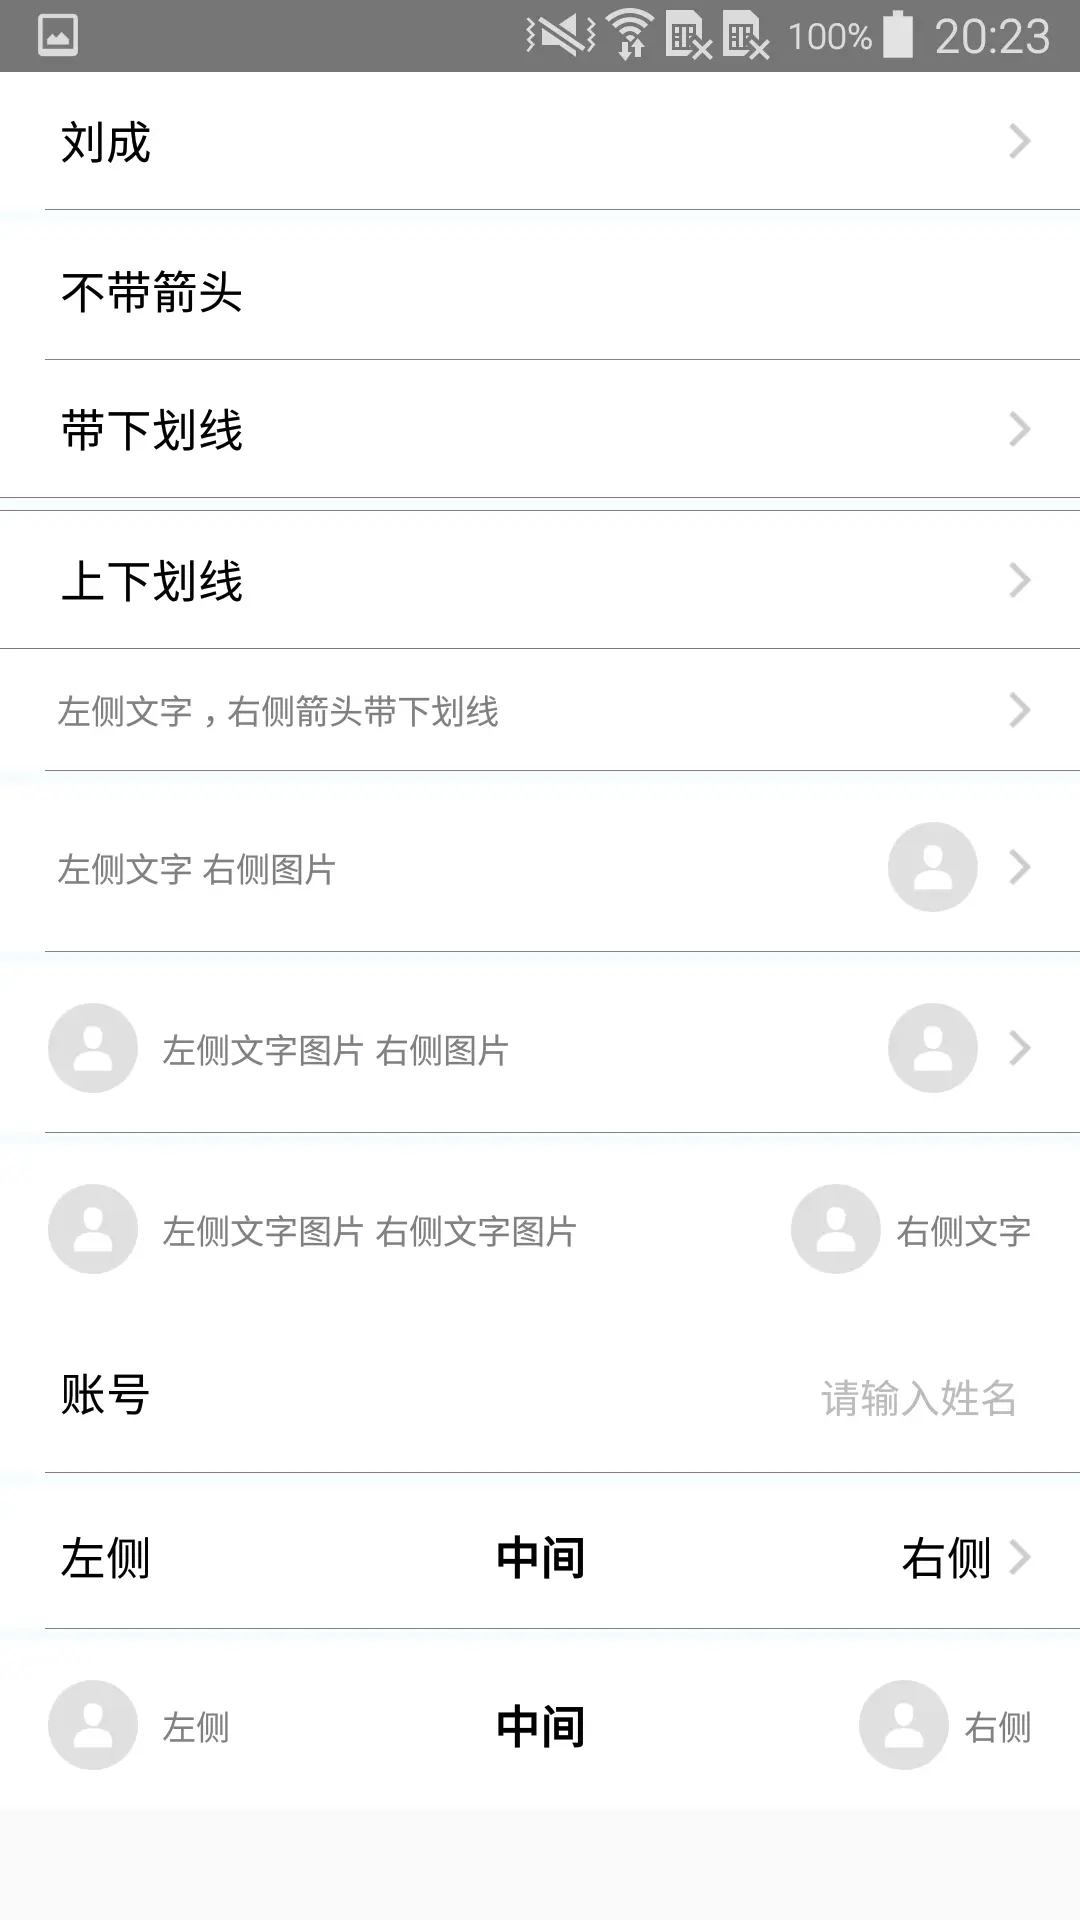
项目中总是会用到很多公共的组件,样式就跟设置里面的单个item很像,本项目就是打造一个公共的万能组件 项目中有两个文件,一个是公用组件,一个是字体大小适配
你可以自定义各种组件哦!
具体代码请参考:https://github.com/LiuC520/react-native-public-component
使用说明
npm install --save react-native-public-component
项目中引入:
import {PublicCompoennt, dimens} from 'react-native-public-component'
如果要使用字体适配和宽高等信息,可以导入dimens
参数说明:
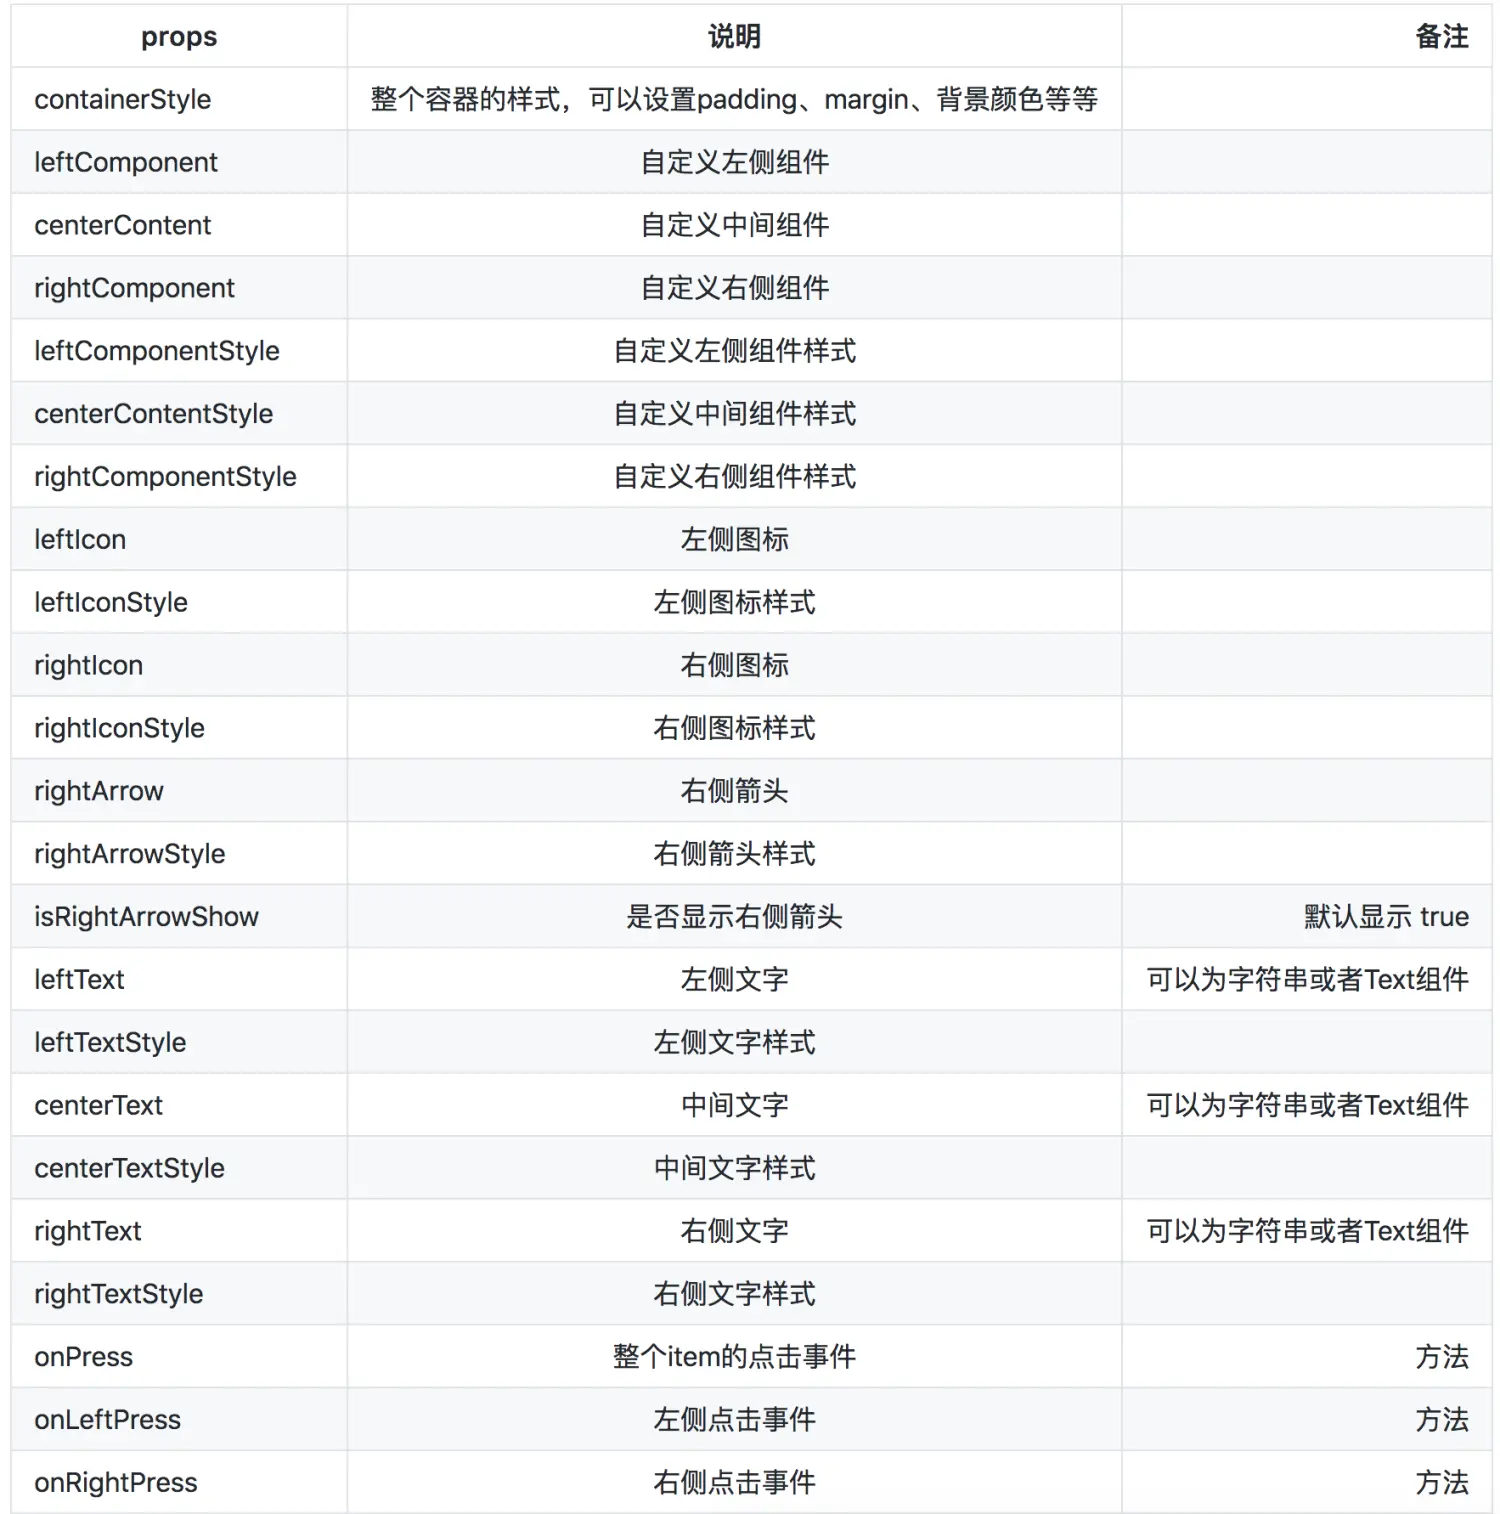
props 说明 备注
containerStyle 整个容器的样式,可以设置padding、margin、背景颜色等等
leftComponent 自定义左侧组件
centerContent 自定义中间组件
rightComponent 自定义右侧组件
leftComponentStyle 自定义左侧组件样式
centerContentStyle 自定义中间组件样式
rightComponentStyle 自定义右侧组件样式
leftIcon 左侧图标
leftIconStyle 左侧图标样式
rightIcon 右侧图标
rightIconStyle 右侧图标样式
rightArrow 右侧箭头
rightArrowStyle 右侧箭头样式
isRightArrowShow 是否显示右侧箭头 默认显示 true
leftText 左侧文字 可以为字符串或者Text组件
leftTextStyle 左侧文字样式
centerText 中间文字 可以为字符串或者Text组件
centerTextStyle 中间文字样式
rightText 右侧文字 可以为字符串或者Text组件
rightTextStyle 右侧文字样式
onPress 整个item的点击事件 方法
onLeftPress 左侧点击事件 方法
onRightPress 右侧点击事件 方法
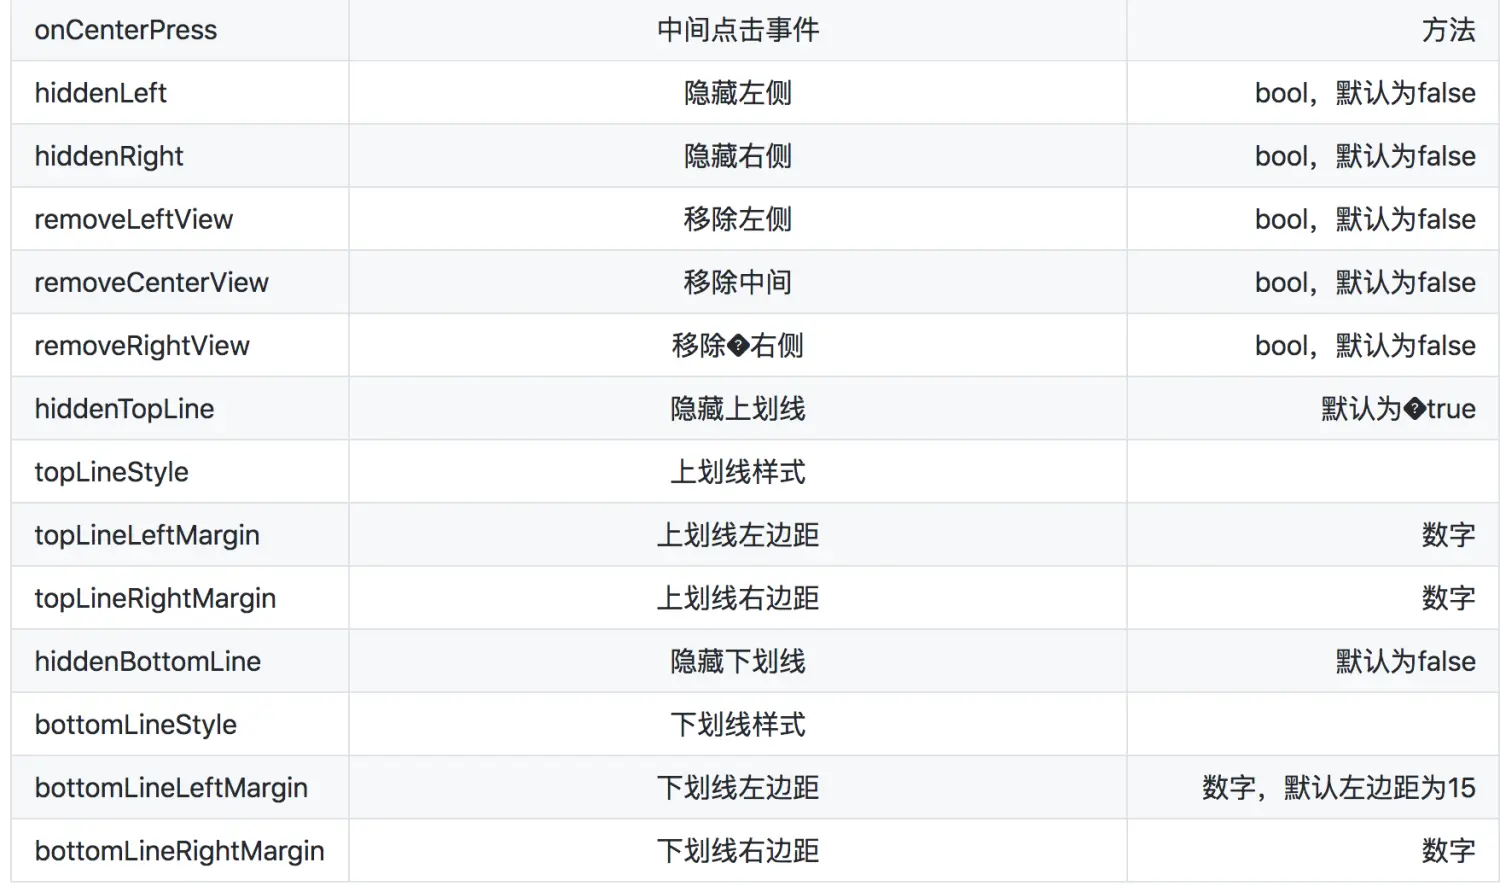
onCenterPress 中间点击事件 方法
hiddenLeft 隐藏左侧 bool,默认为false
hiddenRight 隐藏右侧 bool,默认为false
removeLeftView 移除左侧 bool,默认为false
removeCenterView 移除中间 bool,默认为false
removeRightView 移除�右侧 bool,默认为false
hiddenTopLine 隐藏上划线 默认为�true
topLineStyle 上划线样式
topLineLeftMargin 上划线左边距 数字
topLineRightMargin 上划线右边距 数字
hiddenBottomLine 隐藏下划线 默认为false
bottomLineStyle 下划线样式
bottomLineLeftMargin 下划线左边距 数字,默认左边距为15
bottomLineRightMargin 下划线右边距 数字
具体的使用方法请参考示例 https://github.com/LiuC520/react-native-public-component/blob/master/example/App.js


 721
721

 被折叠的 条评论
为什么被折叠?
被折叠的 条评论
为什么被折叠?
 到【灌水乐园】发言


