


一、sprin整合hessian需要的jar包,服务端只需单独添加hessian包,其余都是spring的包:

二、配置Hessian服务端
1、Hessian服务端项目结构(默认已经配置好spring),如下图(画红框的地方):

2、UserService接口的代码如下:
package com.tansun.jrj.service;

import com.tansun.jrj.po.User;

/*
 * @author lcc
 * @date 2017-2-23 上午11:37:10
 * @description
 *
 */

public interface UserService {

	/**
	 * @description
	 * 获取用户
	 * @return
	 * User对象
	 */
	public User getUser();
}
3、User类的代码如下:
package com.tansun.jrj.po;

import java.io.Serializable;

/*
 * @author lcc
 * @date 2017-2-23 上午11:38:15
 * @description
 *
 */

public class User implements Serializable {

private static final long serialVersionUID = 1692800630322115854L;

	private String name;

	public User(){

	}

	public User(String name){
		this.name = name;
	}

	public String getName() {
		return name;
	}

	public void setName(String name) {
		this.name = name;
	}

}
4、UserService接口的实现类UserServiceImpl代码如下:
package com.tansun.jrj.service.impl;

import com.tansun.jrj.po.User;
import com.tansun.jrj.service.UserService;

/*
 * @author lcc
 * @date 2017-2-23 上午11:36:09
 * @description
 *
 */

public class UserServiceImpl implements UserService{

	/**
	 * @description
	 * 实现IService接口的getUser方法
	 * @return
	 * User对象
	 */
	public User getUser() {
		return new User("lc");
	}

}
5、配置web.xml
<servlet>
  	<servlet-name>springmvc</servlet-name>
  	<servlet-class>org.springframework.web.servlet.DispatcherServlet</servlet-class>
  	<init-param>
  		<param-name>contextConfigLocation</param-name>
  		<param-value>classpath:hessian/hessian-servlet.xml</param-value>
  	</init-param>
  </servlet>

  <servlet-mapping>
  	<!-- spring与hessian整合 -->
        <servlet-name>springmvc</servlet-name>
        <url-pattern>/</url-pattern>
  </servlet-mapping>
6、hessian-servlet.xml文件如下:
<?xml version="1.0" encoding="UTF-8"?>
<beans xmlns="http://www.springframework.org/schema/beans"
xmlns:xsi="http://www.w3.org/2001/XMLSchema-instance"
xsi:schemaLocation="http://www.springframework.org/schema/beans
http://www.springframework.org/schema/beans/spring-beans.xsd">
<!-- Hessian服务接口实现类注入 -->
<bean id="userService" class="com.tansun.jrj.service.impl.UserServiceImpl" />
<!-- 使用HessianServiceExporter为服务接口Impl在网络地址中映射一个Hessian服务 -->
<!-- 完整的远程调用请求 Url:http://localhost:8082/jinrongju/userService -->
<bean name="/userService"
class="org.springframework.remoting.caucho.HessianServiceExporter">
<!-- Hessian服务的接口 -->
<property name="serviceInterface" value="com.tansun.jrj.service.UserService" />
<!-- Hessian服务的接口Impl -->
<property name="service" ref="userService"></property>
</bean>
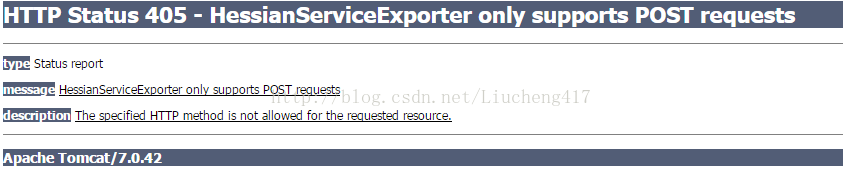
</beans>7、配置完成,启动tomcat。访问:http://localhost:8082/jinrongju/userService 如下图启动成功
三、sprin整合hessian需要的jar包,客户端需要的jar包:

四、配置Hessian客户端
1、Hessian客户端项目结构,如下图:

2、hessian-client.xml文件如下:
<?xml version="1.0" encoding="UTF-8"?>
<beans xmlns="http://www.springframework.org/schema/beans"
    xmlns:xsi="http://www.w3.org/2001/XMLSchema-instance"
    xsi:schemaLocation="http://www.springframework.org/schema/beans
       http://www.springframework.org/schema/beans/spring-beans.xsd">


	<bean id="userService"
	    class="org.springframework.remoting.caucho.HessianProxyFactoryBean">

	    <!-- 注入我们的接口类 -->
	    <property name="serviceInterface" value="com.tansun.jrj.service.UserService" />

	    <!-- 服务器访问地址 -->
	    <property name="serviceUrl" value="http://localhost:8082/jinrongju/userService" />
    </bean>

</beans>
3、测试类UserSpringClient如下:
package com.tansun.jrj.client;

import java.net.MalformedURLException;

import org.springframework.context.ApplicationContext;
import org.springframework.context.support.ClassPathXmlApplicationContext;

import com.tansun.jrj.po.User;
import com.tansun.jrj.service.UserService;

/*
 * @author lcc
 * @date 2017-2-23 下午1:01:24
 * @description
 *
 */
public class UserSpringClient {

	public static void main(String[] args) throws MalformedURLException {
		//加载我们的Spring配置文件
        	ApplicationContext context=new ClassPathXmlApplicationContext("/hessian-client.xml");
        	//获取我们的接口类
        	UserService userService=(UserService)context.getBean("userService");
        	User user=userService.getUser();
        	System.out.println(user.getName());
	}
}
4、执行测试类,结果如下:


 459
459


 被折叠的 条评论
为什么被折叠?
被折叠的 条评论
为什么被折叠?
 到【灌水乐园】发言


