


使用Python Social Auth来集成第三方登录(QQ、微信、微博)
官方文档:https://python-social-auth.readthedocs.io/en/latest/
DRF使用social文档:
1、首先安装依赖包:
pip install social-auth-app-django
2、在INSTALLED_APPS中加入social_django
INSTALLED_APPS = (
    ...
    'social_django',
    ...
)
3、(mysql)数据库迁移(无需执行makemigration,源码中makemigration文件已经生成好):
python manage.py migrate
注意:mysql的storage_engine需要时INNODB
4、在setting文件中添加AUTHENTICATION_BACKENDS:
AUTHENTICATION_BACKENDS = (
    'social_core.backends.weibo.WeiboOAuth2',
    'social_core.backends.qq.QQOAuth2',
    'social_core.backends.weixin.WeixinOAuth2',
    ...
    'django.contrib.auth.backends.ModelBackend',
)
5、配置url
urlpatterns = patterns('',
    ...
    url('', include('social_django.urls', namespace='social'))
    ...
)
6、在setting文件里的TEMPLATES里添加’social_django.context_processors.backends’和’social_django.context_processors.login_redirect’,如下:
TEMPLATES = [
    {
        ...
        'OPTIONS': {
            ...
            'context_processors': [
                ...
                'social_django.context_processors.backends',
                'social_django.context_processors.login_redirect',
                ...
            ]
        }
    }
]
7、在setting文件里配置app_key和app_secret:
SOCIAL_AUTH_WEIBO_KEY = 'xxxxxxxxxxxxxxxxxx'
SOCIAL_AUTH_WEIBO_SECRET = 'xxxxxxxxxxxxxxxxxx'

SOCIAL_AUTH_QQ_KEY = 'xxxxxxxxxxxxxxxxxx'
SOCIAL_AUTH_QQ_SECRET = 'xxxxxxxxxxxxxxxxxx'

SOCIAL_AUTH_WEIXIN_KEY = 'xxxxxxxxxxxxxxxxxx'
SOCIAL_AUTH_WEIXIN_SECRET = 'xxxxxxxxxxxxxxxxxx'
8、在setting中配置指明登录成功后跳转的页面:
SOCIAL_AUTH_LOGIN_REDIRECT_URL = '/index/'
以上配置好之后就可以分别使用微博、QQ、微信第三方登录了:
微博:http://127.0.0.1:8000/login/weibo/
QQ:http://127.0.0.1:8000/login/qq/
微信:http://127.0.0.1:8000/login/weixin/
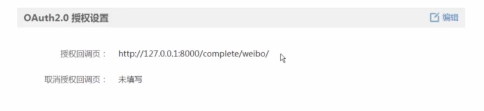
注意:要按照微博等第三方开放平台的要求设置好授权的回调页
例如微博要创建好应用,设置好授权回调页:http://127.0.0.1:8000/complete/weibo/
QQ和微信也是如此
登录逻辑:
如果是第一次登录,那么就会在social_auth_usersocialauth表中新建一条记录,也会在user表中创建一条记录,并自动设置好username(去微博的个人信息中拿到,如果不存在,则自动生成一串唯一ID),然后通过外键user_id关联,,如果不是第一次登录,那么就会在此表中查询user_id


注意:登录成功后像前段返回的默认是session_id,如果用的JWT登录则需要返回token,那么此时就需要修改源码。

首先把social_core复制出来,放到django项目的第三方包里
找到actions.py文件(social_core–actions.py),再找到do_complete函数
修改函数末尾返回的代码:
response = backend.strategy.redirect(url)
payload = jwt_payload_handler(user)
response.set_cookie("name", user.name if user.name else user.username, max_age=24*3600)
response.set_cookie("token", jwt_encode_handler(payload), max_age=24*3600)
return response


 4015
4015

 被折叠的 条评论
为什么被折叠?
被折叠的 条评论
为什么被折叠?
 到【灌水乐园】发言


