


前言
Prisma在2016上线后就大火,该APP是利用神经网络和人工智能技术,为普通照片加入艺术效果的照片编辑软件。
同年Google也发布了一篇《A LEARNED REPRESENTATION FOR ARTISTIC STYLE》论文,实现了前向运算一次为照片整合多种艺术风格的功能,并且优化了内存使用和运算速度,可以在移动设备上快速运算。
最近在研究Tensorflow整合iOS过程中,发现google公开了论文实现的源码和训练数据,也就是说我们可以通过自己写一个前向运算图,整合其训练参数就可以快速实现类Prisma的应用。
下面就介绍一下如何在iPhone上跑一个自己的"Prisma"。
准备工作
- 安装Tensorflow,这个官网上有详细教程这里就不多说了。
- 搭建iOS+Tensorflow工程,这个可以根据Git上的步骤实现,也可以参考官方的Demo程序配置。(这个过程有很多坑,多次尝试,应该可以配置成功)
- 下载模型,本次使用的模型是image_stylization,google已开源在GitHub上。
- 下载训练好的参数,Google提供了2个:
Monet
Varied
Monet训练了10种艺术图片,Varied训练了32种。
当然你也可以自己训练艺术图片,但是得下载VGG的训练参数和ImageNet数据,然后自己训练,比较花时间。
构建计算图
虽然Google提供了模型的源码,但是并没有在源码中输出运算图以方便迁移到移动设备中使用,Android的Demo中倒是提供了生成的pb,如果觉得自己写计算图麻烦可以直接拷到自己iOS工程中使用。
我这里创建了一个python的工程,然后把Google源码中model.py相关的文件都加入了工程。
我的建图代码如下:
import numpy as np
import tensorflow as tf
import ast
import os
from tensorflow.python import pywrap_tensorflow

from matplotlib import pyplot
from matplotlib.pyplot import imshow

import image_utils
import model
import ops
import argparse
import sys


num_styles = 32
imgWidth = 512
imgHeight = 512
channel = 3
checkpoint = "/Users/Jiao/Desktop/TFProject/style-image/checkpoint/multistyle-pastiche-generator-varied.ckpt"

inputImage = tf.placeholder(tf.float32,shape=[None,imgWidth,imgHeight,channel],name="input")
styles = tf.placeholder(tf.float32,shape=[num_styles],name="style")

with tf.name_scope(""):
    transform = model.transform(inputImage,
                            normalizer_fn=ops.weighted_instance_norm,
                            normalizer_params={
                                # 'weights': tf.constant(mixture),
                                'weights' : styles,
                                'num_categories': num_styles,
                                'center': True,
                                'scale': True})

model_saver = tf.train.Saver(tf.global_variables())

with tf.Session() as sess:
    tf.train.write_graph(sess.graph_def, "/Users/Jiao/Desktop/TFProject/style-image/protobuf", "input.pb")
    #checkpoint = os.path.expanduser(checkpoint)
    #if tf.gfile.IsDirectory(checkpoint):
    #    checkpoint = tf.train.latest_checkpoint(checkpoint)
    #    tf.logging.info('loading latest checkpoint file: {}'.format(checkpoint))
    #model_saver.restore(sess, checkpoint)

    #newstyle = np.zeros([num_styles], dtype=np.float32)
    #newstyle[18] = 0.5
    #newstyle[17] = 0.5
    #newImage = np.zeros((1,imgWidth,imgHeight,channel))
    #style_image = transform.eval(feed_dict={inputImage:newImage,styles:newstyle})
    #style_image = style_image[0]
    #imshow(style_image)
    #pyplot.show()
这里输入节点是input和style,输出节点是model中的transformer/expand/conv3/conv/Sigmoid。
到此就将模型的计算图保存到了本地文件夹中。
接下来就是将图和ckpt中的参数合并,并且生成移动端的可以使用的pb文件,这一步可以参考我上一篇文章《iOS+Tensorflow实现图像识别》,很容易就实现。
iOS工程
在上面准备工作中,如果你已经按步骤搭建好iOS+TF的工程,这里你只需要导入生成的最终pb文件就行了。工程结构如图:
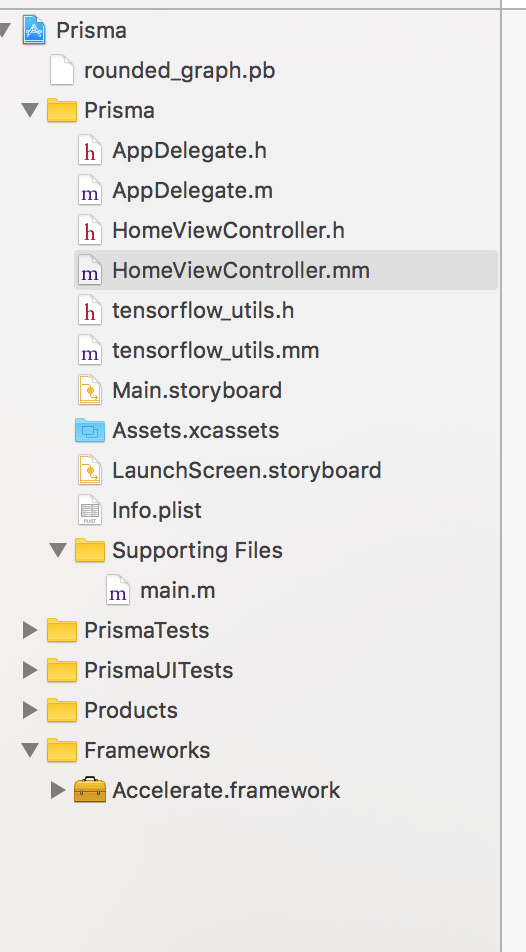
然后在iOS使用pb文件,我这里直接导入了Google提供的tensorflow_utils,使用这个类里面的LoadModel方法可以很快的生成含有计算图的session。
- (void)viewDidLoad {
    [super viewDidLoad];
    tensorflow::Status load_status;
    load_status = LoadModel(@"rounded_graph", @"pb", &tf_session);
    if (!load_status.ok()) {
        LOG(FATAL) << "Couldn't load model: " << load_status;
    }
    currentStyle = 0;
    isDone = true;
    _styleImageView.layer.borderColor = [UIColor grayColor].CGColor;
    _styleImageView.layer.borderWidth = 0.5;
    _ogImageView.layer.borderColor = [UIColor grayColor].CGColor;
    _ogImageView.layer.borderWidth = 0.5;
}
最后就是获取图片,执行运算,生成艺术图片展示。这里图片需要转换成bitmap然后获取data值,展示图片也是相识的过程。具体代码如下:
- (void)runCnn:(UIImage *)compressedImg
{
    unsigned char *pixels = [self getImagePixel:compressedImg];
    int image_channels = 4;
    tensorflow::Tensor image_tensor(
                                    tensorflow::DT_FLOAT,
                                    tensorflow::TensorShape(
                                                            {1, wanted_input_height, wanted_input_width, wanted_input_channels}));
    auto image_tensor_mapped = image_tensor.tensor<float, 4>();
    tensorflow::uint8 *in = pixels;
    float *out = image_tensor_mapped.data();
    for (int y = 0; y < wanted_input_height; ++y) {
        float *out_row = out + (y * wanted_input_width * wanted_input_channels);
        for (int x = 0; x < wanted_input_width; ++x) {
            tensorflow::uint8 *in_pixel =
            in + (x * wanted_input_width * image_channels) + (y * image_channels);
            float *out_pixel = out_row + (x * wanted_input_channels);
            for (int c = 0; c < wanted_input_channels; ++c) {
                out_pixel[c] = in_pixel[c];
            }
        }
    }


    tensorflow::Tensor style(tensorflow::DT_FLOAT, tensorflow::TensorShape({32}));
    float *style_data = style.tensor<float, 1>().data();
    memset(style_data, 0, sizeof(float) * 32);
    style_data[currentStyle] = 1;

    if (tf_session.get()) {
        std::vector<tensorflow::Tensor> outputs;
        tensorflow::Status run_status = tf_session->Run(
                                                        {{contentNode, image_tensor},
                                                            {styleNode, style}},
                                                        {outputNode},
                                                        {},
                                                        &outputs);
        if (!run_status.ok()) {
            LOG(ERROR) << "Running model failed:" << run_status;
            isDone = true;
            free(pixels);
        } else {
            float *styledData = outputs[0].tensor<float,4>().data();
            UIImage *styledImg = [self createImage:styledData];
            dispatch_async(dispatch_get_main_queue(), ^{
                _styleImageView.image = styledImg;
                dispatch_after(dispatch_time(DISPATCH_TIME_NOW, (int64_t)(0.3 * NSEC_PER_SEC)), dispatch_get_main_queue(), ^{
                    isDone = true;
                    free(pixels);
                });
            });
        }
    }
}

- (unsigned char *)getImagePixel:(UIImage *)image
{
    int width = image.size.width;
    int height = image.size.height;
    CGColorSpaceRef colorSpace = CGColorSpaceCreateDeviceRGB();
    unsigned char *rawData = (unsigned char*) calloc(height * width * 4, sizeof(unsigned char));
    NSUInteger bytesPerPixel = 4;
    NSUInteger bytesPerRow = bytesPerPixel * width;
    NSUInteger bitsPerComponent = 8;
    CGContextRef context = CGBitmapContextCreate(rawData, width, height,

                                                 bitsPerComponent, bytesPerRow, colorSpace,

                                                 kCGImageAlphaPremultipliedLast | kCGBitmapByteOrder32Big);

    CGColorSpaceRelease(colorSpace);
    CGContextDrawImage(context, CGRectMake(0, 0, width, height), image.CGImage);
    UIImage *ogImg = [UIImage imageWithCGImage:CGBitmapContextCreateImage(context)];
    dispatch_async(dispatch_get_main_queue(), ^{
        _ogImageView.image = ogImg;
    });
    CGContextRelease(context);
    return rawData;
}

- (UIImage *)createImage:(float *)pixels
{
    unsigned char *rawData = (unsigned char*) calloc(wanted_input_height * wanted_input_width * 4, sizeof(unsigned char));
    for (int y = 0; y < wanted_input_height; ++y) {
        unsigned char *out_row = rawData + (y * wanted_input_width * 4);
        for (int x = 0; x < wanted_input_width; ++x) {
            float *in_pixel =
            pixels + (x * wanted_input_width * 3) + (y * 3);
            unsigned char *out_pixel = out_row + (x * 4);
            for (int c = 0; c < wanted_input_channels; ++c) {
                out_pixel[c] = in_pixel[c] * 255;
            }
            out_pixel[3] = UINT8_MAX;
        }
    }
    CGColorSpaceRef colorSpace = CGColorSpaceCreateDeviceRGB();
    NSUInteger bytesPerPixel = 4;
    NSUInteger bytesPerRow = bytesPerPixel * wanted_input_width;
    NSUInteger bitsPerComponent = 8;
    CGContextRef context = CGBitmapContextCreate(rawData, wanted_input_width, wanted_input_height,

                                                 bitsPerComponent, bytesPerRow, colorSpace,

                                                 kCGImageAlphaPremultipliedLast | kCGBitmapByteOrder32Big);

    CGColorSpaceRelease(colorSpace);
    UIImage *retImg = [UIImage imageWithCGImage:CGBitmapContextCreateImage(context)];
    CGContextRelease(context);
    free(rawData);
    return retImg;
}
这里说明一下,前面python工程已经定义了,我的输入和输出图片的大小是512✕512。
连接iPhone,运行工程_
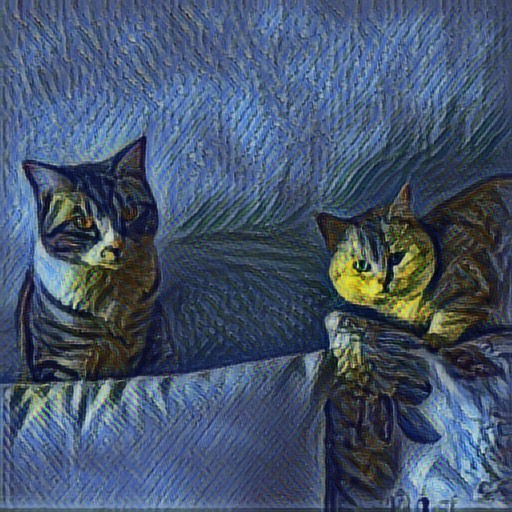
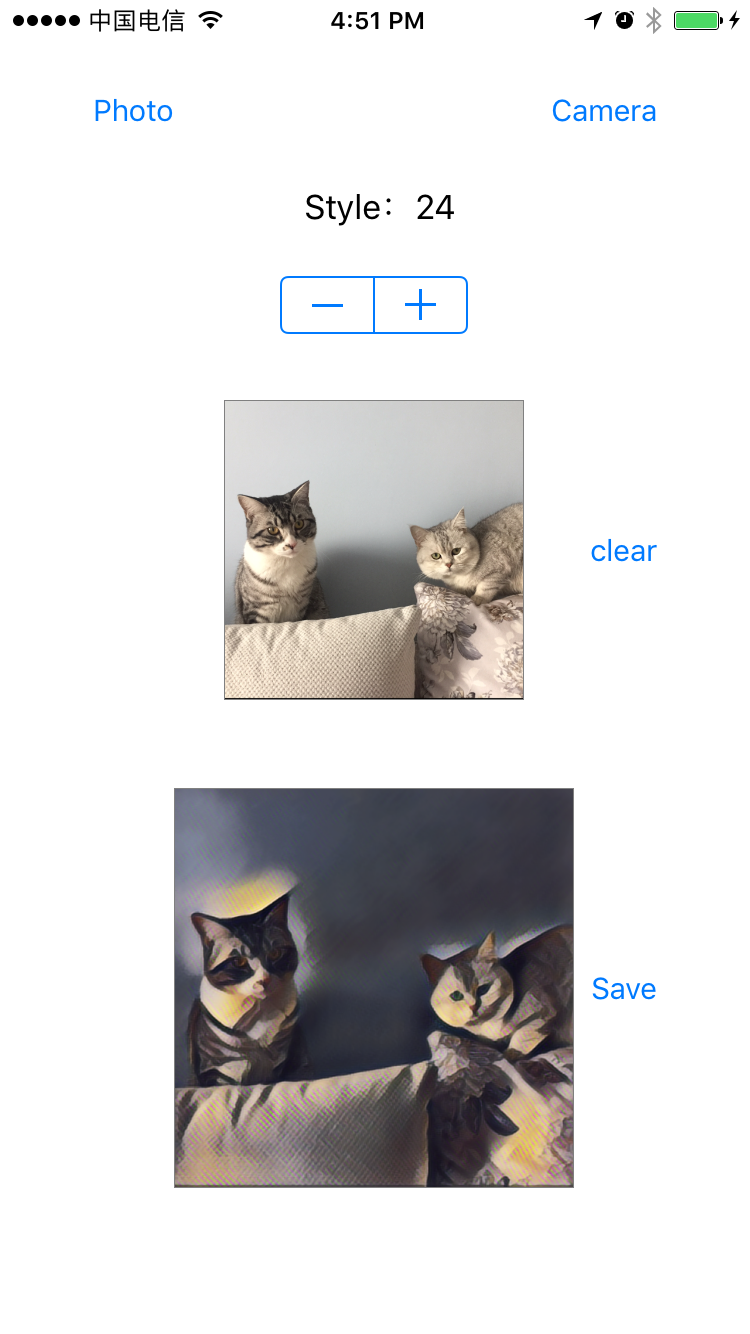
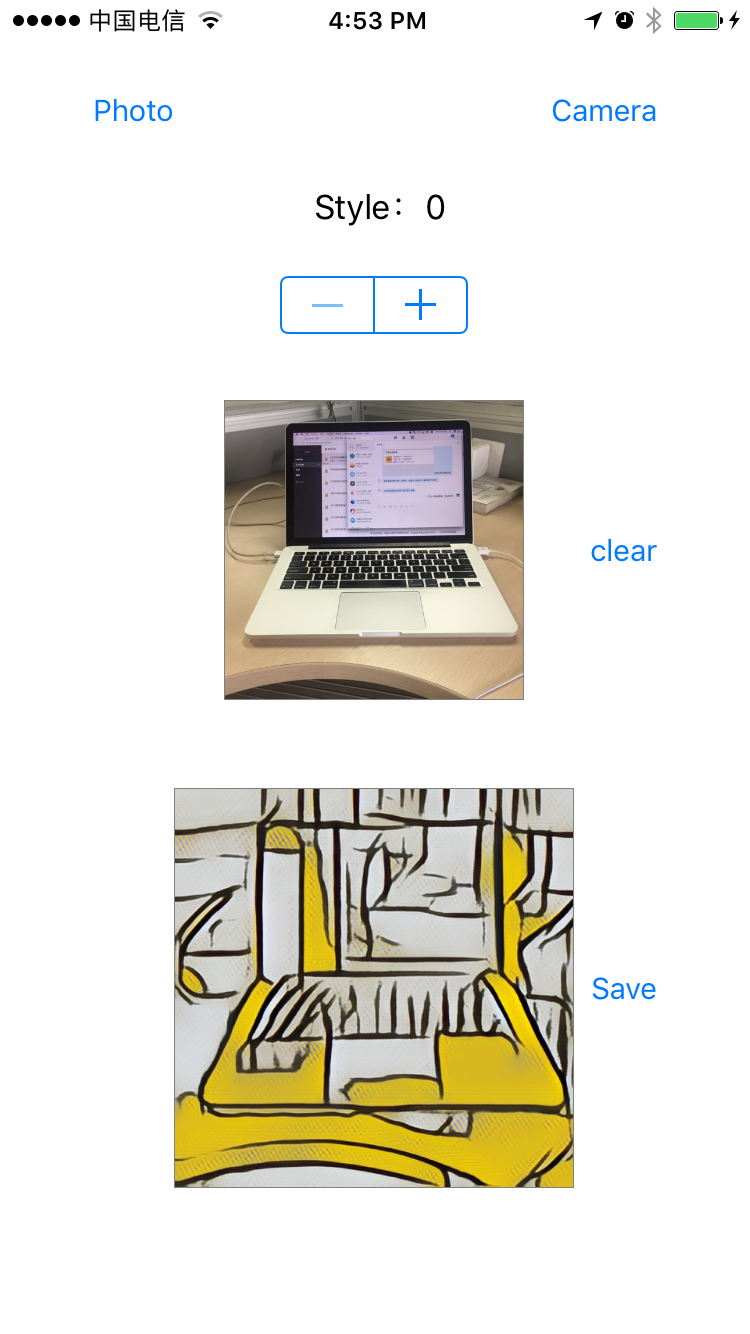
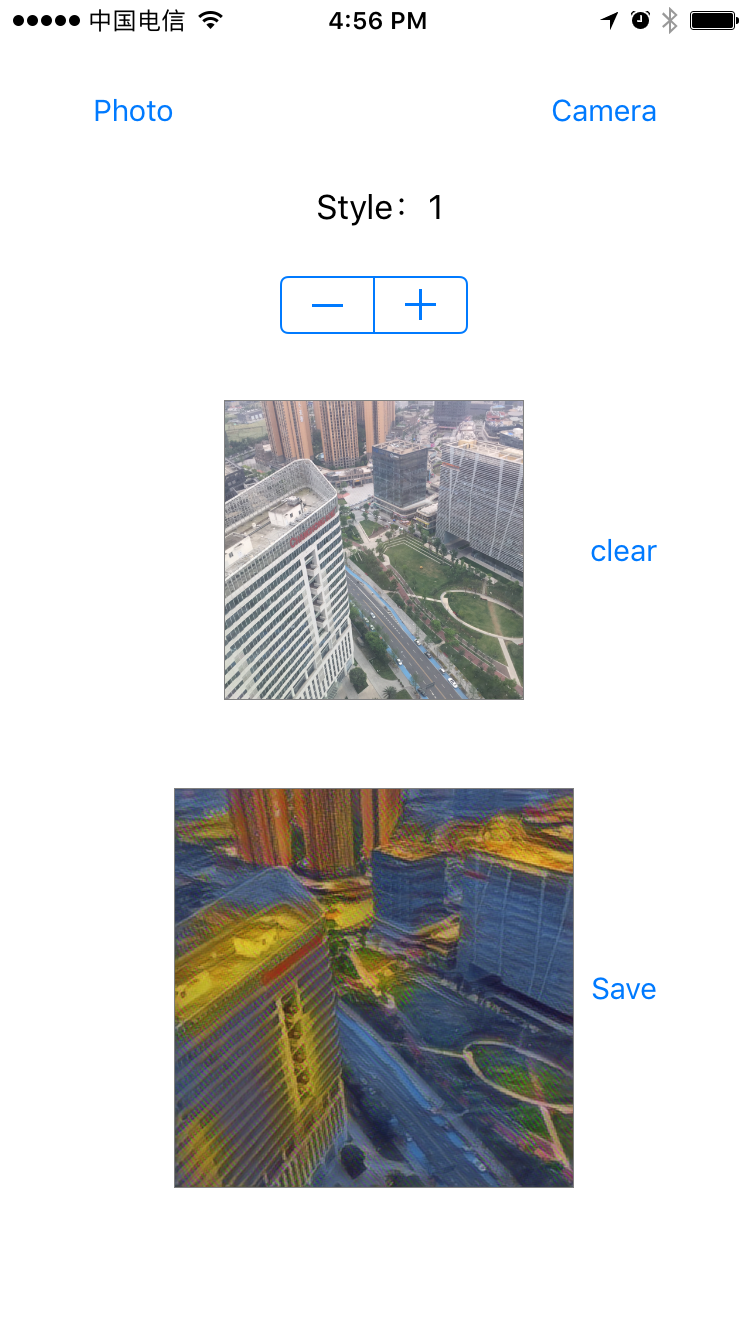
最后连上手机运行,就可以自己创建自己的艺术类图片了。😊
放几张运行效果图:


 812
812


 被折叠的 条评论
为什么被折叠?
被折叠的 条评论
为什么被折叠?
 到【灌水乐园】发言


