


Android动画初步
动画的分类
View Animation
Tween Animation
Frame Animation
Property Animation
Tween Animation
- <!--
- * android:interpolator:修饰动画效果,定义动画的变化率,可以使存在的动画效果accelerated(加速),
- * decelerated(减速),repeated(重复),bounced(弹跳)等。
- * android:fromAlpha="0.0":设置动画开始时控件的透明度,0.0为透明,控件不显示,1.0为不透明,控件全部显示
- * android:toAlpha="1.0":设置动画结束时的控件的透明度
- * android:duration="2500":设置每一次动画持续的时间值
- * android:repeatCount="5":设置动画重复的次数
- * android:repeatMode="reverse":设置动画重复的模式,reverse为0.0 -> 1.0 -> 0.0,动画反复执行;
- * restart为0.0 -> 1.0, 0.0 -> 1.0,动画每次都重新开始执行
- -->
- <alpha xmlns:android="http://schemas.android.com/apk/res/android"
- android:interpolator="@android:anim/accelerate_decelerate_interpolator"
- android:fromAlpha="0.0"
- android:toAlpha="1.0"
- android:duration="2500"
- android:repeatCount="5"
- android:repeatMode="reverse"
- />
- /**
- * xml文件加载图片渐变(Alpha)动画
- */
- Animation mAnimation = AnimationUtils.loadAnimation(this, R.anim.view_animation_alpha);
- /**
- * 代码创建图片渐变(Alpha)动画
- * 实例化AlphaAnimation对象:
- * mAnimation = new AlphaAnimation(fromAlpha, toAlpha);
- * fromAlpha:设置动画开始时控件的透明度,0.0为透明,控件不显示,1.0为不透明,控件全部显示
- * toAlpha:设置动画结束时的控件的透明度
- */
- Animation mAnimation = new AlphaAnimation(0.0f, 1.0f);
- ImageView mImageView = (ImageView)findViewById(R.id.view_animation_imageview);
- //设置控件开始执行动画
- mImageView.startAnimation(mAnimation);
接着实现Scale渐变尺寸伸缩动画效果,同理,也在res/anim文件夹下创建view_animation_scale.xml,文件中的代码如下:
- <!--
- * android:fromXScale="0.0":设置动画开始时X轴方向的缩放起始值。0.0为X轴方向的控件缩成一点,1.0为X轴方向的控件不缩放
- * android:toXScale="1.0":设置动画结束时X轴方向的缩放结束值。
- * android:fromYScale="0.5":设置动画开始时Y轴方向的缩放起始值。0.0为Y轴方向的控件缩成一点,1.0为Y轴方向的控件不缩放
- * android:toYScale="1.0":设置动画结束时Y轴方向的缩放结束值
- * android:pivotX="100%":动画相对于物件的X坐标的开始位置,当value加了百分号%时(例如80%),则实现相对于控件本身
- * 的位置而定的,当value是数值时(不加%号),则是指相对于父控件的位置而定的,单位是px。
- * android:pivotY="80%":动画相对于物件的Y坐标的开始位置,当value加了百分号%时(例如80%),则实现相对于控件本身
- * 的位置而定的,当value是数值时(不加%号),则是指相对于父控件的位置而定的,单位是px。
- * android:duration="2500":设置每一次动画持续的时间值,单位为毫秒(ms)
- * android:repeatCount="5":设置动画重复的次数
- * android:repeatMode="reverse":设置动画重复的模式:
- * reverse为0.0 -> 1.0 -> 0.0,动画反复执行;
- * restart为0.0 -> 1.0, 0.0 -> 1.0,动画每次都重新开始执行
- -->
- <scale xmlns:android="http://schemas.android.com/apk/res/android"
- android:fromXScale="0.0"
- android:toXScale="1.0"
- android:fromYScale="0.5"
- android:toYScale="1.0"
- android:pivotX="100%"
- android:pivotY="80%"
- android:duration="2500"
- android:repeatCount="5"
- android:repeatMode="reverse"
- />
- /**
- * xml文件加载图片缩放(Scale)动画
- */
- mAnimation = AnimationUtils.loadAnimation(this, R.anim.view_animation_scale);
- Animation mAnimation = null;
- /**
- * 代码创建图片渐变(Scale)动画
- * mAnimation = new ScaleAnimation(fromX, toX, fromY, toY, pivotXType, pivotXValue, pivotYType, pivotYValue);
- * fromX:设置动画开始时X轴方向的缩放起始值。0.0为X轴方向的控件缩成一点,1.0为X轴方向的控件不缩放;
- * toX:设置动画结束时X轴方向的缩放结束值;
- * fromY:设置动画开始时Y轴方向的缩放起始值。0.0为Y轴方向的控件缩成一点,1.0为Y轴方向的控件不缩放;
- * toY:设置动画结束时Y轴方向的缩放结束值;
- * pivotXtype:动画在X轴相对于物件位置类型 ,分为RELATIVE_TO_SELF、RELATIVE_TO_PARENT和ABSOLUTE三种类型:
- * 1、RELATIVE_TO_SELF:相对于控件自身;
- * 2、RELATIVE_TO_PARENT:相对于父控件;
- * 3、ABSOLUTE:绝对坐标;
- * pivotXValue:动画相对于物件的X坐标的开始位置;
- * pivotYType:动画在Y轴相对于物件位置类型 ,分为RELATIVE_TO_SELF、RELATIVE_TO_PARENT和ABSOLUTE三种类型;
- * pivotYValue:动画相对于物件的Y坐标的开始位置;
- */
- //mAnimation = new ScaleAnimation(fromX, toX, fromY, toY)
- //mAnimation = new ScaleAnimation(fromX, toX, fromY, toY, pivotX, pivotY)
- //mAnimation = new ScaleAnimation(fromX, toX, fromY, toY, pivotXType, pivotXValue, pivotYType, pivotYValue)
- mAnimation = new ScaleAnimation(0.0f, 1.0f, 0.5f, 1.0f, Animation.RELATIVE_TO_SELF, 1.0f, Animation.RELATIVE_TO_SELF, 1.0f);

接着实现Translate动画效果,同理,在res/anim/文件夹下创建view_animation_translate.xml,文件中的代码如下:
- <!--
- * android:interpolator:修饰动画效果,定义动画的变化率,可以使存在的动画效果accelerated(加速),
- decelerated(减速),repeated(重复),bounced(弹跳)等。
- * android:fromXDelta="0%"动画开始执行时X轴方向控件的起始位置,当value加%时(例如80%),意思是相对于控件的原始位置往右的80%控件宽度的位置
- * 又例如value为-20%时,意思是相对于控件的原始位置往左的20%控件宽度的位置。当Value不加%时(例如80),表示相对于
- * 控件的原始位置往右80个像素(px)的位置,又如当Value为-20时,即往左20个像素。
- * android:toXDelta="100%"动画结束执行时X轴方向控件的结束位置,Value可以加%,也可以不加%,原理同上
- * android:fromYDelta="0%"动画开始执行时Y轴方向控件的起始位置,Value可以加%,也可以不加%,原理同上
- * android:toYDelta="100%"动画结束执行时Y轴方向控件的结束位置,Value可以加%,也可以不加%,原理同上
- * android:duration="2500"设置每一次动画持续的时间值
- * android:repeatMode="reverse"设置动画重复的模式,reverse为0% -> 100% -> 0%,动画反复执行;
- * restart为0% -> 100%, 0% -> 100%,动画每次都重新开始执行
- * android:repeatCount="1"设置动画重复的次数
- * android:startOffset="1000":动画执行前的延迟时间
- * android:fillEnabled="false"当设置为true时,fillAfter和fillBefroe将会都为true,此时会忽略fillBefore和fillAfter两种属性
- * android:fillAfter="true":当Value为true,表示动画执行结束后停留在结束后的状态
- * android:fillBefore="false":当Value为false:表示动画执行结束后回到动画开始时的状态
- -->
- <translate xmlns:android="http://schemas.android.com/apk/res/android"
- android:interpolator="@android:anim/bounce_interpolator"
- android:fromXDelta="0%"
- android:toXDelta="100%"
- android:fromYDelta="0%"
- android:toYDelta="100%"
- android:duration="2500"
- android:repeatMode="reverse"
- android:repeatCount="1"
- android:startOffset="1000"
- android:fillEnabled="false"
- android:fillAfter="true"
- android:fillBefore="true"
- />
- //xml文件加载图片位置位移(Translate)动画
- mAnimation = AnimationUtils.loadAnimation(this, R.anim.view_animation_translate);
- Animation mAnimation = null;
- /**
- * 代码创建图片位置位移(Translate)动画
- * mAnimation = new TranslateAnimation(fromXType, fromXValue, toXType, toXValue, fromYType,
- * fromYValue, toYType, toYValue);
- * fromXType:动画开始执行时在X轴相对于物件位置类型
- * fromXValue:动画开始执行时X轴方向的的起始位置,当位置类型为RELATIVE_TO_SELF时,Value取0.0f~1.0f之间,
- * 当位置类型为RELATIVE_TO_PARENT或ABSOLUTE时, Value使用(px)像素值
- * toXType:动画结束执行时在X轴相对于物件位置类型
- * toXValue:动画结束执行时X轴方向的的结束位置,Value取值方式同上
- * fromYType:动画开始执行时在Y轴相对于物件位置类型
- * fromYValue:动画开始执行时Y轴方向的的起始位置,Value取值方式同上
- * toYType:动画在结束执行时在Y轴相对于物件位置类型
- * toYValue:动画结束执行时Y轴方向的的结束位置,Value取值方式同上
- */
- //mAnimation = new TranslateAnimation(fromXDelta, toXDelta, fromYDelta, toYDelta);
- mAnimation = new TranslateAnimation(Animation.RELATIVE_TO_SELF, 0.0f, Animation.RELATIVE_TO_SELF, 1.0f,
- Animation.RELATIVE_TO_SELF, 0.0f, Animation.RELATIVE_TO_SELF, 1.0f);

接着实现Rotate动画效果,同理,在res/anim/文件夹下创建view_animation_rotate.xml,文件中的代码如下:
- <!--
- * android:fromDegrees="-50":动画开始执行时的控件起始状态的角度;
- * android:toDegrees="360":动画结束执行时的控件结束状态的角度;
- * android:pivotX="50%":旋转动画的中心点的X轴方向的横坐标,Value加%时,意思是相对于控件的原始位置往右方向的50%控件宽度的位置为横坐标,
- * 若Value为负值(例如-50%),则表示往左方向;当Value为数值时,则代表相对于屏幕的(px)像素值;
- * android:pivotY="50%":旋转动画的中心店的Y轴方向的纵坐标,原理同上;
- * android:startOffset="1000":动画执行前的延迟时间;
- * android:fillAfter="true":当Value为true,表示动画执行结束后停留在结束后的状态;
- * android:duration="2500":设置每一次动画持续的时间值,单位为毫秒(ms);
- * android:repeatCount="5":设置动画重复的次数;
- * android:repeatMode="reverse":设置动画重复的模式:
- * reverse为0.0 -> 1.0 -> 0.0,动画反复执行;
- * restart为0.0 -> 1.0, 0.0 -> 1.0,动画每次都重新开始执行
- -->
- <rotate xmlns:android="http://schemas.android.com/apk/res/android"
- android:interpolator="@android:anim/accelerate_decelerate_interpolator"
- android:fromDegrees="520"
- android:toDegrees="3600"
- android:pivotX="50%"
- android:pivotY="50%"
- android:startOffset="1000"
- android:fillAfter="true"
- android:duration="2500"
- android:repeatCount="4"
- android:repeatMode="reverse"
- />
- /**
- * xml文件加载图片旋转(Rotate)动画
- */
- mAnimation = AnimationUtils.loadAnimation(this, R.anim.view_animation_rotate);
- Animation mAnimation = null;
- /**
- * 代码创建图片旋转(Rotate)动画
- * mAnimation = new RotateAnimation(fromDegrees, toDegrees, pivotXType, pivotXValue, pivotYType, pivotYValue);
- * fromDegrees:动画开始执行时的控件起始状态的角度;
- * toDegrees:动画结束执行时的控件结束状态的角度;
- * pivotXType:动画在X轴相对于物件位置类型 ,分为RELATIVE_TO_SELF、RELATIVE_TO_PARENT和ABSOLUTE三种类型:
- * 1、RELATIVE_TO_SELF:相对于控件自身;
- * 2、RELATIVE_TO_PARENT:相对于父控件;
- * 3、ABSOLUTE:绝对坐标;
- * pivotXValue:动画开始执行时X轴方向的的起始位置,当位置类型为RELATIVE_TO_SELF时,Value取0.0f~1.0f之间,当位置类型为RELATIVE_TO_PARENT或ABSOLUTE时,
- * Value使用(px)像素值;
- * pivotYType:动画在Y轴相对于物件位置类型 ,分为RELATIVE_TO_SELF、RELATIVE_TO_PARENT和ABSOLUTE三种类型;
- * pivotYValue:旋转动画的中心店的Y轴方向的纵坐标,原理同上;
- */
- //mAnimation = new RotateAnimation(fromDegrees, toDegrees)
- //mAnimation = new RotateAnimation(fromDegrees, toDegrees, pivotX, pivotY)
- mAnimation = new RotateAnimation(-50f, 360f, Animation.RELATIVE_TO_SELF, 0.5f, Animation.RELATIVE_TO_SELF, 0.5f);
至此我们就实现了Tween Animation中的Alpha、Scale、Translate和Rotate四种动画效果,那我们就可以根据我们APP的具体需求,定义我们自己的动画,不过除了单独使用这些动画效果外,Android还允许我们使用这几种动画里面的若干种组合成一个动画集合,从而实现更加炫更加多样的动画效果。下面我们也分别使用xml和代码来利用动画集合的方式实现一个图片飞进飞出的动画效果,首先也是在res/anim文件夹下创建一个view_animation_set.xml文件,文件中的代码如下:
- <set
- xmlns:android="http://schemas.android.com/apk/res/android"
- android:shareInterpolator="true"
- android:duration="1000"
- android:repeatMode="reverse"
- android:repeatCount="2"
- >
- <alpha
- android:fromAlpha="1.0"
- android:toAlpha="0.0"
- android:fillAfter="true"
- android:duration="1000"
- android:repeatCount="1"
- android:repeatMode="reverse"
- />
- <scale
- android:fromXScale="1.0"
- android:toXScale="0.0"
- android:fromYScale="1.0"
- android:toYScale="0.0"
- android:pivotX="50%"
- android:pivotY="50%"
- android:fillAfter="true"
- android:duration="1000"
- android:repeatCount="1"
- android:repeatMode="reverse"
- />
- <translate
- android:fromXDelta="0%"
- android:toXDelta="100%"
- android:fromYDelta="0%"
- android:toYDelta="100%"
- android:fillAfter="true"
- android:duration="1000"
- android:repeatCount="1"
- android:repeatMode="reverse"
- />
- <rotate
- android:fromDegrees="0"
- android:toDegrees="360"
- android:pivotX="50%"
- android:pivotY="50%"
- android:fillAfter="true"
- android:duration="1000"
- android:repeatCount="1"
- android:repeatMode="reverse"
- />
- </set>
- /**
- * xml文件加载图片集合(Set)动画
- */
- mAnimation = AnimationUtils.loadAnimation(this, R.anim.view_animation_set);
- /**
- * 代码创建图片集合(Set)动画
- */
- AnimationSet mAnimationSet = new AnimationSet(true);
- //定义渐变动画对象
- AlphaAnimation mAlphaAnimation = new AlphaAnimation(1.0f, 0.0f);
- mAlphaAnimation.setRepeatCount(1);
- mAlphaAnimation.setRepeatMode(Animation.REVERSE);
- mAlphaAnimation.setFillAfter(true);
- mAlphaAnimation.setDuration(1000);
- //定义缩放动画对象
- ScaleAnimation mScaleAnimation = new ScaleAnimation(1.0f, 0.0f, 1.0f, 0.0f,
- Animation.RELATIVE_TO_SELF,0.5f,Animation.RELATIVE_TO_SELF,0.5f);
- mScaleAnimation.setRepeatCount(1);
- mScaleAnimation.setRepeatMode(Animation.REVERSE);
- mScaleAnimation.setFillAfter(true);
- mScaleAnimation.setDuration(1000);
- //定义位移动画对象
- TranslateAnimation mTranslateAnimation = new TranslateAnimation(Animation.RELATIVE_TO_SELF, 0.0f,
- Animation.RELATIVE_TO_SELF, 1.0f, Animation.RELATIVE_TO_SELF, 0.0f, Animation.RELATIVE_TO_SELF, 1.0f);
- mTranslateAnimation.setRepeatCount(1);
- mTranslateAnimation.setRepeatMode(Animation.REVERSE);
- mTranslateAnimation.setFillAfter(true);
- mTranslateAnimation.setDuration(1000);
- //定义旋转动画对象
- RotateAnimation mRotateAnimation = new RotateAnimation(0, 360, Animation.RELATIVE_TO_SELF, 0.5f,
- Animation.RELATIVE_TO_SELF, 0.5f);
- mRotateAnimation.setRepeatCount(1);
- mRotateAnimation.setRepeatMode(Animation.REVERSE);
- mRotateAnimation.setFillAfter(true);
- mRotateAnimation.setDuration(1000);
- //添加动画到集合动画对象中
- mAnimationSet.addAnimation(mAlphaAnimation);
- mAnimationSet.addAnimation(mScaleAnimation);
- mAnimationSet.addAnimation(mTranslateAnimation);
- mAnimationSet.addAnimation(mRotateAnimation);

Frame Animation
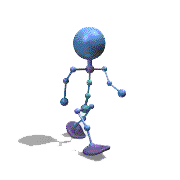
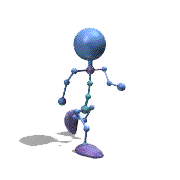
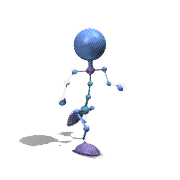
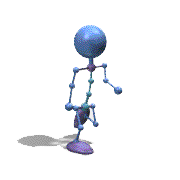

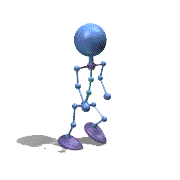
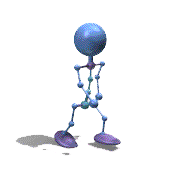
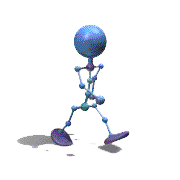
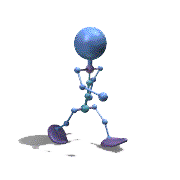
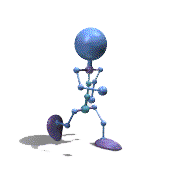
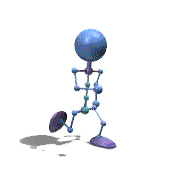
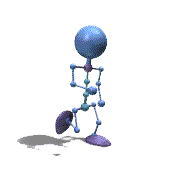
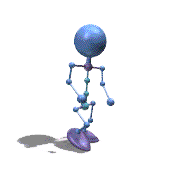
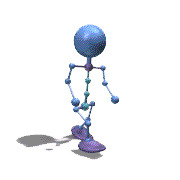
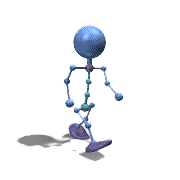
- <animation-list xmlns:android="http://schemas.android.com/apk/res/android"
- android:oneshot="false"
- >
- <item android:drawable="@drawable/drawable_animation01" android:duration="80"/>
- <item android:drawable="@drawable/drawable_animation02" android:duration="80"/>
- <item android:drawable="@drawable/drawable_animation03" android:duration="80"/>
- <item android:drawable="@drawable/drawable_animation04" android:duration="80"/>
- <item android:drawable="@drawable/drawable_animation05" android:duration="80"/>
- <item android:drawable="@drawable/drawable_animation06" android:duration="80"/>
- <item android:drawable="@drawable/drawable_animation07" android:duration="80"/>
- <item android:drawable="@drawable/drawable_animation08" android:duration="80"/>
- <item android:drawable="@drawable/drawable_animation09" android:duration="80"/>
- <item android:drawable="@drawable/drawable_animation10" android:duration="80"/>
- <item android:drawable="@drawable/drawable_animation11" android:duration="80"/>
- <item android:drawable="@drawable/drawable_animation12" android:duration="80"/>
- <item android:drawable="@drawable/drawable_animation13" android:duration="80"/>
- <item android:drawable="@drawable/drawable_animation14" android:duration="80"/>
- <item android:drawable="@drawable/drawable_animation15" android:duration="80"/>
- <item android:drawable="@drawable/drawable_animation16" android:duration="80"/>
- </animation-list>
- public class LoadingRobotProgressView extends ImageView {
- private AnimationDrawable mAnimationDrawable;
- public LoadingRobotProgressView(Context context) {
- super(context);
- // TODO Auto-generated constructor stub
- init();
- }
- public LoadingRobotProgressView(Context context, AttributeSet attrs) {
- super(context, attrs);
- // TODO Auto-generated constructor stub
- init();
- }
- public LoadingRobotProgressView(Context context, AttributeSet attrs, int defStyle) {
- super(context, attrs, defStyle);
- // TODO Auto-generated constructor stub
- init();
- }
- private void init() {
- //设置背景
- this.setBackgroundResource(R.drawable.drawable_animation_robot);
- //获取当前的背景
- mAnimationDrawable = (AnimationDrawable) this.getBackground();
- }
- /**
- * 当进入当前窗口时,开启动画
- */
- @Override
- protected void onAttachedToWindow() {
- super.onAttachedToWindow();
- mAnimationDrawable.start();
- }
- /**
- * 当离开当前窗口时,关闭动画
- */
- @Override
- protected void onDetachedFromWindow() {
- super.onDetachedFromWindow();
- mAnimationDrawable.stop();
- }
- }
观察上面的效果图可知,实验成功。
---------------------------------------------------------------------------------------------------------------
---------------------------------------------------------------------------------------------------------------
Property Animation 初步
Property Animation 是Android3.0(level 11)引入的一个款功能强大、灵活、健壮的动画系统,它可以为任何包括View在内的对象添加动画效果。就实现原理来分析,Property Aniamtion和Tween Animation之间最大的区别就是前者在为对象添加动画效果时,其更改的是对象的实际属性,而后者改变的只是View的绘制效果,View的实际属性值是不发生改变的。比如对一个Button实现左右移动的动画,若使用Property Animation实现的话,Button在移动的过程中,由于Property Animation改变的是Button的实际属性值,因此Button的事件响应焦点也随着移动,若点击移动中的Button,其可响应事件点击;而使用View Animation实现的话,点击移动中的Button,则无法响应事件点击,原因是Button控件本身的实际位置依然在初始位置,其事件响应焦点也依然在初始位置。
Property Animation功能强大,使用起来也非常的灵活,一般的,要实现一个Property Animation的动画,动画系统允许你设置一下动画的元素信息:
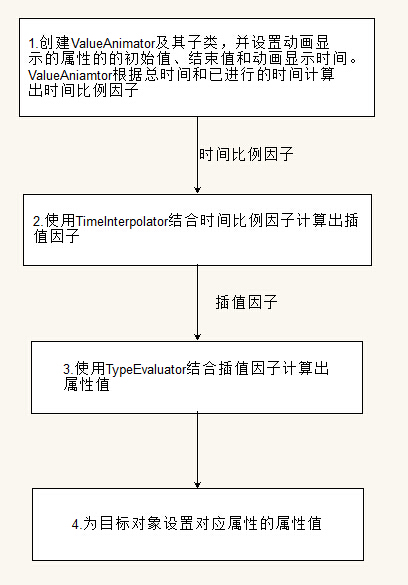
(1) 持续时间:指定动画的持续显示时间。默认的时长是300毫秒。
(2) 图像插值方式:指定属性值的变化方式,表示为关于动画已显示时间的函数。
(3) 重复次数和方式:指定动画是否循环播放,以及重复的次数。还可以指定动画是否反向播放。可以设为先正向播放再反向回放,如此往复直至达到设定的重复次数。
(4) 动画集合:你可以把动画分为多个逻辑组,以便实现同时播放、顺序播放或间隔一段时间再播放。
(5) 帧刷新间隔:指定动画帧的刷新频率。默认是每 10 ms刷新一次,但应用程序实际可执行的刷新频率取决于系统整体的繁忙程度,以及系统对定时器的支持程度。
Property Animation的工作方式
在学习Property Animation的工作之前,我们先通过一张图来看一下使用Property Animation的来实现动画的主要类及其相互之间的工作方式,如图下:
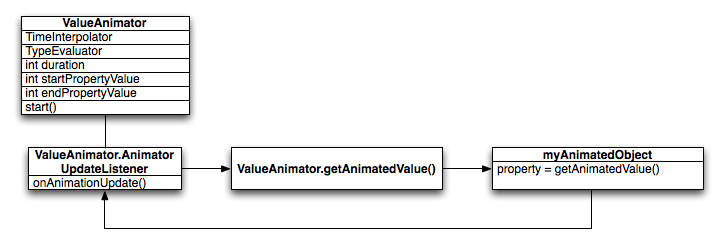
ValueAnimator:该类作为Property Animation系统的主要核心类,它记录了动画自身的一些属性值,比如动画显示的时间,动画对应当前属性的起始值和结束值。同时,ValueAnimator封装了一个计算插值因子的TimeInterpolator以及定义属性计算方式的TypeEvaluator。我们要实现一个Property Animation,都需要使用ValueAnimator或ValueAnimator的子类(ObjectAnimator)来完成动画的配置信息和计算过程。那ValueAnimator及其子类到底是如何完成动画的配置信息和计算过程的呢?下面我将会一一详细地分析,从而使读者了解Property Animation的工作方式:
要启动动画,首先创建一个 ValueAnimator或其子类并指定要动画显示的属性的初始值、结束值以及显示时间,然后调用 start() 启动动画。在整个动画过程中, ValueAnimator 根据动画总时间和已进行的时间自动计算出一个时间比例因子(elapsed fraction),大小介于0和1之间。 时间比例因子代表动画已完成时间的百分比,0 表示 0%,1 表示 100%。ValueAnimator 算完时间比例因子后,将调用已设置好的 TimeInterpolator 计算出一个插值因子(interpolated fraction)。插值因子是一个由时间比例因子换算出来的图像显示状态因子。算完插值因子, ValueAnimator 就会调用合适的 TypeEvaluator ,根据插值因子、初始值、结束值计算出需要动画显示的属性值。计算出属性值后,最后为需要执行动画的对象设置对应属性的属性值。动画在持续的整个过程中,会根据我们当初设置的TimeInterpolator 和TypeEvaluator的计算方式计算出的不同的属性值,从而不断地改变对象属性值的大小,进而产生各式各样的动画效果。
上面讲解Property Animation的动画执行过程可能会比较抽象,下面我们将通过一张图和一个实例来更形象地阐述一下Property Animation的属性计算方式和工作流程。Property Animation的工作流程一般分为四个步骤,如下图:
下面我们接着使用一个例子来了解一下一个对象执行Property Aniamtion的属性计算方式过程。下图(图一)是一个对象的x属性值的变化情况,即在屏幕上的水平位置。该对象从0到40像素点的移动变化过程总共持续了40ms的时间,并以每10ms的帧刷新频率来刷新一次对象,观察下图,每隔10ms,对象所移动的距离都是10个像素点,很明显我们能得出结论该对象的动画是匀速移动的。
图 1
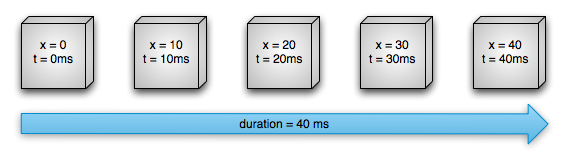
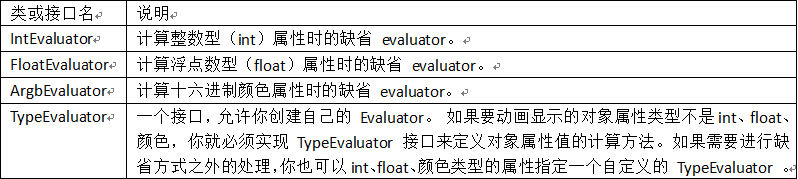
在Android中,我们称以上为以线性插值的方式执行动画,那默认设置的计算插值因子的TimeInterpolator为LinearInterpolator,计算属性的TypeEvaluator为IntEvaluator。这两个类均由系统提供,我们分别看一下两个类的源码,首先是LinearInterpolator的源码如下:
- package android.view.animation;
- import android.content.Context;
- import android.util.AttributeSet;
- /**
- * An interpolator where the rate of change is constant
- *
- */
- public class LinearInterpolator implements Interpolator {
- public LinearInterpolator() {
- }
- public LinearInterpolator(Context context, AttributeSet attrs) {
- }
- public float getInterpolation(float input) {
- return input;
- }
- }
LinearInterpolator类中的实现比较简单,除了构造方法外,就只有一个getInterpolation(float input)方法,该方法用于计算插值因子,参数input为时间比例因子,我们发现以匀速线性插值方式执行的动画的时间比例因子和插值因子是等值的。那有读者会问,时间比例因子又是怎么得来的呢,很简单,记住这个公式就行:时间比例因子 = 动画执行的总时间/当前已进行的时间。
IntEvaluator的源码如下:
- package android.animation;
- /**
- * This evaluator can be used to perform type interpolation between <code>int</code> values.
- */
- public class IntEvaluator implements TypeEvaluator<Integer> {
- public Integer evaluate(float fraction, Integer startValue, Integer endValue) {
- int startInt = startValue;
- return (int)(startInt + fraction * (endValue - startInt));
- }
- }
分析LinearInterpolator和IntEvaluator后,我们来做一个实验,就是借助LinearInterpolator和IntEvaluator类自己来计算一下上面实例的属性值的变化,具体代码如下:
- public class LinearTest {
- public static void main(String[] args) {
- // TODO Auto-generated method stub
- //当前的时间
- float time = 10;
- //时间比例因子
- float timeFactor = 0.0f;
- for(int i = 0;i < 4;i++){
- System.out.println("时间 = " + time +"ms");
- timeFactor = time/40;
- System.out.println("时间因子 = "+ timeFactor);
- //插值因子
- float interpolatorFactor = LinearTest.getInterpolation(timeFactor);
- System.out.println("插值因子 = " + interpolatorFactor);
- //属性值
- int propertyValue = evaluate(interpolatorFactor, 0, 40);
- System.out.println("属性值 = " + propertyValue);
- time += 10;
- System.out.println();
- }
- }
- /**
- * 计算插值因子
- * @param input 时间比例因子
- * @return float 返回插值因子
- */
- public static float getInterpolation(float input) {
- return input;
- }
- /**
- * 计算当前的属性值
- * @param fraction 插值因子
- * @param startValue 属性起始值
- * @param endValue 属性结束值
- * @return Integer 当前的属性值
- */
- public static Integer evaluate(float fraction, Integer startValue, Integer endValue) {
- int startInt = startValue;
- return (int)(startInt + fraction * (endValue - startInt));
- }
- }
- 时间 = 10.0ms
- 时间因子 = 0.25
- 插值因子 = 0.25
- 属性值 = 10
- 时间 = 20.0ms
- 时间因子 = 0.5
- 插值因子 = 0.5
- 属性值 = 20
- 时间 = 30.0ms
- 时间因子 = 0.75
- 插值因子 = 0.75
- 属性值 = 30
- 时间 = 40.0ms
- 时间因子 = 1.0
- 插值因子 = 1.0
- 属性值 = 40
我们再来看看下图(图2),如同上一张图一样,对象的x属性值都是从0到40像素的变化过程,总共持续时间也都是40ms,帧刷新频率都是10ms每次。唯一不同的就是在相同间隔的时间里对象所移动的距离各不相同,如下图中对象在前10ms所移动的距离为6个像素点,而在第10至20ms这个时间段对象所移动的距离为14个像素点,还有在第20至30ms和第30至40ms之间该对象所移动的距离又分别是14和6个像素点。依此我们可以发现,该对象是以先加速后减速的方式进行非匀速运动的。

图2
那在Android中,我们称以上为以非线性插值的方式执行动画。那默认设置的计算插值因子的TimeInterpolator为AccelerateDecelerateInterpolator,计算属性的TypeEvaluator为FloatEvaluator。这两个类均由系统提供,我们分别看一下两个类的源码,首先是AccelerateDecelerateInterpolator的源码如下:
- package android.view.animation;
- import android.content.Context;
- import android.util.AttributeSet;
- /**
- * An interpolator where the rate of change starts and ends slowly but
- * accelerates through the middle.
- *
- */
- public class AccelerateDecelerateInterpolator implements Interpolator {
- public AccelerateDecelerateInterpolator() {
- }
- @SuppressWarnings({"UnusedDeclaration"})
- public AccelerateDecelerateInterpolator(Context context, AttributeSet attrs) {
- }
- public float getInterpolation(float input) {
- return (float)(Math.cos((input + 1) * Math.PI) / 2.0f) + 0.5f;
- }
- }
- package android.animation;
- /**
- * This evaluator can be used to perform type interpolation between <code>float</code> values.
- */
- public class FloatEvaluator implements TypeEvaluator<Number> {
- public Float evaluate(float fraction, Number startValue, Number endValue) {
- float startFloat = startValue.floatValue();
- return startFloat + fraction * (endValue.floatValue() - startFloat);
- }
- }
- public class AccelerateDecelerateTest {
- public static void main(String[] args) {
- // TODO Auto-generated method stub
- //当前的时间
- float time = 10;
- //时间比例因子
- float timeFactor = 0.0f;
- for(int i = 0;i < 4;i++){
- System.out.println("时间 = " + time +"ms");
- timeFactor = time/40;
- System.out.println("时间因子 = "+ timeFactor);
- //插值因子
- float interpolatorFactor = AccelerateDecelerateTest.getInterpolation(timeFactor);
- System.out.println("插值因子 = " + interpolatorFactor);
- //属性值
- float propertyValue = evaluate(interpolatorFactor, 0, 40);
- System.out.println("属性值 = " + propertyValue);
- time += 10;
- System.out.println();
- }
- }
- /**
- * 计算插值因子
- * @param input 时间比例因子
- * @return float 返回插值因子
- */
- public static float getInterpolation(float input) {
- return (float)(Math.cos((input + 1) * Math.PI) / 2.0f) + 0.5f;
- }
- /**
- * 计算当前的属性值
- * @param fraction 插值因子
- * @param startValue 属性起始值
- * @param endValue 属性结束值
- * @return Integer 当前的属性值
- */
- public static Float evaluate(float fraction, Number startValue, Number endValue) {
- float startFloat = startValue.floatValue();
- return startFloat + fraction * (endValue.floatValue() - startFloat);
- }
- }
- 时间 = 10.0ms
- 时间因子 = 0.25
- 插值因子 = 0.14644662
- 属性值 = 5.8578644
- 时间 = 20.0ms
- 时间因子 = 0.5
- 插值因子 = 0.5
- 属性值 = 20.0
- 时间 = 30.0ms
- 时间因子 = 0.75
- 插值因子 = 0.8535534
- 属性值 = 34.142136
- 时间 = 40.0ms
- 时间因子 = 1.0
- 插值因子 = 1.0
- 属性值 = 40.0
观察运行结果,与我们预期的结果基本一致。
---------------------------------------------------------------------------------------------------------------
ValueAnimator和ObjectAnimator实现动画实例
---------------------------------------------------------------------------------------------------------------
使用ValueAnimator实现动画
ValueAnimator是Property Animation系统的核心类,它包含了配置Property Animation属性的大部分方法,那要实现一个Property Animation,都需要直接或间接使用ValueAnimator类。那接下来我们将借助ValueAnimator类提供的方法来实现各种各样的动画效果,不过在此之前我们来学习一下实现动画的几个关键知识点。
Animator监听器介绍
使用及自定义Interpolator

- public class CustomInterpolator implements TimeInterpolator {
- @Override
- public float getInterpolation(float input) {
- // 编写相关的逻辑计算
- //input *= 0.8f;
- return input * input;
- }
- }
使用及自定义TypeEvaluator
- import android.animation.TypeEvaluator;
- import android.annotation.SuppressLint;
- @SuppressLint("NewApi")
- public class CustomEvaluator implements TypeEvaluator<Number> {
- @Override
- public Float evaluate(float fraction, Number startValue, Number endValue) {
- // TODO Auto-generated method stub
- float propertyResult = 0;
- /*float startFloat = startValue.floatValue();
- return (startFloat + fraction * (endValue.floatValue() - startFloat));*/
- return propertyResult;
- }
- }
使用ValueAnimator实现动画的步骤及实践
那一般使用ValueAnimator实现动画分为以下七个步骤:
1. 调用ValueAnimation类中的ofInt(int...values)、ofFloat(String propertyName,float...values)等静态方法实例化ValueAnimator对象,并设置目标属性的属性名、初始值或结束值等值;
2.调用addUpdateListener(AnimatorUpdateListener mListener)方法为ValueAnimator对象设置属性变化的监听器;
3.创建自定义的Interpolator,调用setInterpolator(TimeInterpolator value)为ValueAniamtor设置自定义的Interpolator;(可选,不设置默认为缺省值)
4.创建自定义的TypeEvaluator,调用setEvaluator(TypeEvaluator value)为ValueAnimator设置自定义的TypeEvaluator;(可选,不设置默认为缺省值)
5.在AnimatorUpdateListener 中的实现方法为目标对象的属性设置计算好的属性值。
6.设置动画的持续时间、是否重复及重复次数等属性;
7.为ValueAnimator设置目标对象并开始执行动画。
- /**
- * 使用ValueAnimator改变Imageview的margin的值
- */
- public void marginValueAnimator(){
- //1.调用ofInt(int...values)方法创建ValueAnimator对象
- ValueAnimator mAnimator = ValueAnimator.ofInt(0,screenWidth - mImageViewTest.getWidth());
- //2.为目标对象的属性变化设置监听器
- mAnimator.addUpdateListener(new AnimatorUpdateListener() {
- @Override
- public void onAnimationUpdate(ValueAnimator animation) {
- // 3.为目标对象的属性设置计算好的属性值
- int animatorValue = (int)animation.getAnimatedValue();
- MarginLayoutParams marginLayoutParams = (MarginLayoutParams) mImageViewTest.getLayoutParams();
- marginLayoutParams.leftMargin = animatorValue;
- mImageViewTest.setLayoutParams(marginLayoutParams);
- }
- });
- //4.设置动画的持续时间、是否重复及重复次数等属性
- mAnimator.setDuration(2000);
- mAnimator.setRepeatCount(3);
- mAnimator.setRepeatMode(ValueAnimator.REVERSE);
- //5.为ValueAnimator设置目标对象并开始执行动画
- mAnimator.setTarget(mImageViewTest);
- mAnimator.start();
- }

- /**
- * 使用ValueAnimator实现图片缩放动画
- */
- public void scaleValueAnimator(){
- //1.设置目标属性名及属性变化的初始值和结束值
- PropertyValuesHolder mPropertyValuesHolderScaleX = PropertyValuesHolder.ofFloat("scaleX", 1.0f,0.0f);
- PropertyValuesHolder mPropertyValuesHolderScaleY = PropertyValuesHolder.ofFloat("scaleY", 1.0f,0.0f);
- ValueAnimator mAnimator = ValueAnimator.ofPropertyValuesHolder(mPropertyValuesHolderScaleX,mPropertyValuesHolderScaleY);
- //2.为目标对象的属性变化设置监听器
- mAnimator.addUpdateListener(new AnimatorUpdateListener() {
- @Override
- public void onAnimationUpdate(ValueAnimator animation) {
- // 3.根据属性名获取属性变化的值分别为ImageView目标对象设置X和Y轴的缩放值
- float animatorValueScaleX = (float) animation.getAnimatedValue("scaleX");
- float animatorValueScaleY = (float) animation.getAnimatedValue("scaleY");
- mImageViewTest.setScaleX(animatorValueScaleX);
- mImageViewTest.setScaleY(animatorValueScaleY);
- }
- });
- //4.为ValueAnimator设置自定义的Interpolator
- mAnimator.setInterpolator(new CustomInterpolator());
- //5.设置动画的持续时间、是否重复及重复次数等属性
- mAnimator.setDuration(2000);
- mAnimator.setRepeatCount(3);
- mAnimator.setRepeatMode(ValueAnimator.REVERSE);
- //6.为ValueAnimator设置目标对象并开始执行动画
- mAnimator.setTarget(mImageViewTest);
- mAnimator.start();
- }
- package com.androidleaf.animation.customproperty;
- import android.animation.TimeInterpolator;
- import android.annotation.SuppressLint;
- @SuppressLint("NewApi")
- public class CustomInterpolator implements TimeInterpolator {
- @Override
- public float getInterpolation(float input) {
- input *= 0.8f;
- return input * input;
- }
- }
观察上面的运行效果图,我们可以发现图片不仅实现了收缩动画,而且还实现了一个迅速的收缩和回弹的效果,原因是我们通过自定义Interpolator,使得ScaleX和ScaleY属性值的变化呈非线性的变化,那涉及到自定义Interpolator的知识在上面我们已经学习过了,在此就不重复讲解了。
- /**
- * 隐藏或显示ListView的动画
- */
- public void hideOrShowListViewAnimator(final int startValue,final int endValue){
- //1.设置属性的初始值和结束值
- ValueAnimator mAnimator = ValueAnimator.ofInt(0,100);
- //2.为目标对象的属性变化设置监听器
- mAnimator.addUpdateListener(new AnimatorUpdateListener() {
- @Override
- public void onAnimationUpdate(ValueAnimator animation) {
- // TODO Auto-generated method stub
- int animatorValue = (int)animation.getAnimatedValue();
- float fraction = animatorValue/100f;
- IntEvaluator mEvaluator = new IntEvaluator();
- //3.使用IntEvaluator计算属性值并赋值给ListView的高
- mListView.getLayoutParams().height = mEvaluator.evaluate(fraction, startValue, endValue);
- mListView.requestLayout();
- }
- });
- //4.为ValueAnimator设置LinearInterpolator
- mAnimator.setInterpolator(new LinearInterpolator());
- //5.设置动画的持续时间
- mAnimator.setDuration(500);
- //6.为ValueAnimator设置目标对象并开始执行动画
- mAnimator.setTarget(mListView);
- mAnimator.start();
- }
使用ObjectAnimator实现动画
(2) rotation、rotationX 和 rotationY:这三个属性控制着 2D 旋转角度(rotation属性)和围绕某枢轴点的 3D 旋转角度;
(3) scaleX、scaleY:这两个属性控制着 View 围绕某枢轴点的 2D 缩放比例;
(4) pivotX 和 pivotY: 这两个属性控制着枢轴点的位置,前述的旋转和缩放都是以此点为中心展开的,缺省的枢轴点是 View 对象的中心点;
(5) x 和 y:这是指 View 在容器内的最终位置,等于 View 左上角相对于容器的坐标加上 translationX 和 translationY 后的值;
(6)alpha:表示 View 的 alpha 透明度。缺省值为 1 (不透明),为 0 则表示完全透明(看不见);
要动画显示 View 对象的某个属性,比如颜色或旋转值,我们所有要做的事情就是创建一个 Property animation,并设定对应的 View 属性。那接下来我们就用ObjectAnimator类来分别实现View的透明度渐变、收缩、移动和旋转等动画效果,那在此之前我们也来总结下使用ObjectAnimator实现动画的几个步骤,如下:
- public class ObjectAnimatorFragment extends Fragment implements OnClickListener{
- private ListView mListViewFront;
- private ListView mListViewReverse;
- private Button mButtonFlip;
- private Button mButtonAlpha;
- private Button mButtonScale;
- private Button mButtonTranslate;
- private Button mButtonRotate;
- private Button mButtonSet;
- private ImageView mImageView;
- private int screenWidth = 0;
- private int screenHeight = 0;
- String[] frontStrs = {
- "Front Page 1",
- "Front Page 2",
- "Front Page 3",
- "Front Page 4",
- "Front Page 5",
- "Front Page 6",
- };
- String[] reverseStrs = {
- "Reverse Page 1",
- "Reverse Page 2",
- "Reverse Page 3",
- "Reverse Page 4",
- "Reverse Page 5",
- "Reverse Page 6",
- };
- @Override
- public void onActivityCreated(Bundle savedInstanceState) {
- // TODO Auto-generated method stub
- super.onActivityCreated(savedInstanceState);
- DisplayMetrics metrics = new DisplayMetrics();
- getActivity().getWindowManager().getDefaultDisplay().getMetrics(metrics);
- float density = metrics.density;
- //screenWidth = (int)(metrics.widthPixels * density + 0.5f);
- //screenHeight = (int)(metrics.heightPixels * density + 0.5f);
- screenWidth = metrics.widthPixels;
- screenHeight = metrics.heightPixels;
- }
- @Override
- public View onCreateView(LayoutInflater inflater, ViewGroup container,
- Bundle savedInstanceState) {
- // TODO Auto-generated method stub
- View rootView = inflater.inflate(R.layout.fragment_objectanimator, container, false);
- mListViewFront = (ListView) rootView.findViewById(R.id.front_page_listview);
- mListViewReverse = (ListView) rootView.findViewById(R.id.reverse_page_listview);
- mButtonFlip = (Button)rootView.findViewById(R.id.button_flip);
- mButtonFlip.setOnClickListener(this);
- mButtonAlpha = (Button)rootView.findViewById(R.id.button_alpha);
- mButtonAlpha.setOnClickListener(this);
- mButtonScale = (Button)rootView.findViewById(R.id.button_scale);
- mButtonScale.setOnClickListener(this);
- mButtonTranslate = (Button)rootView.findViewById(R.id.button_translate);
- mButtonTranslate.setOnClickListener(this);
- mButtonRotate = (Button)rootView.findViewById(R.id.button_rotate);
- mButtonRotate.setOnClickListener(this);
- mButtonSet = (Button)rootView.findViewById(R.id.button_set);
- mButtonSet.setOnClickListener(this);
- mImageView = (ImageView)rootView.findViewById(R.id.objectanimator_imageview);
- mImageView.setOnClickListener(this);
- initData();
- return rootView;
- }
- public void initData(){
- ArrayAdapter<String> frontListData = new ArrayAdapter<String>(getActivity(), R.layout.layout_objectanimator_item,R.id.objectanimtor_item_textview, frontStrs);
- ArrayAdapter<String> reverseListData = new ArrayAdapter<String>(getActivity(), R.layout.layout_objectanimator_item,R.id.objectanimtor_item_textview, reverseStrs);
- mListViewFront.setAdapter(frontListData);
- mListViewReverse.setAdapter(reverseListData);
- mListViewReverse.setRotationX(-90.0f);
- }
- @Override
- public void onPause() {
- // TODO Auto-generated method stub
- super.onPause();
- }
- @Override
- public void onClick(View v) {
- // TODO Auto-generated method stub
- switch (v.getId()) {
- case R.id.button_flip:
- flip();
- break;
- case R.id.button_alpha:
- alphaAnimator();
- break;
- case R.id.button_scale:
- scaleAnimator();
- break;
- case R.id.button_translate:
- translateAniamtor();
- break;
- case R.id.button_rotate:
- rotateAniamtor();
- break;
- case R.id.button_set:
- setAnimator();
- break;
- case R.id.objectanimator_imageview:
- mListViewFront.setVisibility(View.VISIBLE);
- mImageView.setVisibility(View.GONE);
- break;
- default:
- break;
- }
- }
- /**
- * 翻转动画效果
- */
- public void flip(){
- final ListView visibleView;
- final ListView invisibleView;
- if(mListViewFront.getVisibility() == View.GONE){
- visibleView = mListViewReverse;
- invisibleView = mListViewFront;
- }else{
- visibleView = mListViewFront;
- invisibleView = mListViewReverse;
- }
- //创建ListView从Visible到Gone的动画
- ObjectAnimator visibleToInVisable = ObjectAnimator.ofFloat(visibleView, "rotationX", 0.0f,90.0f);
- //设置插值器
- visibleToInVisable.setInterpolator(new AccelerateInterpolator());
- visibleToInVisable.setDuration(500);
- //创建ListView从Gone到Visible的动画
- final ObjectAnimator invisibleToVisible = ObjectAnimator.ofFloat(invisibleView, "rotationX", -90.0f,0.0f);
- //设置插值器
- invisibleToVisible.setInterpolator(new DecelerateInterpolator());
- invisibleToVisible.setDuration(500);
- visibleToInVisable.addListener(new AnimatorListenerAdapter() {
- @Override
- public void onAnimationEnd(Animator animation) {
- // TODO Auto-generated method stub
- super.onAnimationEnd(animation);
- visibleView.setVisibility(View.GONE);
- invisibleToVisible.start();
- invisibleView.setVisibility(View.VISIBLE);
- }
- });
- visibleToInVisable.start();
- }
- /**
- * 渐变动画效果
- */
- public void alphaAnimator(){
- ListView alphaListView = null;
- if(mListViewFront.getVisibility() == View.GONE){
- alphaListView = mListViewReverse;
- }else{
- alphaListView = mListViewFront;
- }
- //1、通过调用ofFloat()方法创建ObjectAnimator对象,并设置目标对象、需要改变的目标属性名、初始值和结束值;
- ObjectAnimator mAnimatorAlpha = ObjectAnimator.ofFloat(alphaListView, "alpha", 1.0f,0.0f);
- //2、设置动画的持续时间、是否重复及重复次数属性;
- mAnimatorAlpha.setRepeatMode(Animation.REVERSE);
- mAnimatorAlpha.setRepeatCount(3);
- mAnimatorAlpha.setDuration(1000);
- //3、启动动画
- mAnimatorAlpha.start();
- }
- /**
- * 伸缩动画效果
- */
- public void scaleAnimator(){
- ListView scaleListView = null;
- if(mListViewFront.getVisibility() == View.GONE){
- scaleListView = mListViewReverse;
- }else{
- scaleListView = mListViewFront;
- }
- ObjectAnimator mAnimatorScaleX = ObjectAnimator.ofFloat(scaleListView, "scaleX", 1.0f,0.0f);
- mAnimatorScaleX.setRepeatMode(Animation.REVERSE);
- mAnimatorScaleX.setRepeatCount(3);
- mAnimatorScaleX.setDuration(1000);
- ObjectAnimator mAnimatorScaleY = ObjectAnimator.ofFloat(scaleListView, "scaleY", 1.0f,0.0f);
- mAnimatorScaleY.setRepeatMode(Animation.REVERSE);
- mAnimatorScaleY.setRepeatCount(3);
- mAnimatorScaleY.setDuration(1000);
- mAnimatorScaleX.start();
- mAnimatorScaleY.start();
- }
- /**
- * 位移动画效果
- */
- public void translateAniamtor(){
- ListView translateListView = null;
- if(mListViewFront.getVisibility() == View.GONE){
- translateListView = mListViewReverse;
- }else{
- translateListView = mListViewFront;
- }
- ObjectAnimator mAnimatorTranslateX = ObjectAnimator.ofFloat(translateListView, "translationX", 0.0f,screenWidth/2);
- mAnimatorTranslateX.setRepeatMode(Animation.REVERSE);
- mAnimatorTranslateX.setRepeatCount(3);
- mAnimatorTranslateX.setDuration(1000);
- ObjectAnimator mAnimatorTranslateY = ObjectAnimator.ofFloat(translateListView, "translationY", 0.0f,screenHeight/2);
- mAnimatorTranslateY.setRepeatMode(Animation.REVERSE);
- mAnimatorTranslateY.setRepeatCount(3);
- mAnimatorTranslateY.setDuration(1000);
- mAnimatorTranslateX.start();
- mAnimatorTranslateY.start();
- }
- /**
- * 旋转动画效果
- */
- public void rotateAniamtor(){
- ListView rotateListView = null;
- if(mListViewFront.getVisibility() == View.GONE){
- rotateListView = mListViewReverse;
- }else{
- rotateListView = mListViewFront;
- }
- ObjectAnimator mAnimatorRotate = ObjectAnimator.ofFloat(rotateListView, "rotation", 0.0f,360.0f);
- mAnimatorRotate.setRepeatMode(Animation.REVERSE);
- mAnimatorRotate.setRepeatCount(2);
- mAnimatorRotate.setDuration(2000);
- mAnimatorRotate.start();
- }
- /**
- * 动画集合
- */
- public void setAnimator(){
- ListView setListView = null;
- if(mListViewFront.getVisibility() == View.GONE){
- setListView = mListViewReverse;
- }else{
- setListView = mListViewFront;
- }
- setListView.setVisibility(View.GONE);
- if(mImageView.getVisibility() == View.GONE){
- mImageView.setVisibility(View.VISIBLE);
- }
- //代码方式设置动画
- codeAnimatorSet(mImageView);
- //用ViewPropertyAnimator实现动画
- //viewPropertyAnimator(setListView);
- //加载XML文件中的动画
- /*AnimatorSet mAnimatorSet = (AnimatorSet) AnimatorInflater.loadAnimator(getActivity(), R.animator.property_animation_animatorset);
- mAnimatorSet.setTarget(mImageView);
- mAnimatorSet.start();*/
- }
- /**
- * 使用编码方式实现动画效果
- * @param mImageView
- */
- public void codeAnimatorSet(ImageView mImageView){
- AnimatorSet mAnimatorSet = new AnimatorSet();
- ObjectAnimator mAnimatorSetRotateX = ObjectAnimator.ofFloat(mImageView, "rotationX", 0.0f,360.0f);
- mAnimatorSetRotateX.setDuration(3000);
- ObjectAnimator mAnimatorSetRotateY = ObjectAnimator.ofFloat(mImageView, "rotationY", 0.0f,360.0f);
- mAnimatorSetRotateY.setDuration(3000);
- ObjectAnimator mAnimatorScaleX = ObjectAnimator.ofFloat(mImageView, "scaleX", 1.0f,0.5f);
- mAnimatorScaleX.setRepeatCount(1);
- mAnimatorScaleX.setRepeatMode(Animation.REVERSE);
- mAnimatorScaleX.setDuration(1500);
- ObjectAnimator mAnimatorScaleY = ObjectAnimator.ofFloat(mImageView, "scaleY", 1.0f,0.5f);
- mAnimatorScaleY.setRepeatCount(1);
- mAnimatorScaleY.setRepeatMode(Animation.REVERSE);
- mAnimatorScaleY.setDuration(1500);
- mAnimatorSet.play(mAnimatorSetRotateY).with(mAnimatorScaleX);
- mAnimatorSet.play(mAnimatorScaleX).with(mAnimatorScaleY);
- mAnimatorSet.play(mAnimatorSetRotateY).before(mAnimatorSetRotateX);
- mAnimatorSet.start();
- }
- public void viewPropertyAnimator(ListView mListViewHolder){
- mListViewHolder.animate().cancel();
- mListViewHolder.animate().rotationX(360.0f).setDuration(3000).start();
- }
- }
- <LinearLayout xmlns:android="http://schemas.android.com/apk/res/android"
- xmlns:tools="http://schemas.android.com/tools"
- android:layout_width="match_parent"
- android:layout_height="match_parent"
- android:orientation="vertical"
- android:background="@color/view_animation_background"
- >
- <LinearLayout
- android:layout_width="match_parent"
- android:layout_height="wrap_content"
- android:orientation="horizontal"
- >
- <Button
- android:layout_width="wrap_content"
- android:layout_height="wrap_content"
- android:text="翻转"
- android:id="@+id/button_flip"
- />
- <Button
- android:layout_width="wrap_content"
- android:layout_height="wrap_content"
- android:text="Alpha"
- android:id="@+id/button_alpha"
- />
- <Button
- android:layout_width="wrap_content"
- android:layout_height="wrap_content"
- android:text="Scale"
- android:id="@+id/button_scale"
- />
- <Button
- android:layout_width="wrap_content"
- android:layout_height="wrap_content"
- android:text="Translate"
- android:id="@+id/button_translate"
- />
- </LinearLayout>
- <LinearLayout
- android:layout_width="match_parent"
- android:layout_height="wrap_content"
- android:orientation="horizontal"
- >
- <Button
- android:layout_width="wrap_content"
- android:layout_height="wrap_content"
- android:text="Rotate"
- android:id="@+id/button_rotate"
- />
- <Button
- android:layout_width="wrap_content"
- android:layout_height="wrap_content"
- android:text="Set"
- android:id="@+id/button_set"
- />
- </LinearLayout>
- <ListView
- android:layout_width="match_parent"
- android:layout_height="0dp"
- android:layout_weight="1"
- android:divider="@color/propertyanimator_background"
- android:dividerHeight="0.5dp"
- android:id="@+id/front_page_listview"
- />
- <ListView
- android:layout_width="match_parent"
- android:layout_height="0dp"
- android:layout_weight="1"
- android:divider="@color/propertyanimator_background"
- android:visibility="gone"
- android:dividerHeight="0.5dp"
- android:id="@+id/reverse_page_listview"
- />
- <ImageView
- android:layout_width="match_parent"
- android:layout_height="match_parent"
- android:scaleType="fitStart"
- android:visibility="visible"
- android:src="@drawable/liduohai"
- android:id="@+id/objectanimator_imageview"
- />
- </LinearLayout>
<1>如果权限允许的话,直接在类中增加此 setter 方法;
<2>修改封装类来增加此 setter 方法,并让该封装类来接收属性值并传给初始的对象;
<3>换用 ValueAnimator。
2.如果在调用 ObjectAnimator 的某个工厂方法时,我们只为 values... 参数指定了一个值,那此值将被认定为动画属性的结束值。 这样的话,动画显示的属性必须带有一个 getter 方法,用于获取动画的起始值。 此 getter 方法必须以get<propertyName>()的格式命名。 例如:假设属性名为foo,则需要有一个getFoo()方法。
3.动画属性的 getter 方法(如果必要的话)和 setter 方法所操作数据的类型必须与 ObjectAnimator 中设定的起始和结束值相同。
小结:今天我们主要了解了ValueAnimator和ObjectAnimator的概念及其它们关系和特点,并通过实例学习了如何使用这两个类实现了非常炫的动画效果。总结一下本文我们需要掌握的知识点:(1)了解并学会使用动画监听器;(2)了解Interpolator的概念及作用,并学会自定义Interpolator;(3)解TypeEvaluator的概念及作用,并学会自定义TypeEvaluator;(4)熟练使用ValueAnimator实现动画;(5)熟练使用ObjectAnimator实现动画;(6)使用ObjectAnimator实现动画的一些限制和需要注意的事项。
---------------------------------------------------------------------------------------------------------------
---------------------------------------------------------------------------------------------------------------
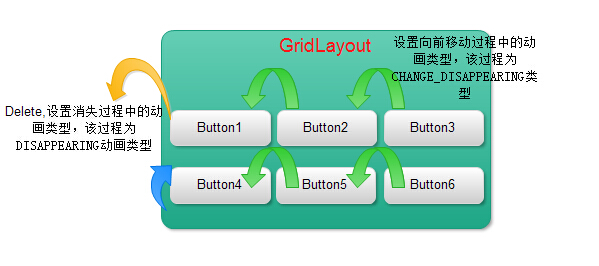
LayoutTransition 类介绍
CHANGE_APPEARING —— 由于容器中要显现一个新的元素,其它元素的变化需要动画显示。
DISAPPEARING —— 元素在容器中消失时需要动画显示。
CHANGE_DISAPPEARING —— 由于容器中某个元素要消失,其它元素的变化需要动画显示。

- /**
- * @author AndroidLeaf
- *ViewGroup中Layout的动画实现
- *主要知识点:
- *调用 LayoutTransition 对象的 setAnimator() 方法来定义下列动画方式,调用参数是 Animator
- *对象和以下 LayoutTransition 常量:
- * (1)APPEARING —— 元素在容器中显现时需要动画显示。
- * (2)CHANGE_APPEARING —— 由于容器中要显现一个新的元素,其它元素的变化需要动画显示。
- * (3)DISAPPEARING —— 元素在容器中消失时需要动画显示。
- * (4)CHANGE_DISAPPEARING —— 由于容器中某个元素要消失,其它元素的变化需要动画显示。
- */
- public class LayoutAnimatorFragment extends Fragment implements OnClickListener{
- private Button mButtonAdd;
- private Button mButtonReset;
- private GridLayout mGridLayout;
- private int buttonNumbers = 1;
- private LayoutTransition mLayoutTransition;
- @Override
- public void onActivityCreated(Bundle savedInstanceState) {
- // TODO Auto-generated method stub
- super.onActivityCreated(savedInstanceState);
- }
- @Override
- public View onCreateView(LayoutInflater inflater, ViewGroup container,
- Bundle savedInstanceState) {
- // TODO Auto-generated method stub
- View rootView = inflater.inflate(R.layout.fragment_layoutanimator, container, false);
- initViews(rootView);
- return rootView;
- }
- public void initViews(View rootView){
- mButtonAdd = (Button)rootView.findViewById(R.id.layout_animator_addbutton);
- mButtonAdd.setOnClickListener(this);
- mButtonReset = (Button)rootView.findViewById(R.id.layout_animator_resetbutton);
- mButtonReset.setOnClickListener(this);
- mGridLayout = (GridLayout)rootView.findViewById(R.id.layout_animator_gridview);
- mLayoutTransition = new LayoutTransition();
- //为GridLayout设置mLayoutTransition对象
- mGridLayout.setLayoutTransition(mLayoutTransition);
- mLayoutTransition.setStagger(LayoutTransition.CHANGE_APPEARING, 30);
- mLayoutTransition.setStagger(LayoutTransition.CHANGE_DISAPPEARING, 30);
- //设置每个动画持续的时间
- mLayoutTransition.setDuration(300);
- //初始化自定义的动画效果
- customLayoutTransition();
- }
- @Override
- public void onPause() {
- // TODO Auto-generated method stub
- super.onPause();
- }
- @Override
- public void onClick(View v) {
- // TODO Auto-generated method stub
- switch (v.getId()) {
- case R.id.layout_animator_addbutton:
- addButton();
- break;
- case R.id.layout_animator_resetbutton:
- resetButton();
- break;
- default:
- break;
- }
- }
- /**
- * 增加Button
- */
- public void addButton(){
- Button mButton = new Button(getActivity());
- LinearLayout.LayoutParams mLayoutParams = new LinearLayout.LayoutParams(50, 50);
- mButton.setLayoutParams(mLayoutParams);
- mButton.setText(String.valueOf(buttonNumbers++));
- mButton.setTextColor(Color.rgb(0, 0, 0));
- if(buttonNumbers % 2 == 1){
- mButton.setBackgroundColor(Color.rgb(45, 118, 87));
- }else{
- mButton.setBackgroundColor(Color.rgb(225, 24, 0));
- }
- mButton.setOnClickListener(new OnClickListener() {
- @Override
- public void onClick(View v) {
- // TODO Auto-generated method stub
- mGridLayout.removeView(v);
- }
- });
- mGridLayout.addView(mButton, Math.min(1, mGridLayout.getChildCount()));
- }
- /**
- * 删除所有的Button,重置GridLayout
- */
- public void resetButton(){
- mGridLayout.removeAllViews();
- buttonNumbers = 1;
- }
- public void customLayoutTransition(){
- /**
- * Add Button
- * LayoutTransition.APPEARING
- * 增加一个Button时,设置该Button的动画效果
- */
- ObjectAnimator mAnimatorAppearing = ObjectAnimator.ofFloat(null, "rotationY", 90.0f,0.0f)
- .setDuration(mLayoutTransition.getDuration(LayoutTransition.APPEARING));
- //为LayoutTransition设置动画及动画类型
- mLayoutTransition.setAnimator(LayoutTransition.APPEARING, mAnimatorAppearing);
- mAnimatorAppearing.addListener(new AnimatorListenerAdapter() {
- @Override
- public void onAnimationEnd(Animator animation) {
- // TODO Auto-generated method stub
- super.onAnimationEnd(animation);
- View view = (View) ((ObjectAnimator) animation).getTarget();
- view.setRotationY(0.0f);
- }
- });
- /**
- * Add Button
- * LayoutTransition.CHANGE_APPEARING
- * 当增加一个Button时,设置其他Button的动画效果
- */
- PropertyValuesHolder pvhLeft =
- PropertyValuesHolder.ofInt("left", 0, 1);
- PropertyValuesHolder pvhTop =
- PropertyValuesHolder.ofInt("top", 0, 1);
- PropertyValuesHolder pvhRight =
- PropertyValuesHolder.ofInt("right", 0, 1);
- PropertyValuesHolder pvhBottom =
- PropertyValuesHolder.ofInt("bottom", 0, 1);
- PropertyValuesHolder mHolderScaleX = PropertyValuesHolder.ofFloat("scaleX", 1.0f,0.0f,1.0f);
- PropertyValuesHolder mHolderScaleY = PropertyValuesHolder.ofFloat("scaleY", 1.0f,0.0f,1.0f);
- ObjectAnimator mObjectAnimatorChangeAppearing = ObjectAnimator.ofPropertyValuesHolder(this, pvhLeft,
- pvhTop,pvhRight,pvhBottom,mHolderScaleX,mHolderScaleY).setDuration(mLayoutTransition
- .getDuration(LayoutTransition.CHANGE_APPEARING));
- mLayoutTransition.setAnimator(LayoutTransition.CHANGE_APPEARING, mObjectAnimatorChangeAppearing);
- mObjectAnimatorChangeAppearing.addListener(new AnimatorListenerAdapter() {
- @Override
- public void onAnimationEnd(Animator animation) {
- // TODO Auto-generated method stub
- super.onAnimationEnd(animation);
- View view = (View) ((ObjectAnimator) animation).getTarget();
- view.setScaleX(1f);
- view.setScaleY(1f);
- }
- });
- /**
- * Delete Button
- * LayoutTransition.DISAPPEARING
- * 当删除一个Button时,设置该Button的动画效果
- */
- ObjectAnimator mObjectAnimatorDisAppearing = ObjectAnimator.ofFloat(null, "rotationX", 0.0f,90.0f)
- .setDuration(mLayoutTransition.getDuration(LayoutTransition.DISAPPEARING));
- mLayoutTransition.setAnimator(LayoutTransition.DISAPPEARING, mObjectAnimatorDisAppearing);
- mObjectAnimatorDisAppearing.addListener(new AnimatorListenerAdapter() {
- @Override
- public void onAnimationEnd(Animator animation) {
- // TODO Auto-generated method stub
- super.onAnimationEnd(animation);
- View view = (View) ((ObjectAnimator) animation).getTarget();
- view.setRotationX(0.0f);
- }
- });
- /**
- * Delete Button
- * LayoutTransition.CHANGE_DISAPPEARING
- * 当删除一个Button时,设置其它Button的动画效果
- */
- //Keyframe 对象中包含了一个时间/属性值的键值对,用于定义某个时刻的动画状态。
- Keyframe mKeyframeStart = Keyframe.ofFloat(0.0f, 0.0f);
- Keyframe mKeyframeMiddle = Keyframe.ofFloat(0.5f, 180.0f);
- Keyframe mKeyframeEndBefore = Keyframe.ofFloat(0.999f, 360.0f);
- Keyframe mKeyframeEnd = Keyframe.ofFloat(1.0f, 0.0f);
- PropertyValuesHolder mPropertyValuesHolder = PropertyValuesHolder.ofKeyframe("rotation",
- mKeyframeStart,mKeyframeMiddle,mKeyframeEndBefore,mKeyframeEnd);
- ObjectAnimator mObjectAnimatorChangeDisAppearing = ObjectAnimator.ofPropertyValuesHolder(this, pvhLeft,pvhTop,pvhRight,pvhBottom,mPropertyValuesHolder)
- .setDuration(mLayoutTransition.getDuration(LayoutTransition.CHANGE_DISAPPEARING));
- mLayoutTransition.setAnimator(LayoutTransition.CHANGE_DISAPPEARING, mObjectAnimatorChangeDisAppearing);
- mObjectAnimatorChangeDisAppearing.addListener(new AnimatorListenerAdapter() {
- @Override
- public void onAnimationEnd(Animator animation) {
- // TODO Auto-generated method stub
- super.onAnimationEnd(animation);
- View view = (View) ((ObjectAnimator) animation).getTarget();
- view.setRotation(0.0f);
- }
- });
- }
- }
- <LinearLayout xmlns:android="http://schemas.android.com/apk/res/android"
- xmlns:tools="http://schemas.android.com/tools"
- android:layout_width="match_parent"
- android:layout_height="match_parent"
- android:background="@color/view_animation_background"
- android:orientation="vertical"
- >
- <LinearLayout
- android:layout_width="match_parent"
- android:layout_height="wrap_content"
- android:orientation="horizontal"
- >
- <Button
- android:layout_width="0dp"
- android:layout_weight="1"
- android:layout_height="wrap_content"
- android:text="Add Button"
- android:id="@+id/layout_animator_addbutton"
- />
- <Button
- android:layout_width="0dp"
- android:layout_weight="1"
- android:layout_height="wrap_content"
- android:text="Reset Button"
- android:id="@+id/layout_animator_resetbutton"
- />
- </LinearLayout>
- <ScrollView
- android:layout_width="match_parent"
- android:layout_height="match_parent"
- >
- <GridLayout
- android:layout_width="match_parent"
- android:layout_height="match_parent"
- android:columnCount="5"
- android:animateLayoutChanges="true"
- android:id="@+id/layout_animator_gridview"
- />
- </ScrollView>
- </LinearLayout>

转http://blog.csdn.net/yegongheng/article/details/38455191
---------------------------------------------------------------------------------------------------------------
---------------------------------------------------------------------------------------------------------------
---------------------------------------------------------------------------------------------------------------
---------------------------------------------------------------------------------------------------------------


 649
649

 被折叠的 条评论
为什么被折叠?
被折叠的 条评论
为什么被折叠?
 到【灌水乐园】发言


