springboot 整合swagger2
1.引入swagger2依赖
<dependency>
            <groupId>io.springfox</groupId>
            <artifactId>springfox-swagger2</artifactId>
            <version>2.9.2</version>
        </dependency>
        <dependency>
            <groupId>io.springfox</groupId>
            <artifactId>springfox-swagger-ui</artifactId>
            <version>2.9.2</version>
        </dependency>```
2.增加Swagger配置类
@Configuration
@EnableSwagger2
public class Swagger2UIConfig{
/**
* springfox为我们提供了一个Docket(摘要的意思)类,我们需要把它做成一个Bean注入到spring中, 显然,我们需要一个配置文件,并通过一种方式(显然它会是一个注解)告诉程序,这是一个Swagger配置文件。
* @return
*/
@Bean
public Docket createRestApi() {
return new Docket(DocumentationType.SWAGGER_2)
.apiInfo(apiInfo())
.select()
.apis(RequestHandlerSelectors.basePackage("com.zhuge.order"))//这里填写项目package
.paths(PathSelectors.any())
.build();
}
/**
* springfox允许我们将信息组合成一个ApiInfo的类,作为构造参数传给Docket
* @return
*/
private ApiInfo apiInfo() {
return new ApiInfoBuilder()
.title("Spring Boot中使用Swagger2构建RESTful API")
.description("rest api 文档构建利器")
.termsOfServiceUrl("https://mp.csdn.net/mp_blog/manage/article?spm=3001.5298")
.version("1.0")
.build();
}
}```
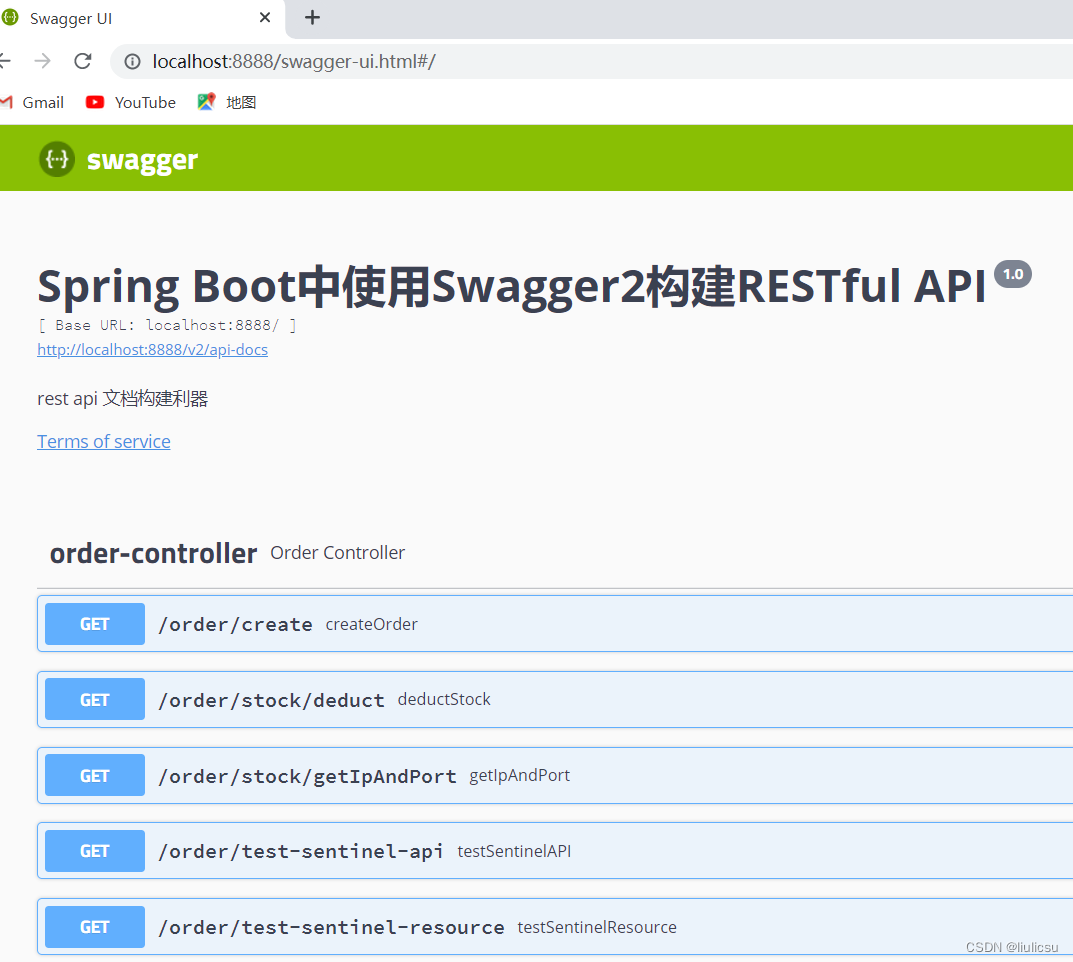
3.启动项目,进入localhost:8888/swagger2/swagger-ui.html#/路径进行访问,注意的是端口是自己项目指定的端口,我现在这个是8888,页面上就会展示controller中定义好的各个接口了


 454
454

 被折叠的 条评论
为什么被折叠?


