


上章我们讲了tableview, 这章我们讲tableview cell ,其实在数据源,第三步马上就用到cell 是不是重用
1.使用系统自定义的各种UITableViewCell的样式 重用
- (UITableViewCell *)tableView:(UITableView *)tableView cellForRowAtIndexPath:(NSIndexPath *)indexPath{
static NSString* indentifier = @"cell";
MyTableCell* cell = [tableView dequeueReusableCellWithIdentifier:indentifier];
if (!cell) {
}
cell.textLabel.text = [_data objectAtIndex:indexPath.row];
cell.detailTextLabel.text = @"detail";
cell.imageView.image = [UIImage imageNamed:@"checkmark.png"];
return cell;
}
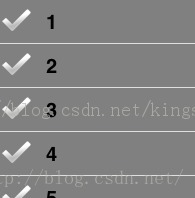
UITableViewCellStyle有三种样式
使用UITableViewCellStyleDefault的效果:
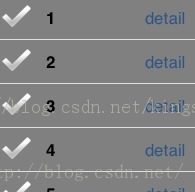
UITableViewCellStyleValue1
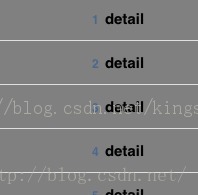
使用UITableViewCellStyleValue2的效果:
在UITableViewCell内默认是有contentview和accessoryView这两个subview的,contentview中的subview根据不同的cell的style会使用不同的布局。contentview和其中的默认subview会根据cell的编辑状态出现的控件自动缩进,自定义cell时可以把自定义控件添加在contentview中,也可以直接添加到cell中。
2.设置UITableViewCell的属性
//cell的右边辅助按钮的样式
cell.accessoryType = UITableViewCellAccessoryCheckmark;
//自定义cell右边的辅助按钮
cell.accessoryView = nil;
//自定义cell的背景
cell.backgroundView = nil;
//设置cell的contentview中的detail的文字内容
cell.detailTextLabel.text = @"";
//查看cell当前的编辑模式
int style = cell.editingStyle;
//设置当cell进入编辑模式时的辅助按钮样式
cell.editingAccessoryType = UITableViewCellAccessoryDisclosureIndicator;
//自定义cell进入编辑模式后辅助按钮
cell.editingAccessoryView = nil;
//获取cell的缩进级别
int level = cell.indentationLevel;
//获取cell的缩进宽度
float width = cell.indentationWidth;
//设置cell被选中时的背景
cell.selectedBackgroundView = nil;
//设置cell的选中状态样式
cell.selectionStyle = UITableViewCellSelectionStyleBlue;
//设置cell的contentview中的textlabel文字内容
cell.textLabel.text = @"";
3.自定义的UITableViewCell重写父类的方法
//初始化uitableviewcell后,自定义cell添加subview
- (id)initWithStyle:(UITableViewCellStyle)style reuseIdentifier:(NSString *)reuseIdentifier
//当cell被选中时,uitableview内部会自动调用该方法,重写该方法可以在cell被选中时做一些额外的操作
- (void)setSelected:(BOOL)selected animated:(BOOL)animated
//当cell处于高亮状态时,uitableview内部会自动调用该方法,重写该方法可以在cell处于高亮时做一些额外操作
-(void)setHighlighted:(BOOL)highlighted animated:(BOOL)animated
//重写layoutsubviews方法,为了查看当cell改变编辑状态时,有什么subview
-(void)layoutSubviews{
[super layoutSubviews];
NSArray* subs = self.subviews;
for (UIView* sub in subs) {
NSLog(@"view:%@",sub);
}
}
当进入删除编辑模式时,cell的subview有一个叫UITableViewCellDeleteConfirmationControl的subview,这代表删除按钮。可以修改该view达到修改删除按钮的位置,大小等属性。
当进入移动编辑模式时,cell的subview有一个叫UITableViewCellReorderControl的subview,这个代表移动按钮。可以修改该view达到修改移动按钮的位置,大小等属性。
当进入插入编辑模式时,cell的subview有一个叫UITableViewCellEditControl的subview,这个代表添加按钮。可以修改该view达到修改添加按钮的位置,大小等属性。
//当cell的状态变为编辑时,uitableview内部会自动调用该方法,重写该方法可以改变cell的布局
-(void)willTransitionToState:(UITableViewCellStateMask)state{
[super willTransitionToState:state];
}
//当cell的状态变为编辑时,uitableview内部会自动调用该方法,重写该方法可以改变cell的布局
-(void)didTransitionToState:(UITableViewCellStateMask)state{
[super didTransitionToState:state];
/*
typedef NS_OPTIONS(NSUInteger, UITableViewCellStateMask) {
UITableViewCellStateDefaultMask = 0,
UITableViewCellStateShowingEditControlMask = 1 << 0,
UITableViewCellStateShowingDeleteConfirmationMask = 1 << 1
};
*/
//滑动出现的删除按钮state是2的,编辑状态下的删除按钮state是3的
if (state == UITableViewCellStateShowingDeleteConfirmationMask||state==3) {
for (UIView *subview in self.subviews) {
//cell的subview为UITableViewCellDeleteConfirmationControl时,代表是删除按钮
if ([NSStringFromClass([subview class]) isEqualToString:@"UITableViewCellDeleteConfirmationControl"]) {
UIView *deleteButtonView = subview;
CGRect f = deleteButtonView.frame;
f.origin.x -= 50;
deleteButtonView.frame = f; }
}
}
//插入和移动的编辑状态state都是1
else if(state==UITableViewCellStateShowingEditControlMask){
for (UIView *subview in self.subviews) {
NSString* type = @"";
//判断如果cell当前是插入模式,则寻找UITableViewCellEditControl的subview,代表添加按钮
if (self.editingStyle==UITableViewCellEditingStyleInsert) {
type = @"UITableViewCellEditControl";
}
//否则寻找UITableViewCellReorderControl的subview,代表移动按钮
else type = @"UITableViewCellReorderControl";
if ([NSStringFromClass([subview class]) isEqualToString:type]) {
UIView *deleteButtonView = [subview.subviews objectAtIndex:0];
CGRect f = deleteButtonView.frame;
f.origin.x -= 50;
deleteButtonView.frame = f;
}
}
}
4.UITableViewCell自定义背景颜色
方法1:
通过修改contentview的backgroundcolor
方法2:
创建一个uiview,设置它的backgroundcolor后再添加到cell里
方法3:
通过在- (void)tableView:(UITableView *)tableView willDisplayCell:(UITableViewCell *)cell forRowAtIndexPath:(NSIndexPath *)indexPath的回调中设置cell的backgroundcolor
//创建UITableViewCell
UITableViewCell *cell = [[UITableViewCellalloc]
initWithStyle:UITableViewCellStyleSubtitlereuseIdentifier:nil];
[cell.textLabel setBackgroundColor:[UIColor clearColor]];//清空标签背景颜色
cell.backgroundView =xx;//设置背景图片
cell.backgroundVColor =xx;
cell.selectedBackgroundView = selectedBgView; //设置选中时的背景颜色
cell.accessoryView = xxxView; //设置右边视图
[cell setAccessoryType:UITableViewCellAccessoryNone]; //设置右侧箭头
[self setSelectionStyle:UITableViewCellSelectionStyleNone];//选中样式
cell.selectionStyle = UITableViewCellSelectionStyleBlue;
//设置cell的高度
- (CGFloat)tableView:(UITableView *)tableViewheightForRowAtIndexPath:(NSIndexPath *)indexPath
contentView下默认有3个子视图,其中的2个是UILabel,通过textLabel和detailTextLabel属性访问,第3个是UIImageView,通过imageView属性访问.
UITableViewCellStyleDefault,UITableViewCellStyleValue1, UITableViewCellStyleValue2,UITableViewCellStyleSubtitle
/**
单元格优化
1. 标示符统一,使用static的目的可以保证表格标示符永远只有一个
2. 首先在缓冲池中找名为"myCell"的单元格对象
3. 如果没有找到,实例化一个新的cell
**/
- (UITableViewCell *)tableView:(UITableView *)tableViewcellForRowAtIndexPath:(NSIndexPath *)indexPath{
static NSString *cellIdentifier = @"myCell";
UITableViewCell *cell = [tableViewdequeueReusableCellWithIdentifier:cellIdentifier];
//使用这种方法不用判断下面的cell
UITableViewCell *cell = [tableViewdequeueReusableCellWithIdentifier:cellIdentifierforIndexPath:indexPath];
if (cell == nil) {
cell = [[UITableViewCellalloc]initWithStyle:UITableViewCellStyleDefaultreuseIdentifier:cellIdentifier];
}
return cell;
}
表格的编辑模式
删除、插入
- (void)setEditing:(BOOL)editing animated:(BOOL)animated; 开启表格编辑状态
- (UITableViewCellEditingStyle)tableView:(UITableView *)tableView editingStyleForRowAtIndexPath:(NSIndexPath *)indexPath{
返回表格编辑编辑样式。不实现默认都是删除
return editingStyle : UITableViewCellEditingStyleDelete,UITableViewCellEditingStyleInsert
}
- (void)tableView:(UITableView *)tableView commitEditingStyle:(UITableViewCellEditingStyle)editingStyleforRowAtIndexPath:(NSIndexPath *)indexPath{
//根据editingStyle处理是删除还是添加操作
完成删除、插入操作刷新表格
- (void)insertRowsAtIndexPaths:(NSArray *)indexPathswithRowAnimation:(UITableViewRowAnimation)animation;
-(void)deleteRowsAtIndexPaths:(NSArray *)indexPathswithRowAnimation:(UITableViewRowAnimation)animation;
}
- (void)tableView:(UITableView *)tableView moveRowAtIndexPath:(NSIndexPath *)sourceIndexPathtoIndexPath:(NSIndexPath *)destinationIndexPath
sourceIndexPath 移动的行
destinationIndexPath 目标的
自定义表格行UITableViewCell
storyboard方式创建:
直接拖到UITableView里面设置UITableViewCell
注意:
1.通过XIB或者Storyboard自定义单元格时,在xib和Storyboard里面需要指定单元格的可重用标示符Identifier
2.注意表格的优化中的差别
在Storyboard中两者等效
xxCell *cell =[tableView dequeueReusableCellWithIdentifier:CellIdentifier];
xxCell *cell1 = [tableView dequeueReusableCellWithIdentifier:CellIdentifier forIndexPath:indexPath];
在代码创建中差别: 这是在viewDidload中
用代码创建cell中的处理和nib一样,注册了cell就有系统接管并且可以用带forIndexPath的方法,没有注册就要自己去实例化cell,不能用带forIndexPath的方法
[tableView registerClass:XxxCellclass] forCellReuseIdentifier:@"xxCell"];
xib方式创建:
//注册Identifier
- (void)viewDidLoad{
[super viewDidLoad];
/**
注意:以下几句注册XIB的代码,一定要在viewDidLoad中!
注册XIB文件,获得根视图,并且转换成TableView,为tableView注册xib
Identifier名要在xib文件中定义,并且保持一致
**/
UINib *nib = [UINibnibWithNibName:@"BookCell"bundle:[NSBundlemainBundle]];
UITableView *tableView = (UITableView *)self.view;
[tableView registerNib:nibforCellReuseIdentifier:@"bookCell"];
}
//没有注册Identifier只能使用下面方法
static NSString *CellIdentifier= @"bookCell";
BookCell *cell =[tableView dequeueReusableCellWithIdentifier:CellIdentifier];
if (cell == nil) {
cell = [[BookCell alloc]initWithStyle:UITableViewCellStyleDefaultreuseIdentifier:CellIdentifier];
NSBundle *bundle = [NSBundlemainBundle];
NSArray *array = [bundleloadNibNamed:@"BookCell"owner:nil options:nil];
cell = [array lastObject];
}
代码方式创建:
1. 建立UITableViewCell的类,继承UITableViewCell
2. 往cell里面加入view的时候注意点:
//新建的组件放入contentView中
[self.contentViewaddSubview:xxView];
//设置图片拉伸属性stretch
UIImage *normalImage = [UIImageimageNamed:@"xx.png"];
normalImage= [normalImage stretchableImageWithLeftCapWidth:
normalImage.size.width /2 topCapHeight:normalImage.size.height /2];
//在tableView里面viewDiDLoad里面要注册cell类
[tableView registerClass:XxxCellclass] forCellReuseIdentifier:@"xxCell"];
自定义表格中Header
//自定义表格在这个方法中定义
-(UIView *)tableView:(UITableView *)tableView viewForHeaderInSection:(NSInteger)section
-(NSString *)tableView:(UITableView *)tableView titleForHeaderInSection:(NSInteger)section


 1686
1686

 被折叠的 条评论
为什么被折叠?
被折叠的 条评论
为什么被折叠?
 到【灌水乐园】发言


