


asterisk官网有安装的具体步骤和教程,这里我主要参考官网中的源码安装方式。链接
1、关闭SELinux、防火墙
sed -i 's/\(^SELINUX=\).*/\SELINUX=disabled/' /etc/sysconfig/selinux
service iptables stop
2、系统更新
yum install -y epel-release
yum update -y
3、安装依赖库和附加服务
yum install -y gcc gcc-c++ lynx bison mysql-devel mysql-server php php-mysql php-pear php-mbstring tftp-server httpd make ncurses-devel libtermcap-devel sendmail sendmail-cf caching-nameserver sox newt-devel libxml2-devel libtiff-devel audiofile-devel gtk2-devel subversion kernel-devel git subversion kernel-devel php-process crontabs cronie cronie-anacron wget vim php-xml uuid-devel libtool sqlite-devel unixODBC mysql-connector-odbc
4、下载:
1)asterisk:
cd /usr/local/scr/
wget https://downloads.asterisk.org/pub/telephony/asterisk/asterisk-14-current.tar.gz
2)libpri:
You'll only need this if you are going to use DAHDI with ISDN interface hardware (such as T1/E1/J1/BRI cards).
wget http://downloads.asterisk.org/pub/telephony/libpri/old/libpri-1.5.0.tar.gzcd /usr/local/src/
wget https://downloads.asterisk.org/pub/telephony/dahdi-linux-complete/dahdi-linux-complete-current.tar.gz注:启动dahdi时会遇到一个问题,dahdi: unrecognized service,原因是版本太高了,后来选择了一个旧版本的就可以了。
cd /usr/local/src/
wget http://downloads.asterisk.org/pub/telephony/dahdi-linux-complete/releases/dahdi-linux-complete-2.6.0+2.6.0.tar.gz587
tar zxvf dahdi-linux-complete-2.6.0+2.6.0.tar.gz
cd dahdi-linux-complete-2.6.0+2.6.0
make all
make install
make config
/etc/init.d/dahdi restart
chkconfig dahdi on5、解压、安装:
1)首先,在编译以上这些源码的时候,可能会报一些错,需要安装一下依赖:
A、You do not appear to have the sources for the.x86_64 kernel installed.
yum install "kernel-devel-uname-r == $(uname -r)" B、g++: Command not found:
yum -y update gcc
yum -y install gcc+ gcc-c++
2)编译、安装libpri:
tar xzvf libpri-1.5.0.tar.gz
cd /usr/src/libpri-1.5.0
make
make install
3)编译、安装dadhi:
如上
4)编译、安装jpsip:
git clone https://github.com/asterisk/pjproject pjproject
unzip pjproject-master.zip
./configure --prefix=/usr --enable-shared --disable-sound --disable-resample --disable-video --disable-opencore-amr CFLAGS='-O2 -DNDEBUG'
make dep
make
make install
ldconfig
ldconfig -p | grep pj
注:可能会遇到这个问题:[libpjsua2-x86_64-unknown-linux-gnu.a] Error 2
deleting the pjproject folder, download it and finally run configure and make commands did the trick for me 5)编译asterisk:
cd /usr/local/src/asterisk-14.X.Y
./configure
在编译的时候会遇到很多问题:
A、提示: JSON support not found
解决:安装jansson
git clone https://github.com/akheron/jansson.git
unzip jansson-master.zip
cd jansson-master
autoreconf
这时可能汇报:centos -bash: autoreconf: command not found
yum -y install autoconf automake libtool
yum -y install libffi-dev
然后,再
./configure --libdir=/usr/lib64
make
make installyum -y install bison
yum -y install bison-devel
yum -y install ncurses
yum -y install ncurses-devel
yum -y install zlib
yum -y install zlib-devel
yum -y install openssl
yum -y install openssl-devel
yum -y install gnutls-devel
yum -y install gcc
yum -y install gcc-c++C、 uuid support not found (this typically means the libjansson development package is missing):
yum -y install uuid-devel
yum -y install libuuid libuuid-devel
D、configure: *** The Asterisk menuselect tool requires the 'libxml2' development package.
configure: *** Please install the 'libxml2' development package.
wget http://download.chinaunix.net/down.php?id=28493&ResourceID=6095&site=1
./configure
make
make install
E、configure: error: *** Asterisk now uses SQLite3 for the internal Asterisk database.
wget http://download.chinaunix.net/down.php?id=19777&ResourceID=9862&site=1
./configure
make
make install
各种问题的解决可以参考:http://blog.sina.com.cn/s/blog_7a3dc0c90102vwvu.html
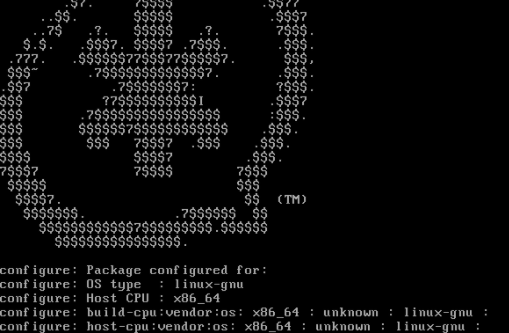
编译成功后,会出现如下图案:
6)make menuselect
# make menuselect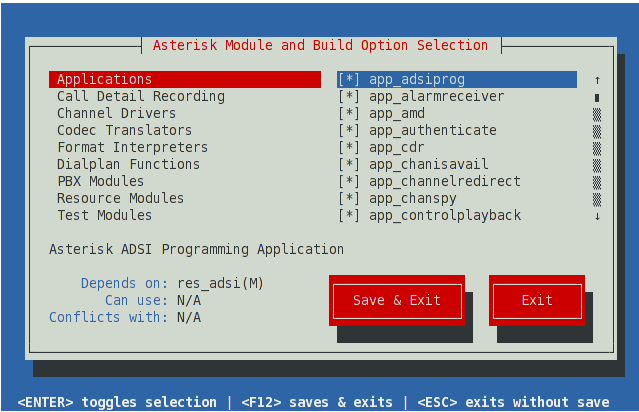
7)安装asterisk:
make
make installng/parking_controller.o parking/parking_devicestate.o parking/parking_manager.o parking/parking_tests.o parking/parking_ui.o -> res_parking.so
[CC] res_phoneprov.c -> res_phoneprov.o
[LD] res_phoneprov.o -> res_phoneprov.so
[CC] res_pjproject.c -> res_pjproject.o
[LD] res_pjproject.o -> res_pjproject.so
[CC] res_pjsip_acl.c -> res_pjsip_acl.o
[LD] res_pjsip_acl.o -> res_pjsip_acl.so
[CC] res_pjsip_authenticator_digest.c -> res_pjsip_authenticator_digest.o
[LD] res_pjsip_authenticator_digest.o -> res_pjsip_authenticator_digest.so
[CC] res_pjsip.c -> res_pjsip.o
[CC] res_pjsip/config_auth.c -> res_pjsip/config_auth.o
[CC] res_pjsip/config_domain_aliases.c -> res_pjsip/config_domain_aliases.o
[CC] res_pjsip/config_global.c -> res_pjsip/config_global.o
[CC] res_pjsip/config_system.c -> res_pjsip/config_system.o
[CC] res_pjsip/config_transport.c -> res_pjsip/config_transport.o
res_pjsip/config_transport.c: In function ‘transport_apply’:
res_pjsip/config_transport.c:604: error: ‘pjsip_tcp_transport_cfg’ has no member named ‘sockopt_params’
res_pjsip/config_transport.c:605: error: ‘pjsip_tcp_transport_cfg’ has no member named ‘sockopt_params’
res_pjsip/config_transport.c:606: error: ‘pjsip_tcp_transport_cfg’ has no member named ‘sockopt_params’
res_pjsip/config_transport.c:607: error: ‘pjsip_tcp_transport_cfg’ has no member named ‘sockopt_params’
res_pjsip/config_transport.c:608: error: ‘pjsip_tcp_transport_cfg’ has no member named ‘sockopt_params’
make[1]: *** [res_pjsip/config_transport.o] Error 1
make: *** [res] Error 2
# cd /usr/src
# wget http://www.pjsip.org/release/2.3/pjproject-2.3.tar.bz2
# tar -jxvf pjproject-2.3.tar.bz2
cd pjproject-2.3
# ./configure CFLAGS="-DNDEBUG -DPJ_HAS_IPV6=1" --prefix=/usr --libdir=/usr/lib64 --enable-shared --disable-video --disable-sound --disable-opencore-amr
# make dep
# make
# make install
# ldconfig -p | grep pj
最后,在重新make asterisk。
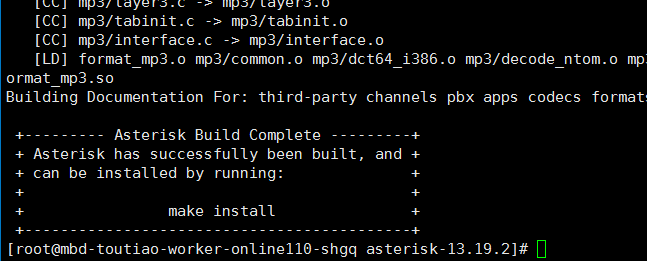
make成功后会出现
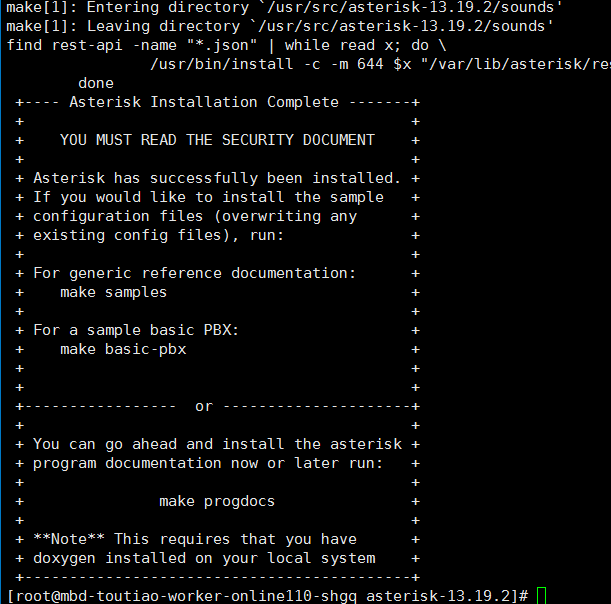
make install成功后,会出现
8)安装sample:
# make samples9)运行asterisk:
# /usr/sbin/asterisk
# ps -ef | grep aste
root      4177 32476  0 19:09 pts/1    00:00:00 grep aste
root      4273     1  0  2016 ?        00:02:20 /usr/libexec/postfix/master
root      8742     1  0 Mar14 ?        00:03:42 /usr/sbin/asterisk
接下来一篇文章会介绍asterisk的hello world。
参考:
https://my.oschina.net/u/2404183/blog/709215
http://blog.topspeedsnail.com/archives/5497
http://www.digium.com/blog/2015/02/24/install-asterisk-13-pjsip-centos-6/
http://www.digium.com/blog/2012/11/05/how-to-install-asterisk-11-on-centos-6/
http://www.cnblogs.com/welhzh/p/4682809.html
https://hello.lanbing.org/post/2013142.html


 5473
5473

 被折叠的 条评论
为什么被折叠?
被折叠的 条评论
为什么被折叠?
 到【灌水乐园】发言


