


以前做过snmp的东西久了都快忘了,突然又要做才发觉啥都想不起来了,悲剧了,先复习下。
这里介绍的是net-snmp代理的移植,是代理哦,是net-snmp哦,想搞snmp++的就不要看了。
首先介绍下我的环境,我是XP的主系统,然后虚拟机,然后虚拟机中的redhat9,net-snmp的版本是什么?好像是5.2.9什么的,应该不重要。接着介绍移植吧。首先在redhat9中需要安装net-snmp的完整版,因为我们需要通过主机作为管理端。具体安装过程就不说了,傻瓜一点就直接configure,make,make install就可以了,安装完成后需要配置snmpd.conf,具体怎么配置就不详细介绍了,我把自己的配置代码给出来一看就明白了:
# sec.name source community
com2sec local localhost public
com2sec mynetwork default public
####
# Second, map the security names into group names:
# sec.model sec.name
group MyRWGroup v1 local
group MyRWGroup v2c local
group MyRWGroup usm local
group MyROGroup v1 mynetwork
group MyROGroup v2c mynetwork
group MyROGroup usm mynetwork
####
# Third, create a view for us to let the groups have rights to:
# incl/excl subtree mask
view all included .1 80
####
# Finally, grant the 2 groups access to the 1 view with different
# write permissions:
# context sec.model sec.level match read write notif
access MyROGroup "" any noauth exact all none none
access MyRWGroup "" any noauth exact all all none
# -----------------------------------------------------------------------------
# status of notWritable.
syslocation Right here, right now.
syscontact Me <me@somewhere.org>
# Make sure mountd is running
proc mountd
# Make sure there are no more than 4 ntalkds running, but 0 is ok too.
proc ntalkd 4
# Make sure at least one sendmail, but less than or equal to 10 are running.
proc sendmail 10 1
# a simple hello world
exec echotest /bin/echo hello world
# Check the / partition and make sure it contains at least 10 megs.
disk / 10000
# Check for loads:
load 12 14 14
***********************************************************************
上面的配置在下位机中也是可以使用的。
下面介绍交叉编译吧,我使用的下位机其实就是arm2410的开发板,因此需要重新编译net-snmp。首先进入net-snmp目录,然后
1 ./configure --host=arm-linux --target=arm --with-cc=arm-linux-gcc --with-ar=arm-linux-ar --prefix=/usr/net-snmp --with-endianness=little --enable-mini-agent
2 make LDFLAGS="-static"
3 make install
4 将snmpd文件上传到开发板的/usr/sbin目录,snmpd.conf放到/usr/share/snmp/snmpd.conf
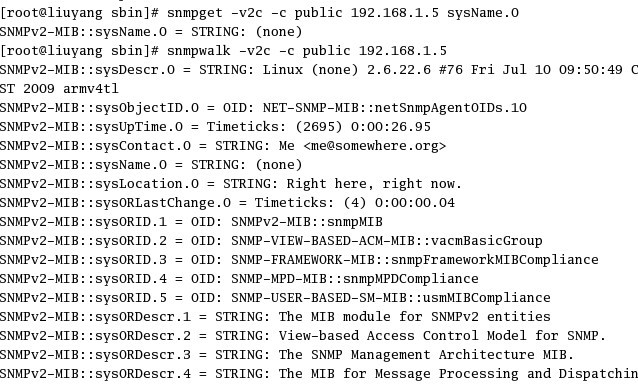
OK,现在可以通过snmp命令在管理端查询设置开发板状态了。。我这里开发板的IP是192.168.1.5


 654
654

 被折叠的 条评论
为什么被折叠?
被折叠的 条评论
为什么被折叠?
 到【灌水乐园】发言


