


教程
图形验证码属于老生常谈了,具体细节这里就不说了。生成图形验证码的办法非常多,今天讲解一种通过Kaptcha组件快速生成图形验证码的方法。
Kaptcha是谷歌开源的一款简单实用的图形验证码组件。我个人推荐它的最大原因是容易上手,采用约定大于配置的方式,快速契合到项目中。
话不多说,我们看看该如何使用它:
<dependency>
   <groupId>com.google.code.kaptcha</groupId>
   <artifactId>kaptcha</artifactId>
   <version>2.3</version>
 </dependency>
@Component
public class KaptchaConfig {
@Bean
public DefaultKaptcha getDefaultKaptcha(){
com.google.code.kaptcha.impl.DefaultKaptcha defaultKaptcha = new com.google.code.kaptcha.impl.DefaultKaptcha();
Properties properties = new Properties();
properties.put("kaptcha.border", "no");
properties.put("kaptcha.textproducer.font.color", "red");
properties.put("kaptcha.image.width", "213");
properties.put("kaptcha.image.height", "88");
properties.put("kaptcha.textproducer.font.size", "45");
properties.put("kaptcha.session.key", "verifyCode");
properties.put("kaptcha.textproducer.char.space", "6");
properties.put("kaptcha.obscurificator.impl", "com.google.code.kaptcha.impl.WaterRipple");
// properties.put("kaptcha.textproducer.font.names", "宋体,楷体,微软雅黑");
properties.put("kaptcha.background.clear.from", "yellow");
properties.put("kaptcha.background.clear.to", "green");
Config config = new Config(properties);
defaultKaptcha.setConfig(config);
return defaultKaptcha;
}
}| 配置名 | 配置作用 | 默认值 |
| kaptcha.border | 图片边框,合法值:yes , no | yes |
| kaptcha.border.color | 边框颜色,合法值: r,g,b (and optional alpha) 或者 white,black,blue. | black |
| kaptcha.image.width | 图片宽 | 200 |
| kaptcha.image.height | 图片高 | 50 |
| kaptcha.producer.impl | 图片实现类 | com.google.code.kaptcha.impl.DefaultKaptcha |
| kaptcha.textproducer.impl | 文本实现类 | com.google.code.kaptcha.text.impl.DefaultTextCreator |
| kaptcha.textproducer.char.string | 文本集合,验证码值从此集合中获取 | abcde2345678gfynmnpwx |
| kaptcha.textproducer.char.length | 验证码长度 | 5 |
| kaptcha.textproducer.font.names | 字体 | Arial, Courier |
| kaptcha.textproducer.font.size | 字体大小 | 40px. |
| kaptcha.textproducer.font.color | 字体颜色,合法值: r,g,b 或者 white,black,blue. | black |
| kaptcha.textproducer.char.space | 文字间隔 | 2 |
| kaptcha.noise.impl | 干扰实现类 | com.google.code.kaptcha.impl.DefaultNoise |
| kaptcha.noise.color | 干扰 颜色,合法值: r,g,b 或者 white,black,blue. | black |
| kaptcha.obscurificator.impl | 图片样式:<br />水纹 com.google.code.kaptcha.impl.WaterRipple <br /> 鱼眼 com.google.code.kaptcha.impl.FishEyeGimpy <br /> 阴影 com.google.code.kaptcha.impl.ShadowGimpy | com.google.code.kaptcha.impl.WaterRipple |
| kaptcha.background.impl | 背景实现类 | com.google.code.kaptcha.impl.DefaultBackground |
| kaptcha.background.clear.from | 背景颜色渐变,开始颜色 | light grey |
| kaptcha.background.clear.to | 背景颜色渐变, 结束颜色 | white |
| kaptcha.word.impl | 文字渲染器 | com.google.code.kaptcha.text.impl.DefaultWordRenderer |
| kaptcha.session.key | session key | KAPTCHA_SESSION_KEY |
| kaptcha.session.date | session date |
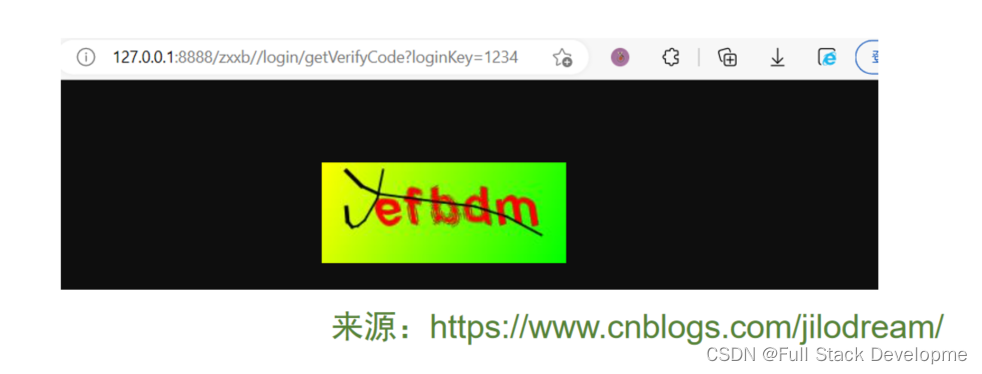
@GetMapping("/login/getVerifyCode")
    public void getVerifyCode(String loginKey,
                              HttpServletRequest httpServletRequest,
                              HttpServletResponse httpServletResponse) {
        try {
            log.warn("query verify Code" + loginKey);
            loadService.getVerifyCode(loginKey, httpServletRequest, httpServletResponse);
        } catch (Exception e) {
            log.error("get verify Code failed :", e);
        }
    }
public void getVerifyCode(String loginKey, HttpServletRequest httpServletRequest,
HttpServletResponse httpServletResponse) throws IOException {
ByteArrayOutputStream imgOutputStream = new ByteArrayOutputStream();
try {
//生产验证码字符串并保存到session中
String verifyCode = captchaProducer.createText();
// httpServletRequest.getSession().setAttribute("verifyCode", verifyCode); // 写入会话
//redisCache.setVerifyInfo(loginKey, verifyCode); //写入redis
captchaMap.put(loginKey, verifyCode);//写入内存
log.warn("reset verify code key {}, code {}", loginKey, verifyCode);
BufferedImage challenge = captchaProducer.createImage(verifyCode);
ImageIO.write(challenge, "jpg", imgOutputStream);
} catch (IllegalArgumentException | IOException e) {
httpServletResponse.sendError(HttpServletResponse.SC_NOT_FOUND);
return;
}
byte[] captchaOutputStream = imgOutputStream.toByteArray();
httpServletResponse.setHeader("Cache-Control", "no-store");
httpServletResponse.setHeader("Pragma", "no-cache");
httpServletResponse.setDateHeader("Expires", 0);
httpServletResponse.setContentType("image/jpeg");
try (ServletOutputStream responseOutputStream = httpServletResponse.getOutputStream()) {
responseOutputStream.write(captchaOutputStream);
responseOutputStream.flush();
} catch (IOException ex) {
log.error("find ex in create a new verify Code", ex);
}
}


 4518
4518


 被折叠的 条评论
为什么被折叠?
被折叠的 条评论
为什么被折叠?
 到【灌水乐园】发言


