


█ 【安卓学习之第三方库】 消息推送之极光推送
█ 相关文章:
-
● 【安卓学习之第三方库】库的使用2-jar类库的使用(以dom4j为例)和升级(以极光推送为例)
● 【安卓学习之第三方库】 消息推送之极光推送
● 【安卓学习之第三方库】 消息推送之阿里云推送
█ 读前说明:
-
● 本文通过学习别人写demo,学习一些课件,参考一些博客,’学习相关知识,如果涉及侵权请告知
● 本文只简单罗列相关的代码实现过程
● 涉及到的逻辑以及说明也只是简单介绍,主要当做笔记,了解过程而已
█ 极光后台:
-
● 两年没有进极光后台,发现界面发生了很大变化,功能也有些变化,这边就整理下,重新学习下
● 后台创建应用,【推送设置】里面设置应用包名,获取AppKey和Master Secret:
AppKey 为极光平台应用的唯一标识。
Master Secret 用于服务器端 API 调用时与 AppKey 配合使用达到鉴权的目的,请保管好 Master Secret 防止外泄。

● 推送设置,主要设置应用包名,只能设置一次,同时可以下载demo以及进入集成开发文档的快捷入口:(可以说,极光还是挺人性化的,让大家集成方便,找资料也方便,当然还提供了论坛、qq群等方式供大家去讨论,此外高效,稳定,免费,大家都喜欢)
应用包名 :Android应用程序的包名(Package Name)。在 AndroidManifest.xml 里配置使用的。
该包名推送业务和 IM 共同使用,一旦指定,不可更改。
快速集成(Android):这里下载已经配置好了当前应用包名与 AppKey 的示例应用,导入到 Eclipse 里马上就可以运行起来并接收推送。
也可以直接复制这些配置到你自己的应用里去。

● 推送测试,下载demo或者集成sdk后,在没有后台配合的情况下,就可以直接通过该界面进行推送测试,正常主要都是用【自定义消息】(一般都是json字符串,再转换成对象),当然也可以用【发送通知】。


● 推送历史查看,因为我们直接通过后台网页发送推送消息,所以要选择web:
如果在极光后台网页上面发送的消息,直接选择web查看;如果是自己公司的后台通过调用api发送推送的,就选中api查看。

● app测试,下载demo,界面如下:

● app测试,收到消息推送,含【发送通知】和【自定义消息】:

█ demo结构:
-
● demo下载后,工程名为:JPushExample(1630873),打开工程,代码目录如下:

● build.gradle文件如下:
apply plugin: 'com.android.application'

android {
    compileSdkVersion 26
    defaultConfig {
        applicationId "com.xxx.xxxx"// 值来自开发者平台设置的【应用包名】
        minSdkVersion 9
        targetSdkVersion 26
        versionCode 360
        versionName "3.6.0"

        manifestPlaceholders = [
                JPUSH_APPKEY : "012345678901234567890123",//值来自开发者平台取得的【AppKey】
                JPUSH_CHANNEL: "default_developer",
        ]
    }

    buildTypes {
        release {
            minifyEnabled false
            proguardFiles getDefaultProguardFile('proguard-android-optimize.txt'), 'proguard-rules.pro'
        }
    }
    sourceSets {
        main {
            jniLibs.srcDirs = ['libs']
        }
    }

}

dependencies {
    implementation fileTree(dir: 'libs', include: ['*.jar'])
}
● AndroidManifest.xml文件如下:
<?xml version="1.0" encoding="utf-8"?>
<manifest xmlns:android="http://schemas.android.com/apk/res/android"
    xmlns:tools="http://schemas.android.com/tools"
    package="com.example.jpushdemo"// 注意,这个包名可以和平台设置的【应用包名】不一样,是假包名
    >

    <application
        android:icon="@drawable/ic_launcher"
        android:allowBackup="false"
        android:label="@string/app_name"
        android:name="com.example.jpushdemo.ExampleApplication"
        tools:ignore="GoogleAppIndexingWarning">

        <!-- User defined.  For test only  用户自定义的广播接收器-->
        <receiver
            android:name="com.example.jpushdemo.MyReceiver"
            android:enabled="true">
            <intent-filter>
                <action android:name="cn.jpush.android.intent.REGISTRATION" /> <!--Required  用户注册SDK的intent-->
                <action android:name="cn.jpush.android.intent.MESSAGE_RECEIVED" /> <!--Required  用户接收SDK消息的intent-->
                <action android:name="cn.jpush.android.intent.NOTIFICATION_RECEIVED" /> <!--Required  用户接收SDK通知栏信息的intent-->
                <action android:name="cn.jpush.android.intent.NOTIFICATION_OPENED" /> <!--Required  用户打开自定义通知栏的intent-->
                <action android:name="cn.jpush.android.intent.CONNECTION" /><!-- 接收网络变化 连接/断开 since 1.6.3 -->
                <category android:name="${applicationId}" />
            </intent-filter>
        </receiver>

        <!-- User defined.  For test only  用户自定义接收消息器,3.0.7开始支持,目前新tag/alias接口设置结果会在该广播接收器对应的方法中回调-->
        <!--since 3.3.0 接收JPush相关事件-->

		<!-- Required since 3.0.7 -->
		<!-- 新的 tag/alias 接口结果返回需要开发者配置一个自定的广播 -->
		<!-- 3.3.0开始所有事件将通过该类回调 -->
		<!-- 该广播需要继承 JPush 提供的 JPushMessageReceiver 类, 并如下新增一个 Intent-Filter -->
        <receiver android:name="com.example.jpushdemo.PushMessageReceiver">
            <intent-filter>
                <action android:name="cn.jpush.android.intent.RECEIVE_MESSAGE" />
                <category android:name="${applicationId}"></category>
            </intent-filter>
        </receiver>

    </application>
</manifest>
█ demo讲解:
-
● 首页需要在Application中进行初始化JPush(如果已经初始化JPush,但没有登录成功,则执行重新登录):
	JPushInterface.setDebugMode(true); 	// 设置开启日志,发布时请关闭日志
    JPushInterface.init(this);     		// 初始化 JPush
● 初始化后,就可以开始接收推送消息,这边我们注意到两个文件:
MyReceiver:用户自定义的广播接收器
PushMessageReceiver:用户自定义接收消息器,3.0.7开始支持,
注 : **从JPush3.0.7开始,需要配置继承JPushMessageReceiver的广播,原来如果配了MyReceiver现在可以弃用
● 观察可以发现这两个文件其实是一样的,MyReceiver是将所有的消息处理都在同一个方法中,想要知道是什么事件,需要自己取值判断,而PushMessageReceiver是将不同的消息处理放在不同的方法中,提前给你分类了:
这边重点关注4个地方:【自定义消息】推送处理、【发送通知】推送处理、【发送通知】通知打开处理、和极光服务器的连接状态。
public class MyReceiver extends BroadcastReceiver {
	private static final String TAG = "JIGUANG-Example";

	@Override
	public void onReceive(Context context, Intent intent) {
		try {
			Bundle bundle = intent.getExtras();
			Logger.d(TAG, "[MyReceiver] onReceive - " + intent.getAction() + ", extras: " + printBundle(bundle));

			if (JPushInterface.ACTION_REGISTRATION_ID.equals(intent.getAction())) {
				String regId = bundle.getString(JPushInterface.EXTRA_REGISTRATION_ID);
				Logger.d(TAG, "[MyReceiver] 接收Registration Id : " + regId);
				//send the Registration Id to your server...

			} else if (JPushInterface.ACTION_MESSAGE_RECEIVED.equals(intent.getAction())) {
				Logger.d(TAG, "[MyReceiver] 接收到推送下来的自定义消息: " + bundle.getString(JPushInterface.EXTRA_MESSAGE));
			   // ######################【自定义消息】推送处理######################

			} else if (JPushInterface.ACTION_NOTIFICATION_RECEIVED.equals(intent.getAction())) {
				Logger.d(TAG, "[MyReceiver] 接收到推送下来的通知");
				int notifactionId = bundle.getInt(JPushInterface.EXTRA_NOTIFICATION_ID);
				Logger.d(TAG, "[MyReceiver] 接收到推送下来的通知的ID: " + notifactionId);
				// ######################【发送通知】推送处理######################
			} else if (JPushInterface.ACTION_NOTIFICATION_OPENED.equals(intent.getAction())) {
				Logger.d(TAG, "[MyReceiver] 用户点击打开了通知");
				// ######################【发送通知】通知打开处理######################
			} else if(JPushInterface.ACTION_CONNECTION_CHANGE.equals(intent.getAction())) {
				boolean connected = intent.getBooleanExtra(JPushInterface.EXTRA_CONNECTION_CHANGE, false);
				Logger.w(TAG, "[MyReceiver]" + intent.getAction() +" connected state change to "+connected);
				// ######################和极光服务器的连接状态######################
			} else {
				Logger.d(TAG, "[MyReceiver] Unhandled intent - " + intent.getAction());
			}
		} catch (Exception e){

		}

	}
}
public class PushMessageReceiver extends JPushMessageReceiver{
    private static final String TAG = "PushMessageReceiver";

    // ######################【自定义消息】推送处理######################
    @Override
    public void onMessage(Context context, CustomMessage customMessage) {
        Log.e(TAG,"[onMessage] "+customMessage);
        processCustomMessage(context,customMessage);
    }
    // ######################【发送通知】通知打开处理######################
    @Override
    public void onNotifyMessageOpened(Context context, NotificationMessage message) {
        Log.e(TAG,"[onNotifyMessageOpened] "+message);
    }
	// ######################【发送通知】按钮处理######################
    @Override
    public void onMultiActionClicked(Context context, Intent intent) {
        Log.e(TAG, "[onMultiActionClicked] 用户点击了通知栏按钮");

    }
    // ######################【发送通知】推送处理######################
    @Override
    public void onNotifyMessageArrived(Context context, NotificationMessage message) {
        Log.e(TAG,"[onNotifyMessageArrived] "+message);
    }

    // ######################和极光服务器的连接状态######################
    @Override
    public void onConnected(Context context, boolean isConnected) {
        Log.e(TAG,"[onConnected] "+isConnected);
    }
}
█ demo运行:
-
● 我们运行下,看看执行的过程:
MyReceiver和PushMessageReceiver都执行了【和极光服务器的连接状态】的推送
05-26 10:19:17.700 4763-4763/ E/JIGUANG-Example: [ExampleApplication] onCreate
05-26 10:19:18.205 4763-4901/ E/PushMessageReceiver: [onNotificationSettingsCheck] isOn:true,source:0
05-26 10:19:18.234 4763-4763/ E/JIGUANG-Example: [MyReceiver] onReceive - cn.jpush.android.intent.CONNECTION, extras: key:cn.jpush.android.CONNECTION_CHANGE, value:true
05-26 10:19:18.234 4763-4763/ E/JIGUANG-Example: [MyReceiver]cn.jpush.android.intent.CONNECTION connected state change to true
05-26 10:19:18.235 4763-4901/ E/PushMessageReceiver: [onConnected] true

● 发送一条【自定义消息】-再发送一条【发送通知】-点击通知栏的【发送通知】:
MyReceiver没有收到消息,PushMessageReceiver收到消息,因此,我们推送可以直接使用PushMessageReceiver,并将MyReceiver去掉
05-26 10:25:00.751 4763-4901/ E/PushMessageReceiver: [onMessage] CustomMessage{messageId='47287858038278660', extra='', message='已经收到自定义消息', contentType='', title='', senderId='012345678901234567890123', appId='com.xxx.xxx'}
05-26 10:25:37.193 4763-4901/ E/PushMessageReceiver: [onNotifyMessageArrived] NotificationMessage{notificationId=536806284, msgId='47287858037918248', appkey='012345678901234567890123', notificationContent='点开我有惊喜', notificationAlertType=7, notificationTitle='今天是25号', notificationSmallIcon='', notificationLargeIcon='', notificationExtras='{}', notificationStyle=0, notificationBuilderId=0, notificationBigText='', notificationBigPicPath='', notificationInbox='', notificationPriority=0, notificationCategory='', developerArg0='', platform=0, notificationChannelId='', displayForeground='', notificationType=0}
05-26 10:26:31.569 4763-4763/ E/PushMessageReceiver: [onNotifyMessageOpened] NotificationMessage{notificationId=536806284, msgId='47287858037918248', appkey='012345678901234567890123', notificationContent='点开我有惊喜', notificationAlertType=7, notificationTitle='今天是25号', notificationSmallIcon='', notificationLargeIcon='', notificationExtras='{}', notificationStyle=0, notificationBuilderId=0, notificationBigText='', notificationBigPicPath='', notificationInbox='', notificationPriority=0, notificationCategory='', developerArg0='', platform=0, notificationChannelId='', displayForeground='', notificationType=0}

● 接下来删除MyReceiver.java,在运行下demo,看是否可以收到推送:
删除MyReceiver.java后,android会自动将AndroidManifest.xml中的相关信息删除。并发现推送接收正常,说明确实可以直接弃用MyReceiver.java。

● 为什么MyReceiver.java收不到推送?
在新的SDK中,是优先PushMessageReceiver接收,之后是否有调用super,确定是否继续广播到旧版本Receiver
如果需要在旧版本的Receiver接收cn.jpush.android.intent.MESSAGE_RECEIVED广播
可以不重写此方法,或者重写此方法且调用super.onMessage
如果重写此方法,没有调用super,则不会发送广播到旧版本Receiver

█ 推送的 jcenter 自动集成方法:
-
● 注意事项:
从JPush3.0.7开始,需要配置继承JPushMessageReceiver的广播,原来如果配了MyReceiver现在可以弃用
从JPush3.2.2开始,需要 JCore2.1.1 及以上的 版本,升级 SDK 的时候请将 JCore 一起升级。
从JCore2.0.0开始,需要额外在 Androidmanifest 中配置一个继承极光JCommonService的Service,可以在更多手机平台上获得更稳定的推送通道的支持。(JCore1.x版本不需要)
需要留意iOS证书是否到期,否则将导致无法接收到推送
jcenter 自动集成时,不需要在jniLibs中添加 jar 和 so;jar手动集成时,需要在jniLibs中添加 jar 和 so,还要在AndroidManifest.xml 中添加比前者更多的JPush SDK 相关的配置。
每日广播免费数量上限为10条/天


● 此时使用的版本:
implementation ‘cn.jiguang.sdk:jpush:3.6.0’ // 此处以JPush 3.6.0 版本为例。
implementation ‘cn.jiguang.sdk:jcore:2.3.4’ // 此处以JCore 2.3.4 版本为例。
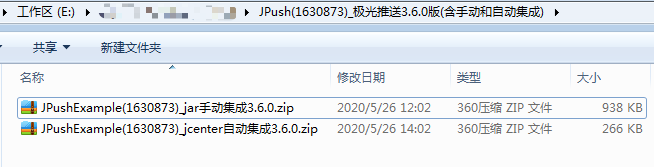
● demo使用jar手动集成,未使用 jcenter 自动集成,这里也使用了 jcenter 自动集成:
传送门:含jar手动集成和 jcenter 自动集成的demo,
用户只需要修改下build.gradle中的applicationId和AppKey即可,亲测,可用,操作步骤可以直接参考官网:极光推送 - Android SDK 集成指南 - 极光文档

█ 推送的消息解析:
-
● 极光推送 - Push API v3 - 推送对象 - 极光文档:

● notification:通知
{
    "notification" : {
        "android" : {
             "alert" : "hello, JPush!", // 通知内容
             "title" : "JPush test", // 通知标题
             "builder_id" : 3, // 通知栏样式 ID
             "style":1  // 1,2,3 // 通知栏样式类型
             "alert_type":1 // -1 ~ 7 // 通知提醒方式
             "big_text":"big text content",// 大文本通知栏样式
             "inbox":JSONObject,// 文本条目通知栏样式
             "big_pic_path":"picture url",// 大图片通知栏样式
             "priority":0, // -2~2 // 	通知栏展示优先级
             "category":"category str", // 通知栏条目过滤或排序
             "large_icon": "http://www.jiguang.cn/largeIcon.jpg",// 通知栏大图标
           "intent": {// 指定跳转页面
                "url": "intent:#Intent;component=com.jiguang.push/com.example.jpushdemo.SettingActivity;end",
            },
             "extras" : {// 扩展字段
                  "news_id" : 134,
                  "my_key" : "a value"
             }
        }
    }
}
● message:自定义消息
 "message": {
        "msg_content": "Hi,JPush",// 消息内容本身
        "content_type": "text",// 	消息内容类型
        "title": "msg",// 消息标题
        "extras": {// JSON 格式的可选参数
            "key": "value"
        }
    },
● MyReceiver接收的方式(以下部分没有经过验证,仅供参考):
 	@Override
    public void onReceive(Context context, Intent intent) {
        Bundle bundle = intent.getExtras();
        if (JPushInterface.ACTION_MESSAGE_RECEIVED.equals(intent.getAction())) {
            Log.e(TAG, "[MyReceiver] 接收到推送下来的自定义消息: " + bundle.getString(JPushInterface.EXTRA_MESSAGE));
            // ######################【自定义消息】推送处理######################
            String title= bundle.getString(JPushInterface.EXTRA_TITLE);//消息的标题
            String message= bundle.getString(JPushInterface.EXTRA_MESSAGE);// 消息内容本身
            String extras= bundle.getString(JPushInterface.EXTRA_EXTRA);// 扩展字段
           if (!TextUtils.isEmpty(extras)) {
                try {
	                Msg msg = new Gson().fromJson(extras, Msg.class);
	                .......
	                .......
                } catch (Exception e) {
                	e.printStackTrace();
            	}
           }
        }else if (JPushInterface.ACTION_NOTIFICATION_OPENED.equals(intent.getAction())) {
            Log.e(TAG, "[MyReceiver] 用户点击打开了通知");
            // ######################【发送通知】通知打开处理######################
            String title= bundle.getString(JPushInterface.EXTRA_NOTIFICATION_TITLE);// 通知标题
            String alert= bundle.getString(JPushInterface.EXTRA_ALERT);// 通知内容
            String extras= bundle.getString(JPushInterface.EXTRA_EXTRA);// 扩展字段
           if (!TextUtils.isEmpty(extras)) {
                try {
	                Msg msg = new Gson().fromJson(extras, Msg.class);
	                .......
	                .......
                } catch (Exception e) {
                	e.printStackTrace();
            	}
           }
        }
    }
● JPushMessageReceiver接收的方式(以下部分没有经过验证,仅供参考):
public class PushMessageReceiver extends JPushMessageReceiver {
    private static final String TAG = "PushMessageReceiver";

    // ######################【自定义消息】推送处理######################
    @Override
    public void onMessage(Context context, CustomMessage customMessage) {
        Log.e(TAG, "[onMessage] " + customMessage);
        String title= customMessage.title;//消息的标题
        String message= customMessage.message;// 消息内容本身
        String extras= customMessage.extra;// 扩展字段
       if (!TextUtils.isEmpty(extras)) {
            try {
             Msg msg = new Gson().fromJson(extras, Msg.class);
             .......
             .......
            } catch (Exception e) {
            	e.printStackTrace();
        	}
       }
    }

    // ######################【发送通知】通知打开处理######################
    @Override
    public void onNotifyMessageOpened(Context context, NotificationMessage message) {
        Log.e(TAG, "[onNotifyMessageOpened] " + message);
 		String title= message.notificationTitle;// 通知标题
        String alert= message.notificationContent;// 通知内容
        String extras= message.notificationExtras;// 扩展字段
        if (!TextUtils.isEmpty(extras)) {
            try {
             Msg msg = new Gson().fromJson(extras, Msg.class);
             .......
             .......
            } catch (Exception e) {
            	e.printStackTrace();
        	}
       }
    }

    // ######################【发送通知】推送处理######################
    @Override
    public void onNotifyMessageArrived(Context context, NotificationMessage message) {
        Log.e(TAG, "[onNotifyMessageArrived] " + message);
    }
}
█ 相关资料:
-
● 1.极光推送 - Android SDK 集成指南 - 极光文档、极光推送 - Push API v3 - 推送对象 - 极光文档
● 2.2018-04-03 Android极光推送使用方法大全(升级JCore为2.0版本) - Wang_Mr - 简书
● 3.2019-06-25 极光推送第二篇:消息接收 - Small_Cake -
简书
● 4.2017-08-01 极光推送api_移动开发_fishmai的专栏-CSDN博客
转载请注明出处:
https://blog.csdn.net/ljb568838953/article/details/106338256


 被折叠的 条评论
为什么被折叠?
被折叠的 条评论
为什么被折叠?
 到【灌水乐园】发言


