


使用SpringBoot2.0整合ehcache实现单点项目缓存
1.创建一个springboot项目,在pom.xml中引入相关依赖
       <!-- SpringBoot 对lombok 支持 -->
        <dependency>
            <groupId>org.projectlombok</groupId>
            <artifactId>lombok</artifactId>
        </dependency>
        <!--开启 cache 缓存 -->
        <dependency>
            <groupId>org.springframework.boot</groupId>
            <artifactId>spring-boot-starter-cache</artifactId>
        </dependency>
        <!-- ehcache缓存 -->
        <dependency>
            <groupId>net.sf.ehcache</groupId>
            <artifactId>ehcache</artifactId>
        </dependency>
        <dependency>
            <groupId>org.mybatis.spring.boot</groupId>
            <artifactId>mybatis-spring-boot-starter</artifactId>
            <version>1.1.1</version>
        </dependency>
        <!-- mysql 依赖 -->
        <dependency>
            <groupId>mysql</groupId>
            <artifactId>mysql-connector-java</artifactId>
        </dependency>
2.创建一个ehcache配置文件ehcache.xml
<?xml version="1.0" encoding="UTF-8"?>
<ehcache xmlns:xsi="http://www.w3.org/2001/XMLSchema-instance" xsi:noNamespaceSchemaLocation="../config/ehcache.xsd">

    <!--这个是磁盘存储路径,当内存缓存满了的时候,就会存放在此处-->
    <diskStore path="java.io.tmpdir"/>

    <!--defaultCache:echcache的默认缓存策略  -->
    <defaultCache maxElementsInMemory="10000" eternal="false"
                  timeToIdleSeconds="120"
                  timeToLiveSeconds="120"
                  maxElementsOnDisk="10000000"
                  diskExpiryThreadIntervalSeconds="120"
                  memoryStoreEvictionPolicy="LRU">
        <persistence strategy="localTempSwap"/>
    </defaultCache>
        <!--此处的user与后面缓存名称一致-->
    <cache name="user"
           maxElementsInMemory="10000"
           eternal="false"
           timeToIdleSeconds="120"
           timeToLiveSeconds="120"
           maxElementsOnDisk="10000000"
           diskExpiryThreadIntervalSeconds="120"
           memoryStoreEvictionPolicy="LRU">
        <persistence strategy="localTempSwap"/>
    </cache>
</ehcache>
3.在application.yml文件中添加相关配置
###端口号配置
server:
  port: 8080
###数据库配置
spring:
  datasource:
    url: jdbc:mysql://localhost:3306/test
    username: root
    password: 123456
    driver-class-name: com.mysql.jdbc.Driver
  # 缓存配置读取
  cache:
    type: ehcache
    ehcache:
      config: classpath:ehcache.xml
4.在启动类上添加开始缓存的注解
@MapperScan(basePackages = {"com.gothic.ehcache.mapper"})
@EnableCaching   //开启缓存
@SpringBootApplication
public class EhcacheApplication {

    public static void main(String[] args) {
        SpringApplication.run(EhcacheApplication.class, args);
    }

}
5.创建一个用户对象
@Data
public class Users implements Serializable {

    private Integer id;
    private String name;
    private Integer age;

}
6.在控制器中实现查询用户以及修改用户
@RestController
public class IndexControoller {

    @Autowired
    private UserService userService;

    /**
     * @Description: 查询用户
     */
    @RequestMapping("/getUser")
    public List<Users> getUser(Integer id) {
        return userService.getUser(id);
    }

    /**
     * @Description: 修改用户,这里使用测试数据,
     * 不用创建页面那么麻烦了
     */
    @GetMapping("/editUser")
    public String editUser(){
        Users users = new Users();
        users.setId(1);
        users.setName("hello");
        users.setAge(32);
        Integer result = userService.editUser(users);
        return "success";
    }
}
7.业务层service
@Service
public class UserService {

    @Autowired
    private UserMapper userMapper;

    @Autowired
    private CacheManager cacheManager;

    public List<Users> getUser(Integer id) {
        return userMapper.getUser(id);
    }

    @Transactional
    public Integer editUser(Users users) {
        Integer result = userMapper.editUser(users);
        //在编辑用户时,清除查询用户的缓存
        cacheManager.getCache("user").clear();
        return result;
    }
}
8.mapper层直接使用注解方式查询以及编辑,不使用配置文件
//@CacheConfig 配置缓存基本信息cacheName缓存名称
@CacheConfig(cacheNames = {"user"})
public interface UserMapper {
//@Cacheable 该方法查询数据库完成后,存入到缓存中
@Select("SELECT ID ,NAME,AGE FROM users where id=#{id}")
@Cacheable
List<Users> getUser(@Param("id") Integer id);
@Update("update users set name=#{name}, age=#{age} where id=#{id}")
Integer editUser(Users users);
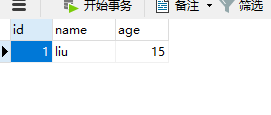
}9.在数据库内置一条数据,如下:
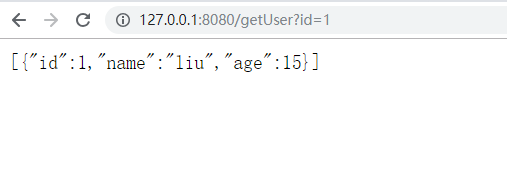
10.测试:
①第一次查询用户,显示如下json数据,直接使用MySQL的可视化工具修改该数据的name以及age后再次刷新,依然没有变化,说明缓存已经生效
②因为我们在生产过程中不可能去修改数据库,所以我们为了在修改数据后实时更新缓存,就需要在编辑用户时,清除缓存,就如以上service中的editUser方法中一样清除,访问修改用户的方法
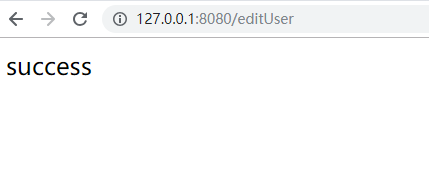
修改成功后再次访问查询用户方法,数据已经更新为修改后的数据


 255
255


 被折叠的 条评论
为什么被折叠?
被折叠的 条评论
为什么被折叠?
 到【灌水乐园】发言


