


转载请标明出处:http://blog.csdn.net/lmj623565791/article/details/37737213
上篇博客已经实现了地图的定位以及结合了方向传感器用户路痴定位方向,如果你还不清楚,请查看:Android 百度地图 SDK v3.0.0 (二) 定位与结合方向传感器,本章会教大家如何添加覆盖物,实现周边搜索,以及对覆盖物的点击出现介绍等效果。
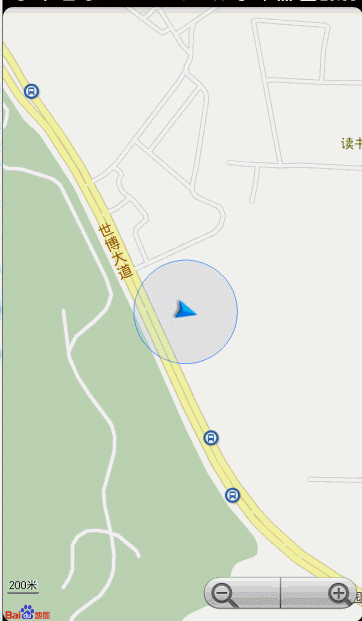
效果图:
我们的需求是,当用户点击衣食住行,或者对对附近搜索是,从服务器返回数据(经纬度,商家信息,介绍等),然后动态生成覆盖物,实现上述效果。关于图片,由于手机上的内存的有限性,所有的图片下载完成都应该存入预设的缓存中,例如LruCache,然后需要的时候从缓存取,缓存没有,下载完成放入缓存;即实现所有的图片所占的内存永远不会超过缓存预设的内存值,当然了本篇的重点不是这个,我直接拿了几张图片加入我们的项目中模拟。
1、承载数据的实体
我们从服务器返回的数据部分,最终可能是个Json数组,我们需要转换为实体集合,即下面的Info.java:
package com.zhy.zhy_baidu_ditu_demo03;

import java.io.Serializable;
import java.util.ArrayList;
import java.util.List;

public class Info implements Serializable
{
	private static final long serialVersionUID = -758459502806858414L;
	/**
	 * 精度
	 */
	private double latitude;
	/**
	 * 纬度
	 */
	private double longitude;
	/**
	 * 图片ID,真实项目中可能是图片路径
	 */
	private int imgId;
	/**
	 * 商家名称
	 */
	private String name;
	/**
	 * 距离
	 */
	private String distance;
	/**
	 * 赞数量
	 */
	private int zan;

	public static List<Info> infos = new ArrayList<Info>();

	static
	{
		infos.add(new Info(34.242652, 108.971171, R.drawable.a01, "英伦贵族小旅馆",
				"距离209米", 1456));
		infos.add(new Info(34.242952, 108.972171, R.drawable.a02, "沙井国际洗浴会所",
				"距离897米", 456));
		infos.add(new Info(34.242852, 108.973171, R.drawable.a03, "五环服装城",
				"距离249米", 1456));
		infos.add(new Info(34.242152, 108.971971, R.drawable.a04, "老米家泡馍小炒",
				"距离679米", 1456));
	}

	public Info()
	{
	}

	public Info(double latitude, double longitude, int imgId, String name,
			String distance, int zan)
	{
		super();
		this.latitude = latitude;
		this.longitude = longitude;
		this.imgId = imgId;
		this.name = name;
		this.distance = distance;
		this.zan = zan;
	}

	public double getLatitude()
	{
		return latitude;
	}

	public void setLatitude(double latitude)
	{
		this.latitude = latitude;
	}

	public double getLongitude()
	{
		return longitude;
	}

	public void setLongitude(double longitude)
	{
		this.longitude = longitude;
	}

	public String getName()
	{
		return name;
	}

	public int getImgId()
	{
		return imgId;
	}

	public void setImgId(int imgId)
	{
		this.imgId = imgId;
	}

	public void setName(String name)
	{
		this.name = name;
	}

	public String getDistance()
	{
		return distance;
	}

	public void setDistance(String distance)
	{
		this.distance = distance;
	}

	public int getZan()
	{
		return zan;
	}

	public void setZan(int zan)
	{
		this.zan = zan;
	}

}
我直接在实体类中声明了一个静态列表集合,模拟从服务器返回的数据Info.infos。
2、地图中动态添加Overlay
为了方便,我把按钮都放在menu菜单中:
@Override
public boolean onOptionsItemSelected(MenuItem item)
{
	switch (item.getItemId())
	{
	 case R.id.id_menu_map_addMaker:
		addInfosOverlay(Info.infos);
		break;
	...
	}
}
/**
* 初始化图层
*/
public void addInfosOverlay(List<Info> infos)
{
mBaiduMap.clear();
LatLng latLng = null;
OverlayOptions overlayOptions = null;
Marker marker = null;
for (Info info : infos)
{
// 位置
latLng = new LatLng(info.getLatitude(), info.getLongitude());
// 图标
overlayOptions = new MarkerOptions().position(latLng)
.icon(mIconMaker).zIndex(5);
marker = (Marker) (mBaiduMap.addOverlay(overlayOptions));
Bundle bundle = new Bundle();
bundle.putSerializable("info", info);
marker.setExtraInfo(bundle);
}
// 将地图移到到最后一个经纬度位置
MapStatusUpdate u = MapStatusUpdateFactory.newLatLng(latLng);
mBaiduMap.setMapStatus(u);
}
可以看到,我们迭代添加了Overlay,然后在返回的Marker中设置了商家的信息,用户用户对Marker的点击时,拿到商家数据生成详细信息布局。
3、为地图上的Marker添加点击事件:
//对Marker的点击
		mBaiduMap.setOnMarkerClickListener(new OnMarkerClickListener()
		{
			@Override
			public boolean onMarkerClick(final Marker marker)
			{
				//获得marker中的数据
				Info info = (Info) marker.getExtraInfo().get("info");

				InfoWindow mInfoWindow;
				//生成一个TextView用户在地图中显示InfoWindow
				TextView location = new TextView(getApplicationContext());
				location.setBackgroundResource(R.drawable.location_tips);
				location.setPadding(30, 20, 30, 50);
				location.setText(info.getName());
				//将marker所在的经纬度的信息转化成屏幕上的坐标
				final LatLng ll = marker.getPosition();
				Point p = mBaiduMap.getProjection().toScreenLocation(ll);
				Log.e(TAG, "--!" + p.x + " , " + p.y);
				p.y -= 47;
				LatLng llInfo = mBaiduMap.getProjection().fromScreenLocation(p);
				//为弹出的InfoWindow添加点击事件
				mInfoWindow = new InfoWindow(location, llInfo,
						new OnInfoWindowClickListener()
						{

							@Override
							public void onInfoWindowClick()
							{
								//隐藏InfoWindow
								mBaiduMap.hideInfoWindow();
							}
						});
				//显示InfoWindow
				mBaiduMap.showInfoWindow(mInfoWindow);
				//设置详细信息布局为可见
				mMarkerInfoLy.setVisibility(View.VISIBLE);
				//根据商家信息为详细信息布局设置信息
				popupInfo(mMarkerInfoLy, info);
				return true;
			}
		});
根据商家的信息Info.java为详细信息布局中的控件添加数据(记得生成TextView的时候,先设置背景,再设置padding,不然可能会失效~~~)
/**
	 * 根据info为布局上的控件设置信息
	 *
	 * @param mMarkerInfo2
	 * @param info
	 */
	protected void popupInfo(RelativeLayout mMarkerLy, Info info)
	{
		ViewHolder viewHolder = null;
		if (mMarkerLy.getTag() == null)
		{
			viewHolder = new ViewHolder();
			viewHolder.infoImg = (ImageView) mMarkerLy
					.findViewById(R.id.info_img);
			viewHolder.infoName = (TextView) mMarkerLy
					.findViewById(R.id.info_name);
			viewHolder.infoDistance = (TextView) mMarkerLy
					.findViewById(R.id.info_distance);
			viewHolder.infoZan = (TextView) mMarkerLy
					.findViewById(R.id.info_zan);

			mMarkerLy.setTag(viewHolder);
		}
		viewHolder = (ViewHolder) mMarkerLy.getTag();
		viewHolder.infoImg.setImageResource(info.getImgId());
		viewHolder.infoDistance.setText(info.getDistance());
		viewHolder.infoName.setText(info.getName());
		viewHolder.infoZan.setText(info.getZan() + "");
	}
这里我们使用了一个ViewHoler进行控件的复用,让findViewById只会执行一次
	/**
	 * 复用弹出面板mMarkerLy的控件
	 *
	 * @author zhy
	 *
	 */
	private class ViewHolder
	{
		ImageView infoImg;
		TextView infoName;
		TextView infoDistance;
		TextView infoZan;
	}
最后添加地图的单击事件,隐藏出现的详细信息布局和InfoWindow
mBaiduMap.setOnMapClickListener(new OnMapClickListener()
		{

			@Override
			public boolean onMapPoiClick(MapPoi arg0)
			{
				return false;
			}

			@Override
			public void onMapClick(LatLng arg0)
			{
				mMarkerInfoLy.setVisibility(View.GONE);
				mBaiduMap.hideInfoWindow();

			}
		});
最后看一下我们的布局文件:
<RelativeLayout xmlns:android="http://schemas.android.com/apk/res/android"
    xmlns:tools="http://schemas.android.com/tools"
    android:layout_width="match_parent"
    android:layout_height="match_parent" >

    <com.baidu.mapapi.map.MapView
        android:id="@+id/id_bmapView"
        android:layout_width="fill_parent"
        android:layout_height="fill_parent"
        android:clickable="true" />

    <RelativeLayout
        android:id="@+id/id_marker_info"
        android:visibility="gone"
        android:layout_width="fill_parent"
        android:layout_height="220dp"
        android:layout_alignParentBottom="true"
        android:background="#CC4e5a6b"
        android:clickable="true" >

        <ImageView
            android:id="@+id/info_img"
            android:layout_width="fill_parent"
            android:layout_height="150dp"
            android:layout_marginBottom="10dp"
            android:layout_marginLeft="12dp"
            android:layout_marginRight="12dp"
            android:layout_marginTop="10dp"
            android:alpha="1.0"
            android:background="@drawable/map_image_border_white"
            android:clickable="true"
            android:scaleType="fitXY"
            android:src="@drawable/a04" />

        <RelativeLayout
            android:layout_width="fill_parent"
            android:layout_height="50dp"
            android:layout_alignParentBottom="true"
            android:background="@drawable/bg_map_bottom" >

            <LinearLayout
                android:layout_width="fill_parent"
                android:layout_height="wrap_content"
                android:layout_centerVertical="true"
                android:layout_marginLeft="20dp"
                android:orientation="vertical" >

                <TextView
                    android:id="@+id/info_name"
                    android:layout_width="wrap_content"
                    android:layout_height="wrap_content"
                    android:text="老米家泡馍小炒"
                    android:textColor="#FFF5EB" />

                <TextView
                    android:id="@+id/info_distance"
                    android:layout_width="wrap_content"
                    android:layout_height="wrap_content"
                    android:text="距离200米"
                    android:textColor="#FFF5EB" />
            </LinearLayout>

            <LinearLayout
                android:layout_width="wrap_content"
                android:layout_height="wrap_content"
                android:layout_alignParentRight="true"
                android:layout_centerVertical="true"
                android:layout_marginRight="20dp"
                android:orientation="horizontal" >

                <ImageView
                    android:layout_width="wrap_content"
                    android:layout_height="wrap_content"
                    android:onClick="zan"
                    android:src="@drawable/map_zan" />

                <TextView
                    android:id="@+id/info_zan"
                    android:layout_width="wrap_content"
                    android:layout_height="wrap_content"
                    android:layout_gravity="center"
                    android:text="652"
                    android:textColor="#FFF5EB" />
            </LinearLayout>
        </RelativeLayout>
    </RelativeLayout>

</RelativeLayout>
除了MapView,其他都是详细信息的布局,默认是隐藏的,当用户点击Marker显示以及设置初值,当用户单击地图时再将其隐藏。
好了,到此介绍完毕~~
注:开发者key需要换成自己申请的,不清楚申请的请看第一篇博客的。
百度地图相关博客视频版本已经上线:Android中百度地图的使用期待您的支持。
博主部分视频已经上线,如果你不喜欢枯燥的文本,请猛戳(初录,期待您的支持):
2、Android自定义控件实战 打造Android流式布局和热门标签


 524
524


 被折叠的 条评论
为什么被折叠?
被折叠的 条评论
为什么被折叠?
 到【灌水乐园】发言


