


K8S启用 nfs-client-provisioner
我们使用了nfs来进行数据存储,在elk配置中使用了nfs storageclass.所以先要启用nfs-client-provisioner
k8s部署ELK
1.创建单独的 namespace
# cat 00-ns.yaml
apiVersion: v1
kind: Namespace
metadata:
  name: ns-elk
  labels:
    app: elasticsearch
2. 生成开启 x-pack 时的 ssl 证书
# docker run --name es-certutil -i -w /tmp docker.elastic.co/elasticsearch/elasticsearch:7.14.0 /bin/sh -c  \
    "elasticsearch-certutil ca --out /tmp/es-ca.p12 --pass '' && \
    elasticsearch-certutil cert --name security-master --dns \
    security-master --ca /tmp/es-ca.p12 --pass '' --ca-pass '' --out /tmp/elastic-certificates.p12"

# docker cp es-certutil:/tmp/elastic-certificates.p12 ./

// 生成 ssl 认证要使用的 secret elastic-certificates
kubectl -n ns-elk create secret generic elastic-certificates --from-file=./elastic-certificates.p12
3. 部署 elasticsearch master 节点
# cat 01-es-master.yaml
apiVersion: apps/v1
kind: StatefulSet
metadata:
 namespace: ns-elk
 name: elasticsearch-master
 labels:
   app: elasticsearch
   role: master
spec:
 serviceName: elasticsearch-master
 replicas: 3
 selector:
   matchLabels:
     app: elasticsearch
     role: master
 template:
   metadata:
     labels:
       app: elasticsearch
       role: master
   spec:
     containers:
       - name: elasticsearch
         image: docker.elastic.co/elasticsearch/elasticsearch:7.14.0
         resources:
           requests:
             memory: 2Gi
             cpu: 1.0
           limits:
             memory: 4Gi
             cpu: 2.0
         command: ["bash", "-c", "ulimit -l unlimited && sysctl -w vm.max_map_count=262144 && chown -R elasticsearch:elasticsearch /usr/share/elasticsearch/data && exec su elasticsearch docker-entrypoint.sh"]
         ports:
           - containerPort: 9200
             name: http
           - containerPort: 9300
             name: transport
         env:
           # 使用修改环境变量的方式修改 elasticsearch 配置
           - name: discovery.seed_hosts
             value: "elasticsearch-master-0.elasticsearch-master.ns-elk.svc.cluster.local"
           - name: cluster.initial_master_nodes
             value: "elasticsearch-master-0,elasticsearch-master-1,elasticsearch-master-2"
           - name: ES_JAVA_OPTS
             value: -Xms2g -Xmx2g

           - name: node.master
             value: "true"
           - name: node.ingest
             value: "false"
           - name: node.data
             value: "false"

           - name: cluster.name
             value: "elasticsearch-cluster-v7"
           - name: node.name
             valueFrom:
               fieldRef:
                 fieldPath: metadata.name

           - name: xpack.security.enabled
             value: "true"
           - name: xpack.security.transport.ssl.enabled
             value: "true"
           - name: xpack.monitoring.collection.enabled
             value: "true"
           - name: xpack.security.transport.ssl.verification_mode
             value: "certificate"
           - name: xpack.security.transport.ssl.keystore.path
             value: "/usr/share/elasticsearch/config/elastic-certificates.p12"
           - name: xpack.security.transport.ssl.truststore.path
             value: "/usr/share/elasticsearch/config/elastic-certificates.p12"

         volumeMounts:
          - mountPath: /usr/share/elasticsearch/data
            name: pv-storage-elastic-master
          - name: elastic-certificates
            readOnly: true
            mountPath: "/usr/share/elasticsearch/config/elastic-certificates.p12"
            subPath: elastic-certificates.p12
          - mountPath: /etc/localtime
            name: localtime
         # Gave permission to init container
         securityContext:
           privileged: true

     volumes:
     - name: elastic-certificates
       secret:
         secretName: elastic-certificates
     - hostPath:
         path: /etc/localtime
       name: localtime

 volumeClaimTemplates:
   - metadata:
       name: pv-storage-elastic-master
     spec:
       accessModes: [ "ReadWriteOnce" ]
       storageClassName: "nfs-storage"  #使用新建的sc
       resources:
         requests:
           storage: 50Gi
部署后会报异常[“java.net.UnknownHostException: elasticsearch-master-0.elasticsearch-master.ns-elk.svc.cluster.local: Name or service not known”,这是因为服务没有暴露,节点名无法解析导致的,可以先行执行步骤6里的部分来解决。
4. 部署 elasticsearch data 节点
apiVersion: apps/v1
kind: StatefulSet
metadata:
 namespace: ns-elk
 name: elasticsearch-data
 labels:
   app: elasticsearch
   role: data
spec:
 serviceName: elasticsearch-data
 replicas: 3
 selector:
   matchLabels:
     app: elasticsearch
     role: data
 template:
   metadata:
     labels:
       app: elasticsearch
       role: data
   spec:
     containers:
       - name: elasticsearch
         image: docker.elastic.co/elasticsearch/elasticsearch:7.14.0
         resources:
           requests:
             memory: 2Gi
             cpu: 0.5
           limits:
             memory: 4Gi
             cpu: 2.0
         command: ["bash", "-c", "ulimit -l unlimited && sysctl -w vm.max_map_count=262144 && chown -R elasticsearch:elasticsearch /usr/share/elasticsearch/data && exec su elasticsearch docker-entrypoint.sh"]
         ports:
           - containerPort: 9200
             name: http
           - containerPort: 9300
             name: transport
         env:
           - name: discovery.seed_hosts
             value: "elasticsearch-master.ns-elk.svc.cluster.local"
           - name: ES_JAVA_OPTS
             value: -Xms2g -Xmx2g

           - name: node.master
             value: "false"
           - name: node.ingest
             value: "false"
           - name: node.data
             value: "true"

           - name: cluster.name
             value: "elasticsearch-cluster-v7"
           - name: node.name
             valueFrom:
               fieldRef:
                 fieldPath: metadata.name

           - name: xpack.security.enabled
             value: "true"
           - name: xpack.security.transport.ssl.enabled
             value: "true"
           - name: xpack.monitoring.collection.enabled
             value: "true"
           - name: xpack.security.transport.ssl.verification_mode
             value: "certificate"
           - name: xpack.security.transport.ssl.keystore.path
             value: "/usr/share/elasticsearch/config/elastic-certificates.p12"
           - name: xpack.security.transport.ssl.truststore.path
             value: "/usr/share/elasticsearch/config/elastic-certificates.p12"

         volumeMounts:
          - mountPath: /usr/share/elasticsearch/data
            name: pv-storage-elastic-data
          - name: elastic-certificates
            readOnly: true
            mountPath: "/usr/share/elasticsearch/config/elastic-certificates.p12"
            subPath: elastic-certificates.p12
          - mountPath: /etc/localtime
            name: localtime

         # Gave permission to init container
         securityContext:
           privileged: true

     volumes:
     - name: elastic-certificates
       secret:
         secretName: elastic-certificates
     - hostPath:
         path: /etc/localtime
       name: localtime
 volumeClaimTemplates:
 - metadata:
     name: pv-storage-elastic-data
   spec:
     accessModes: [ "ReadWriteOnce" ]
     storageClassName: "nfs-storage"
     resources:
       requests:
         storage: 1000Gi
5. 部署 elasticsearch client/ingest 节点
apiVersion: apps/v1
kind: StatefulSet
metadata:
  namespace: ns-elk
  name: elasticsearch-client
  labels:
    app: elasticsearch
    role: client
spec:
  serviceName: elasticsearch-client
  replicas: 3
  selector:
    matchLabels:
      app: elasticsearch
      role: client
  template:
    metadata:
      labels:
        app: elasticsearch
        role: client
    spec:
      containers:
        - name: elasticsearch
          image: docker.elastic.co/elasticsearch/elasticsearch:7.14.0
          resources:
            requests:
              memory: 4Gi
              cpu: 0.1
            limits:
              memory: 6Gi
              cpu: 1.0
          command: ["bash", "-c", "ulimit -l unlimited && sysctl -w vm.max_map_count=262144 && chown -R elasticsearch:elasticsearch /usr/share/elasticsearch/data && exec su elasticsearch docker-entrypoint.sh"]
          ports:
            - containerPort: 9200
              name: http
            - containerPort: 9300
              name: transport
          env:
            - name: discovery.seed_hosts
              value: "elasticsearch-master.ns-elk.svc.cluster.local"
            - name: ES_JAVA_OPTS
              value: -Xms4g -Xmx4g

            - name: node.master
              value: "false"
            - name: node.ingest
              value: "true"
            - name: node.data
              value: "false"

            - name: cluster.name
              value: "elasticsearch-cluster-v7"
            - name: node.name
              valueFrom:
                fieldRef:
                  fieldPath: metadata.name
            # 设置密码:kubectl -n ns-elk exec -it $(kubectl -n ns-elk get pods | grep elasticsearch-client | sed -n 1p | awk '{print $1}') -- bin/elasticsearch-setup-passwords auto -b
            - name: xpack.security.enabled
              value: "true"
            - name: xpack.security.transport.ssl.enabled
              value: "true"
            - name: xpack.monitoring.collection.enabled
              value: "true"
            - name: xpack.security.transport.ssl.verification_mode
              value: "certificate"
            - name: xpack.security.transport.ssl.keystore.path
              value: "/usr/share/elasticsearch/config/elastic-certificates.p12"
            - name: xpack.security.transport.ssl.truststore.path
              value: "/usr/share/elasticsearch/config/elastic-certificates.p12"

          volumeMounts:
           - mountPath: /usr/share/elasticsearch/data
             name: pv-storage-elastic-client
           - name: elastic-certificates
             readOnly: true
             mountPath: "/usr/share/elasticsearch/config/elastic-certificates.p12"
             subPath: elastic-certificates.p12
           - mountPath: /etc/localtime
             name: localtime

          # Gave permission to init container
          securityContext:
            privileged: true

      volumes:
      - name: elastic-certificates
        secret:
          secretName: elastic-certificates
      - hostPath:
          path: /etc/localtime
        name: localtime
  volumeClaimTemplates:
  - metadata:
      name: pv-storage-elastic-client
    spec:
      accessModes: [ "ReadWriteOnce" ]
      storageClassName: "nfs-storage"
      resources:
        requests:
          storage: 100Gi
6. 暴露 elasticsearch service
apiVersion: v1
kind: Service
metadata:
  namespace: ns-elk
  name: elasticsearch-master
  labels:
    app: elasticsearch
    role: master
spec:
  clusterIP: None
  selector:
    app: elasticsearch
    role: master
  ports:
    - port: 9200
      name: http
    - port: 9300
      name: node-to-node
---
apiVersion: v1
kind: Service
metadata:
  namespace: ns-elk
  name: elasticsearch-data
  labels:
    app: elasticsearch
    role: data
spec:
  clusterIP: None
  selector:
    app: elasticsearch
    role: data
  ports:
    - port: 9200
      name: http
    - port: 9300
      name: node-to-node
---
apiVersion: v1
kind: Service
metadata:
  labels:
    app: elasticsearch
    role: client
  name: elasticsearch-service
  namespace: ns-elk
spec:
  type: NodePort
  ports:
  - nodePort: 32725
    port: 9200
    protocol: TCP
    targetPort: 9200
  selector:
    app: elasticsearch
    role: client
  sessionAffinity: None
7 设置 elasticsearch 的密码
进入 elasticsearch client 容器内部,执行bin/elasticsearch-setup-passwords auto -b
[root@elasticsearch-client-0 elasticsearch]# bin/elasticsearch-setup-passwords auto -b
Changed password for user apm_system
PASSWORD apm_system = hrL5MqxSqEY0K7bAfA74

Changed password for user kibana_system
PASSWORD kibana_system = NIX0anrjoIaTtGKKBW7v

Changed password for user kibana
PASSWORD kibana = NIX0anrjoIaTtGKKBW7v

Changed password for user logstash_system
PASSWORD logstash_system = 5LVOoGUjz7Of2sgUIPlc

Changed password for user beats_system
PASSWORD beats_system = Cs0xvSP6VECpt3IRtWSm

Changed password for user remote_monitoring_user
PASSWORD remote_monitoring_user = YxDfPzPaTwOJyhWd8AdK

Changed password for user elastic
PASSWORD elastic = eIPkwl0zjMfQJRw9ljUJ
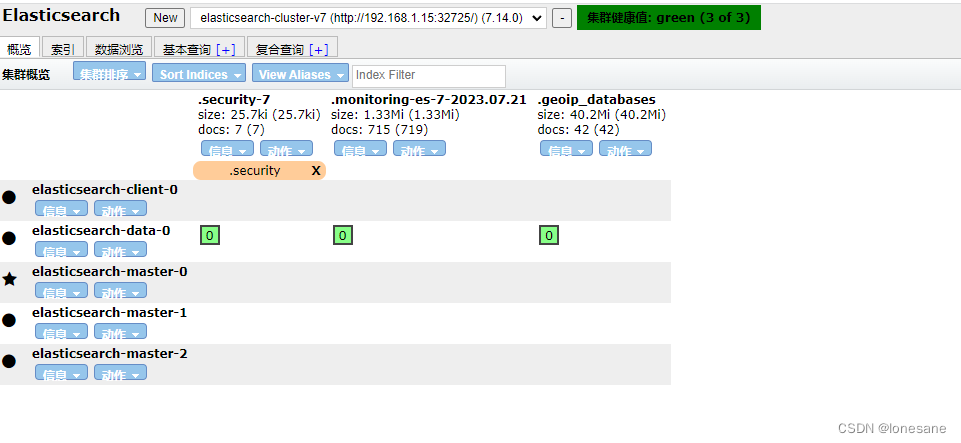
用elasticsearch-head调试es是否部署成功
9. 部署 kibana
apiVersion: v1
kind: ConfigMap
metadata:
  namespace: ns-elk
  name: kibana-config
  labels:
    app: kibana
data:
  kibana.yml: |-
    server.host: 0.0.0.0
    i18n.locale: "zh-CN"
    elasticsearch:
      hosts: ${ELASTICSEARCH_HOSTS}
      username: ${ELASTICSEARCH_USER}
      password: ${ELASTICSEARCH_PASSWORD}
---
kind: Deployment
apiVersion: apps/v1
metadata:
  labels:
    app: kibana
  name: kibana
  namespace: ns-elk
spec:
  replicas: 1
  revisionHistoryLimit: 10
  selector:
    matchLabels:
      app: kibana
  template:
    metadata:
      labels:
        app: kibana
    spec:
      containers:
        - name: kibana
          image: docker.elastic.co/kibana/kibana:7.14.0
          ports:
            - containerPort: 5601
              hostPort: 5601
              name: 5601tcp5601
              protocol: TCP
          env:
            # elasticsearch.hosts ???
            - name: ELASTICSEARCH_HOSTS
              value: "http://elasticsearch-service:9200"
            - name: ELASTICSEARCH_USER
              value: "elastic"
            - name: ELASTICSEARCH_PASSWORD
              value: "eIPkwl0zjMfQJRw9ljUJ" #使用上一步生成的密码
            - name: xpack.encryptedSavedObjects.encryptionKey
              value: "min-32-byte-long-strong-encryption-key"

          volumeMounts:
          - name: kibana-config
            mountPath: /usr/share/kibana/config/kibana.yml
            readOnly: true
            subPath: kibana.yml
          - mountPath: /etc/localtime
            name: localtime
      volumes:
      - name: kibana-config
        configMap:
          name: kibana-config
      - hostPath:
          path: /etc/localtime
        name: localtime

      # imagePullSecrets:
      # - name:
      tolerations:
        - key: node-role.kubernetes.io/master
          effect: NoSchedule
这时就可以通过账号 elastic 和密码 eIPkwl0zjMfQJRw9ljUJ 登录 kiban了

部署 logstach
apiVersion: v1
kind: ConfigMap
metadata:
  name: logstash-configmap
  namespace: ns-elk
data:
  logstash.yml: |
    http.host: "0.0.0.0"
    path.config: /usr/share/logstash/pipeline
  logstash.conf: |
    # 参考:https://www.elastic.co/guide/en/logstash/current/plugins-inputs-kafka.html
    input {
      tcp {
        port => 5064
        codec => json_lines
        type => "spring_cloud"
      }
      udp {
        port => 5065
        codec => json_lines
        type => "spring_cloud"
      }
    }
    filter {
      date {
        match => [ "timestamp" , "dd/MMM/yyyy:HH:mm:ss Z" ]
      }
    }
      # 参考:https://www.elastic.co/guide/en/logstash/current/plugins-outputs-elasticsearch.html
      output {
        elasticsearch {
          hosts => ["elasticsearch-service:9200"]
          user => "elastic"
          password => "eIPkwl0zjMfQJRw9ljUJ"
          # 参考:https://discuss.elastic.co/t/separate-indexes-for-each-kubernetes-namespace/169131/3
          # 根据 kubernetes.pod.name 字段单独创建 pod 的索引
          index => "%{[serverName]}-%{+YYYY.MM.dd}"
      }
    }

---
apiVersion: apps/v1
kind: Deployment
metadata:
  name: logstash-deployment
  namespace: ns-elk
spec:
  selector:
    matchLabels:
      app: logstash
  replicas: 1
  template:
    metadata:
      labels:
        app: logstash
    spec:
      containers:
      - name: logstash
        image: docker.elastic.co/logstash/logstash:7.14.0
        ports:
        - containerPort: 5064
          hostPort: 5064
          name: 5064tcp5064
          protocol: TCP
        volumeMounts:
          - name: config-volume
            mountPath: /usr/share/logstash/config
          - name: logstash-pipeline-volume
            mountPath: /usr/share/logstash/pipeline
          - mountPath: /etc/localtime
            name: localtime
      volumes:
      - name: config-volume
        configMap:
          name: logstash-configmap
          items:
            - key: logstash.yml
              path: logstash.yml
      - name: logstash-pipeline-volume
        configMap:
          name: logstash-configmap
          items:
            - key: logstash.conf
              path: logstash.conf
      - hostPath:
          path: /etc/localtime
        name: localtime
---
kind: Service
apiVersion: v1
metadata:
  name: logstash-service
  namespace: ns-elk
spec:
  selector:
    app: logstash
  type: NodePort
  ports:
    - name: tcp5064
      port: 5064
      protocol: TCP
      targetPort: 5064
      nodePort: 32701
    - name: udp5065
      port: 5065
      protocol: TCP
      targetPort: 5065
      nodePort: 32702
集成spring cloud
1. 引入包
<dependency>
  <groupId>net.logstash.logback</groupId>
  <artifactId>logstash-logback-encoder</artifactId>
  <version>6.6</version>
</dependency>
2. logback-spring.xml ,配置logstash到appender
<?xml version="1.0" encoding="UTF-8"?>
<configuration debug="false">
<springProperty scope="context" name="applicationName" source="spring.application.name"/>
...
<appender name="STDOUT" class="ch.qos.logback.core.ConsoleAppender">
<encoder>
<pattern>%date{yyyy-MM-dd HH:mm:ss.SSS} %-5level %logger{36}:%line - %msg%n
</pattern>
<charset>UTF-8</charset>
</encoder>
</appender>
<!-- <appender name="logstash" class="net.logstash.logback.appender.LogstashTcpSocketAppender">-->
<!-- <!–logstash的请求地址–>-->
<!-- <destination>192.168.1.50:32701</destination>-->
<!-- <encoder charset="UTF-8" class="net.logstash.logback.encoder.LogstashEncoder">-->
<!-- <customFields>{"serverName":"${applicationName}"}</customFields>-->
<!-- </encoder>-->
<!-- </appender>-->
<!--LogStash-->
<appender name="udp_logstash" class="net.logstash.logback.appender.LogstashSocketAppender">
<host>192.168.1.50</host>
<port>32702</port>
<customFields>{"serverName":"${applicationName}"}</customFields>
</appender>
<!-- 日志输出级别 -->
<root level="INFO">
...
<appender-ref ref="STDOUT"/>
<appender-ref ref="udp_logstash"/>
</root>
</configuration>
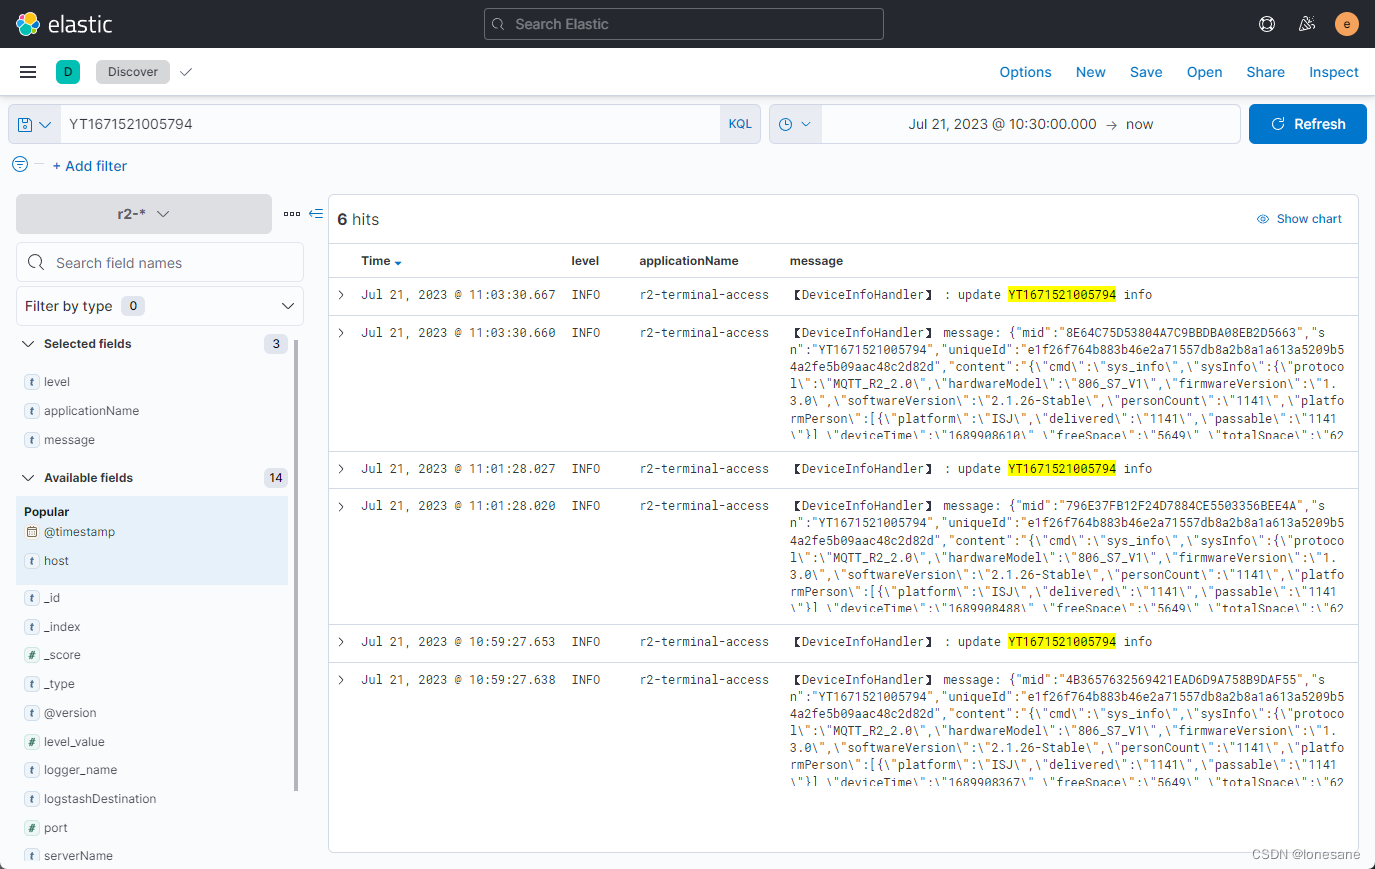
kibana操作
日志传输到ElasticSearch后我们就需要借助kibana将日志展示出来。
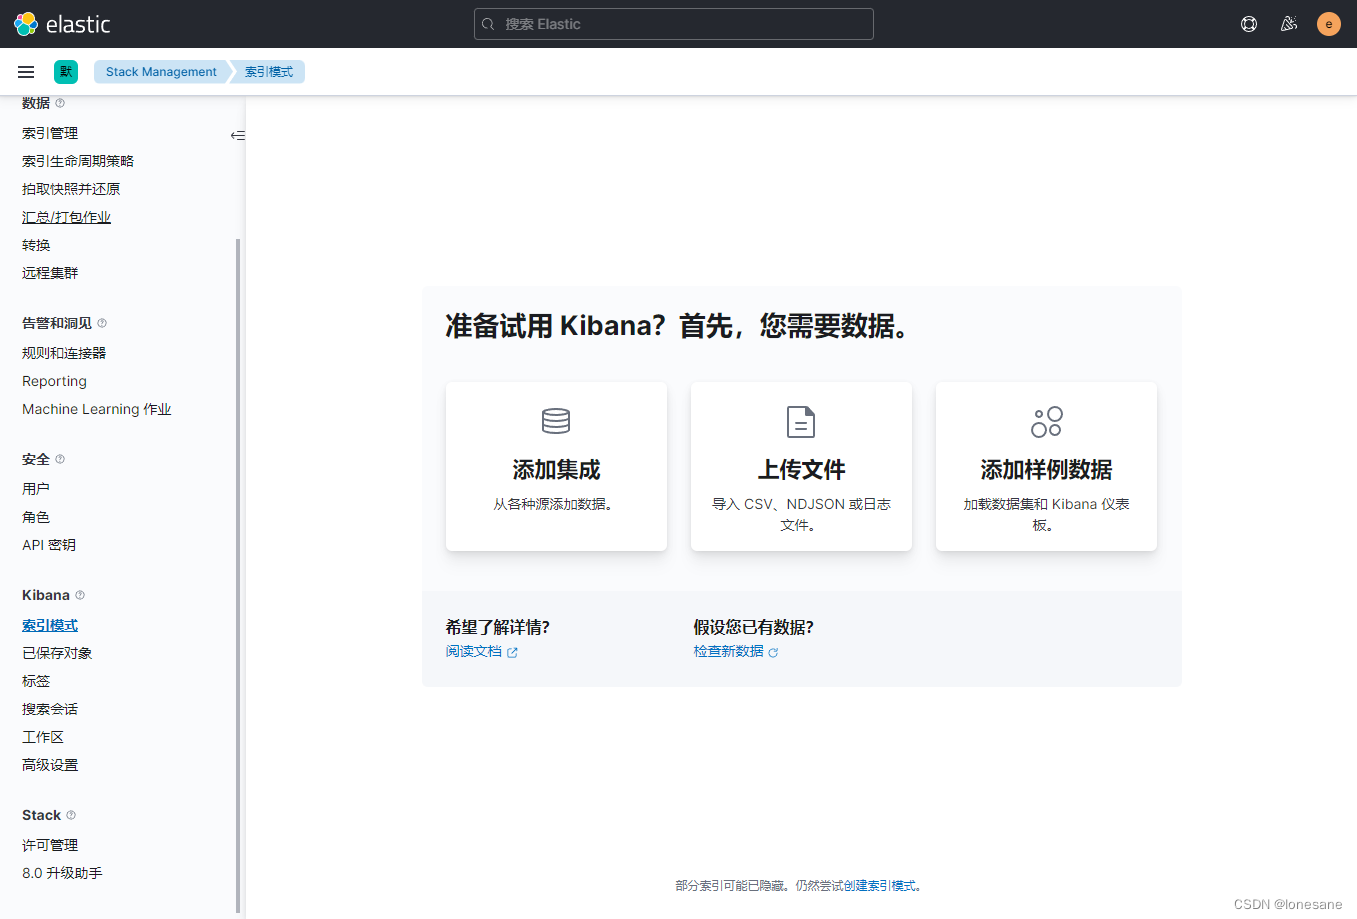
首先我们需要登录kibana,创建索引模式
数据没有接入进来之前,索引模式页面如下,
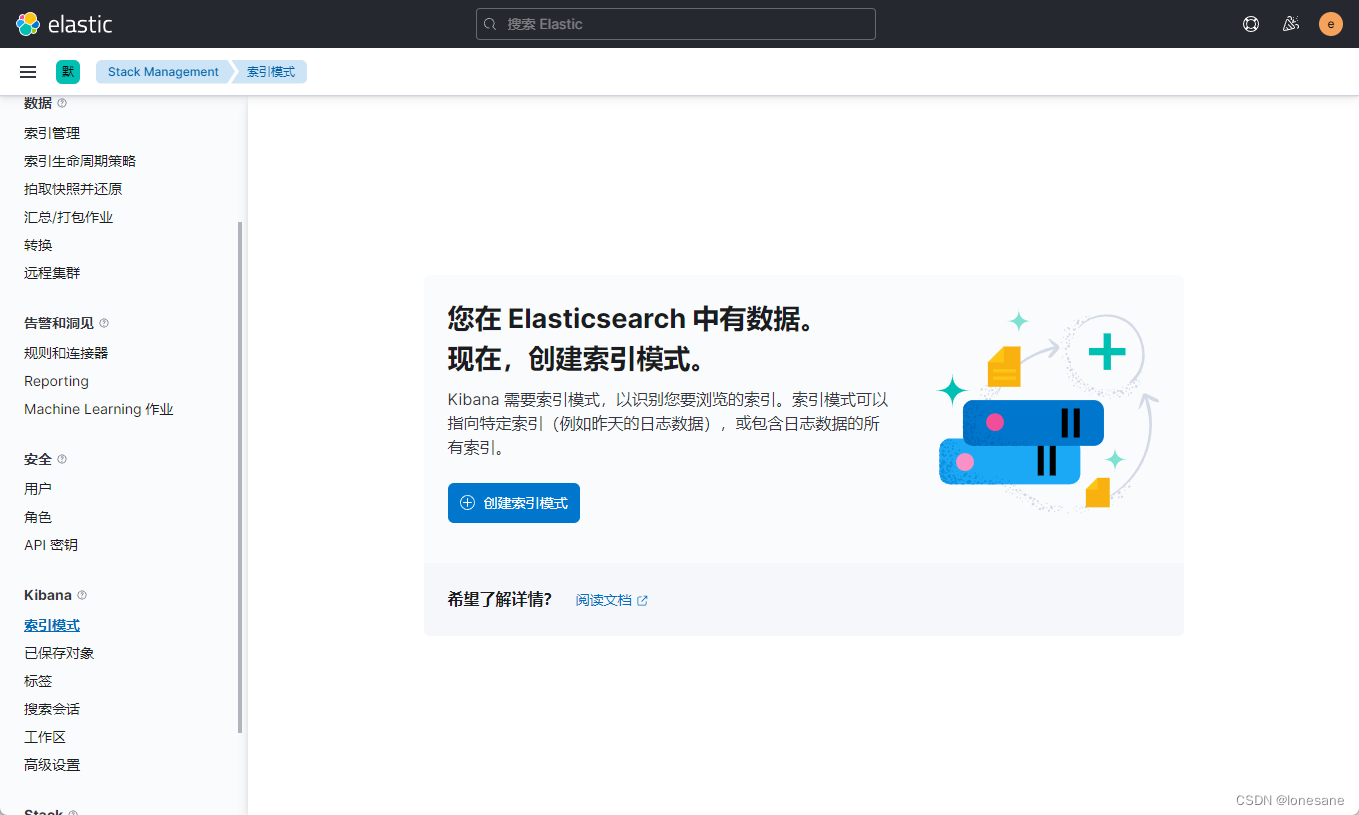
当数据正常接入后就可以创建索引模式
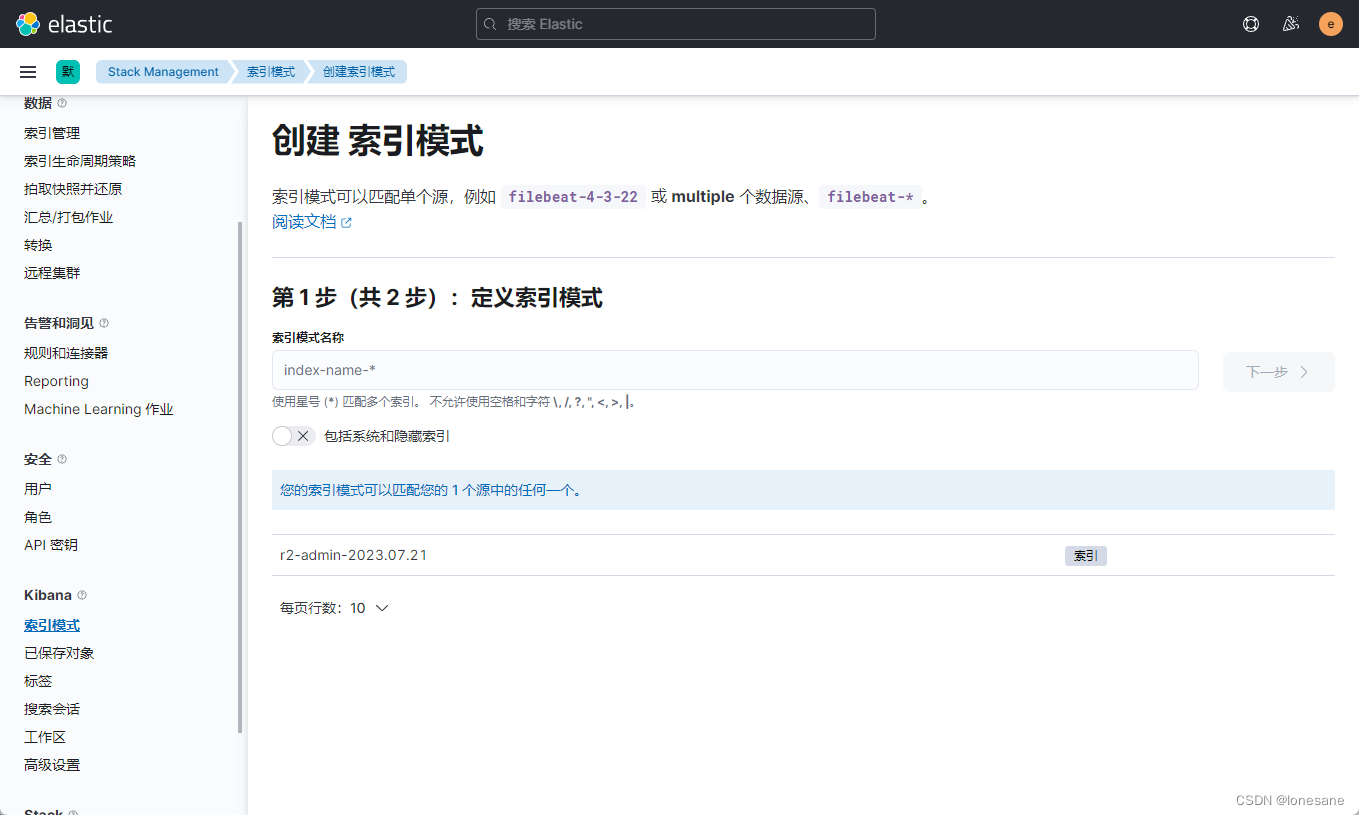
然后就可以在Discover中查看日志了
logback动态读取logstash的路径
上面我们配置logstash输出到elasticsearch的时候是直接写死了destination的配置.那在实际开发的时候我们肯定不能这样,环境不同logstash的路径也不同,所以我们需要从nacos配置中心读取对应logstash的地址。
小提示,springboot读取配置文件是有优先级的,如果使用默认的logback.xml或者logback-spring.xml为配置文件名则会读取不到nacos上的配置,他会先于配置中心加载。所以我们这里需要使用自定义配置文件。
- 修改nacos配置中心service对应的配置文件,配置自定义日志名称以及logstash的路径
logging:
  config: classpath:logback-custom.xml

logstash:
  destination: 172.xx.0.xxx:5064
-
修改日志配置文件为 logback-custom.xml
-
在logback-custom.xml中定义常量,从配置中心读取配置,并修改destination属性的值
<?xml version="1.0" encoding="UTF-8"?>
<configuration debug="false">
    <springProperty scope="context" name="applicationName" source="spring.application.name"/>
    <springProperty scope="context" name="logstashDestination" source="logstash.destination"/>
    ...
    <appender name="STDOUT" class="ch.qos.logback.core.ConsoleAppender">
        <encoder>
            <pattern>%date{yyyy-MM-dd HH:mm:ss.SSS} %-5level %logger{36}:%line - %msg%n
            </pattern>
            <charset>UTF-8</charset>
        </encoder>
    </appender>

    <!--LogStash-->
    <appender name="logstash" class="net.logstash.logback.appender.LogstashTcpSocketAppender">
        <!--logstash的请求地址-->
        <destination>${logstashDestination}</destination>
        <encoder charset="UTF-8" class="net.logstash.logback.encoder.LogstashEncoder">
            <customFields>{"serverName":"${applicationName}"}</customFields>
        </encoder>
    </appender>


    <root level="INFO">
        ...
        <appender-ref ref="STDOUT"/>
        <appender-ref ref="logstash"/>
    </root>
</configuration>


 1万+
1万+


 被折叠的 条评论
为什么被折叠?
被折叠的 条评论
为什么被折叠?
 到【灌水乐园】发言


