


要将数据库中的数据列表显示在屏幕上,我们要使用ListView这个控件,当用户从数据库中取出数据时,要将数据绑定到显示控件上,如何绑定呢,我们需要创建适配器进行绑定,创建适配器有两种方式:
第一种是用SimpleAdapter创建(要求绑定的数据是List<HashMap<String, Object>>数据类型)
第二种是用SimpleCursorAdapter创建(要求绑定的数据是Cursor数据类型)
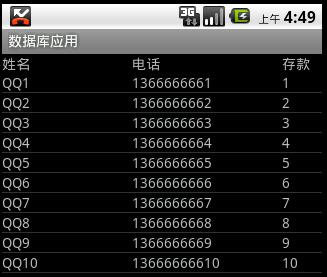
显示效果如图所示:
界面布局:
item.xml
- <?xml version="1.0" encoding="utf-8"?>
- <!--item -->
- <LinearLayout
- xmlns:android="http://schemas.android.com/apk/res/android"
- android:orientation="horizontal"
- android:layout_width="fill_parent"
- android:layout_height="fill_parent">
- <!-- 名称 -->
- <TextView
- android:layout_width="130dp"
- android:layout_height="wrap_content"
- android:id="@+id/name"
- />
- <!-- 电话 -->
- <TextView
- android:layout_width="150dp"
- android:layout_height="wrap_content"
- android:id="@+id/phone"
- />
- <!-- 存款 -->
- <TextView
- android:layout_width="fill_parent"
- android:layout_height="wrap_content"
- android:id="@+id/amount"
- />
- </LinearLayout>
main.xml
- <?xml version="1.0" encoding="utf-8"?>
- <LinearLayout xmlns:android="http://schemas.android.com/apk/res/android"
- android:orientation="vertical"
- android:layout_width="fill_parent"
- android:layout_height="fill_parent"
- >
- <!-- 标题 -->
- <LinearLayout
- android:orientation="horizontal"
- android:layout_width="fill_parent"
- android:layout_height="wrap_content">
- <TextView
- android:layout_width="130dp"
- android:layout_height="wrap_content"
- android:text="姓名"
- />
- <TextView
- android:layout_width="150dp"
- android:layout_height="wrap_content"
- android:text="电话"
- />
- <TextView
- android:layout_width="fill_parent"
- android:layout_height="wrap_content"
- android:text="存款"
- />
- </LinearLayout>
- <!-- ListView控件 -->
- <ListView
- android:layout_width="fill_parent"
- android:layout_height="fill_parent"
- android:id="@+id/listView"
- />
- </LinearLayout>
使用SimpleAdapter进行数据绑定
- public class MainActivity extends Activity {
- private PersonService service;
- @Override
- public void onCreate(Bundle savedInstanceState) {
- super.onCreate(savedInstanceState);
- setContentView(R.layout.main);
- service = new PersonService(this);
- ListView listView = (ListView) this.findViewById(R.id.listView);
- //获取到集合数据
- List<Person> persons = service.getScrollData(0, 10);
- List<HashMap<String, Object>> data = new ArrayList<HashMap<String,Object>>();
- for(Person person : persons){
- HashMap<String, Object> item = new HashMap<String, Object>();
- item.put("id", person.getId());
- item.put("name", person.getName());
- item.put("phone", person.getPhone());
- item.put("amount", person.getAmount());
- data.add(item);
- }
- //创建SimpleAdapter适配器将数据绑定到item显示控件上
- SimpleAdapter adapter = new SimpleAdapter(this, data, R.layout.item,
- new String[]{"name", "phone", "amount"}, new int[]{R.id.name, R.id.phone, R.id.amount});
- //实现列表的显示
- listView.setAdapter(adapter);
- //条目点击事件
- listView.setOnItemClickListener(new ItemClickListener());
- }
- //获取点击事件
- private final class ItemClickListener implements OnItemClickListener{
- public void onItemClick(AdapterView<?> parent, View view, int position, long id) {
- ListView listView = (ListView) parent;
- HashMap<String, Object> data = (HashMap<String, Object>) listView.getItemAtPosition(position);
- String personid = data.get("id").toString();
- Toast.makeText(getApplicationContext(), personid, 1).show();
- }
- }
- }
使用SimpleCursorAdapter进行数据绑定
- public class MainActivity extends Activity {
- private PersonService service;
- @Override
- public void onCreate(Bundle savedInstanceState) {
- super.onCreate(savedInstanceState);
- setContentView(R.layout.main);
- service = new PersonService(this);
- ListView listView = (ListView) this.findViewById(R.id.listView);
- //获取游标
- Cursor cursor = service.getCursorScrollData(0, 10);
- //创建SimpleCursorAdapter适配器将数据绑定到item显示控件上
- SimpleCursorAdapter adapter = new SimpleCursorAdapter(this, R.layout.item, cursor,
- new String[]{"name", "phone", "amount"}, new int[]{R.id.name, R.id.phone, R.id.amount});
- listView.setAdapter(adapter);
- //条目点击事件
- listView.setOnItemClickListener(new ItemClickListener());
- }
- private final class ItemClickListener implements OnItemClickListener{
- public void onItemClick(AdapterView<?> parent, View view, int position, long id) {
- ListView listView = (ListView) parent;
- Cursor cursor = (Cursor) listView.getItemAtPosition(position);
- String personid = String.valueOf(cursor.getInt(cursor.getColumnIndex("_id")));
- Toast.makeText(getApplicationContext(), personid, 1).show();
- }
- }
- }
注意:使用第二种方式在获取数据集合时必须指定主键"_id"
转自http://blog.csdn.net/furongkang/article/details/6819247感谢感恩


 被折叠的 条评论
为什么被折叠?
被折叠的 条评论
为什么被折叠?
 到【灌水乐园】发言


