


go-python3使用指南与踩坑记录
简介
在开发工作中有时候会有需要和其他语言进行交互的需求,笔者前段时间就接到了需要在go中调用python3的需求,这种需求笔者想到了两种解法,一是直接在代码中调用python3,二是使用shell命令执行python3脚本。在本文中主要介绍了在go中使用go-python3这个库调用python3的一些实践历程与踩坑经历。关于使用脚本在另一篇文章:https://blog.csdn.net/LuciferMS/article/details/121888491
环境搭建
github上有现成的go调用python3开源框架,https://github.com/DataDog/go-python3,值得注意的是目前这个库只支持python3.7,笔者开始的时候电脑上装的是python3.8,所以在这个上面花费了好多时间,不过这也给了我一个教训,就是使用一个开源库的时候一定要好好看他的readme.md,留意一下有什么值得注意的地方。
使用go get github.com/DataDog/go-python3就可以获取这个库到你的项目中,但是也有可能会报错,如果是pkg_config的问题可以在电脑上安装一下这个依赖,mac上安装:brew install pkg_config ,再试一次,问题就迎刃而解了。
程序demo
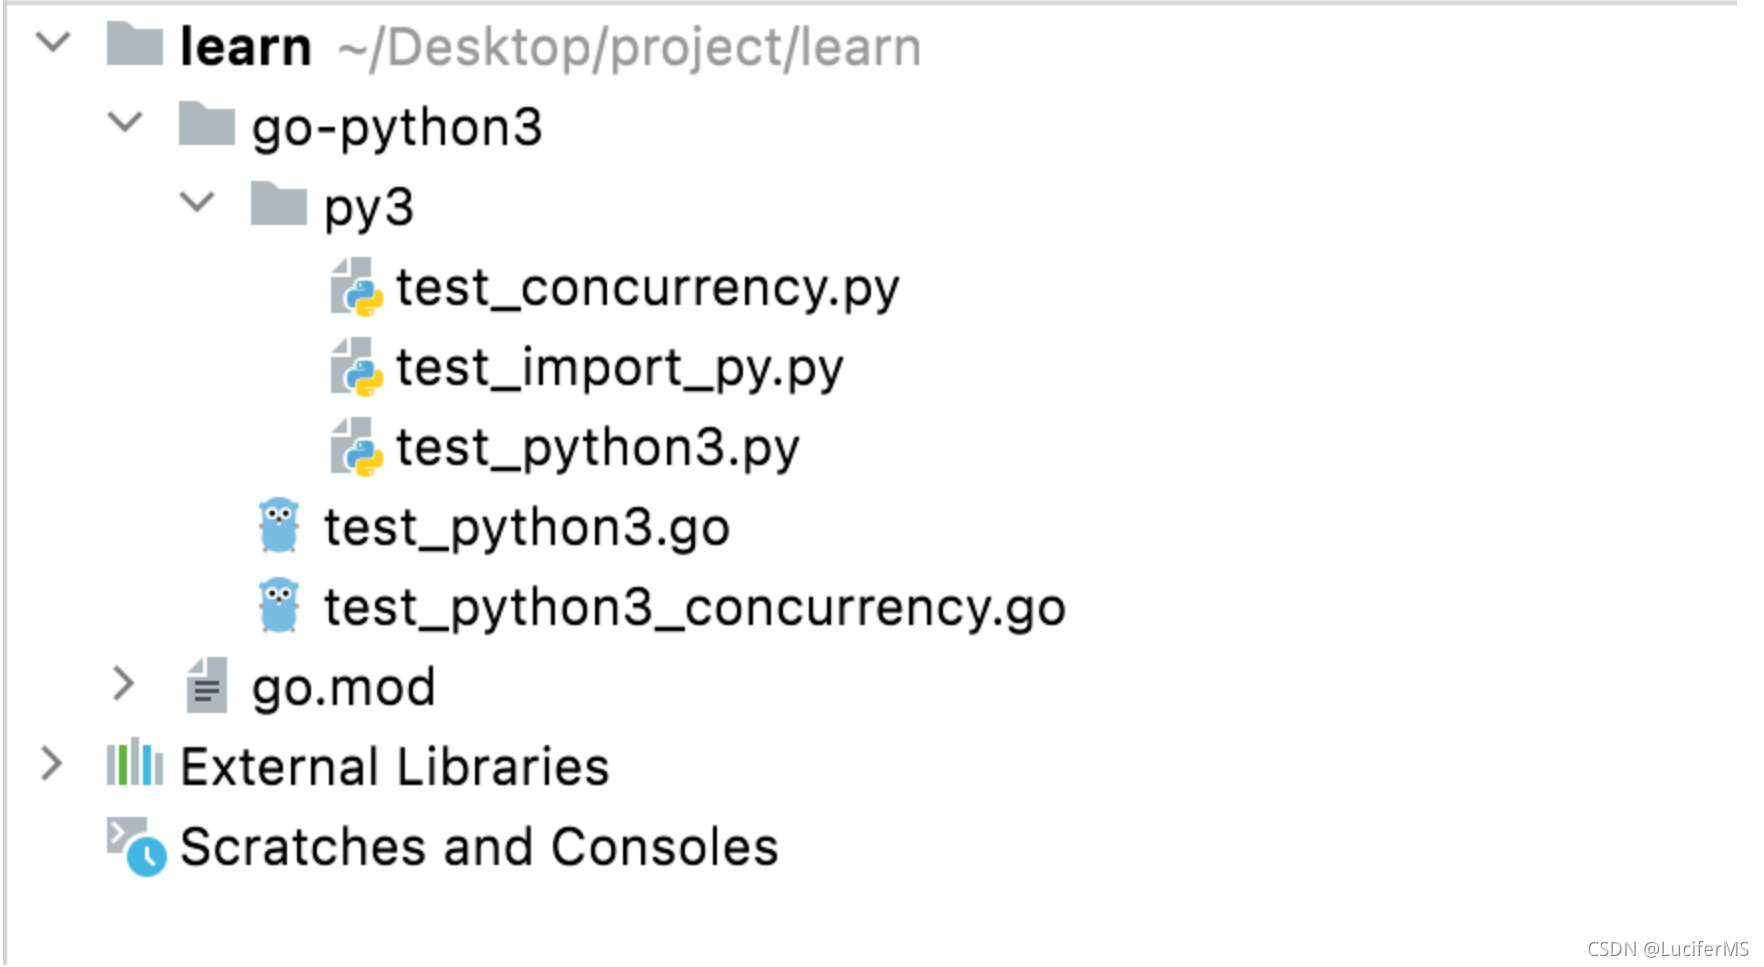
笔者的程序目录结构是这样的:
下面我们来看这个库的具体使用demo:
1.go代码 test_python3.go
package main

import (
   "fmt"
   "github.com/DataDog/go-python3"
   "log"
   "os"
)

func ImportModule(dir, name string) *python3.PyObject {
   sysModule := python3.PyImport_ImportModule("sys")
   path := sysModule.GetAttrString("path")
   pathStr, _ := pythonRepr(path)
   log.Println("before add path is " + pathStr)
   python3.PyList_Insert(path, 0, python3.PyUnicode_FromString(""))
   python3.PyList_Insert(path, 0, python3.PyUnicode_FromString(dir))
   pathStr, _ = pythonRepr(path)
   log.Println("after add path is " + pathStr)
   return python3.PyImport_ImportModule(name)
}

func main(){
   python3.Py_Initialize()
   if !python3.Py_IsInitialized() {
      fmt.Println("Error initializing the python interpreter")
      os.Exit(1)
   }
   path, _ := os.Getwd()
   helloPy := ImportModule(path + "/py3", "test_python3")
   if helloPy == nil {
      log.Fatalf("helloPy is nil")
      return
   }
   helloFunc := helloPy.GetAttrString("test_print_name")
   if helloFunc == nil {
      log.Fatalf("helloFunc is nil")
   }
   var args = python3.PyTuple_New(1)
   python3.PyTuple_SetItem(args, 0, python3.PyUnicode_FromString("python3"))
   helloPy3Str := helloFunc.Call(args, python3.Py_None)
   if helloPy3Str == nil {
      log.Fatalf("helloPy3Str is nil")
   }
   funcResultStr, _ := pythonRepr(helloPy3Str)
   log.Println("func result: " + funcResultStr)
}

func pythonRepr(o *python3.PyObject) (string, error) {
   if o == nil {
      return "", fmt.Errorf("object is nil")
   }

   s := o.Repr()
   if s == nil {
      python3.PyErr_Clear()
      return "", fmt.Errorf("failed to call Repr object method")
   }
   defer s.DecRef()

   return python3.PyUnicode_AsUTF8(s), nil
}
2.python代码test_python3.py
import os

from test_import_py import f
from test_import_py import x

# import cython
def test_print_name(name):
    print(os.getcwd())
    y = f(1.1)
    print(x)
    return y
3.python&cython代码
import cython

x = 3

@cython.cfunc
@cython.exceptval(-2, check=True)
def f(x: cython.double) -> cython.double:
    return x ** 2 - x
程序运行结果

程序测试点
- 如何引入执行一个python方法?
- 在python代码中引入别的模块会不会有问题
- 在python程序中写Cython会不会有问题
结果解析
-
python3.Py_Initialize()调用这个方法可以初始化python3的执行环境,只有执行了这个方法才可以运行相关的python3操作,值得注意的是这个方法既没有返回值,也不能重复初始化,重复初始化会报错。这个方法没有返回值意味着我们没法从这个方法中感知它的执行过程是否有问题,但是他也提供了python3.Py_IsInitialized()这个方法来让我们知道python3的环境是否初始化完成。这两个方法要一起使用。 -
添加搜索路径 ,我们要往sys.path中添加我们写的python代码所在的目录作为搜索路径,添加进去之后,文件之中的代码才可以作为一个模块被import进来。值得注意的是,当我们import一个文件的时候,会把这个py脚本的代码执行一边,如py代码中的
print("hello")就被执行了 -
执行代码,其中有一些api和值得关注的点如下:
- PyImport_ImportModule:引入一个模块,通俗的理解就是传入一个文件名(前提是这个文件名所在的目录已经被引入到搜索路径下面,也就是sys.path下面),值得注意的是,如果这个被引入的文件路径不对或者不存在,这个方法返回的是nil,并不会报错,如果报错了,那应该是我们引入的文件中的python代码存在着问题,笔者遇到过一个坑,就是python代码中import的一些依赖并没有在代码中有使用,然后就报错了。
- GetAttrString:根据名字获取模块中的一个变量,返回的是一个pythonObject,比如我们再a.py中定义了一个
demo = 1那么这个时候我们a.GetAttrString(“demo”)就获取到了这个变量了,当然这里也可以获取一个方法。 - Call:调用一个方法,值得注意的是这里的传参是一个tuple,如果不是tuple,Call方法会返回nil。还有一点值得关注的地方是,这里存在着一个并发的问题,如果一个函数在Call执行的过程中,再次被调用,此时python环境就会crash,感觉这个应该是python的原因,python的GIL机制,不能支持真正的并发运行代码。这个demo会在后面贴出。
- pythonRepr,封装的代码,将一个python对象转化为字符串。
并发调用方法的坑
test_concurrency.go
package main

import (
   "fmt"
   "github.com/DataDog/go-python3"
   "log"
   "os"
)

func main()  {
   python3.Py_Initialize()
   if !python3.Py_IsInitialized() {
      fmt.Println("Error initializing the python interpreter")
      os.Exit(1)
   }
   sysModule := python3.PyImport_ImportModule("sys")
   path := sysModule.GetAttrString("path")
   //pathStr, _ := pythonRepr2(path)
   //log.Println("before add path is " + pathStr)
   python3.PyList_Insert(path, 0, python3.PyUnicode_FromString(""))
   python3.PyList_Insert(path, 0, python3.PyUnicode_FromString("./py3"))
   concurrencyFile := python3.PyImport_ImportModule("test_concurrency")
   if concurrencyFile == nil {
      log.Fatalf("concurrency is nil")
      return
   }
   testFunc := concurrencyFile.GetAttrString("test_func")
   if testFunc == nil {
      log.Fatalf("testFunc is nil")
      return
   }
   go func() {
      testFunc.Call(python3.Py_None, python3.Py_None)
      for  {

      }
   }()
  	//time.Sleep(10 * time.Second)
   go func() {
      testFunc.Call(python3.Py_None, python3.Py_None)
      for  {

      }
   }()
   select {

   }
}
test_concurrency.py
import time

def test_func():
    print("hello")
    time.sleep(10)
-
这个程序的大概意思就是一个python方法耗时是10s(执行的时候人为的sleep 10s),然后在go中有两个协程并发的去调用这个方法,这个程序的执行结果就是python crash,
-
解决方法1: 但是如果将注释中的代码也加入其中,也就是说在两个协程之间加入11s的沉睡,这样两个协程对这个func的调用就是串行的了,这样就不会有问题。
-
解决方法2:
将go代码改成下面这个样子,改动点在代码中已标出
package main

import (
   "fmt"
   "github.com/DataDog/go-python3"
   "log"
   "os"
)

func main()  {
   python3.Py_Initialize()
   if !python3.Py_IsInitialized() {
      fmt.Println("Error initializing the python interpreter")
      os.Exit(1)
   }
   sysModule := python3.PyImport_ImportModule("sys")
   path := sysModule.GetAttrString("path")
   python3.PyList_Insert(path, 0, python3.PyUnicode_FromString(""))
   python3.PyList_Insert(path, 0, python3.PyUnicode_FromString("./py3"))
   concurrencyFile := python3.PyImport_ImportModule("test_concurrency")
   if concurrencyFile == nil {
      log.Fatalf("concurrency is nil")
      return
   }
   testFunc := concurrencyFile.GetAttrString("test_func")
   if testFunc == nil {
      log.Fatalf("testFunc is nil")
      return
   }
   go func() {
      ensure := python3.PyGILState_Ensure() //获取python GIL(全局解释器)状态 0:释放 1:占用
      fmt.Println(ensure)
      testFunc.Call(python3.Py_None, python3.Py_None)
      for  {

      }
   }()
  go func() {
  	for {
  		if  python3.PyGILState_Ensure() == python3.PyGILState(0) {
  			testFunc.Call(python3.Py_None, python3.Py_None)
  			break
  		} else {

  		}
  	}
  	for  {

  	}
  }()
   select {

   }
}
上面代码的改动主要是添加了对python GIL状态的判断,python由于又全局解释器的存在,所以不能并行执行多线程的代码,这个并发的问题应该也是由于GIL的存在才会导致的。笔者翻阅了Cython的API文档,找到了这个方法可以获取GIL的状态,这个问题才得以解决,但是感觉这也不是最优的方案,因为这样代码还是串行执行的,后面再探究一下有没有优化的空间吧。
总结
其实现在回头看来,这段探索历程还是很有意思的,在工作中能有这样的体验当然也是相当棒的。
话说回来,笔者也不是很懂python,所以一些东西都是摸着石头过河,很多结论都带有一丝猜测在里面,有不对支持还请读者多多提点。
参考
- python GIL: https://www.cnblogs.com/traditional/p/13289905.html
- Cython的Api文档: https://docs.python.org/zh-cn/3/c-api/index.html


 1199
1199


 被折叠的 条评论
为什么被折叠?
被折叠的 条评论
为什么被折叠?
 到【灌水乐园】发言


