


写在前面的话
1、参考学习自:https://blog.csdn.net/howard2005/article/details/107926234
2、内容如果有不对的,希望可以指出或补充。
3、课堂回顾。
一、概述
MyBatis: 持久层框架,它支持定制化 SQL、存储过程以及高级映射。避免了几乎所有的 JDBC(Java Database Connectivity,Java数据库连接) 代码和手动设置参数以及获取结果集。可以使用简单的 XML 或注解来配置和映射原生信息,将接口和 Java 的 POJOs(Plain Ordinary Java Object,普通的 Java对象)映射成数据库中的记录。
二、操作
(一)准备
1、数据库(数据源)

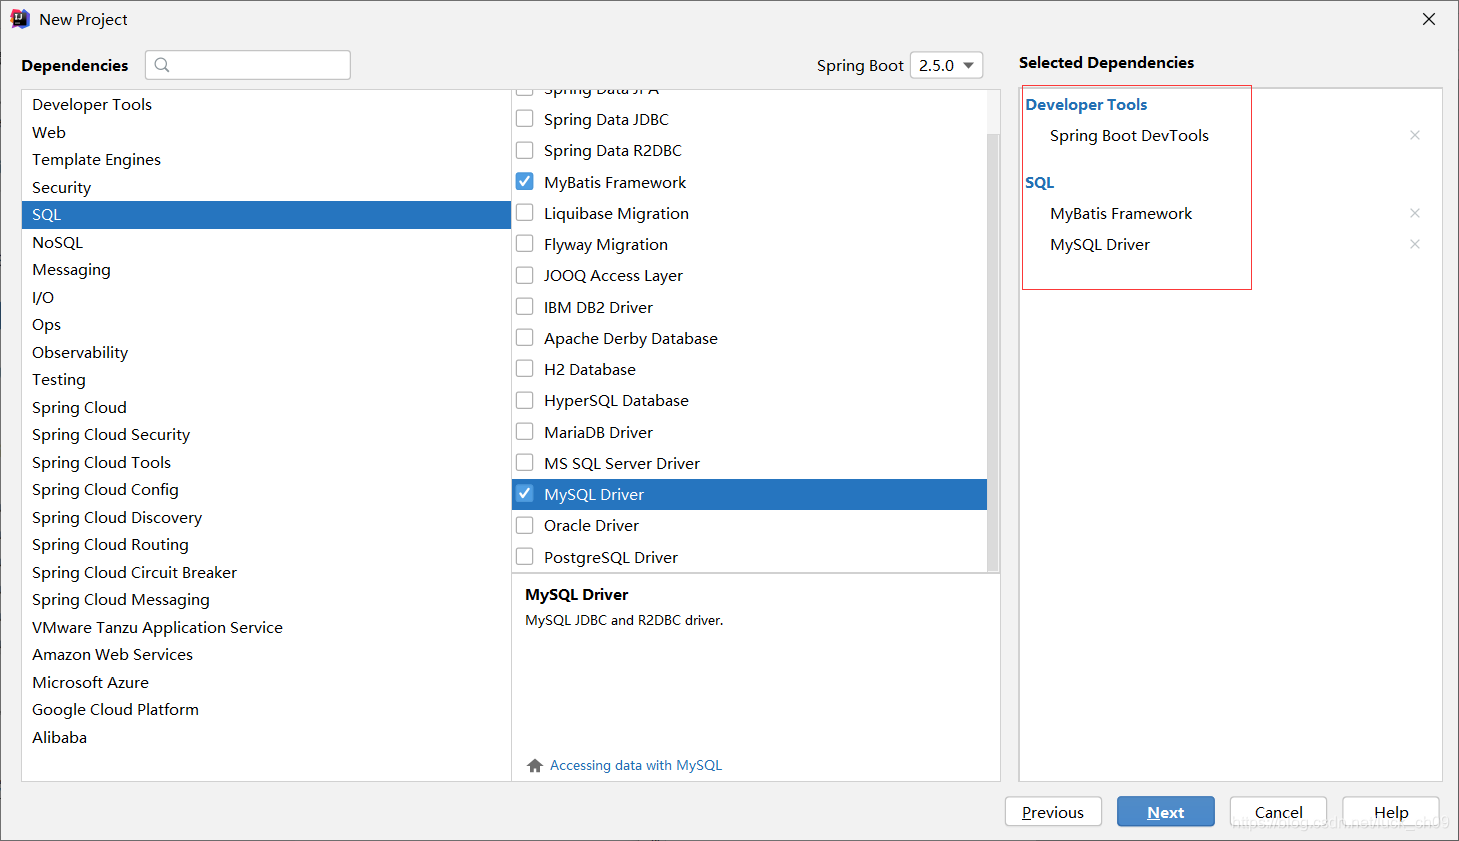
2、创建项目
创建Spring Boot项目MyBatisDemo,其中需要注意的如下。
Comment(评论实体类)、Article(文章实体类)


3、配置文件
全局配置文件application.properties更名为application.yaml,在其中编写如下内容。
# 配置数据库
spring:
  datasource:
    driver-class-name: com.mysql.cj.jdbc.Driver
    url: jdbc:mysql://localhost:3306/blog?serverTimezone=UTC&useUnicode=true&characterEncoding=UTF-8
    username: root
    password: 【这里填写自己数据库的密码】

    # 配置Druid数据源
    type: com.alibaba.druid.pool.DruidDataSource
    druid.initial-size: 20 #初始连接数
    druid.min-idle: 10 #最小空闲数
    druid.max-active: 100 #最大连按数

# 配置mybatis
mybatis:
  configuration:
    map-underscore-to-camel-case: true # 允许将下划线命名法转换为驼峰命名法(a_id-->aId)
  mapper-locations: classpath:mapper/*.xml # 映射器配置文件路径
  type-aliases-package: net.ch.lesson06.bean # 指定的实体类别名路径
pom.xml文件(在其中添加阿里巴巴的Druid数据源)
<dependency>
    <groupId>com.alibaba</groupId>
    <artifactId>druid-spring-boot-starter</artifactId>
    <version>1.2.6</version>
</dependency>
(二)效果实现
1、使用注解方式整合MyBatis
CommentMapper(评论映射器接口)

2、使用配置文件方式整合MyBatis
ArticleMapper(文章映射接口)

ArticleMapper.xml(映射器配置文件),具体查看【参考学习链接内容】。

(三)测试效果展示
1、使用注解方式整合MyBatis
testFindById()

testInsertComment()

testDeleteComment()

2、使用配置文件方式整合MyBatis
testFindArticleById()


testUpdateArticle()


 1万+
1万+


 被折叠的 条评论
为什么被折叠?
被折叠的 条评论
为什么被折叠?
 到【灌水乐园】发言


