


系统安装
anaconda安装
cudn cudnn安装
下载cudnn安装
配置环境变量
检查cuda是否安装成功
检查cudnn是否安装成功
配置conda源
修改pip镜像源为阿里云
tensorflow-gpu下载安装
测试tensorflow-gpu是否可用
conda 常用命令
tensorflow对应版本cuda和cudnn版本对照参考
系统安装
anaconda安装
从官网中下载windows版本anaconda。
下载个人版本够用了
anacondawindows64位下载链接anacondaLinux64位下载链接
下载完成后打开安装程序
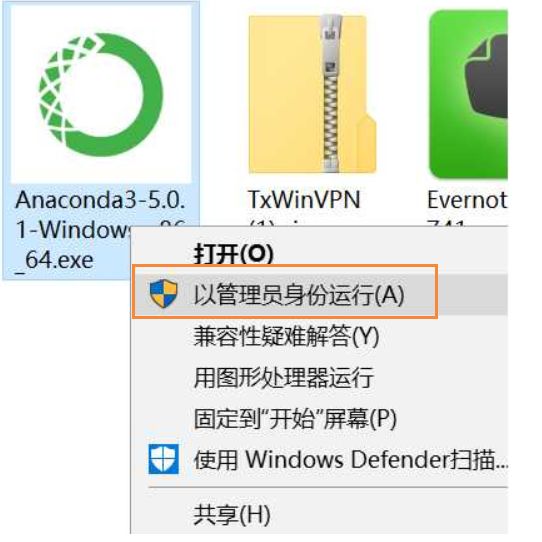
进入安装界面,点击 next

选择安装路径

勾选勾选上自动配置环境变量选项,这样无需再手动配置环境变量,
- 如果已经安装Python环境不建议勾选第二个选项.
- 若未安装python环境建议两个选项都勾选

安装完成后点击点击finish完成安装

验证anaconda是否安装成功
打开cmd输入conda info出现下列相关信息说明anaconda安装成功,且环境变量配置成功
C:\Users\Administrator>conda info

     active environment : None
       user config file : C:\Users\Administrator\.condarc
 populated config files : C:\Users\Administrator\.condarc
          conda version : 4.9.2
    conda-build version : 3.15.1
         python version : 3.7.0.final.0
       virtual packages : __win=0=0
                          __archspec=1=x86_64
       base environment : D:\ProgramFiles\Anaconda3  (writable)
cudn cudnn安装
Nvidia官网cuda下载地址选择对应windows版本,建议选择exe(local)版本。本地安装。

点击download在这里附上编写本文档时的最新版本cuda版本:cuda_11.2.1_461.09_win10.exe下载链接

需要注意请根据自己所使用框架具体要求下载对应版本的cuda,否则在运行时可能会报版本错误。cuda版本参考
打开安装程序,选择安装路径
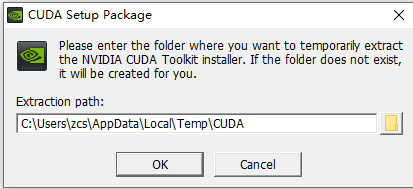
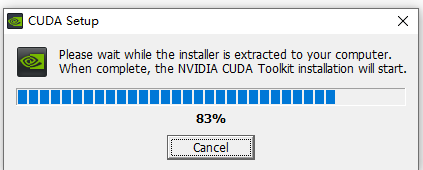
点击OK等待安装
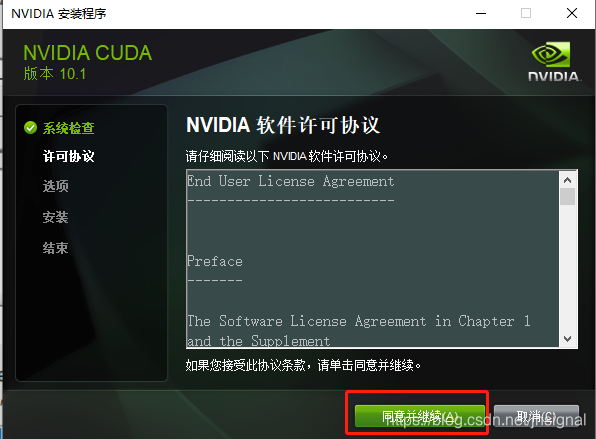
同意协议
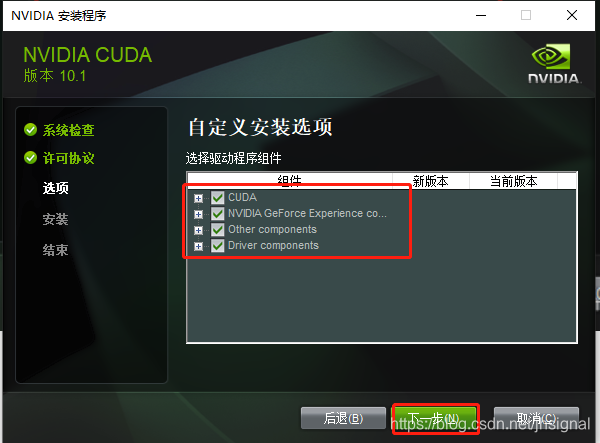
选择自定义安装
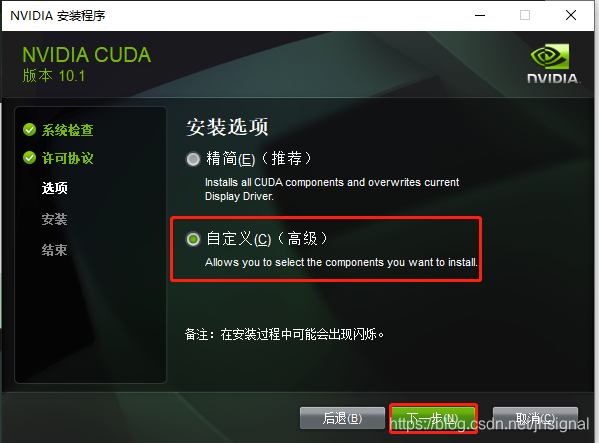
勾选所有组件,注意
组件当前版本若大于新版本请不要勾选此组件
请记住cuda安装路径windows默认为
C:\Program Files\NVIDIA GPU Computing Toolkit\CUDA\对应版本
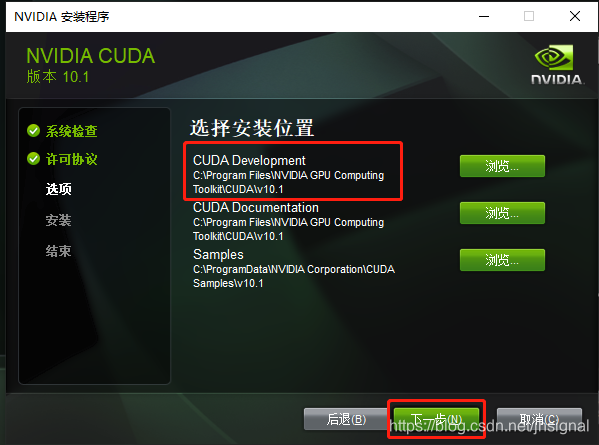
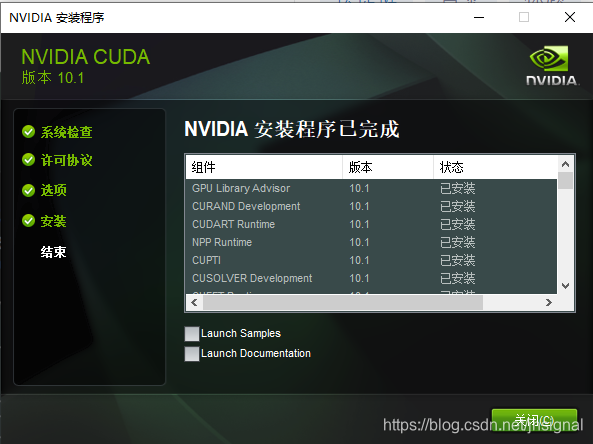
点击下一步
下载cudnn
NVIDIA cuDNN是用于深度神经网络的GPU加速的原语库。,cudnn下载需要在nvidia注册账号,可能需要科学上网。
- cudnn官方下载地址需要注册账号
- 将下载好的cudnn解压至cuda安装目录下:

配置环境变量
将cuda文件夹中的bin目录添加到系统变量中
C:\Program Files\NVIDIA GPU Computing Toolkit\CUDA\v10.2\bin
将cuda文件夹中的libnvvp目录添加到系统变量中
C:\Program Files\NVIDIA GPU Computing Toolkit\CUDA\v10.2\libnvvp
将cuda文件夹中的include目录添加到系统变量中
C:\Program Files\NVIDIA GPU Computing Toolkit\CUDA\v10.2\include
将cuda文件夹中的lib目录添加到系统变量中
C:\Program Files\NVIDIA GPU Computing Toolkit\CUDA\v10.2\lib
如果系统安装多个cuda以上所有系统变脸全部上移到顶部
检查cuda是否安装成功
检查cuda是否添加到环境变量,打开环境变量查看系统变量中的CUDA_PATH和CUDA_PATH_Vxx.x是否存在且正确。

然后启动cmd输入nvcc-V查看是否正确

检查cudnn是否安装成功
进入到cuda的安装路径,C:\Program Files\NVIDIA GPU Computing Toolkit\CUDA\v10.1\extras\demo_suite,找到如下两个.exe文件:

首先执行:deviceQuery.exe,查看是否出现如下界面:

然后执行bandwidthTest.exe,出现如下界面,则代代表cuDNN也安装成功。

配置conda源
使用conda install安装环境依赖时,经常会遇到网络超时,因此需要切换国内源。
- 打开
conda prompt - 添加镜像源(命令行)
conda config --add channles(url)
#清华源
conda config --add channels https://mirrors.tuna.tsinghua.edu.cn/anaconda/pkgs/free/
conda config --add channels https://mirrors.tuna.tsinghua.edu.cn/anaconda/pkgs/main/
conda config --add channels https://mirrors.tuna.tsinghua.edu.cn/anaconda/cloud//pytorch/
conda config --add channels https://mirrors.tuna.tsinghua.edu.cn/anaconda/cloud/conda-forge/
conda config --set show_channel_urls yes
#北京外国语大学镜像
conda config --add https://mirrors.bfsu.edu.cn/anaconda/pkgs/main
conda config --add https://mirrors.bfsu.edu.cn/anaconda/pkgs/free
conda config --add https://mirrors.bfsu.edu.cn/anaconda/pkgs/r
conda config --add https://mirrors.bfsu.edu.cn/anaconda/pkgs/pro
conda config --add https://mirrors.bfsu.edu.cn/anaconda/pkgs/msys2
conda config --set show_channel_urls yes
- 添加镜像源(.condarc)
选择下面一个镜像站的代码复制并替换下面文件中的全部内容
- windows为
“C:\用户\你的用户名\.condarc” - windows无法直接创建
.condarc文件,可先执行
conda config --set show_channel_urls yes
生成该文件之后再修改。
- Linux为
"/home/你的用户名/.condarc"。(若没有这个文件就新建一个,注意文件名为.condarc,不要有任何其他后缀)。将下面内容直接复制进该文件
channels:
  - defaults
show_channel_urls: true
default_channels:
  - https://mirrors.tuna.tsinghua.edu.cn/anaconda/pkgs/main
  - https://mirrors.tuna.tsinghua.edu.cn/anaconda/pkgs/r
  - https://mirrors.tuna.tsinghua.edu.cn/anaconda/pkgs/msys2
custom_channels:
  conda-forge: https://mirrors.tuna.tsinghua.edu.cn/anaconda/cloud
  msys2: https://mirrors.tuna.tsinghua.edu.cn/anaconda/cloud
  bioconda: https://mirrors.tuna.tsinghua.edu.cn/anaconda/cloud
  menpo: https://mirrors.tuna.tsinghua.edu.cn/anaconda/cloud
  pytorch: https://mirrors.tuna.tsinghua.edu.cn/anaconda/cloud
  simpleitk: https://mirrors.tuna.tsinghua.edu.cn/anaconda/cloud
channels:
  - defaults
show_channel_urls: true
channel_alias: https://mirrors.bfsu.edu.cn/anaconda
default_channels:
  - https://mirrors.bfsu.edu.cn/anaconda/pkgs/main
  - https://mirrors.bfsu.edu.cn/anaconda/pkgs/free
  - https://mirrors.bfsu.edu.cn/anaconda/pkgs/r
  - https://mirrors.bfsu.edu.cn/anaconda/pkgs/pro
  - https://mirrors.bfsu.edu.cn/anaconda/pkgs/msys2
custom_channels:
  conda-forge: https://mirrors.bfsu.edu.cn/anaconda/cloud
  msys2: https://mirrors.bfsu.edu.cn/anaconda/cloud
  bioconda: https://mirrors.bfsu.edu.cn/anaconda/cloud
  menpo: https://mirrors.bfsu.edu.cn/anaconda/cloud
  pytorch: https://mirrors.bfsu.edu.cn/anaconda/cloud
  simpleitk: https://mirrors.bfsu.edu.cn/anaconda/cloud
运行conda clean -i清除索引缓存,保证用的是镜像站提供的索引
查看镜像源
conda config --show-sources
修改pip镜像源为阿里云
在windows文件夹管理器中输入%appdata%,进入\appdata\roaming目录新建pip目录,新建pip.ini文件
在pip文件中输入以下内容
[global]

index-url = http://mirrors.aliyun.com/pypi/simple

[install]

trusted-host = mirrors.aliyun.com
tensorflow-gpu下载安装
- 打开Anaconda Navigator
- 点击Environments

3.点击create,

4.输入环境变量名,选择python版本,点击create。稍等一会便创建成功

*环境创建成功后打开conda prompt
- 激活该环境
conda activate tensorflow1
安装tensorflow-gpu
conda install tensorflow-gpu
#安装指定版本tensorflow-gpu
conda install tensorflow-gpu==2.1.0
查看是否安装上环境conda list

出现tensorflow-gpu便说明安装成功
测试tensorflow-gpu是否可用
激活环境
conda activate tensorflow1
(medicine) C:\Users\dhcc>python
Python 3.8.6 | packaged by conda-forge | (default, Jan 25 2021, 22:54:47) [MSC v.1916 64 bit (AMD64)] on win32
Type "help", "copyright", "credits" or "license" for more information.
>>> import tensorflow as tf
2021-02-27 16:24:32.243502: I tensorflow/stream_executor/platform/default/dso_loader.cc:49] Successfully opened dynamic library cudart64_110.dll
>>> tf.test.is_gpu_available()
2021-02-27 16:27:25.706998: I tensorflow/core/common_runtime/gpu/gpu_device.cc:1720] Found device 0 with properties:
pciBusID: 0000:83:00.0 name: Tesla V100-SXM2-16GB computeCapability: 7.0
coreClock: 1.53GHz coreCount: 80 deviceMemorySize: 15.88GiB deviceMemoryBandwidth: 836.37GiB/s
2021-02-27 16:27:25.719334: I tensorflow/stream_executor/platform/default/dso_loader.cc:49] Successfully opened dynamic library cudart64_110.dll
2021-02-27 16:27:25.725227: I tensorflow/stream_executor/platform/default/dso_loader.cc:49] Successfully opened dynamic library cublas64_11.dll
2021-02-27 16:27:25.731455: I tensorflow/stream_executor/platform/default/dso_loader.cc:49] Successfully opened dynamic library cublasLt64_11.dll
2021-02-27 16:27:25.737729: I tensorflow/stream_executor/platform/default/dso_loader.cc:49] Successfully opened dynamic library cufft64_10.dll
2021-02-27 16:27:25.744441: I tensorflow/stream_executor/platform/default/dso_loader.cc:49] Successfully opened dynamic library curand64_10.dll
2021-02-27 16:27:25.752021: I tensorflow/stream_executor/platform/default/dso_loader.cc:49] Successfully opened dynamic library cusolver64_10.dll
2021-02-27 16:27:25.759194: I tensorflow/stream_executor/platform/default/dso_loader.cc:49] Successfully opened dynamic library cusparse64_11.dll
2021-02-27 16:27:25.766735: I tensorflow/stream_executor/platform/default/dso_loader.cc:49] Successfully opened dynamic library cudnn64_8.dll
2021-02-27 16:27:25.782919: I tensorflow/core/common_runtime/gpu/gpu_device.cc:1862] Adding visible gpu devices: 0
2021-02-27 16:27:26.528352: I tensorflow/core/common_runtime/gpu/gpu_device.cc:1261] Device interconnect StreamExecutor with strength 1 edge matrix:
2021-02-27 16:27:26.534888: I tensorflow/core/common_runtime/gpu/gpu_device.cc:1267]      0
2021-02-27 16:27:26.539445: I tensorflow/core/common_runtime/gpu/gpu_device.cc:1280] 0:   N
2021-02-27 16:27:26.558320: I tensorflow/core/common_runtime/gpu/gpu_device.cc:1406] Created TensorFlow device (/device:GPU:0 with 14827 MB memory) -> physical GPU (device: 0, name: Tesla V100-SXM2-16GB, pci bus id: 0000:83:00.0, compute capability: 7.0)
2021-02-27 16:27:26.569970: I tensorflow/compiler/jit/xla_gpu_device.cc:99] Not creating XLA devices, tf_xla_enable_xla_devices not set
True
#或者
>>> tf.config.list_physical_devices('GPU')
2021-02-27 16:40:04.176880: I tensorflow/compiler/jit/xla_cpu_device.cc:41] Not creating XLA devices, tf_xla_enable_xla_devices not set
2021-02-27 16:40:04.187789: I tensorflow/core/common_runtime/gpu/gpu_device.cc:1720] Found device 0 with properties:
pciBusID: 0000:83:00.0 name: Tesla V100-SXM2-16GB computeCapability: 7.0
coreClock: 1.53GHz coreCount: 80 deviceMemorySize: 15.88GiB deviceMemoryBandwidth: 836.37GiB/s
2021-02-27 16:40:04.199739: I tensorflow/stream_executor/platform/default/dso_loader.cc:49] Successfully opened dynamic library cudart64_110.dll
2021-02-27 16:40:04.205925: I tensorflow/stream_executor/platform/default/dso_loader.cc:49] Successfully opened dynamic library cublas64_11.dll
2021-02-27 16:40:04.211750: I tensorflow/stream_executor/platform/default/dso_loader.cc:49] Successfully opened dynamic library cublasLt64_11.dll
2021-02-27 16:40:04.218167: I tensorflow/stream_executor/platform/default/dso_loader.cc:49] Successfully opened dynamic library cufft64_10.dll
2021-02-27 16:40:04.224249: I tensorflow/stream_executor/platform/default/dso_loader.cc:49] Successfully opened dynamic library curand64_10.dll
2021-02-27 16:40:04.229874: I tensorflow/stream_executor/platform/default/dso_loader.cc:49] Successfully opened dynamic library cusolver64_10.dll
2021-02-27 16:40:04.235953: I tensorflow/stream_executor/platform/default/dso_loader.cc:49] Successfully opened dynamic library cusparse64_11.dll
2021-02-27 16:40:04.242297: I tensorflow/stream_executor/platform/default/dso_loader.cc:49] Successfully opened dynamic library cudnn64_8.dll
2021-02-27 16:40:04.259506: I tensorflow/core/common_runtime/gpu/gpu_device.cc:1862] Adding visible gpu devices: 0
[PhysicalDevice(name='/physical_device:GPU:0', device_type='GPU')]
conda 常用命令
- Conda是没有重命名环境的功能的, 要实现这个基本需求, 只能通过克隆-删除的过程。
- 切记不要直接mv移动环境的文件夹来重命名, 会导致一系列无法想象的错误的发生!
1. conda --version #查看conda版本,验证是否安装

2. conda update conda #更新至最新版本,也会更新其它相关包

3. conda update --all #更新所有包

4. conda update package_name #更新指定的包

5. conda create -n env_name package_name #创建名为env_name的新环境,并在该环境下安装名为package_name 的包
可以指定新环境的版本号,例如:
conda create -n python2 python=python2.7 numpy pandas,
创建了python2环境,python版本为2.7,同时还安装了numpy pandas包

6. source activate env_name #切换至env_name环境

7. source deactivate #退出环境

8. conda info -e #显示所有已经创建的环境

9. conda create --name new_env_name --clone old_env_name #复制old_env_name为new_env_name

10. conda remove --name env_name –all #删除环境

11. conda list #查看所有已经安装的包

12. conda install package_name #在当前环境中安装包

13. conda install --name env_name package_name #在指定环境中安装包

14. conda remove -- name env_name package #删除指定环境中的包

15. conda remove package #删除当前环境中的包

16. conda create -n tensorflow_env tensorflow

conda activate tensorflow_env #conda 安装tensorflow的CPU版本

17. conda create -n tensorflow_gpuenv tensorflow-gpu

conda activate tensorflow_gpuenv #conda安装tensorflow的GPU版本

18. conda env remove -n env_name #采用第10条的方法删除环境失败时,可采用这种方法

19. conda install --channel https://conda.anaconda.org/anaconda tensorflow=1.8.0
提供一个下载地址,使用上面命令就可安装1.8.0版本tensorflow

conda clean -p 删除一些没用的包,这个命令会检查哪些包没有在包缓存中被硬依赖到其他地方,并删除它们

conda clean -t可以将conda保存下来的tar打包。

conda clean -y -all //删除所有的安装包及cache
这里给出tensorflow对应版本cuda和cudnn版本对照参考。


 135
135


 被折叠的 条评论
为什么被折叠?
被折叠的 条评论
为什么被折叠?
 到【灌水乐园】发言


