


原文来自http://www.yiiframework.com/wiki/490/creating-a-simple-crud-app-with-yii2
因为翻译能力有限,所以采用双语对照的形式,有译得不好的地方请多原谅。
Creating a SimpleCRUD App With Yii2 (Revised 12/20/2013)
用 Yii2创建一个简单的 CRUD(增删改查)应用(修订日期 2013-12-20)
WhatWe'll Be Covering 我们将做些什么
WhatYou'll Need 我们需要些什么
CreatingYour App 创建你的应用
Creatinga Config file 创建一个配置文件
Creatingthe Database 创建一个数据库模型
Creatingthe Database Model 创建一个数据库模型
Creatingthe Controller 创建一个控制器
Views视图
HandlingAuthentication处理身份验证
ConcludingThoughts结束时的感想
Creating a Simple CRUDApp with Yii Framework 2 (Updated December 20th, 2013)
用 Yii创建一个简单的 CRUD(增删改查)应用(2013年12月20日修订)
By popular demand,today I will be revisitingmyprevious Yii Framework 2 Getting Started Guide and updating it with what iscurrently available in the Yii Framework 2 Repository. Provide here is an supersimple example CRUD application that will help you get started using theframework.
应大家的要求,今天我将要修订我前面写的一篇文章《Yii2框架入门指南》,我将用Yii2框架库里提供的最新内容来升级它。这里提供的是一个超简单的CRUD(增删改查)程序,将会帮助你从零起步使用这个框架。
Resources资源
Demo演示
OriginalBlog Entry 最早的博客实体
What We'll Be Covering我们将做些什么
In this tutorial wewill be covering the following:
在这个教程中,我们将完成下面这些内容:
-
Creating a Basic App
-
创建一基本的应用
-
Connecting to a MySQL Database
-
连接到一个MySQL数据库
-
Creating Logic to handle CRUD of a single model
-
创建逻辑来管理一个简单模型中的CRUD(增删改查)
-
Handling Basic Authentication
-
处理身份验证
What You'll Need我们需要些什么
-
A Webserver setup with either Apache or Nginx.
-
使用Apache或者 Nginx设置一个Web服务器,
-
A MySQL Database (5.5+)
-
一个MySQL数据库(版本号在5.5以上)
-
Yii 2 Requirements (I'm running 5.5.x)
-
Yii2需求(我正使用的是PHP5.5.x)
Disclaimers要求
Before we getstarted...在我们开始之前...
-
Yii Framework 2 is by no means "Production Ready". Don't use itin production. What is provided here is mainly used as an example of what youcan do in Yii Framework 2.
-
Yii2框架绝对没有做好“生产准备”,不要把它用于生产我在这里提供的,只能主要用作一个你学习使用Yii2框架的例子。
-
All the code released with this blog post is released under the MITLicense. Feel free to fork it and play with it.
-
这个博客提供的所有代码,遵行 MIT许可发布。您可以自由地使用它和用它来建立分支。
-
The code provided is by no means "Production Ready". If you runthis code in a production environment you run it at your own risk.
-
这里提供的代码绝对没有做好“生产准备”,如果你在一个生产环境中使用这些代码,你要对你自己的行为承担风险。
-
For simplicity, all commands will be from a Linux shell, and I will not beproviding specific Windows commands. Adapt them as necessary for Windows.
-
为简单起见,所有的命令都是从 Linux终端上得来,我不会提供特定的针对Windows的命令。您可以修改它们,使之适用于Windows。
-
This article may be reproduced and distributed under the followingconditions -please don't steal my writing and claim it as your own:
-
这篇文章可以在一定条件下复制和发布——请不要窃取我的作品并将它据为已意。
-
A link to the original articleMUST be provided in the reproduction:
1.您在复制它时,必须要提供一个指向原文的链接。
Erianna伊瑞安娜
-
My name and CopyrightMUST be provided in the reproduction:
2.在复制品中,还必须提供我的名字和版权。
Copyright© 2013 Charles R. Portwood II |Erianna
©版权所有2013,Charles R(查理斯·R)Portwood II (波德伍德二世)|Erianna伊瑞安娜
Creating Your App创建你的应用
When I wrote my firsttutorial covering this topic Yii didn't have a basic web application yet. As ofthe time of writing, Yii now includes three web applications for you to testand try out. As with my last tutorial, we're going to do everything fromscratch for the learning experience.
在我写我的第一个包含这个话题的教程时,Yii还没有一个基本的互联网应用。就在我的写作过程中,Yii已经包含了3个互联网应用来让你评测并试用它。作为我的最后一个教程,我们将为抓住学习经验做任何事情。
Creating Your WebSkeleton创建你的网络骨架
First, create a newfolder in your web directory. Inside that folder add the following folders:
首先,在你的Web文件夹下建立一个新的文件夹。在新建的文件夹中添加下列文件夹:
/config/
/web/
/assets/
/css/
/assets/
/commands/
/controllers/
/migrations/
/models/
/runtime/
/views/
/site/
/layouts/
A couple things tonotice here that are kinda important:
这里有一些比较重要的事情需要引起注意:
First, as of the timeof writing, the concept of a "protected" folder is gone. Yii lookalot more like the other PHP frameworks out there now (Codeigniter, Zend,CakePHP to name a few) in terms of base folder structure. The second thing tonotice is that we have 2 assets folders. The assets folder in the root of ourdirectory is going to contain stuff to handling assets, whereas the assetsfolder inside of our web/ directory is going tocontain our compiled assets.
首先,截至到正在写作的当下,“protected”文件夹的概念再没有。就基本目录结构而言,Yii现在看起来更像其他 PHP框架了(举几个来说,Codeigniter,Zend, CakePHP)第二个要关注的事情是,我们有两个assets文件夹我们根目录下的assets文件夹将要包含操控assets的文件,然而我们的web目录中的assets文件夹将包含我们编译的assets。
Now onto some files:
现在来到一些文件上:
The first file we wantto create isyii, which is equivalenttoyiic in Yii Framework 1.x.Create this file in the root of your directory, then add the following:
我们要创建的第一个文件是yii,它与Yii框架 1.x版本中的yiic文件相等。在我们的根目录下创建这个文件,然后写入下列内容:
#!/usr/bin/env php
<?php
defined('YII_DEBUG') ordefine('YII_DEBUG', true);
// fcgi doesn't have STDIN definedby default
// fcgi默认没有定义 STDIN(标准输入)
defined('STDIN') or define('STDIN',fopen('php://stdin', 'r'));
require(__DIR__ .'/vendor/autoload.php');
require(__DIR__ .'/vendor/yiisoft/yii2/yii/Yii.php');
$config = require(__DIR__ .'/config/console.php');
$application = newyii\console\Application($config);
$exitCode = $application->run();
exit($exitCode);
Then, create a file calledAppAsset.php inassets/:
然后,创建一个文件,命名为AppAssetphp in assets/:
<?php
namespace app\assets;
use yii\web\AssetBundle;
class AppAsset extends AssetBundle
{
public $basePath = '@webroot';
public $baseUrl = '@web';
public $depends = [
'yii\web\YiiAsset',
'yii\bootstrap\BootstrapAsset',
];
}
Finaly, create yourindex.php bootstrap file inweb/index.php:
最后,在web文件夹中创建你的index.php和bootstrap文件:
<?php
// comment out the following twolines when deployed to production
//在部署到生产环境时,请注释掉下面的这两行
defined('YII_DEBUG') ordefine('YII_DEBUG', true);
require(__DIR__ .'/../vendor/autoload.php');
require(__DIR__ .'/../vendor/yiisoft/yii2/yii/Yii.php');
$config = require(__DIR__ .'/../config/web.php');
(newyii\web\Application($config))->run();
This last part is veryimportant. Your web directory needs to point toweb/index.php rather thanindex.php. Until you make this change youwon't be able to see anything when you run your application. We're not at thepoint where you can see stuff yet, but it's important to point this out firstso that we can make sure it's taken care of.
这最后的部分是非常重要的。你的站点文件夹要指向web/index.php,而不是index.php。直到你完成这些改变,你运行自己的程序才能够看到一些东西。我们不是把你能看到这些东西当作要点,不过是因为先指出这一点很重要,以便我们能确信它能得到好的关注。
With these two filesin place we can create our composer file that will download and install YiiFramework 2 for us. Create a new file in the root of our appliation calledcomposer.json
这两个文件准备就绪之后,我们就能创建我们的composer(设计)文件,它能为我们下载并且安装Yii2框架。在我们的程序根目录下创建一个文件,命名为composer.json。
{
"name": "A Basic CRUDApp",
"description": "Yii 2Basic CRUD Example",
"keywords": ["yii","framework", "basic", "CRUD"],
"homepage":"http://yf2.erianna.com",
"type": "project",
"license": "MITC",
"minimum-stability":"dev",
"require": {
"php":">=5.4.0",
"yiisoft/yii2":"*",
"yiisoft/yii2-bootstrap": "*",
"yiisoft/yii2-codeception": "*",
"yiisoft/yii2-debug":"*",
"yiisoft/yii2-gii":"*",
"yiisoft/yii2-swiftmailer": "*"
},
"scripts": {
"post-create-project-cmd": [
"yii\composer\Installer::setPermission"
]
},
"extra": {
"writable": [
"runtime",
"web/assets"
],
"executable": [
"yii"
]
}
}
Next we'll be usingcomposer to install Yii for us. If you already have composer installed you canskip ahead.
下一步,我们要用composer来为我们安装Yii。如果你已经有了composer,你可以路过前面的内容。
Install Composer安装Composer
Yii 2 now usescomposer to download additional packages Yii uses. Before we can get startedusing Yii we'll need to download and install composer.
Yii2现在使用composer来下载它它所使用的安装包。在我们能够开始使用Yii之前,我们得下载并安装composer。
curl -sShttps://getcomposer.org/installer | sudo php -- --install-dir=/usr/bin
sudo ln -s /usr/bin/composer.phar/usr/bin/composer
Then install thecomposer dependencies
然后安装composer的依赖文件。
sudo composer self-update
composer install
Installing Yii安装Yii
With the installationof composer taken care of, we can now install Yii and it's dependencies
在细心安装了composer之后,我们可以安装Yii和它的依赖文件。
# Install Yii Dependencies
composer install composer安装
If everything goeswell, you should see a bunch of output that looks similar to the following. Ifyou get an error, fix it and try runningcomposer install again.
如果一切顺利,你可能看到一个输出的分支,它看起来与下面的内容相似。如果你遇上了一个错误,解决它并且重新安装composer。
Loading composer repositories with package information
加载包含有包信息的composer库。
Installing dependencies (includingrequire-dev)
- Installing ezyang/htmlpurifier (v4.5.0)
Loading from cache
- Installing michelf/php-markdown (1.3)
Loading from cache
- Installing phpspec/php-diff (dev-master 30e103d)
Cloning 30e103d19519fe678ae64a60d77884ef3d71b28a
- Installing yiisoft/jquery (1.10.2)
Loading from cache
- Installing yiisoft/yii2-composer (dev-master 96ecb97)
Cloning 96ecb97c2083231706147f026d104d82a7202ad0
- Installing swiftmailer/swiftmailer (dev-master f0be830)
Cloning f0be8302f28913af7bd7df6639e5bec5b5e79257
- Installing twbs/bootstrap (dev-master 2854c5c)
Cloning 2854c5c3fb65b709fbf32d05faccf7a294626cca
- Installing yiisoft/yii2 (dev-master e6ac68b)
Cloning e6ac68b89c520befbcb4682880ac8284f1d094dd
- Installing yiisoft/yii2-codeception (dev-master d7e6e58)
Cloning d7e6e5806483647a5fee6462bb216e67773d9e88
- Installing yiisoft/yii2-bootstrap (dev-master 54fedb4)
Cloning 54fedb4c22b057b27ff088d11e6f411992956eeb
- Installing yiisoft/yii2-debug (dev-master 97e2460)
Cloning 97e24600932d511f419c114ef1d44e85211c47c2
- Installing yiisoft/yii2-gii (dev-master 84bb194)
Cloning 84bb19424561b744167636fb893701a15368d58b
- Installing yiisoft/yii2-swiftmailer (dev-master d378f7d)
Cloning d378f7d6d731c8130597411935d7ee05aa73897a
Writing lock file
写锁定文件
Generating autoload files
生成自动加载文件
Creating a Config file创建一个配置文件
Now that we've setupour application to be bootstrapped, we can create a config file. The configfiles for Yii 2 are pretty much the same as they were in Yii 1 with only a fewexceptions. We'll create that file in config/web.php. Note, that I'm going to diverge a bit from the exampleapp for simplicity.
现在我们已经安装了一个带有bootstrap的自己的程序,我们可以创建一个配置文件。Yii2的配置文件与Yii 1.x版本中的设置文件非常相似,只有极少的例外。我们将在config/web.php中创建这个文件。注意,我将在创建一个简洁例子的方向上偏离那么一点点。
<?php
return array(
'id' => 'app',
// Preload the Debug Module
// 提前加载 Debug Module(排错模型)
'preload' => array(
'debug'
),
'basePath' => dirname(__DIR__),
'extensions' => require(__DIR__ .'/../vendor/yiisoft/extensions.php'),
// Components
// 组件
'components' => array(
// UrlManager
// 链接管理
'urlManager' => array(
'class' =>'yii\web\UrlManager',
// Disable index.php
// 弃用(不使用)index.php
'showScriptName' => false,
// Disable r= routes
'enablePrettyUrl' => true
),
// Caching
// 缓存
'cache' => array(
'class' =>'yii\caching\FileCache'
),
// UserIdentity
// 用户身份
'user' => array(
'identityClass' =>'app\models\User',
),
// Logging
// 日志
'log' => array(
'traceLevel' => YII_DEBUG ?3 : 0,
'targets' => array(
array(
'class' =>'yii\log\FileTarget',
'levels' =>array('error', 'warning')
)
)
),
// Database
// 数据库
'db' => array(
'class' =>'yii\db\Connection',
'dsn' =>'mysql:host=localhost;dbname=yf2',
'username' => 'yf2',
'password' => 'yf2',
'charset' => 'utf8'
)
),
// Modules
//模型
'modules' => array(
'debug' => 'yii\debug\Module',
'gii' => 'yii\gii\Module'
),
// Extra Params if we want them
// 额外的参数(如果你需要的话)
'params' => array()
);
At this point if wevisit our webserver we'll get a lovely error message:
这时如果我们去访问我们的网站,我们会看到一个可爱的错误信息。
Not Found (#404)
没有找到(#404)
Unable to resolve the request "".
不能解决这个请求“”。
The above error occurred while the Web server was processing your request.
上面的错误在Web服务器处理你的请求时产生。
Please contact us if you think this is a server error. Thank you.
如果您认为这是一个服务器错误,请您与我们联系。谢谢。
If you get that, thatmeans Yii 2 was able to bootstrap itself.
如果你得到了这些提示,这说明Yii2能够引导它自身。
Creating the Database 创建一个数据库
For this applicationwe are going to create a simple "posts" database using migrations.Before we do that though, we need to create a MySQL user and database. We cando that using the following commands:
我们将为这个程序创建一个简单的"posts"数据库用于迁移。但在我们做这个之前,我们需要去创建一个MySQL用户和数据库。我们可以用下面的命令做这个。
mysql >
CREATE USER 'yf2' IDENTIFIED BY'yf2';
CREATE DATABASE yf2;
GRANT ALL PRIVILEGES ON yf2.* TO'yf2' WITH GRANT OPTION;
FLUSH PRIVILEGES;
Next, we need tocreate a config file for our console application to run from. Create a filecalledconsole.php inconfig/ with the following:
下一步,我们要为将来运行的终端程序创建一个配置文件在config/文件夹中创建一个文件,命名为console.php,内容如下:
<?php
return array(
'id' => 'basic-console',
'basePath' => dirname(__DIR__),
'preload' => array('log'),
'controllerPath' => dirname(__DIR__) . '/commands',
'controllerNamespace' => 'app\commands',
'extensions' => require(__DIR__ .'/../vendor/yiisoft/extensions.php'),
'components' => array(
'cache' => array(
'class' =>'yii\caching\FileCache',
),
// Database
// 数据库
'db' => array(
'class' => 'yii\db\Connection',
'dsn' =>'mysql:host=localhost;dbname=yf2',
'username' => 'yf2',
'password' => 'yf2',
'charset' => 'utf8'
),
'log' => array(
'targets' => array(
array(
'class' =>'yii\log\FileTarget',
'levels' =>array('error', 'warning'),
),
),
),
),
'params' => array(),
);
Migrations迁移
With our config optionin place, we can now create a migration for our database. From your commandline run and typeyes at the prompt.
基于我们准备好的配置选项,我们能够为我们的数据库创建一个迁移。在你的命令行中运行,在提示符后输入yes。
php yii migrate/create posts
Your output shouldlook as follows:
你的输出应该像下面这样的:
Yii Migration Tool (based on Yiiv2.0.0-dev)
Yii 迁移工具(基于 Yii v2.0.0-dev)
Create new migration'/var/www/.../migrations/m131220_164042_posts.php'? (yes|no) [no]:yes
New migration created successfully.
新的迁移创建成功
The migrations in Yii2 haven't changed much since Yii 1. Replace theup() anddown method with the followingrespectively:
Yii2中的迁移比起Yii1,并没有太多的改变。分别下面的内容替换up()和down方法。
public function up()
{
return $this->createTable('posts', array(
'id' => 'INT PRIMARY KEYAUTO_INCREMENT',
'title' => 'VARCHAR(255)',
'data' => 'TEXT',
'create_time' => 'INT',
'update_time' => 'INT'
));
}
public function down()
{
return $this->dropTable('posts');
}
From the command lineyou can now create the database using themigrate/up command
你现在可以从命令行用migrate/up命令创建数据库。
php yii migrate/up --interactive=0
Which should give youthe following output:
它会给你下面这样的输出:
Yii Migration Tool (based on Yii v2.0.0-dev)
Yii 迁移工具(基于 Yii v2.0.0-dev)
Total 1 new migration to be applied:
m131220_164042_posts
*** applying m131220_164042_posts
> create table posts ... done (time:0.056s)
*** applied m131220_164042_posts (time: 0.093s)
Migrated up successfully.
Migrate up成功。
migrate/down will drop the table.Feel free to bring the database up and down to explore some.
migrate/down将删除那张表。可以自由地给数据库up或是down来体验一下。
Creating the DatabaseModel创建一个数据库模型
Now that our databasetable has been created we can create the mode associated to our posts table. Todo this we're going to use good old Gii, which has recieved a major update interms of prettyness.
现在我们的数据库中已经创建了表,我们可以创建与posts表关联的模块。要做这个我们要使用很好的老Gii,从精致这个角度讲,它已经接受了一个主要的升级。
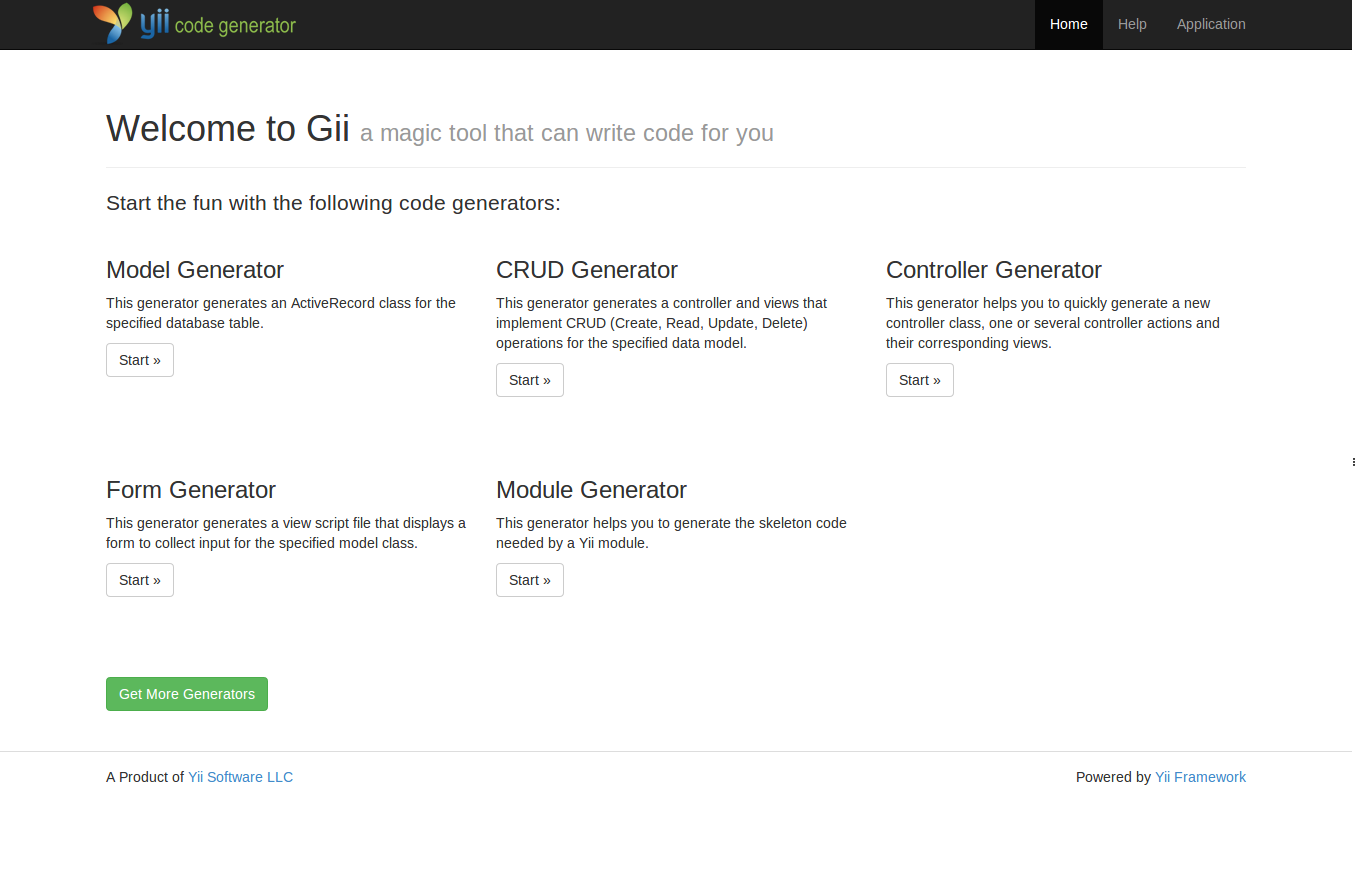
Click on the ModelGenerator and add the following values to the form:
单击模块生成器,添加下列信息到表单中去:
Table Name: posts
表名称:posts
Model Class: Posts
模块类:Posts
Then click preview,then generate. Yii will then write outmodels/Posts.php for us. The default models that Yiigenerates aretiny compared to that of Yii 1. There are a few changes weneed to make first though.
然后点击预览,再是生成。Yii然后会为我们写出models/Posts.php。生成器生成的默认的模块,比Yii1生成的略微小一点。但我们还得要先做一点修改。
First, we need tomodify ourrules()method. Let's makeID andcreate_time not required:
首先,我们要修改我们的rules()方法。我们不再需要ID和create_time:
public function rules()
{
return [
[['title', 'data'], 'required'],
[['data'], 'string'],
[['create_time', 'update_time'],'safe'],
[['title'], 'string', 'max' => 255]
];
}
Next, let's add abehavior to automated thecreate_time andupdate_time timestamps. Yii thankfully provides a behavior calledAutoTimestamp that we can use toautomated this process.
其次,我们加一个动作来使create_time和update_time时间戳自动化。感谢Yii提供了一个名叫AutoTimestamp(自动时间戳)动作,使得我们能使这个过程自动化。
public function behaviors()
{
return array(
'timestamp' => array(
'class' =>'yii\behaviors\AutoTimestamp'
)
);
}
Anytime we modify arecord now, the database will automatically set the appropriate timestamp.
无论什么时候我们修改一条记录,数据库会自动地设置合适的时间戳。
Creating theController创建一个控制器
Now that we have abasic model we can create ourSiteController that will handle adding and updating things. We'll startby creating a new file called SiteController.php incontrollers/ and adding the following:
现在我们有了的模块,我们可以创建我们的SiteController(站点控制器),它能管理增加或修改事物。我们从创建一个名为SiteController.php的新文件开始,就在controllers/目录下,然后增加下列内容:
<?php
namespace app\controllers;
use Yii;
use yii\web\Controller;
use app\models\Posts;
class SiteController extendsController
{
}
As much as I hatenamespaces in PHP, Yii 2 has made using them less painful than they were whenthis article was written last time. For this application we're only going to becreated an index, save, and delete action for our site to use.
我很害怕PHP中的namespace(命名空间),在我最后写这篇文章的时候,Yii2已经使得使用namespace比以前的痛苦好了一点。我们要为这个程序创建一个index、save和删除动作给我们的站点使用。
Handling Errors处理错误
Nobody like errors,but we'll we need to handle them someway.
没有人喜欢错误,但我们要去用某种方式处理他们。
public function actions()
{
return [
'error' => [
'class' =>'yii\web\ErrorAction',
]
];
}
Loading Models载入模块
Before we create ouractions, let's create a helper method to load our model. Those familiar withYii should recognize it.
在我们创建我们的actions(动作)之前,让我创建一个辅助方法来载入我们的model(模块)。这些与Yii非常熟悉的东西很容易被认出来。
private function loadModel($id)
{
$model = Posts::find($id);
if ($model == NULL)
throw new HttpException(404, 'Model notfound.');
return $model;
}
The one change we'llneed to make to make this work is the inclusion of a new classHttpException. To include thisclass, add the following to youruse block at the top of your controller.
为了使它工作,我们要做的一个改变是对一个新的class(类)HttpException的包含。为了包含这个class(类),在你的controller(控制器)的最上面,在use block(块)中添加下面的内容。
use yii\web\HttpException;
Deleting Records删除记录
Deleting records ispretty simple, so lets create that action first.
删除记录相当地简单,所以我们先创建它。
public functionactionDelete($id=NULL)
{
$model = $this->loadModel($id);
if (!$model->delete())
Yii::$app->session->setFlash('error', 'Unable to delete model');
$this->redirect($this->createUrl('site/index'));
}
There's nothing toosurprising here, we delete the model and redirect to the index page. And if weencounter an error we set a pretty flash message which we will display in ourviews.
这里没有什么东西值得太惊讶,我们删除了这个模块而且重定向到index页面。而且,如果我们遇到了一个错误,我们设置一个漂亮的flash信息,我们将在views(视图)中显示它。
Viewing Records显示记录
Viewing records isalso pretty simple, just load all the models and pass them to the view fordisplay. Notice that$this->render() now just returns a value rather than outputting it. If you want to displaycontent on the page you'll need to echo it.
显示记录也是非常简单,只是载入所有的model(模块),再把它们传给视图来显示。注意,$this->render()现在只是返回一个值,而不是转出它。如果你想要在页面上显示内容,你需要echo它。
public function actionIndex()
{
$models = Posts::find()->all();
echo $this->render('index', array('models' => $models));
}
Creating/UpdatingRecords创建/修改记录
I like havingcreation/updating in the same method for an application as simple as this. Wecan create a hybrid method as follows:
我喜欢在一个程序中用一个方法来实现creation/updating(增加/修改),就像现在这样。我们可以创建像下面这样的一个混合方法:
public function actionSave($id=NULL)
{
if ($id == NULL)
$model = new Posts;
else
$model = $this->loadModel($id);
if (isset($_POST['Posts']))
{
$model->load($_POST);
if ($model->save())
{
Yii::$app->session->setFlash('success', 'Model has been saved');
$this->redirect($this->createUrl('site/save', array('id' =>$model->id)));
}
else
Yii::$app->session->setFlash('error','Model could not be saved');
}
echo $this->render('save', array('model' => $model));
}
Simply put, if we aregiven an ID, try loading it with ourloadModel() method (Which will automatically throw an error for usif one is not found). If we aren't given an ID, we'll assume the user wants tocreate a new record. Then, if the user submits any data we try to save it, andupdate the user when we make that attempt.
简单地放置,如果我们得到了一个ID,试着用loadModel()方法去载入它(如果一个都没有,它会自动给我们甩出一个错误来)如果我们没有得到一个ID,我们就可以假设用户希望创建一个新记录。于是,如果用户提交任何数据,我们都试着去保存它,我们在尝试的时候,还会去更新用户。
For now, that takescare of our controllers. (Pretty easy, huh?). We'll come back to our controllera little later when to add authentication. For now let's move onto creating ourviews.
现在,它们在关注我们的controller(控制器)。(是不是非常简单,嗯?).我们会在一会儿之后再回到controller(控制器)上来,到那时我们会加入authentication(验证)。在我们要去创建我们的views(视图)。
Views视图
Now on to creatingviews. There's 3 views we'll need to create, our layout, the index view, andour save view.
现在创建一个视图。有3个视图需要创建,我们的layout(布局)、index视图,还有我们的 save(保存)视图。
For now, justtouch (create the files)views/site/index.php andviews/site/save.php, then createviews/layouts/main.php.
现在,只碰碰(创建文件)views/site/index.php、views/site/save.php,然后创建views/layouts/main.php。
Layout布局
Layouts in Yii 2 are abit more complex than they were in Yii 1, but it's nothing that we can'thandle.
比起Yii1来,layout(布局)在Yii2中有一点点复杂,但完全可以控制。
First, we need toinclude all the view helpers we're going to use (including our asset manager).We're going to use Twitter Bootstrap to make things pretty for now.
首先,我们需要包含所有的将要用到的视图辅助(包括我们的asset(资源)管理器。我们将要用Twitter Bootstrap,来使它更漂亮。
<?php
use yii\helpers\Html;
use yii\bootstrap\Nav;
use yii\bootstrap\NavBar;
use app\assets\AppAsset;
/**
* @var \yii\web\View $this
* @var string $content
*/
AppAsset::register($this);
?>
I'm not really goingto go intoAppAssetat this time. For now, all you need to know is that it's taking care of all ofour assets for us.
我并不是真的在现在要进入AppAsset中去。现在,你只要知道它在为我们全力处理assets就行了。
Next, we're going toadd all of our markup.
其次,我们将要加上所有的标记。
<?php $this->beginPage() ?>
<!DOCTYPE html >
<html >
<head>
<title><?php echo Html::encode($this->title) ?></title>
<?php $this->head() ?>
</head >
<body style="margin-top:100px;"; >
<?php $this->beginBody() ?>
<?php
NavBar::begin([
'brandLabel' => 'Home',
'brandUrl' =>Yii::$app->homeUrl,
'options' => [
'class' => 'navbar-inversenavbar-fixed-top',
],
]);
NavBar::end();
?>
<div class="container">
<?php if(Yii::$app->session->hasFlash('success')): ?>
<div class="alertalert-success">
<?php echoYii::$app->session->getFlash('success'); ?>
</div>
<?php elseif(Yii::$app->session->hasFlash('error')): ?>
<div class="alertalert-danger">
<?php echoYii::$app->session->getFlash('error'); ?>
</div>
<?php endif; ?>
<?php echo $content ?>
</div>
<?php $this->endBody() ?>
</body >
</htm l>
<?php $this->endPage() ?>
A few new controllersmethods here - but nothing too surprising. Basically thebegin/end Body/Page methods areplaceholders for any css and javascript Yii will inject into our templates.Most likely these were moved outside of the renderer to improve performance.
这里有一些新的控制器方法,不过并不让人惊讶。从基本上看,那些 begin/end和Body/Page方法都是在Yii注射CSS和javascript到我们的模板中时的标记。大概这些移至renderer外面的东西是为了提高性能。
That last thing tonote is that we're going to place our flash messages in our layout and displaythem if they were provided
要记住的最后一件事就是我们要把我们的即时信息放到我们的布局上面去,如果需要,我们就显示它们。
With our layout in place,we can now visithttp://localhost in our browser and see some stuff!
随着我们的布局准备就绪,我们可以在浏览器中浏览 http://localhost,你可以看到一些东西。
With our layout done,let's take a quick look at the fancy new profiler at the bottom.
我们的布局完成后,让我们快速看一下底部精美的分析器。
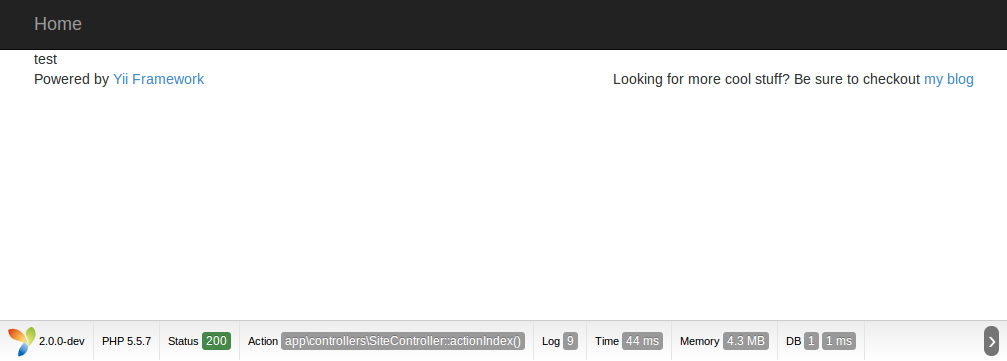
Profiling on Steroids扼要介绍一下快速建造
Remember how we addedthedebug module to ourconfig/web.php file? This is what weget in return. Rather than just dumping everything to the screen, Yii 2 isactually profiling in the background and just giving us a "at aglance" details, which is pretty neat.
你还记得我们是怎样添加那个排错模型到我们的config/web.php文件中去吗?这就是我们换回的好处。Yii2实际上不是把所有的东西都释放在屏幕上,而是在后台分析,只给了我们一个“瞥一眼”的内容,这非常巧妙的。
What's evenmoreneat is when you click on any of the items in the bar you get an amazingprofiler that has all sorts of using information such as your current config,request parameters, profiling, and any logs that were writtenfor thatrequest. The profiler alone (at least in my opinion) is one of thecoolestnew features coming in Yii 2.
更为巧妙的是,当你点击工具栏上的任何一个部件时,你会得到一个分析器,它包括各种类型的有用信息,比如你的当前配置,需要的参数,分析,以及为这个请求任何一类日志而写的任何一条日志。单独的分析器(至少在我的意见中),是Yii2即将带来的一个最好的新功能。
Index File Index文件
With our layout inplace, we can now create our index view file. We're going to use the same codefrom my previous article with just a few alterations:
基于我们准备好的布局,我们现在能够创建我们的index视图文件。我们将利用我上一篇文章中的相同代码,只需要作少许修改即可。
<?php use yii\helpers\Html; ?>
<?php echo Html::a('Create NewPost', array('site/save'), array('class' => 'btn btn-primary pull-right'));?>
<divclass="clearfix"></div>
<hr />
<table class="tabletable-striped table-hover">
<tr>
<td>#</td>
<td>Title</td>
<td>Created</td>
<td>Updated</td>
<td>Options</td>
</tr>
<?php foreach ($models as $post): ?>
<tr>
<td>
<?php echoHtml::a($post->id, array('site/save', 'id'=>$post->id)); ?>
</td>
<td><?php echoHtml::a($post->title, array('site/save', 'id'=>$post->id));?></td>
<td><?php echo date('m/d/YH:i', $post->create_time); ?></td>
<td><?php echo date('m/d/YH:i', $post->update_time); ?></td>
<td>
<?php echo Html::a('update',array('site/save', 'id'=>$post->id)); ?>
<?php echo Html::a('delete',array('site/delete', 'id'=>$post->id)); ?>
</td>
</tr>
<?php endforeach; ?>
</table>
There's nothing oddhere, just note that youhave to include the view helper (Yii doesn'tautomatically include it from the layout).
这里没有任何奇怪的,你只注意要把view helper(视图辅助)包含进来就可以了(Yii没有自动从布局中自动包含它们)。
Creating & UpdatedRecords创建和修改记录
Create a new filecalledsave.php inviews/site/ and add our form:
在views(视图)/site/文件夹中创建一个新文件,命名为save.php,加入我们的表单:
<?php
use yii\helpers\Html;
use yii\widgets\ActiveForm;
?>
<?php $form =ActiveForm::begin(array(
'options' => array('class' => 'form-horizontal', 'role' =>'form'),
)); ?>
<div class="form-group">
<?php echo $form->field($model,'title')->textInput(array('class' => 'form-control')); ?>
</div>
<div class="form-group">
<?php echo $form->field($model,'data')->textArea(array('class' => 'form-control')); ?>
</div>
<?php echo Html::submitButton('Submit', array('class' => 'btnbtn-primary pull-right')); ?>
<?php ActiveForm::end(); ?>
$form has changed a bit,but it's more or less the same from the last time we went through this. Thebiggest change is the use of ActiveForm.
$form有了一点小的改变,但与我们最后看到的情况差不多。最大的改变是ActiveForm的使用。
At this point we'vecreate a pretty simple system for displaying and updating data. If you want,try making a "view" view that will allow you to see the data outsideof an update view.
就此我们已经创建了一个漂亮的简单的系统来显示和更新数据。如果你愿意,可以尝试做一个“视图”视图,它可以让你看到更新视图之外数据之外的数据。
HandlingAuthentication处理验证
With the core of ourapplication completed, let's now add some basic authentication. For thisappliance we're going to require authentication for users editing and deletingcontent, but not for viewing.
在我们程序核心部分完成之后,我们来添加一下基本的验证。在这个程序中,我们要求在用户编辑、删除内容时要验证,但在查看时不需要。
This first thing weneed for authentication is a Users model which we're just going to take fromthe Yii 2 Basic application. Create a new file calledUser.php inmodels/ and add the following:
首先我们需要一个给验证使用的 Users模型,我们将从Yii2基本程序中得到它。在文件夹models/下创建一个新的文件,名叫User.php,添加下面的内容:
<?php
namespace app\models;
class User extends \yii\base\Objectimplements \yii\web\IdentityInterface
{
public $id;
public $username;
public $password;
public $authKey;
private static $users = [
'100' => [
'id' => '100',
'username' => 'admin',
'password' => 'admin',
'authKey' => 'test100key',
],
'101' => [
'id' => '101',
'username' => 'demo',
'password' => 'demo',
'authKey' => 'test101key',
],
];
public static function findIdentity($id)
{
return isset(self::$users[$id]) ? newstatic(self::$users[$id]) : null;
}
public static function findByUsername($username)
{
foreach (self::$users as $user) {
if (strcasecmp($user['username'],$username) === 0) {
return new static($user);
}
}
return null;
}
public function getId()
{
return $this->id;
}
public function getAuthKey()
{
return $this->authKey;
}
public function validateAuthKey($authKey)
{
return $this->authKey === $authKey;
}
public function validatePassword($password)
{
return $this->password ===$password;
}
}
Okay, so there's alotof new things here, let's break them down one by one.
好了,现在这里有许多新的事物,让我们一个接一个地来掌握它们。
First, we need todeclare our namespace. Since we're creating a model, this is an applicationmodel.
首先,我们要声明我们的namespace(命名空间)。因为我们已经创建了一个模型,这是一个应用程序模型。
<?php
namespace app\models;
Next, we extend Yii'sbase object class and implement a few methods defined in IdentityInterface anddeclare some properties our model will work with.
然后,我们扩展Yii的基本物件类,执行一些身份接口中定义的方法,再声明我们的模型工作将要用到的一些属性。
class User extends \yii\base\Objectimplements \yii\web\IdentityInterface
{
public $id;
public $username;
public $password;
public $authKey;
}
What we ultimatly willpass around will be a static object. The newest thing for our UserIdentity isthe use ofyii\web\IdentityInterface, which contains four methods we'll need to implement,getAuthKey(),validateAuthKey(),getId(), andfindIdentity().
最后我们要分发的将会是一个静态的项目。在我们的用户验证中,最新鲜的事情是yii\web\IdentityInterface的使用,它包含4个我们将要执行的方法,分别是getAuthKey(), validateAuthKey(),getId(), and findIdentity()。
We also have this$authKey thing that we'll getto in a bit.
我们还有一个东西$authKey,我们将会对它有一点了解。
For this applicationwe'll only be using a file based user lists. We can defined that as:
在这个程序中,我们只会使用一个基本用户列表的文件。我们可以这样声明:
private static $users = [
'100' => [
'id' => '100',
'username' => 'admin',
'password' => 'admin',
'authKey' => 'test100key',
],
'101' => [
'id' => '101',
'username' => 'demo',
'password' => 'demo',
'authKey' => 'test101key',
],
];
Next, we havefindIdentity(), which returns astatic instance ofUser of an item from thearray above. We're going to call this methodafter we validate theuser's credentials,
然后,我们用findIdentity(),它会从上面的数组中返回一个某个物件的用户的静态的事例在我们确认用户证书有效之后,我们就会去呼叫这个方法。
public static functionfindIdentity($id)
{
return isset(self::$users[$id]) ? new static(self::$users[$id]) : null;
}
Next we havefindByUsername() which is just asimple helper for finding a username in our flat file database.
其次,我们有 findByUsername(),它是一个简单的辅助器,用来在我们的平面文件数据库中去找一个用户名。
public static functionfindByUsername($username)
{
foreach (self::$users as $user) {
if (strcasecmp($user['username'],$username) === 0) {
return new static($user);
}
}
return null;
}
The remaining methods arejust validators on the static instance we'll get back fromfindIdentity(). With the exceptionofvalidatePassword() we have to implementthese methods
这个静态例子中剩下的方法只有validators了,我们将从findIdentity()返回。为了例外的validatePassword(),我们必须执行这些方法。
public function getId()
{
return $this->id;
}
public function getAuthKey()
{
return $this->authKey;
}
public functionvalidateAuthKey($authKey)
{
return $this->authKey === $authKey;
}
public functionvalidatePassword($password)
{
return $this->password === $password;
}
These key values arefor automatic logins. Rather than having to pass the username and password forreauthentication with autologin enabled, we an pass a key which we'll considervalid. Each user should have a unix authKey, and should be persisted in adatabase when it's created. Additionally, the keyspace of this key should besufficiently large enought to thward identity attacks.
这些关键的值是为了自动登录的。与其传递一个用户名和密码来使用允许自动登陆的再验证,我们倒不如传递一个我们认为有效的密钥。每一个用户都有一个unix认证密钥,它会在被创建之后持续存在在一个数据库中。另外,这些密钥的密钥空间,大到足够能挡住身份攻击。
Login Model登陆模型
Now that ourIdentity is setup, we cancreate aLoginModelfor authentication this data. Begin by creatingmodels/LoginForm.php and adding thefollowing:
现在我们的身份验证已经配置好了,我们可以创建一个登陆模型来验证这些数据。从创建models/LoginForm.php开始,添加如下内容:
<?php
namespace app\models;
use Yii;
use yii\base\Model;
class LoginForm extends Model
{
public $username;
public $password;
public $rememberMe = true;
private $_user = false;
}
Then add somevalidation rules:
然后添加一些确认规则:
public function rules()
{
return [
// username and password are bothrequired
// 用户名和密码必须同时具备
[['username', 'password'], 'required'],
// password is validated byvalidatePassword()
// 密码经过validatePassword()的验证
['password', 'validatePassword'],
// rememberMe must be a boolean value
// rememberMe (“记住我”)必须是一个布尔值
['rememberMe', 'boolean'],
];
}
There's three methodswe'll want to define,validatePassword() (Since we declared it as a password validator),login() (So we can login), andgetUser(), which will retrieveour user identity for us.
我们需要声明三个方法,validatePassword()(因为我们把它声明为一个密码验证器), login()(于是我们可以登陆),还有 getUser(),它能帮我们取回我们的用户验证。
We can start bydefininggetUser(),which will call our identitiesfindByUsername() method and return it if it is found.
我们可以从声明getUser()开始,它能够调用身份验证findByUsername()方法并在它找到后返回用户名。
private function getUser()
{
if ($this->_user === false) {
$this->_user =User::findByUsername($this->username);
}
return $this->_user;
}
Next we'll define ourvalidator, which will retrieve our user viagetUser(), and validate the password againstour identitiesvalidatePassword() method.
接着我们要声明我们的验证器,我们能通过getUser()取回我们的用户,并且靠我们的身份验证validatePassword()方法来验证密码的有效性。
public function validatePassword()
{
$user = $this->getUser();
if (!$user || !$user->validatePassword($this->password)) {
$this->addError('password','Incorrect username or password.');
}
}
Finally, we have ourlogin() method which will runour validators and create our session. The biggest thing to note here is thatour Yii::$app->user->{attribute}'s are now set viaYii::$app->user->login($attributes). Anything in ourgetUser() method will bepopulated into our session, which is a nice improvement over Yii 1.
最后,我们有了login()方法,它能返回验证器并且创建会话。这里应该注意的最大的事情是我们的Yii::$app->user->{attribute}'s,现在是通过Yii::$app->user->login($attributes)。getUser()方法找到的所有信息都会被放在我们的会话中,这是从Yii1以来一个好的改进。
public function login()
{
if ($this->validate()) {
returnYii::$app->user->login($this->getUser(), $this->rememberMe ?3600*24*30 : 0);
} else {
return false;
}
}
Updating ourController更新我们的控制器
With our models takencare of we can now move back to our controller and create login/logout methods.
在模型的任用之下,我们能够回到控制器中创建login/logout方法。
First, we need toinclude ourLoginFormmodel. We can do that by adding ause statement to the top of our controller:
首先,我们要包含我们的LoginForm模型。我们可以用在我们的控制器的最开始添加一个用户状态的方式来做这个。
use app\models\LoginForm;
Logout hasn't changedmuch:
登出没有什么改变:
public function actionLogout()
{
Yii::$app->user->logout();
return $this->goHome();
}
And login is prettymuch the same as Yii 1 as well. Notice that we're going to be using a newlayout calledsignin.
登录与Yii1非常相似。请注意,我们将要使用一个新的布局,名叫signin
Also, Yii 2 providesthese neatgoHome()andgoBack() methods forredirecting.
而且,Yii2提供了非常巧妙的goHome()和goBack()方法来实现转向。
public function actionLogin()
{
$this->layout = 'signin';
if (!\Yii::$app->user->isGuest) {
$this->goHome();
}
$model = new LoginForm();
if ($model->load($_POST) && $model->login()) {
return $this->goBack();
} else {
return $this->render('login', [
'model' => $model,
]);
}
}
Signin Layout登录布局
The layout forauthentication is going to be the same as our main layoutsans theheader:
这个用于身份验证的布局将与我们的主布局相同,请看它的开头:
<?php
use yii\helpers\Html;
use yii\bootstrap\Nav;
use yii\bootstrap\NavBar;
use yii\widgets\Breadcrumbs;
use app\assets\AppAsset;
AppAsset::register($this);
?>
<?php $this->beginPage() ?>
<!DOCTYPE html >
<html lang="<?=Yii::$app->language ?>">
<head >
<meta charset="<?= Yii::$app->charset ?>"/>
<title><?= Html::encode($this->title) ?></title>
<?php $this->head() ?>
</head >
<body class="signin">
<?php $this->beginBody() ?>
<div class="row">
<div class="container">
<?php echo $content; ?>
</div>
</div>
<?php $this->endBody() ?>
</body >
</htm l>
<?php $this->endPage() ?>
Since twitterbootstrap already provides CSS for a nice looking login page, let's add it toweb/assets/css/signing.css:
鉴于twitter bootstrap已经提供了一个非常好看的登录页面所需要的CSS,就让我们把它加入web/assets/css/signing.css:
body.signin {
padding-top: 40px;
padding-bottom: 40px;
background-color: #eee;
}
.signin .form-signin {
max-width: 330px;
padding: 15px;
margin: 0 auto;
}
.signin .form-signin.form-signin-heading,
.signin .form-signin .checkbox {
margin-bottom: 10px;
}
.signin .form-signin .checkbox {
font-weight: normal;
}
.signin .form-signin .form-control {
position: relative;
font-size: 16px;
height: auto;
padding: 10px;
-webkit-box-sizing: border-box;
-moz-box-sizing: border-box;
box-sizing: border-box;
}
.signin .form-signin.form-control:focus {
z-index: 2;
}
.signin .form-signininput[type="text"] {
margin-bottom: -1px;
border-bottom-left-radius: 0;
border-bottom-right-radius: 0;
}
.signin .form-signininput[type="password"] {
margin-bottom: 10px;
border-top-left-radius: 0;
border-top-right-radius: 0;
}
We'll also need toinclude our CSS inAppAsset.php, which can be done by adding a new public property to the class:
我们还需要包含我们在AppAsset.php中的CSS,这可能通过给类添加一个新的公共属性来完成。
public $css = [
'css/signin.css',
];
Login Form登录表单
Now for the loginform. Create a new file calledviews/site/login.php and add the following. The formshould be pretty straightforward.
现在轮到了登录表单。创建一个新的文件,命名为views/site/login.php,添加如下内容:这个表单是非常简明的。
<?php
use yii\helpers\Html;
use yii\widgets\ActiveForm;
?>
<?php $form =ActiveForm::begin(array(
'options' => array('class' => 'form-signin', 'role' => 'form'),
)); ?>
<h2 class="form-signin-heading">Please signin</h2>
<div class="form-group">
<?php echo $form->field($model,'username')->textInput(array('class' => 'form-control')); ?>
</div>
<div class="form-group">
<?php echo $form->field($model,'password')->passwordInput(array('class' => 'form-control')); ?>
</div>
<?php echo Html::submitButton('Submit', array('class' => 'btnbtn-primary pull-right')); ?>
<?php ActiveForm::end(); ?>
Now if you visithttp://localhost/site/login you'll be shown aworking authentication form.
现在,如果你浏览 http://localhost/site/login,你会看到一个工作中的验证表单。
RequiringAuthentication必要的身份验证
With ourauthentication form working we can now make it required for certain views.Let's allow the index action, but require authentication for save and delete.
基于我们的身份验证表单已经工作了,我们现在可以给某些视图添加验证。我们可以开放index动作,但保存和删除动作需要验证。
In Yii 2 we can handlethis by attaching a AccessControl behavior as follows:
在Yii2中,我们能够用附加一个AccessControl操作来处理这些,就像下面的这样:
public function behaviors()
{
return [
'access' => [
'class' =>'yii\web\AccessControl',
'only' => ['save', 'delete','logout'],
'rules' => [
[
'actions' => ['index','save', 'delete'],
'allow' =>true,
'roles' => ['@'],
],
],
]
];
}
Theonly element means weshould only require authentication for those actions, and for the actions thatit applies to we should allow the user only if they are authenticated (@).
唯一要素意味着我们只需要为这些动作验证,在它就到的动作上,我们只能允许那些通过了验证的用户。
Concluding Thoughts 结束时的思考
Yii2 has come alongway since I first posted this. I hope that his update helps new users wanted toexplore Yii 2 better understand what to expect from the framework and to get afeel for what is to come.
自从我贴出这个之后,Yii2已经走过了一段很长的路。我希望这次的更新能帮助那些想探索Yii 2的新的用户更好地理解,理解他们能从这个框架中期待什么以及感觉到哪些将会到来。
Resources 资源
Demo演示
OriginalBlog Entry最早的博客实体
For more tutorials,guides, source code, and information visit my blog athttps://www.erianna.com.
如果想看到更多的教程、指南、源代码或信息,请访问我的博客https://www.erianna.com。


 3778
3778


 被折叠的 条评论
为什么被折叠?
被折叠的 条评论
为什么被折叠?
 到【灌水乐园】发言


