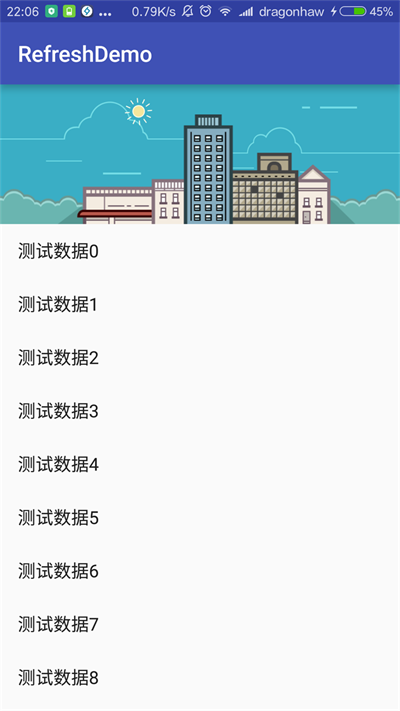
转载请注明出处:http://blog.csdn.net/qq347198688/article/details/52518150
看到这个酷炫的下拉刷新,是不是有点蠢蠢欲动,觉得很激动,当你继续看完整篇文章,了解到它的用法那么简单之后,估计你会更加的兴奋,这可比自己写一个下拉刷新强多了,动画效果还这么好看。那么接下来就让我们看看它到底是如果用的吧,而且效果到底怎么样。
用法
让我们来看到一个简单的例子
1.添加依赖

    compile 'com.yalantis:phoenix:1.2.3'

2.把这个PullToRefreshView 控件添加到你的布局中

    <com.yalantis.phoenix.PullToRefreshView
        android:id="@+id/pull_to_refresh"
        android:layout_width="match_parent"
        android:layout_height="match_parent">

        <ListView
        android:id="@+id/list_view"
        android:divider="@null"
        android:dividerHeight="0dp"
        android:layout_width="match_parent"
        android:layout_height="match_parent" />

    </com.yalantis.phoenix.PullToRefreshView>

3.在你的onCreate()方法中创建PullToRefreshView对象并且写OnRefreshListener方法

    mPullToRefreshView = (PullToRefreshView)findViewById(R.id.pull_to_refresh);
    mPullToRefreshView.setOnRefreshListener(new PullToRefreshView.OnRefreshListener() {
        @Override
        public void onRefresh() {
        mPullToRefreshView.postDelayed(new Runnable() {
            @Override
            public void run() {
                mPullToRefreshView.setRefreshing(false);
            }
        }, REFRESH_DELAY);
    }
     });
基本上这款下拉刷新的框架就是按这个步骤来配置,接下来,我们来举一个很简单的例子。
简单例子
MainActivity.class代码:
package com.example.dragonhaw.refreshdemo;

import android.support.v7.app.AppCompatActivity;
import android.os.Bundle;
import android.widget.ArrayAdapter;
import android.widget.ListView;
import com.yalantis.phoenix.PullToRefreshView;
import java.util.ArrayList;
import java.util.List;

/**
 * Created by dragonhaw in 9/12/2016
 */
public class MainActivity extends AppCompatActivity {

    private PullToRefreshView mPullToRefreshView;

    private ListView listView;

    private List<String> datas;

    @Override
    protected void onCreate(Bundle savedInstanceState) {
        super.onCreate(savedInstanceState);
        setContentView(R.layout.activity_main);

        mPullToRefreshView = (PullToRefreshView) findViewById(R.id.pull_to_refresh);
        listView = (ListView) findViewById(R.id.list_view);
        listView.setAdapter(new ArrayAdapter<String>(this, android.R.layout.simple_list_item_1, getDatas()));
        mPullToRefreshView.setOnRefreshListener(new PullToRefreshView.OnRefreshListener() {
            @Override
            public void onRefresh() {
                mPullToRefreshView.postDelayed(new Runnable() {
                    @Override
                    public void run() {
                        //三秒后将下拉刷新的状态变为刷新完成
                        mPullToRefreshView.setRefreshing(false);
                    }
                }, 3000);
            }
        });
    }

    //为ListView添加数据
    public List<String> getDatas() {
        datas = new ArrayList<String>();
        for (int i = 0; i < 30; i++) {
            datas.add("测试数据" + i);
        }
        return datas;
    }
}
activity_main.xml代码如下:
<?xml version="1.0" encoding="utf-8"?>
<RelativeLayout xmlns:android="http://schemas.android.com/apk/res/android"
    xmlns:tools="http://schemas.android.com/tools"
    android:layout_width="match_parent"
    android:layout_height="match_parent"
    tools:context=".MainActivity">

    <com.yalantis.phoenix.PullToRefreshView
        android:id="@+id/pull_to_refresh"
        android:layout_width="match_parent"
        android:layout_height="match_parent">

        <ListView
            android:id="@+id/list_view"
            android:divider="@null"
            android:dividerHeight="0dp"
            android:layout_width="match_parent"
            android:layout_height="match_parent" />

    </com.yalantis.phoenix.PullToRefreshView>
</RelativeLayout>
运行效果:


 1320
1320

 被折叠的 条评论
为什么被折叠?


