原文链接:http://blog.csdn.net/xiazdong/article/details/7214967
本文章环境:
1. Eclipse for JavaEE developer Helios
2. Struts 2.3.1.1
3. tomcat 7.0.6
配置前提:配置好tomcat,本文省略配置tomcat步骤
其实MyEclipse和Eclipse for JavaEE 的配置过程差不多,唯一的区别在于:
Eclipse for JAVAEE创建 Dynamic Web Projec;
MyEclipse创建的是Web Project;
1、创建一个Dynamic Web Project

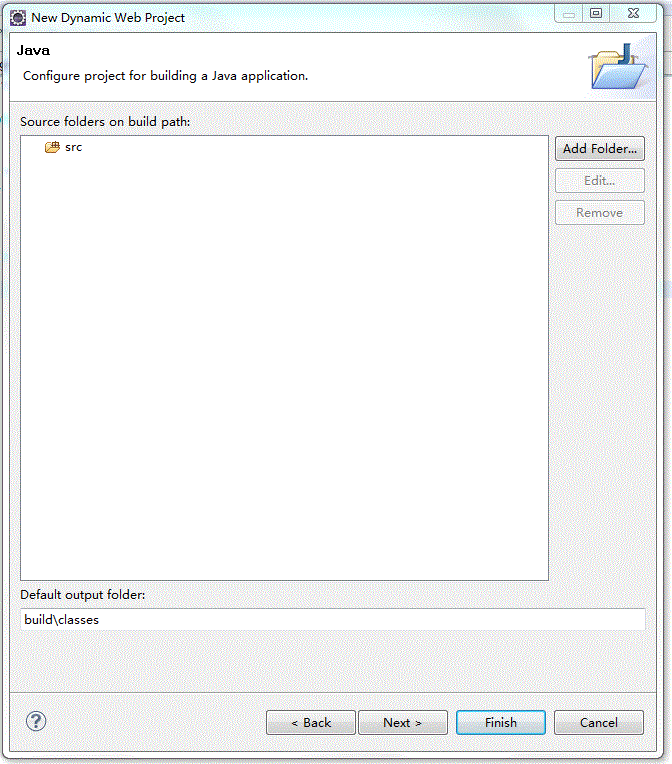
2.点击next

3.看到output folder为build\classes,和传统的WEB-INF\classes有所差别,但是开发时不需要注意;

4.
在WEB-INF中配置web.xml,为了将Struts2框架添加入WEB应用;
在src中配置struts.xml(Eclipse在编译时会将src目录下的除了Java文件外的其他文件全部拷贝进WEB-INF\classes)
将struts核心类库导入WEB-INF\lib中;

5.编写web.xml
此处配置的目的是为了将struts2框架融入web应用,此处配置了一个过滤器,从前面学习可以知道,过滤器的作用是在Servlet执行之前完成一些事情,从<url-pattern>中可以看出任意的请求都会进入struts2的框架的范畴;
- <?xml version="1.0" encoding="GBK"?>
- <web-app xmlns:xsi="http://www.w3.org/2001/XMLSchema-instance" xmlns="http://java.sun.com/xml/ns/javaee" xmlns:web="http://java.sun.com/xml/ns/javaee/web-app_2_5.xsd" xsi:schemaLocation="http://java.sun.com/xml/ns/javaee http://java.sun.com/xml/ns/javaee/web-app_3_0.xsd" version="3.0">
- <filter>
- <filter-name>struts2</filter-name>
- <filter-class>org.apache.struts2.dispatcher.ng.filter.StrutsPrepareAndExecuteFilter</filter-class>
- </filter>
- <filter-mapping>
- <filter-name>struts2</filter-name>
- <url-pattern>/*</url-pattern>
- </filter-mapping>
- </web-app>
6.编写struts.xml
- <?xml version="1.0" encoding="GBK" ?>
- <!DOCTYPE struts PUBLIC
- "-//Apache Software Foundation//DTD Struts Configuration 2.0//EN"
- "http://struts.apache.org/dtds/struts-2.0.dtd">
- <struts>
- </struts>
编写Hello world
1.创建一个Hello.jsp 并且内容为Hello struts2!!!
2.配置struts.xml
- <struts>
- <constant name="struts.devMode" value="true"></constant>
- <package name="HelloPackage" namespace="/" extends="struts-default">
- <action name="Hello">
- <result>/Hello.jsp</result>
- </action>
- </package>
- </struts>
3.部署并在浏览器中填写 http://localhost:8888/StrutsDemo01/Hello
注意:在以后的开发中必须在<struts>元素中添加:
<constant name="struts.devMode" value="true"></constant>
因为这表明是在开发者模式,是指发生错误时提供更多的提示信息;


 2646
2646


 被折叠的 条评论
为什么被折叠?


