Qt一伸缩效果

Qt一伸缩效果

简述

在群里,看到一小伙伴想做一收缩效果。秉着开源,交流,探讨精神(O(∩_∩))夸过了哈。模仿了一这效果。
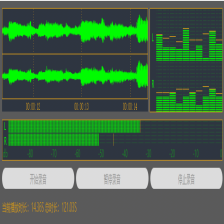
效果图

这里写图片描述

这里写图片描述

通过对比大家也看到了,黄色区域部分。是可以添加任何控件的,根据自身的需要进行添加自己想要添加的控件。

代码

//这里是主界面ShrinkAnimation.cpp
ShrinkAnimation::ShrinkAnimation(QWidget *parent)
    : QWidget(parent)
{
    ui.setupUi(this);
    initControl();
}

ShrinkAnimation::~ShrinkAnimation()
{

}

void ShrinkAnimation::initControl()
{
    ui.titleWidget->setFixedWidth(this->width());
    //这里就是那黄色区域
    StatusWidget* pWidget = new StatusWidget(ui.upWidget);
    pWidget->setFixedSize(this->width(), 48);
    pWidget->move(0, ui.titleWidget->height());
    //点击效果按钮,进行效果展示
    connect(ui.pushButton, &QPushButton::clicked, [this, pWidget](){
    //fixSizeHeight是自定义属性
        QPropertyAnimation *animation = new QPropertyAnimation(ui.upWidget, "fixSizeHeight");
        animation->setDuration(500);
        animation->setEasingCurve(QEasingCurve::InQuad);
        //高于最小高度,代表处于展开状态
        if (ui.upWidget->height() > 32)
        {
            animation->setEndValue(32);
        }
        //否做就是收缩状态
        else
        {
            animation->setEndValue(pWidget->height() + 32);
        }
        animation->start(QAbstractAnimation::DeleteWhenStopped);
    });
}
//这里主要是设置效果按钮的位置
void ShrinkAnimation::resizeEvent(QResizeEvent *)
{
    ui.titleWidget->setFixedWidth(this->width());
    ui.pushButton->move(this->width() - ui.pushButton->width(), 0);
}
//黄色区域代码,添加自己想要添加的控件
StatusWidget::StatusWidget(QWidget *parent)
    : QWidget(parent)
{
    ui.setupUi(this);
}

StatusWidget::~StatusWidget()
{

}

void StatusWidget::paintEvent(QPaintEvent* event)
{
    // 背景图
    QStyleOption opt;
    opt.init(this);
    QPainter p(this);
    style()->drawPrimitive(QStyle::PE_Widget, &opt, &p, this);
    __super::paintEvent(event);
}

这里写图片描述

//TitleWidget 这里就是自定义属性,设置展开收缩那部分
class TitleWidget : public QWidget
{
    Q_OBJECT
    Q_PROPERTY(int fixSizeHeight READ fixSizeHeight WRITE setCusfixSizeHeight)

public:
    TitleWidget(QWidget *parent = 0);
    ~TitleWidget();

public:
    void setCusfixSizeHeight(int height);
    int  fixSizeHeight();

private:
    Ui::TitleWidget ui;
};

//TitleWidget .cpp
TitleWidget::TitleWidget(QWidget *parent)
    : QWidget(parent)
{
    ui.setupUi(this);
}

TitleWidget::~TitleWidget()
{

}

void TitleWidget::setCusfixSizeHeight(int height)
{
    this->setFixedHeight(height);
}

int TitleWidget::fixSizeHeight()
{
    return this->height();
}

主界面UI

这里写图片描述

结尾

可能有些讲述得不太清楚,没理解的,——可以加我Q,要工程文件——。注意是我工作QQ,很多小伙伴都加我大号。。。。

只为记录,只为分享! 愿所写能对你有所帮助。不忘记点个顶顶支持下,谢谢~

QToolButton 的动态伸缩效果可以通过设置其大小策略和大小限制来实现。 具体步骤如下: 1. 设置 QToolButton 的大小策略为 Preferred,这样可以让 QToolButton 自动根据其内容大小调整大小。 ``` toolButton.setSizePolicy(QSizePolicy.Preferred, QSizePolicy.Preferred) ``` 2. 设置 QToolButton 的最小尺寸和最大尺寸,这样可以限制 QToolButton 的大小范围。 ``` toolButton.setMinimumSize(QSize(0, 0)) toolButton.setMaximumSize(QSize(16777215, 16777215)) ``` 3. 将 QToolButton 放入一个布局管理器中,例如 QVBoxLayout。 4. 当需要展开或收起 QToolButton 时,通过设置布局管理器的大小来实现 QToolButton 的动态伸缩效果。 例如,当需要展开 QToolButton 时,可以将 QVBoxLayout 的最小尺寸设置为 QToolButton 的内容大小,当需要收起 QToolButton 时,可以将 QVBoxLayout 的最小尺寸设置为 QSize(0, 0)。 完整代码示例如下: ```python from PyQt5.QtWidgets import QApplication, QWidget, QVBoxLayout, QToolButton, QTextEdit, QPushButton, QHBoxLayout, QMainWindow, QLabel from PyQt5.QtCore import QSize class MainWindow(QMainWindow): def __init__(self): super().__init__() # 创建一个主窗口 widget = QWidget() self.setCentralWidget(widget) # 创建一个垂直布局 layout = QVBoxLayout() widget.setLayout(layout) # 创建一个 QToolButton toolButton = QToolButton() toolButton.setText("Click me") toolButton.setSizePolicy(QSizePolicy.Preferred, QSizePolicy.Preferred) toolButton.setMinimumSize(QSize(0, 0)) toolButton.setMaximumSize(QSize(16777215, 16777215)) # 创建一个文本框 textEdit = QTextEdit() # 创建一个按钮,用于展开和收起 QToolButton button = QPushButton("Expand") # 创建一个水平布局,将按钮和 QToolButton 放在一起 hbox = QHBoxLayout() hbox.addWidget(button) hbox.addWidget(toolButton) # 将水平布局和文本框放入垂直布局中 layout.addLayout(hbox) layout.addWidget(textEdit) # 为按钮添加点击事件,用于展开和收起 QToolButton button.clicked.connect(lambda: self.expand(toolButton, hbox)) def expand(self, toolButton, hbox): if hbox.minimumSize() == QSize(0, 0): hbox.setMinimumSize(QSize(toolButton.sizeHint().width(), toolButton.sizeHint().height())) else: hbox.setMinimumSize(QSize(0, 0)) if __name__ == "__main__": app = QApplication([]) mainWindow = MainWindow() mainWindow.show() app.exec_() ``` 运行以上代码,点击 "Expand" 按钮即可展开和收起 QToolButton,并且 QToolButton 会动态伸缩
评论 4
添加红包

请填写红包祝福语或标题

红包个数最小为10个

红包金额最低5元

当前余额3.43前往充值 >
需支付:10.00
成就一亿技术人!
领取后你会自动成为博主和红包主的粉丝 规则
hope_wisdom
发出的红包

打赏作者

雨田哥

你的鼓励将是我创作的最大动力

¥1 ¥2 ¥4 ¥6 ¥10 ¥20
扫码支付:¥1
获取中
扫码支付

您的余额不足,请更换扫码支付或充值

打赏作者

实付
使用余额支付
点击重新获取
扫码支付
钱包余额 0

抵扣说明:

1.余额是钱包充值的虚拟货币,按照1:1的比例进行支付金额的抵扣。
2.余额无法直接购买下载,可以购买VIP、付费专栏及课程。

余额充值