1.阿里云对象存储OSS
为了解决海量数据存储与弹性扩容,项目中我们采用云存储的解决方案- 阿里云OSS。
1.1 开通“对象存储OSS”服务
(1)申请阿里云账号
(2)实名认证
(3)开通“对象存储OSS”服务
(4)进入管理控制台
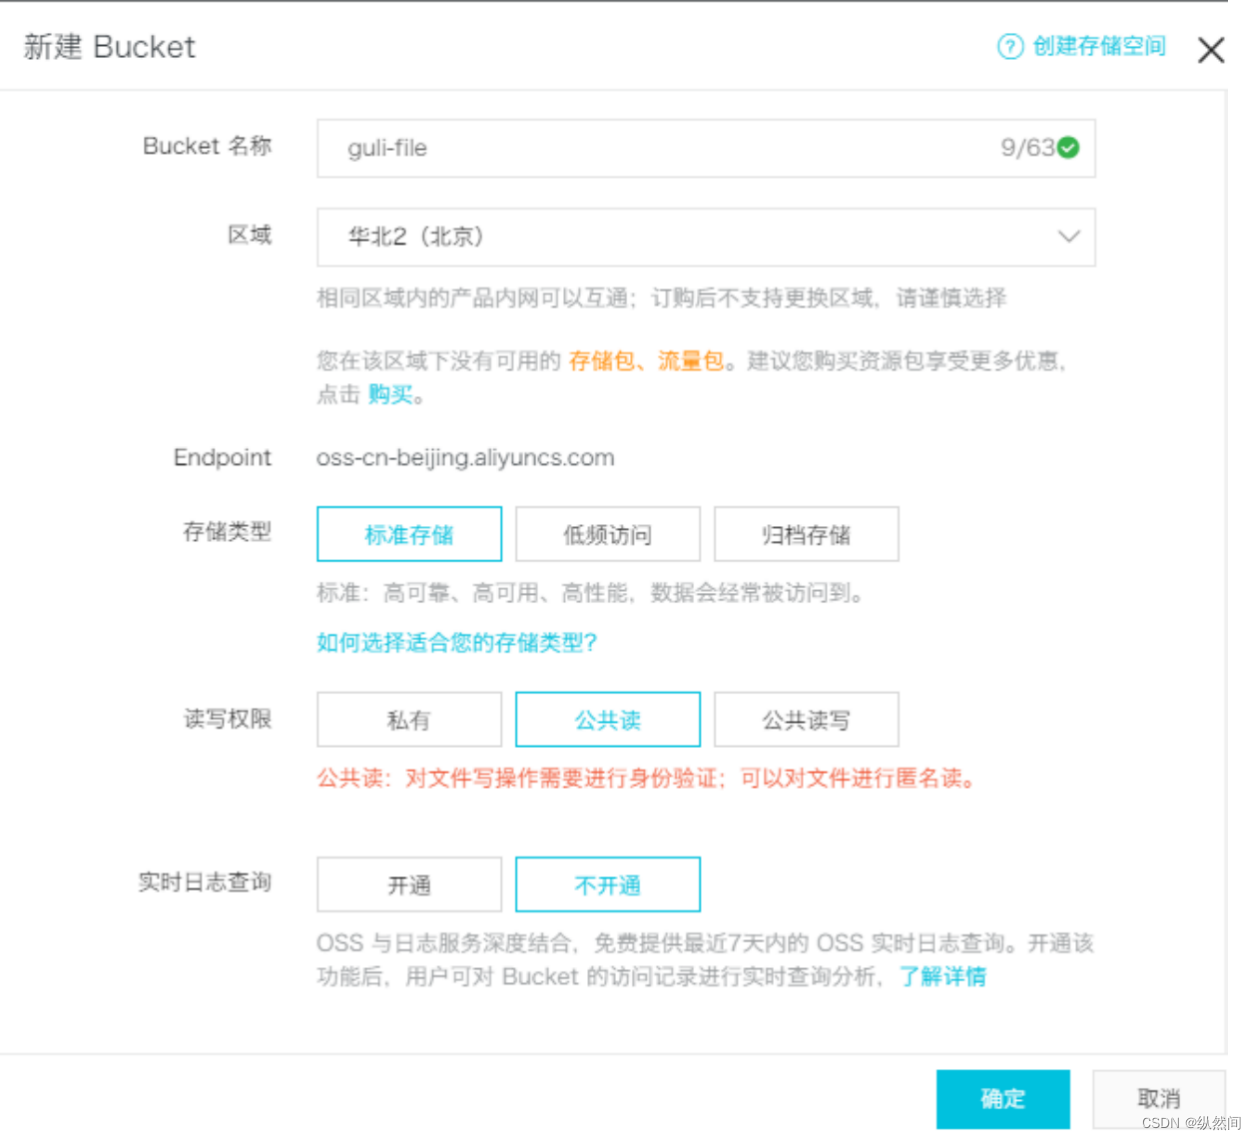
1.1.1 创建Bucket
选择:标准存储、公共读、不开通
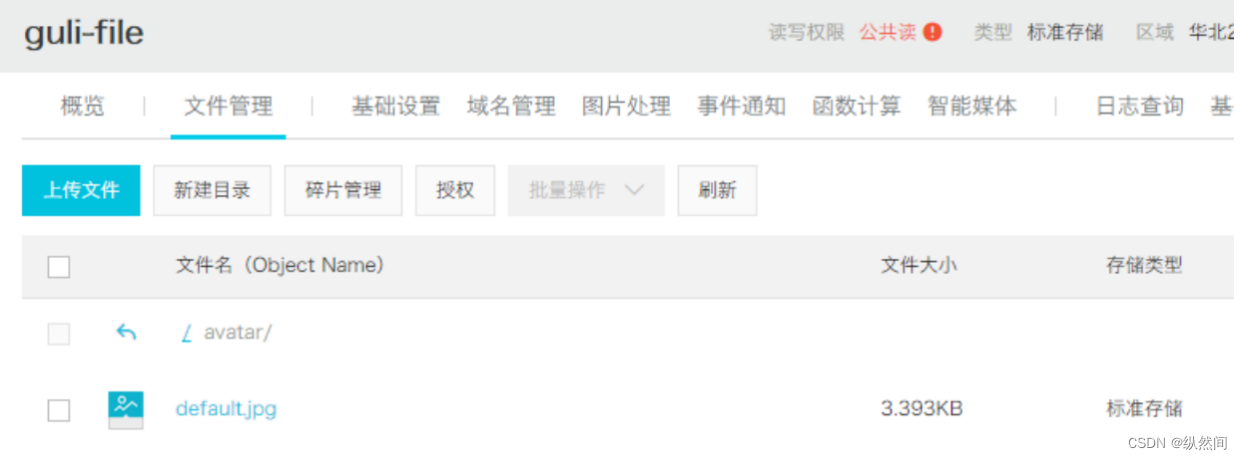
1.1.2 上传默认头像
创建文件夹avatar,上传默认的用户头像
1.1.3 创建RAM子用户
(1)添加用户组
(2)添加用户
(3)添加用户到用户组
(4)设置用户组权限:AliyunOSSFullAccess
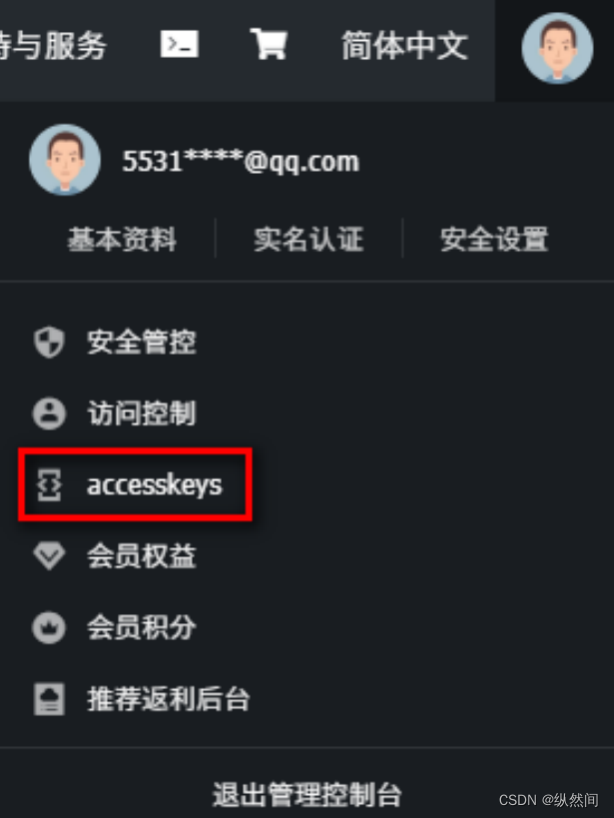
(5)获取子用户AccessKeyId,AccessKeySecret
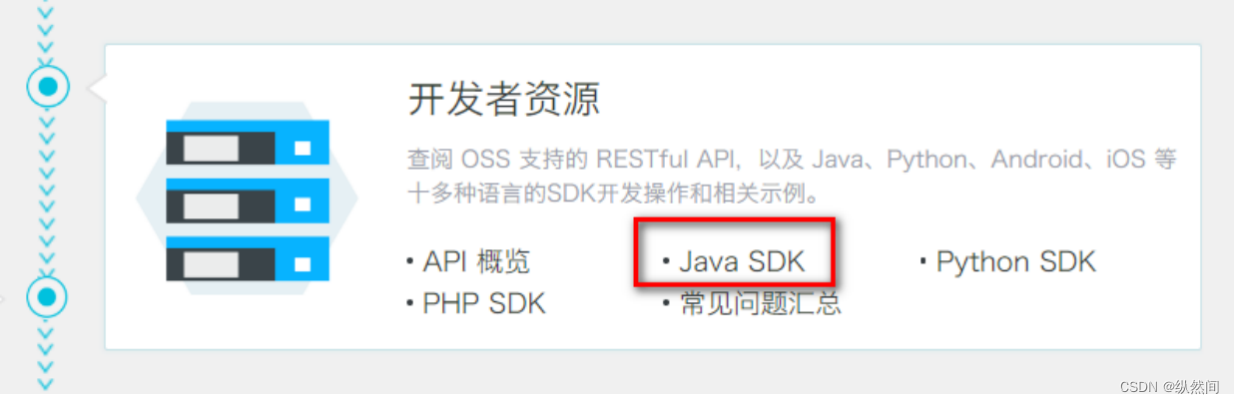
1.2 使用SDK
1.2.1 创建Mavaen项目
com.atguigu
aliyun-oss
1.2.2 pom
<dependencies>
<!--aliyunOSS-->
<dependency>
<groupId>com.aliyun.oss</groupId>
<artifactId>aliyun-sdk-oss</artifactId>
<version>2.8.3</version>
</dependency>
<dependency>
<groupId>junit</groupId>
<artifactId>junit</artifactId>
<version>4.12</version>
</dependency>
</dependencies>
1.2.3 找到编码时需要用到的常量值
(1)endpoint
(2)bucketName
(3)accessKeyId
(4)accessKeySecret
1.2.4 测试创建Bucket的连接
|
public class OSSTest {
@Test
public void oss(){
// Endpoint以杭州为例,其它Region请按实际情况填写。
String endpoint = "http://oss-cn-beijing.aliyuncs.com";
// 阿里云主账号AccessKey拥有所有API的访问权限,风险很高。强烈建议您创建并使用RAM账号进行API访问或日常运维,请登录 https://ram.console.aliyun.com 创建RAM账号。
String accessKeyId = "<yourAccessKeyId>";
String accessKeySecret = "<yourAccessKeySecret>";
// 创建OSSClient实例。
OSSClient ossClient = new OSSClient(endpoint, accessKeyId, accessKeySecret);
// 创建存储空间。
String bucketName = "sgg-hw";
// 新建存储空间默认为标准存储类型,私有权限。
ossClient.createBucket(bucketName);
// 关闭OSSClient。
ossClient.shutdown();
}
}
|
2. 存储服务-测试
2.1 创建模块
Artifact:test_oss
2.3 配置pom.xml
| <dependencies>
<dependency>
<groupId>com.test</groupId>
<artifactId>test_common</artifactId>
<version>0.0.1-SNAPSHOT</version>
</dependency>
<!--aliyunOSS-->
<dependency>
<groupId>com.aliyun.oss</groupId>
<artifactId>aliyun-sdk-oss</artifactId>
<version>2.8.3</version>
</dependency>
<!--日期时间工具-->
<dependency>
<groupId>joda-time</groupId>
<artifactId>joda-time</artifactId>
<version>2.10.1</version>
</dependency>
</dependencies> |
2.4 配置application.properties
| #服务端口
server.port=8002
#服务名
spring.application.name=test-oss
#环境设置:dev、test、prod
spring.profiles.active=dev
#阿里云 OSS
#不同的服务器,地址不同
aliyun.oss.file.endpoint=your endpoint
aliyun.oss.file.keyid=your accessKeyId
aliyun.oss.file.keysecret=your accessKeySecret
#bucket可以在控制台创建,也可以使用java代码创建
aliyun.oss.file.bucketname=test-file
aliyun.oss.file.filehost=avatar |
2.5 logback-spring.xml
修改日志路径
2.6 创建启动类
创建OssApplication.java
2.7 启动项目
报错
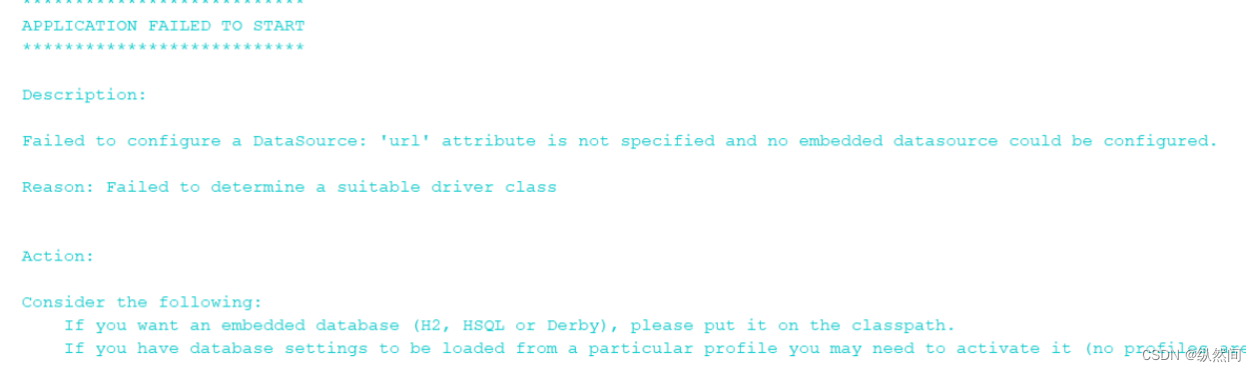
springboot会默认加载
org.springframework.boot.autoconfigure.jdbc.DataSourceAutoConfiguration这个类,
而DataSourceAutoConfiguration类使用了@Configuration注解向spring注入了dataSource bean,又因为项目(oss模块)中并没有关于dataSource相关的配置信息,所以当spring创建dataSource bean时因缺少相关的信息就会报错。
解决办法:
方法1、在@SpringBootApplication注解上加上exclude,解除自动加载DataSourceAutoConfiguration
@SpringBootApplication(exclude = DataSourceAutoConfiguration.class)
方法2、common项目中mybatis-plus-boot-starter配置添加<optional>true</optional>
此种方式会引起后续的包扫描问题,后面再详解,此处先使用第一种方式
3. 后端实现文件上传
3.1 从配置文件读取常量
创建常量读取工具类:ConstantPropertiesUtil.java
使用@Value读取application.properties里的配置内容
用spring的 InitializingBean 的 afterPropertiesSet 来初始化配置信息,这个方法将在所有的属性被初始化后调用。
| package com.test.oss.utils;
import org.springframework.beans.factory.InitializingBean;
import org.springframework.beans.factory.annotation.Value;
import org.springframework.stereotype.Component;
@Component
public class ConstantPropertiesUtil implements InitializingBean {
@Value("${aliyun.oss.file.endpoint}")
private String endpoint;
@Value("${aliyun.oss.file.keyid}")
private String keyId;
@Value("${aliyun.oss.file.keysecret}")
private String keySecret;
@Value("${aliyun.oss.file.filehost}")
private String fileHost;
@Value("${aliyun.oss.file.bucketname}")
private String bucketName;
public static String END_POINT;
public static String ACCESS_KEY_ID;
public static String ACCESS_KEY_SECRET;
public static String BUCKET_NAME;
public static String FILE_HOST ;
@Override
public void afterPropertiesSet() throws Exception {
END_POINT = endpoint;
ACCESS_KEY_ID = keyId;
ACCESS_KEY_SECRET = keySecret;
BUCKET_NAME = bucketName;
FILE_HOST = fileHost;
}
} |
3.2 文件上传
创建Service接口:FileService.java
| package com.test.oss.service;
import org.springframework.web.multipart.MultipartFile;
public interface FileService {
/**
* 文件上传至阿里云
* @param file
* @return
*/
String upload(MultipartFile file);
} |
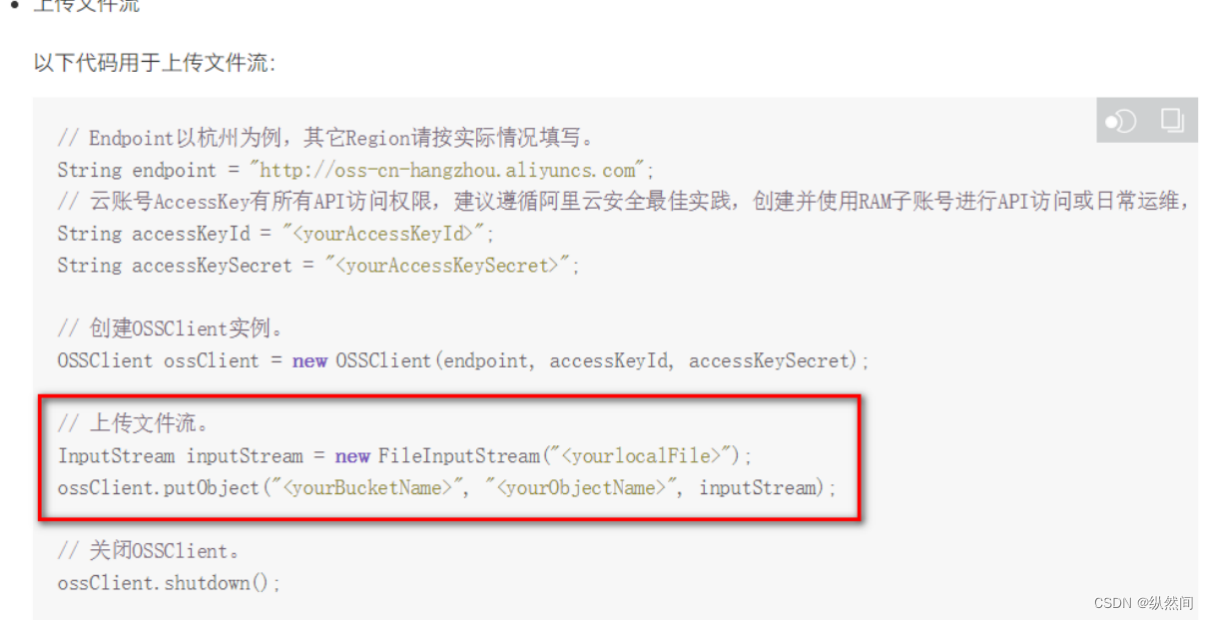
实现:FileServiceImpl.java
参考SDK中的:Java->上传文件->简单上传->流式上传->上传文件流
| package com.test.oss.service;
import com.aliyun.oss.OSSClient;
import com.test.oss.util.ConstantPropertiesUtil;
import org.joda.time.DateTime;
import org.springframework.stereotype.Service;
import org.springframework.util.StringUtils;
import org.springframework.web.multipart.MultipartFile;
import javax.imageio.ImageIO;
import javax.imageio.ImageReader;
import java.awt.image.BufferedImage;
import java.io.IOException;
import java.io.InputStream;
import java.util.Iterator;
import java.util.UUID;
@Service
public class FileServiceImpl implements FileService{
private static String TYPESTR[] = {".png",".jpg",".bmp",".gif",".jpeg"};
@Override
public String upload(MultipartFile file) {
OSSClient ossClient = null;
String url = null;
try {
// 创建OSSClient实例。
ossClient = new OSSClient(
ConstantPropertiesUtil.END_POINT,
ConstantPropertiesUtil.ACCESS_KEY_ID,
ConstantPropertiesUtil.ACCESS_KEY_SECRET);
boolean flag = false;
//判断文件格式
for(String type : TYPESTR){
if(StringUtils.endsWithIgnoreCase(file.getOriginalFilename(),type)){
flag = true;
break;
}
}
if(!flag){
return "图片格式不正确";
}
//判断文件内容
BufferedImage image = ImageIO.read(file.getInputStream());
if(image != null){
System.err.println(String.valueOf(image.getHeight()));
System.err.println(String.valueOf(image.getWidth()));
} else{
return "文件内容不正确";
}
//获取文件名称
String filename = file.getOriginalFilename();
//文件名字: lijin.shuai.jpg
String ext = filename.substring(filename.lastIndexOf("."));
String newName = UUID.randomUUID().toString() + ext;// ertyerxvnxrvjtcfhjktcfgh
String dataPath = new DateTime().toString("yyyy/MM/dd");
String urlPath = ConstantPropertiesUtil.FILE_HOST + "/" + dataPath + "/" + newName;
// 上传文件流。
InputStream inputStream = file.getInputStream();
ossClient.putObject(ConstantPropertiesUtil.BUCKET_NAME, urlPath, inputStream);
url = "https://"+ConstantPropertiesUtil.BUCKET_NAME + "." + ConstantPropertiesUtil.END_POINT + "/" + urlPath;
} catch (Exception e) {
e.printStackTrace();
} finally {
// 关闭OSSClient。
ossClient.shutdown();
}
return url;
}
} |
可以添加枚举
FILE_UPLOAD_ERROR(false, 21004, "文件上传错误");
在抛异常的时候使用:
throw new EduException(ResultCode.FILE_UPLOAD_ERROR);
3.3 控制层
创建controller:FileUploadController.java
| package com.test.oss.controller;
import com.test.oss.service.FileService;
import com.test.common.entity.Result;
import io.swagger.annotations.Api;
import io.swagger.annotations.ApiOperation;
import io.swagger.annotations.ApiParam;
import org.springframework.beans.factory.annotation.Autowired;
import org.springframework.web.bind.annotation.*;
import org.springframework.web.multipart.MultipartFile;
@Api(description="阿里云文件管理")
@CrossOrigin //跨域
@RestController
@RequestMapping("/oss/file")
public class FileController {
@Autowired
private FileService fileService;
/**
* 文件上传
*
* @param file
*/
@ApiOperation(value = "文件上传")
@PostMapping("upload")
public Result upload(
@ApiParam(name = "file", value = "文件", required = true)
@RequestParam("file") MultipartFile file) {
String uploadUrl = fileService.upload(file);
//返回r对象
return Result.ok().message("文件上传成功").data("url", uploadUrl);
}
} |
3.4 重启oss服务
3.5 配置Swagger
| package com.test.oss.config;
import org.springframework.context.annotation.Bean;
import org.springframework.context.annotation.Configuration;
import springfox.documentation.builders.ApiInfoBuilder;
import springfox.documentation.service.ApiInfo;
import springfox.documentation.service.Contact;
import springfox.documentation.spi.DocumentationType;
import springfox.documentation.spring.web.plugins.Docket;
import springfox.documentation.swagger2.annotations.EnableSwagger2;
@Configuration
@EnableSwagger2
public class Swagger2Config {
@Bean
public Docket webApiConfig(){
return new Docket(DocumentationType.SWAGGER_2)
.groupName("webApi")
.apiInfo(webApiInfo())
.select()
.build();
}
private ApiInfo webApiInfo(){
return new ApiInfoBuilder()
.title("网站-文档")
.description("本文档描述了接口定义")
.version("1.0")
.contact(new Contact("华安", "http://xxx.com", "492902688@qq.com"))
.build();
}
} |
3.6 Swagger中测试文件上传
3.7 配置nginx反向代理
将接口地址加入nginx配置
location ~ /oss/ {
proxy_pass http://localhost:8002;
}
重启nginx
nginx -s reload
4. 前端整合图片上传组件
需要上传图片的插件!
4.1 复制头像上传组件
从vue-element-admin复制组件:
vue-element-admin/src/components/ImageCropper
vue-element-admin/src/components/PanThumb
4.2 前端添加文件上传组件
src/views/edu/teacher/add.vue
template:
| <!-- 讲师头像:TODO --> <el-form-item label="讲师头像"> <!-- 头衔缩略图 --> <pan-thumb :image="teacher.avatar"/> <!-- 文件上传按钮 --> <el-button type="primary" icon="el-icon-upload" @click="imagecropperShow=true">更换头像 </el-button> <!-- v-show:是否显示上传组件 :key:类似于id,如果一个页面多个图片上传控件,可以做区分 :url:后台上传的url地址 @close:关闭上传组件 @crop-upload-success:上传成功后的回调 --> <image-cropper v-show="imagecropperShow" :width="300" :height="300" :key="imagecropperKey" :url="BASE_API+'/oss/file/upload'" field="file" @close="close" @crop-upload-success="cropSuccess"/> </el-form-item> |
引入组件模块
import ImageCropper from '@/components/ImageCropper'
import PanThumb from '@/components/PanThumb'
4.3 设置默认头像
config/dev.env.js中添加阿里云oss bucket地址
OSS_PATH: '"http://guli-test.oss-cn-beijing.aliyuncs.com"'
组件中初始化头像默认地址
const defaultForm = {
......,
avatar: process.env.OSS_PATH + '/avatar/default.jpg'
}
4.4 js脚本实现上传和图片回显
export default {
components: { ImageCropper, PanThumb },
data() {
return {
//其它数据模型
......,
BASE_API: process.env.BASE_API, // 接口API地址
imagecropperShow: false, // 是否显示上传组件
imagecropperKey: 0 // 上传组件id
}
},
......,
methods: {
//其他函数
......,
// 上传成功后的回调函数
cropSuccess(data) {
console.log(data)
this.imagecropperShow = false
this.teacher.avatar = data.url
// 上传成功后,重新打开上传组件时初始化组件,否则显示上一次的上传结果
this.imagecropperKey = this.imagecropperKey + 1
},
// 关闭上传组件
close() {
this.imagecropperShow = false
// 上传失败后,重新打开上传组件时初始化组件,否则显示上一次的上传结果
this.imagecropperKey = this.imagecropperKey + 1
}
}
}
4.5 测试文件上传
前后端联调


 3653
3653

 被折叠的 条评论
为什么被折叠?
被折叠的 条评论
为什么被折叠?
 到【灌水乐园】发言


