


导入typora文件的时候,图片失效,后来一张张复制进来不知有没有错位。
创建项目
初始
1.在项目文件夹终端 vue create mall
2.在GitHub new一个repository
3.把GitHub创建的仓库和项目文件夹之间建立联系。
这个方法是把网上的文件夹clone到自己本地,会在本地新建一个文件夹的!网上直接 git clone 仓库地址(报错的话fatal: unable to access)把https改成git就可以
(我实操是1.git init 2. git config http.sslVerify “false” 3.git clone git://github.com/xiaohou1112/coderwhymalltest.git)
最终我创建项目的实操是在本地 vue create amall以后,执行下面2行。
git remote add origin https://github.com/xiaohou1112/amll.git
git push -u origin main
但是main上传失败,把main改成master后成功。
目录结构划分

首页开发
css文件从coderwhy的仓库中直接引入的。https://github.com/coderwhy/supermall/tree/master/src
base.css 引用了
@import "./normalize.css";
App.vue 在style里面引用了
@import"./assets/css/base.css";
好像是cli2才有的vue.config.js和.editorconfig
设置文件别名。这里配置的会和node_modules进行合并。
router和store不设置别名。因为所有文件里都可以 this. r o u t e r 或 者 t h i s . router 或者 this. router或者this.store 拿到对象。
更改配置后要重新 npm run serve
module.exports={
  configureWebpack:{
    resolve:{
      alias:{
        'assets':'@/assets',
        'common':'@/common',
        'components':'@/components',
        'network':'@/network',
        'views':'@/views',
      }
    }
  }
}
resolve解决路径相关问题。extensions:[]还可以让有一些文件的后缀名就不用写了。
弹幕:
ctrl c退出,编辑完配置文件后再npm run sreve 2、其次就是resolve下添加extensions: [’.js’, ‘.vue’, ‘.json’,’.css’,’.scss’]
没必要弄别名。cli4里直接@开头就完事了,@就代表src
vscode下载EditorConfig 插件,右键最后一个生成
.editorconfig
这个文件是为了让代码风格完全一样。比如把原来组里的这个文件拉到新组里,就会是一样的代码风格。
1.tabbar移入
dom里面使用别名需要在前面加~

路由映射关系配置
前面在浏览器里面一直报undefined path之类的错误的时候,应该就是路由还没配置好?因为配置好以后报错也消失了。
在app.vue里面放进去后,要配置路由的映射关系。
router - index.js
import Vue from 'vue'
import VueRouter from 'vue-router'

const Home = () => import('../views/home/Home')
const Category = () => import('../views/category/Category')
const Cart = () => import('../views/cart/Cart')
const Profile = () => import('../views/profile/Profile')
// 1.安装插件
Vue.use(VueRouter)

// 2.创建router
const routes = [
  {
    path: '',
    redirect: '/home'
  },
  {
    path: '/home',
    component: Home
  },
  {
    path: '/category',
    component: Category
  },
  {
    path: '/cart',
    component: Cart
  },
  {
    path: '/profile',
    component: Profile
  }
]
const router = new VueRouter({
  routes,
  mode:'history'
})

export default router
main.js里面
import router from './router'

new Vue({
 render: h => h(App),
 router
}).$mount('#app')
2.更改标签页小图标
public - index.html - link标签 icon
<link rel="icon" href="<%= BASE_URL %>favicon.ico">
把需要的小图标直接覆盖掉public里面的,就得到下图!
<%= BASE_URL %> 是在动态获取当前文件所在的路径。在这个路径找ico。这是jsp语法。之后 npm run build 打包到dist文件夹里面是不存在这种语法的。
3.封装独立的导航组件
导航注意预留插槽。因为有的页面会用到的。插槽要用div包起来,用于设置样式属性。
创建在 components-commin-navbar. (这里有个coderwhy的习惯,文件夹小写,组件名大写)
<template>
  <div class="nav-bar">
    <div class="left"><slot name="left"></slot></div>
    <div class="center"><slot name="center"></slot></div>
    <div class="right"><slot name="right"></slot></div>
  </div>
</template>

<script>
  export default {
    name: "NavBar"
  }
</script>

<style scoped>
  .nav-bar {
    display: flex;
    height: 44px;
    line-height: 44px;
    text-align: center;
    box-shadow: 0 1px 1px rgba(100,100,100,.1);
  }

  .left, .right {
    width: 60px;
  }

  .center {
    flex: 1;
  }
</style>
flex
父盒子要 display:flex
因为left和right已经设置了width,center的flex:1表达的是比例,只有一个比例,所以占据了剩余空间的100%
home页使用navbar
<template>
<div id="home">
<nav-bar class="homenav">
<div slot="center">购物街</div>
</nav-bar>
</div>
</template>
<script>
import NavBar from 'components/common/navbar/NavBar'
export default {
name: "Home",
components:{
NavBar
}
}
</script>
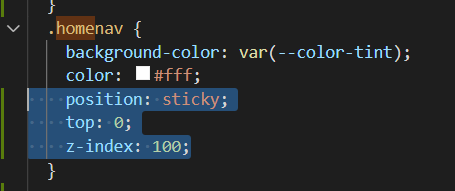
<style scoped>
.homenav{
background-color: var(--color-tint);
color: #fff;
}
</style>
此处遇到一次问题,class="homenav"起初写的是home-nav,不生效,删除-后生效。不知原因。
注册组件驼峰命名法,然后使用的时候vue规定用-隔开。
4.请求首页数据
安装 npm install axios --save
src-router-request.js
import axios from 'axios'

export function request(config) {
  // 1.创建axios的实例
  const instance = axios.create({
    baseURL: 'http://123.207.32.32:8000',
    timeout: 5000
  })

  // 2.axios的拦截器
  // 2.1.请求拦截的作用
  instance.interceptors.request.use(config => {
    return config
  }, err => {
     console.log(err);
  })

  // 2.2.响应拦截
  instance.interceptors.response.use(res => {
    return res.data
  }, err => {
    console.log(err);
  })

  // 3.发送真正的网络请求,这个函数返回的是promise,其他地方调用函数的时候可以直接.then
  return instance(config)
}
有了request以后发送网络请求。这里要给首页home.vue发送网络请求。
首页面向request直接发送网络请求,创建文件network-home.js,home.vue面向home.js开发。

res在函数里面,执行完以后res被回收了,result还存着数据,所以取数据的对象和result都不会被回收,result是在组件里面定义的。
5.轮播图
直接从coderwhy复制的swiper文件夹。下面是使用过程
这里可以这么导入是因为创建了index.js文件,导出对象
import Swiper from './Swiper'
import SwiperItem from './SwiperItem'

export {
  Swiper, SwiperItem
}
使用轮播图的时候,注意用v-for需要绑定key。
传入几个swiper-item 取决于banners数组大小。
    <swiper>
      <swiper-item v-for="item in banners" :key="item">
        <a :href="item.link">
          <img :src="item.image" alt="">
        </a>
      </swiper-item>
    </swiper>
操作完之后一直没有显示,把定时器时间改长了才显示出来(原来是100)。在src-components-common-swiper-Swiper.vue-
    mounted: function () {
      // 1.操作DOM, 在前后添加Slide
      setTimeout(() => {
        this.handleDom();

        // 2.开启定时器
        this.startTimer();
      }, 300)
    },

可以展示了,又对做一次独立的封装。避免Home.vue的Dom代码太长太杂?
封装在views-home-childComps 里的 HomeSwiper.vue
6.推荐信息展示
再views-home-childComps创建RecommendView.vue组件
1.组件获取数据。现在数据在首页里面,用props获取。
<script>
export default {
  neme:"RecommendView",
  props:{
    recommends:{
      type:Array,
      default() {
        return[]
      }
    }
  }
}
</script>
2.home.vue 里 import-注册组件-使用组件
:recommends=“recommends” 把东西传进来
3.根据样子写template

<template>
  <div class="recommend">
    <div v-for="(item,index) in recommends" :key="index" class="recommend-item">
      <a :href="item.link">
        <img :src="item.image" alt="">
        <div>{{item.title}}</div>
      </a>
    </div>
  </div>
</template>
4.css设置边边角角
<style scoped>
 .recommend {
    display: flex;
    width: 100%;
    text-align: center;
    font-size: 12px;
    padding: 10px 0 20px;
    border-bottom: 10px solid #eee;
  }

  .recommend-item {
    flex: 1;
  }

  .recommend-item img {
    width: 70px;
    height: 70px;
    margin-bottom: 10px;
  }
</style>
7.FeatureView组件封装

创建文件:views-childComps-FeatureView.vue
这里没有学习价值,直接是一张图和链接,没有请求数据。
<template>
  <div class="feature">
    <a href="https://act.mogujie.com/zzlx67">
      <img src="~assets/img/home/recommend_bg.jpg" alt="">
    </a>
  </div>
</template>

<script>
  export default {
    name: "FeatureView"
  }
</script>

<style scoped>
  .feature img {
    width: 100%;
  }
</style>
然后在home.vue里面import-注册-使用
此时会遇到2个问题:
1.滚动的时候导航栏被卷进去了;
2.最底下的被tabbar挡住了,滚不出来。
1)解决navbar被滚掉问题
在home.vue 里给 homenav加样式
    position: sticky;
    top: 0;
    z-index: 100;
这里老师用的fixed,根据弹幕修改为sticky。fixed是对于浏览器窗口定位住,脱离了标准流,下面的东向西上来了,就被homebar盖住了。sticky不会,它的行为就像 position:relative; 而当页面滚动超出目标区域时,它的表现就像 position:fixed;,它会固定在目标位置。
(插曲:老师这里用的fixed,然后给整个home盒子加了padding-top。官方推荐可以用padding的时候不要用margin。
2)解决盒子被tabbar挡住问题

我的想法:在最底下加个div,高度和tabbar一样。或者最底下的部分 padding-bottom: 49px;
8.TabControl组件封装


这个组件在多个页面用到,而且和业务相关,所以在components-content里面创建文件夹 tabControl
这里每个地方填充多少tab多少文字之类是不确定的。只是文字不一样的时候没必要用slot!
这里把要显示的文字用props传进去,用type要求传入数组,default里给个默认值,一个空数组。
export default {
    name: "TabControl",
    props: {
      titles: {
        type: Array,
        default() {
          return []
        }
      }
    },
}
用组件的时候传文字就可。用数组决定显示几个以及多少字。如下
<tab-control :titles="['流行', '新款', '精选']" class="tab-control"/>
template
<template>
  <div class="tab-control">
    <div v-for="(item, index) in titles" :key="item"
         class="tab-control-item"
         :class="{active: index === currentIndex}"
         @click="itemClick(index)">
      <span>{{item}}</span>
    </div>
  </div>
</template>
大盒子,包装里面未知个数的小盒子,布局父盒子flex,子盒子,flex:1
v-for取数据,:class动态绑定点击的是哪一个盒子,给这个盒子显示不同的样式。
script
<script>
  export default {
    name: "TabControl",
    props: {
      titles: {
        type: Array,
        default() {
          return []
        }
      }
    },
    data() {
      return {
        currentIndex: 0
      }
    },
    methods: {
      itemClick(index) {
        this.currentIndex = index;
        this.$emit('tabClick', index) //事件tabClick,参数index表示点击了哪个tab
      }
    }
  }
</script>
data给默认值,刚打开的时候选中的是第一个。
点击后调用方法改变currentindex。方法里传入参数index,决定哪个处于点击状态。
this.$emit把这个组件里面的点击事件传到外面去。

现在这个点击事件在TabControl内部,点击后传到外面home。详细见12.
style
  .tab-control {
    display: flex;
    text-align: center;
    font-size: 15px;
    height: 40px;
    line-height: 40px;
    background-color: #fff;
  }

  .tab-control-item {
    flex: 1;
  }

  .tab-control-item span {
    padding: 5px;
  }

  .active {
    color: var(--color-high-text);
  }

  .active span {
    border-bottom: 3px solid var(--color-tint);
  }
前3个:大体布局。后2个:点击后颜色和加底线。
为了让这个组件,滚动到下面以后还要显示在页面的固定位置上,加css
  .tab-control{
    position: sticky;
    top:44px;
    }
9.保存商品的数据结构设计
p161
针对复杂设计的时候要先设计数据结构。

在一个变量中存储:流行、新款、精选三者的数据。点击的时候,把变量里面对应的数据取出来展示出来。
一次性把三者的数据都请求出来,在一个地方做存储。
goods:(流行/新款/精选)
goods对象,里面保存3个key分别对应对象,每个对象记录着自己当前加载到第几页了page,加载了多少数据了list。
        goods: {
          'pop': {page: 0, list: []},
          'new': {page: 0, list: []},
          'sell': {page: 0, list: []},
        }
请求到的数据往设计好的数据结构里存放。
10.首页数据的请求和保存
当前goods对象里没有任何数据,先把每个对象的page1数据请求下来,这样切换tab的时候可以及时展示数据。
1.去哪里请求呢? network-home.js
export function getHomeGoods(type, page) {
  return request({
    url: '/home/data',
    params: {
      type,
      page
    }
  })
}

baseURL在request.js里面设置过。
2.在Home.vue import方法,来到export default里的created(){}使用方法,这里做一次封装。
created是组件创建完就执行的函数,在这里最好只写主要逻辑,更详细的逻辑卸载methods里。
1)这个函数最开始封装在home.js
2) 然后请求数据的具体逻辑在methods里面,函数的名字是一样的
3)在created里面请求的时候,要在前面加上this,等于对当前对象的methods里面调用了这个函数。不加this的话相当于在调用import进去的函数。created里面调用函数请求到的数据,在data里面设计好的goods对象里保存起来。
下面就是home.vue里的排版
    created() {
      // 1.请求多个数据
      this.getHomeMultidata()

      // 2.请求商品数据
      this.getHomeGoods('pop')
      this.getHomeGoods('new')
      this.getHomeGoods('sell')
    },
    methods:{
    	/**
       * 网络请求相关的方法
       */
      getHomeMultidata() {
        getHomeMultidata().then(res => {
          this.banners = res.data.banner.list;
          this.recommends = res.data.recommend.list;
        })
      },
      getHomeGoods(type) {
        const page = this.goods[type].page + 1 //动态获取page + 1
        getHomeGoods(type, page).then(res => {
          this.goods[type].list.push(...res.data.list)	//把res.data.list数据push进去
          this.goods[type].page += 1 //多了一组数据以后page+1

          // 完成上拉加载更多
          this.$refs.scroll.finishPullUp()
        })
      }
    }
  }
第一次请求数据的时候page是0,this.goods[type] 比如传入pop,取它page然后+1,也就是原来page基础上+1.
this.goods[type].list.push(…res.data.list) 就是把res.data.list这个数组做解析传到this.goods[type].list
// 弹幕1:逻辑还是有问题的。得等服务器响应数据成功,page才能+1
// 弹幕2:goods是对象,type是变量。对象获取的属性是变量的时候,就是goods[type]的写法。变量形式的要用[]
ES6扩展运算符号:…就可直接合并两个数组
let totalNums = []
const nums1 = [20, 11, 222]
// for (let n of nums1) {
//   totalNums.push(n)
// }

totalNums.push(...nums1)
函数参数前面有…就代表可以传很多个参数,push的设计里面就是可以传很多参数的。
这里的用处就是可以把nums1里面的元素一个个解构出来push到另一个数组里。
如果直接totalNums.push([20, 11, 222]) 会把整个数组当成一个元素传进去,[[],[]]like this
请求到的数据f12到vue块块就可以看到goods对象里面已经请求到数据啦!
11.首页商品数据的展示

封装蓝色大组件,里面再放一个个小组件(for)
父子通信
大组件GoodsList.vue
考虑到在别的页面也会复用。而且和业务相关,所以创建goods文件夹。src/components/content/goods/GoodsList.vue
从home(父)请求商品的数据,用props
    props: {
      goods: {
        type: Array,
        default() {
          return []
        }
      }
    }
在Home.vue 使用组件的时候,举例子就是从pop里面拿到list交给props里定义的goods
拿到后就可以在GoodsList.vue 里面用template展示数据,比如用{{goods}}会把数据(real data)展示出来。

小组件GoodsListItem.vue
GoodsList使用的时候单标签,因为小组件不需要添加插槽,因为数据显示固定,所以不用插槽!

每一个小组件都对应了list里的一个对象。
去小组件里props向父组件拿数据。这里注意类型是object
    props: {
      goodsItem: {
        type: Object,
        default() {
          return {}
        }
      }
    }
父组件里的使用
:goods-item="item"是父子通信,父传子。看props里面定义的名字就是goodsItem,然后自定义属性不可以用驼峰,所以上面属性:goods-item=“item”。
下面小组件取图片~

可以看到每一个小组件拿到的是一个个的object,打开图片就在show的img这里。
<img :src="goodsItem.show.img" alt="" @load="imageLoad">
取小组件里面的文字描述~
![[title描述]](https://img-blog.csdnimg.cn/35b67480940b487b9422313940ac6b6d.png?x-oss-process=image/watermark,type_d3F5LXplbmhlaQ,shadow_50,text_Q1NETiBAZu-_vWbvv70=,size_20,color_FFFFFF,t_70,g_se,x_16)

文字这一块用div包起来
<div class="goods-info">
      <p>{{goodsItem.title}}</p>
      <span class="price">{{goodsItem.price}}</span>
      <span class="collect">{{goodsItem.cfav}}</span>
</div>
收藏的英文collection favorites=cfav
后面就是样式调整。
父子代码
GoodsList.vue
<template>
  <div class="goods">
    <goods-list-item v-for="item in goods" :key="item"
    :goods-item="item"/>
  </div>
</template>

<script>
  import GoodsListItem from './GoodsListItem'

  export default {
    name: "GoodsList",
    components: {
      GoodsListItem
    },
    props: {
      goods: {
        type: Array,
        default() {
          return []
        }
      }
    }
  }
</script>

<style scoped>
  .goods {
    display: flex;
    flex-wrap: wrap;
    justify-content: space-around;

    padding: 2px;
  }


</style>
GoodsListItem.vue
<template>
  <div class="goods-item" @click="itemClick">
    <img :src="goodsItem.show.img" alt="" @load="imageLoad">
    <div class="goods-info">
      <p>{{goodsItem.title}}</p>
      <span class="price">{{goodsItem.price}}</span>
      <span class="collect">{{goodsItem.cfav}}</span>
    </div>
  </div>
</template>

<script>
  export default {
    name: "GoodsListItem",
    props: {
      goodsItem: {
        type: Object,
        default() {
          return {}
        }
      }
    },
    methods: {
      imageLoad() {
        this.$bus.$emit('itemImageLoad')
      },
      itemClick() {
        this.$router.push('/detail/' + this.goodsItem.iid)
      }
    }
  }
</script>

<style scoped>
  .goods-item {
    padding-bottom: 40px;
    position: relative;

    width: 48%;
  }

  .goods-item img {
    width: 100%;
    border-radius: 5px;
  }

  .goods-info {
    font-size: 12px;
    position: absolute;
    bottom: 5px;
    left: 0;
    right: 0;
    overflow: hidden;
    text-align: center;
  }

  .goods-info p {
    overflow: hidden;
    text-overflow: ellipsis;
    white-space: nowrap;
    margin-bottom: 3px;
  }

  .goods-info .price {
    color: var(--color-high-text);
    margin-right: 20px;
  }

  .goods-info .collect {
    position: relative;
  }

  .goods-info .collect::before {
    content: '';
    position: absolute;
    left: -15px;
    top: -1px;
    width: 14px;
    height: 14px;
    background: url("~assets/img/common/collect.svg") 0 0/14px 14px;
  }
</style>
12.TabControl 点击切换商品
在TabControl 组件里设置好事件往外传:
this.$emit('tabClick', index)
在Home用v-on监听这个事件:
    <tab-control :titles="['流行', '新款', '精选']"
                  class="tab-control"
                  @tabClick="tabClick"/>
在Home的methods里设置事件监听相关的方法:
      tabClick(index) {
        switch (index) {
          case 0:
            this.currentType = 'pop'
            break
          case 1:
            this.currentType = 'new'
            break
          case 2:
            this.currentType = 'sell'
            break
        }
里面的内容根据tabClick(index)的 index 动态决定。
最初 等于是想使用index让pop这个位置改成不同的字符串,对应的new或者sell。先在data里设置一个当前的默认值 currentType: ‘pop’ 所以用case0 1 2 可以给每一个对应的 case传入字符串。
于是变为
但这样,好像绑定的代码太长了。所以用computed包装一下。
computed: {
      showGoods() {
        return this.goods[this.currentType].list
      }
    }
上面标签改一下
<good-list :goods="showGoods"/>
13. BackTop组件
封装和使用
<template>
  <div class="back-top">
    <img src="~assets/img/common/top.png" alt="">
  </div>
</template>

<script>
export default {
}
</script>
<style scoped>
.back-top{
  position: fixed;
  right: 8px;
  bottom: 50px;
}
.back-top img {
  width: 43px;
  height: 43px;
}
</style>
Home.vue中使用
template
<back-top @click.native="backClick"/>
      backClick(){
        this.$refs.scroll. scrollTo(0,0)
      }
this.$refs.scroll 指向了现在组件中的scroll标签。进入这个组件后,调用这个组件的方法scrollTo
在scroll这个组件中,封装了一个方法,让原本的写法this.$refs.scroll. scroll. scrollTo(0,0) 少了一个scroll和一个参数。
Scroll.vue 中
  methods:{
    scrollTo(x,y,time=300){
      this.scroll.scrollTo(x,y,time)
    }
  }
组件的显示和隐藏
显示和隐藏是根据position.y 也就是看页面滚到什么位置了。
1.考虑不是所有使用scroll组件的页面都需要监听,如果默认使用就要监听的话会影响性能。故使用props,调用scroll.vue的组件,如果需要监听,就传probeType="3"进来。
<scroll class="content" ref="scroll" :probe-type="3">
冒号原因: 没有冒号也可以传进来,但是传进来是字符串,不加冒号不管三七二十一都当成字符串。加了冒号绑定了才会按照设定的Number传数字3进来。
在scroll.vue中作如下设置:
<script>export default {
  name:"Scroll",
  props:{
    probeType:{
      type: Number,
      default: 0
    }
  },
  mounted(){
    this.scroll = new BScroll(this.$refs.wrapper,{
      click:true,
      probeType: this.probeType
    })
  },
</script>
2.在scroll.vue 组件中把position传出去给需要监听position的父组件。
<script>
mounted(){
    // 1.创建BScroll对象
    this.scroll = new BScroll(this.$refs.wrapper,{
      click:true,
      probeType: this.probeType
    })

    // 2.监听滚动的位置
    this.scroll.on('scroll',(position) => {
      this.$emit('scroll',position)
    })
  },
 </script>
home.vue就可以接收这个position
contentScroll(position) {
      // 1.判断BackTop是否显示
      this.isShowBackTop = (-position.y) > 1000
}
data中给 isShowBackTop 默认赋值false
isShowBackTop: false,
当position过1000了,就给他true,标签用v-show接收这个变量的Boolean,动态决定是否展示。
<back-top @click.native="backClick" v-show="isShowBackTop"/>
pull up to load more
上拉加载更多
1.scroll.vue中在BScroll对象中设置
pullUpLoad:this.pullUpLoad
这个属性由外界传入决定,在props里设置
    pullUpLoad:{
      type: Boolean,
      default: false //默认不监听,不是所有页面都需要监听位置的
    }
在首页里就要给scroll标签的这个属性传一个true,因为我首页要监听位置,所以传true
    <scroll class="content"
            ref="scroll"
            :probe-type="3"
            @scroll="contentScroll"
            :pull-up-load="true"
            @pullingUp="loadMore">
另外还有上拉到底部了,pullingUp这个事件对应去调用loadMore方法
//scroll.vue
// 3.监听scroll滚动到底部
    if(this.pullUpLoad){
      this.scroll.on('pullingUp',() => {
      this.$emit('pullingUp')
     })
    }
     //home.vue methods
<script>
	loadMore() {
        this.getHomeGoods(this.currentType)
      },
      getHomeGoods(type) {
        const page = this.goods[type].page + 1
        getHomeGoods(type, page).then(res => {
          this.goods[type].list.push(...res.data.list)
          this.goods[type].page += 1

          // 完成上拉加载更多
          this.$refs.scroll.finishPullUp()
        })
      }
</script>
TabControl 的 offsetTop获取分析
搞了better-scroll以后tabcontrol的sticky就失效了。所以给这个类和设置的样式都删除了。
滚动多少时需要吸顶
获取tabcontrol的offsettop,所有组件都有一个属性$el,用于获取组件中的元素
this.$refs.tabControl.$el.offsetTop
元素就可以获取offsettop
但这是放在mounted里面,这时候元素里的img都还没加载完,获得的offsettop的值是不正确的。所以要监听图片加载完,这里上面的图片中,Hoemswiper的img加载最慢,所以就监听它。加载完成,发出时间,在home.vue获取正确的值。
在HomeSwiper.vue 的img加属性 <img :src=“item.image” alt="" @load=“imageLoad”>
要把这个事件发送到home
data() {
      return {
        isLoad: false //因为这里要获得imd加载完后的高度,不需要调用四次,搞个节流阀,调用一次imageLoad后就关掉
      }
    },
methods: {
      imageLoad() {
        if (!this.isLoad) {
          this.$emit('swiperImageLoad')
          this.isLoad = true
        }
      }
    }
isLoad用来记之前有没有发出过HomeSwiper这个事件,有的话就不用第二次了, isLoad进行状态记录。
home里
<home-swiper :banners="banners" @swiperImageLoad="swiperImageLoad"/>
home-methods
      swiperImageLoad() {
        this.tabOffsetTop = this.$refs.tabControl2.$el.offsetTop;
      },
监听滚动,动态改变tabbar样式
      contentScroll(position) {
        // 1.判断BackTop是否显示
        this.isShowBackTop = (-position.y) > 1000

        // // 2.决定tabControl是否吸顶(position: fixed)
        this.isTabFixed = (-position.y) > this.tabOffsetTop
      },
isTabFixed 根据这个变量,动态决定tabbar有没有fixed属性。(但是最后并不是用fixed
- 问题:动态的改变tabControl的样式时, 会出现两个问题:
- 问题一: 下面的商品内容, 会突然上移
- 问题二: tabControl虽然设置了fixed, 但是也随着Better-Scroll一起滚出去了.
- 其他方案来解决停留问题.
- 在最上面, 多复制了一份PlaceHolderTabControl组件对象, 利用它来实现停留效果. 两个的ref要不同
- 当用户滚动到一定位置时, PlaceHolderTabControl显示出来.
- 当用户滚动没有达到一定位置时, PlaceHolderTabControl隐藏起来.用v-show,然后第二个tabbar就用v-show设置取反的变量
用了better-scroll后滚动的区域只有中间那一块,nav-bar的fixed等定位属性可以删除。

14.离开home记录状态和位置
不销毁
在app.vue中 保证首页不被销毁。
但是位置不能保证不变。
让Home中的内容保持原来的位置
- 离开时, 保存一个位置信息saveY.
- 进来时, 将位置设置为原来保存的位置saveY信息即可.
- 注意: 最好回来时, 进行一次refresh()
15.跳转到详情页并携带id
弹幕操作:我直接在keep-alive里把detail移出让他每次点击都创建一遍了
GoodsListItem.vue
<div class="goods-item" @click="itemClick">
      itemClick() {
        this.$router.push('/detail/' + this.goodsItem.iid) //动态路由
      }
views里面创建文件夹detail 文件 Detail.vue
在router-index.js里配置路由
const Detail = () => import('../views/detail/Detail')
  {
    path: '/detail/:iid', //动态路由
    component: Detail
  }
Detail.vue
<template>
  <div>{{iid}}</div>
</template>

<script>
export default {
  name:"Detail",
  data(){
    return{
      iid:null
    }
  },
  created(){
    this.iid = this.$route.params.iid
  }
}
</script>
Control的样式时, 会出现两个问题:
- 问题一: 下面的商品内容, 会突然上移
- 问题二: tabControl虽然设置了fixed, 但是也随着Better-Scroll一起滚出去了.
- 其他方案来解决停留问题.
- 在最上面, 多复制了一份PlaceHolderTabControl组件对象, 利用它来实现停留效果. 两个的ref要不同
- 当用户滚动到一定位置时, PlaceHolderTabControl显示出来.
- 当用户滚动没有达到一定位置时, PlaceHolderTabControl隐藏起来.用v-show,然后第二个tabbar就用v-show设置取反的变量
用了better-scroll后滚动的区域只有中间那一块,nav-bar的fixed等定位属性可以删除。
14.离开home记录状态和位置
不销毁
在app.vue中 保证首页不被销毁。
但是位置不能保证不变。
让Home中的内容保持原来的位置
- 离开时, 保存一个位置信息saveY.
- 进来时, 将位置设置为原来保存的位置saveY信息即可.
- 注意: 最好回来时, 进行一次refresh()
15.跳转到详情页并携带id
弹幕操作:我直接在keep-alive里把detail移出让他每次点击都创建一遍了
GoodsListItem.vue
<div class="goods-item" @click="itemClick">
      itemClick() {
        this.$router.push('/detail/' + this.goodsItem.iid) //动态路由
      }
views里面创建文件夹detail 文件 Detail.vue
在router-index.js里配置路由
const Detail = () => import('../views/detail/Detail')
  {
    path: '/detail/:iid', //动态路由
    component: Detail
  }
Detail.vue
<template>
  <div>{{iid}}</div>
</template>

<script>
export default {
  name:"Detail",
  data(){
    return{
      iid:null
    }
  },
  created(){
    this.iid = this.$route.params.iid
  }
}
</script>


 406
406


 被折叠的 条评论
为什么被折叠?
被折叠的 条评论
为什么被折叠?
 到【灌水乐园】发言


