


Selenium 自动登录网站、截图及 Requests 抓取登录后的网页内容。一起了解下吧。
- Selenium: 支持 Web 浏览器自动化的一系列工具和库的综合项目。
- Requests: 唯一的一个非转基因的 Python HTTP 库,人类可以安全享用。

为什么选择 Selenium 实现自动登录?
Selenium 实现,相当于模拟用户手动打开浏览器、进行登录的过程。
相比直接 HTTP 请求登录,有几个好处:
- 避免登录窗口的复杂情况(iframe, ajax 等),省得分析细节。
- 用 Selenium 实现,依照用户操作流程即可。
- 避免模拟 Headers 、记录 Cookies 等 HTTP 完成登录的细节。
- 用 Selenium 实现,依赖浏览器自身功能即可。
- 利于实现加载等待、发现特殊情况(登录验证等),加进一步逻辑。
另外,自动登录等过程的可视化,给外行看挺让人感觉高端的。
为什么选择 Requests 抓取网页内容?
抓取登录后的某些内容,而非爬取网站, Requests 够用、好用。
1) 准备 Selenium
基础环境: Python 3.7.4 (anaconda3-2019.10)
pip 安装 Selenium :
-
pip install selenium
获取 Selenium 版本信息:
$ python

Python 3.7.4 (default, Aug 13 2019, 15:17:50)

[Clang 4.0.1 (tags/RELEASE_401/final)] :: Anaconda, Inc. on darwin

Type "help", "copyright", "credits" or "license" for more information.

>>> import selenium

>>> print('Selenium version is {}'.format(selenium.__version__))

Selenium version is 3.141.0
2) 准备浏览器及其驱动
下载 Google Chrome 浏览器并安装: www.google.com/chrome/
下载 Chromium/Chrome WebDriver: chromedriver.storage.googleapis.com/index.html
然后,将 WebDriver 路径加入到 PATH ,例如:
# macOS, Linux

export PATH=$PATH:/opt/WebDriver/bin >> ~/.profile


# Windows

setx /m path "%path%;C:\WebDriver\bin\"
3) Go coding!
读取登录配置
登录信息是私密的,我们从 json 配置读取:
# load config

import json

from types import SimpleNamespace as Namespace


secret_file = 'secrets/douban.json'

# {

# "url": {

# "login": "https://www.douban.com/",

# "target": "https://www.douban.com/mine/"

# },

# "account": {

# "username": "username",

# "password": "password"

# }

# }

with open(secret_file, 'r', encoding='utf-8') as f:

config = json.load(f, object_hook=lambda d: Namespace(**d))


login_url = config.url.login

target_url = config.url.target

username = config.account.username

password = config.account.password
Selenium 自动登录
以 Chrome WebDriver 实现,登录测试站点为「豆瓣」。
打开登录页面,自动输入用户名、密码,进行登录:
# automated testing

from selenium import webdriver


# Chrome Start

opt = webdriver.ChromeOptions()

driver = webdriver.Chrome(options=opt)

# Chrome opens with “Data;” with selenium

# https://stackoverflow.com/questions/37159684/chrome-opens-with-data-with-selenium

# Chrome End


# driver.implicitly_wait(5)


from selenium.common.exceptions import TimeoutException

from selenium.webdriver.common.by import By

from selenium.webdriver.support.ui import WebDriverWait

from selenium.webdriver.support import expected_conditions as EC

wait = WebDriverWait(driver, 5)


print('open login page ...')

driver.get(login_url)

driver.switch_to.frame(driver.find_elements_by_tag_name("iframe")[0])


driver.find_element_by_css_selector('li.account-tab-account').click()

driver.find_element_by_name('username').send_keys(username)

driver.find_element_by_name('password').send_keys(password)

driver.find_element_by_css_selector('.account-form .btn').click()

try:

wait.until(EC.presence_of_element_located((By.ID, "content")))

except TimeoutException:

driver.quit()

sys.exit('open login page timeout')
如果用 IE 浏览器,如下:
# Ie Start

# Selenium Click is not working with IE11 in Windows 10

# https://github.com/SeleniumHQ/selenium/issues/4292

opt = webdriver.IeOptions()

opt.ensure_clean_session = True

opt.ignore_protected_mode_settings = True

opt.ignore_zoom_level = True

opt.initial_browser_url = login_url

opt.native_events = False

opt.persistent_hover = True

opt.require_window_focus = True

driver = webdriver.Ie(options = opt)

# Ie End
如果设定更多功能,可以:
-
cap = opt.to_capabilities() -
cap['acceptInsecureCerts'] = True -
cap['javascriptEnabled'] = True
打开目标页面,进行截图
print('open target page ...')

driver.get(target_url)

try:

wait.until(EC.presence_of_element_located((By.ID, "board")))

except TimeoutException:

driver.quit()

sys.exit('open target page timeout')


# save screenshot

driver.save_screenshot('target.png')

print('saved to target.png')
Requests 复刻 Cookies ,请求 HTML
# save html

import requests


requests_session = requests.Session()

selenium_user_agent = driver.execute_script("return navigator.userAgent;")

requests_session.headers.update({"user-agent": selenium_user_agent})

for cookie in driver.get_cookies():

requests_session.cookies.set(cookie['name'], cookie['value'], domain=cookie['domain'])


# driver.delete_all_cookies()

driver.quit()


resp = requests_session.get(target_url)

resp.encoding = resp.apparent_encoding

# resp.encoding = 'utf-8'

print('status_code = {0}'.format(resp.status_code))

with open('target.html', 'w+') as fout:

fout.write(resp.text)


print('saved to target.html')
4) 运行测试
可以临时将 WebDriver 路径加入到 PATH :
# macOS, Linux

export PATH=$(pwd)/drivers:$PATH


# Windows

set PATH=%cd%\drivers;%PATH%
运行 Python 脚本,输出信息如下:
$ python douban.py
Selenium version is 3.141.0
--------------------------------------------------------------------------------
open login page ...
open target page ...
saved to target.png
status_code = 200
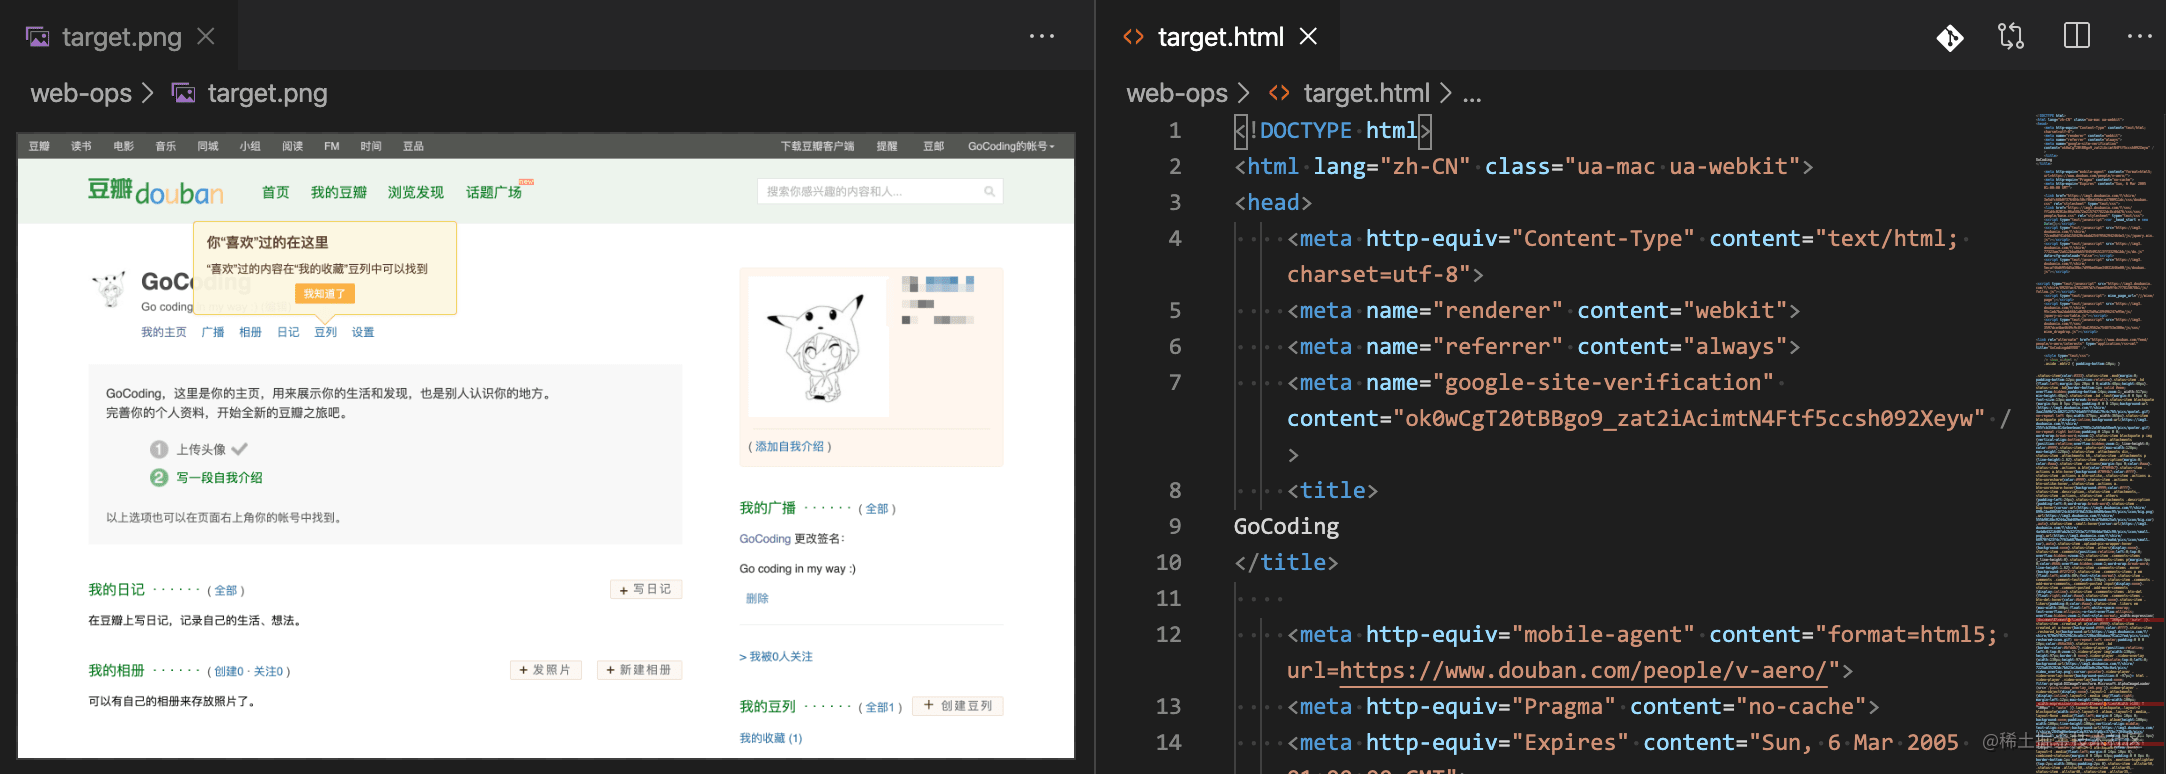
saved to target.html截图 target.png, HTML 内容 target.html ,结果如下:
结语
登录过程如果遇到验证呢?
- 滑动验证,可以 Selenium 模拟
- 滑动距离,图像梯度算法可判断
- 图文验证,可以 Python AI 库识别
最后感谢每一个认真阅读我文章的人,礼尚往来总是要有的,虽然不是什么很值钱的东西,如果你用得到的话可以直接拿走:
这些资料,对于【软件测试】的朋友来说应该是最全面最完整的备战仓库,这个仓库也陪伴上万个测试工程师们走过最艰难的路程,希望也能帮助到你!


 396
396

 被折叠的 条评论
为什么被折叠?
被折叠的 条评论
为什么被折叠?
 到【灌水乐园】发言


