


前言:这篇博客接着上一篇博客,如果你对这一篇博客感兴趣,那么建议你也去看看上一篇。
13、content,与 :before 及 :after 伪元素配合使用,来插入生成内容。可以选择的属性值为
normal,什么都没有
attr(attribute),选择元素的属性值
<!DOCTYPE html>
<html lang="en">
<head>
    <meta charset="UTF-8">
    <title>welcome</title>
    <style>
        div {
            width: 600px;
            margin: 100px auto;
        }
        a:after {
            content: "(" attr(href) ") " attr(class);
        }
    </style>
</head>
<body>
    <div>
        <a href="www.baidu.com" class="link bg">百度</a><br/>
        <a href="www.google.com">谷歌</a>
    </div>
</body>
</html>
显示效果为

string,设置文本
<!DOCTYPE html>
<html lang="en">
<head>
<meta charset="UTF-8">
<title>welcome</title>
<style>
div {
width: 600px;
margin: 100px auto;
}
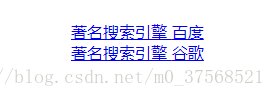
a:before {
content: "著名搜索引擎 ";
}
</style>
</head>
<body>
<div>
<a href="www.baidu.com" class="link bg">百度</a><br/>
<a href="www.google.com">谷歌</a>
</div>
</body>
</html>显示效果为
url(url),通过URL获取内容
<!DOCTYPE html>
<html lang="en">
<head>
    <meta charset="UTF-8">
    <title>welcome</title>
    <style>
        div {
            width: 600px;
            margin: 100px auto;
        }
        p:after {
            content: url("1.jpg");
            position: relative;
            top: 10px;
            left: 20px;
        }
    </style>
</head>
<body>
    <div>
        <p>百度</p>
        <p>谷歌</p>
    </div>
</body>
</html>
显示效果为

小例子,移动到元素上面改变内容
<!DOCTYPE html>
<html lang="en">
<head>
    <meta charset="UTF-8">
    <title>welcome</title>
    <style>
        div {
            width: 600px;
            margin: 100px auto;
        }
        span {
            line-height: 40px;
            cursor: pointer;
        }
        span:hover:before {
            content: "[";
            position: relative;
            right: 26px;
            top: 2px;
            font-size: 20px;
        }
        span:hover:after {
            content: "]";
            position: relative;
            left: 26px;
            top: 2px;
            font-size: 20px;
        }
    </style>
</head>
<body>
    <div>
        <span>百度</span><br/>
        <span>google</span>
    </div>
</body>
</html>
14、counter,counter-increment进行累加操作,counter-reset进行初始化变量操作,变量默认从0开始。
下面通过标题列表说明
<!DOCTYPE html>
<html lang="en">
<head>
    <meta charset="UTF-8">
    <title>welcome</title>
    <style>
        body {
            counter-reset: section;
        }
        div {
            width: 600px;
            margin: 100px auto;
        }
        h1 {
            counter-reset: subsection;
        }
        h1:before {
            counter-increment: section;
            content: "Section" counter(section) ".";
        }
        h2:before {
            counter-increment: subsection;
            content: counter(section) "." counter(subsection);
        }
    </style>
</head>
<body>
    <div>
        <h1>爱好</h1>
            <h2>阅读</h2>
            <h2>运动</h2>
            <h2>摄影</h2>
        <h1>性格</h1>
    </div>
</body>
</html>
效果图显示

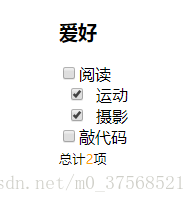
通过counter实现复选框选择栏目汇总
<!DOCTYPE html>
<html lang="en">
<head>
    <meta charset="UTF-8">
    <title>welcome</title>
    <style>
        body {
            counter-reset: num;
        }
        div {
            width: 600px;
            margin: 100px auto;
        }
        input:checked {
            width: 30px;
            counter-increment: num;
        }
        .total:after {
            color: orange;
            content:counter(num);
        }
    </style>
</head>
<body>
    <div>
        <h3>爱好</h3>
        <input type="checkbox" value="阅读" />阅读<br/>
        <input type="checkbox" value="运动" />运动<br/>
        <input type="checkbox" value="摄影" />摄影<br/>
        <input type="checkbox" value="敲代码" />敲代码<br/>
        <small>总计<span class="total"></span>项</small><br/>
    </div>
</body>
</html>
实现效果图为
注意上面的汇总的栏目一定要放在input下面,如果放在input上面,那么就无效,如下图
/*无效*/
<div>
    <h3>爱好</h3>
    <small>总计<span class="total"></span>项</small><br/>
    <input type="checkbox" value="阅读" />阅读<br/>
    <input type="checkbox" value="运动" />运动<br/>
    <input type="checkbox" value="摄影" />摄影<br/>
    <input type="checkbox" value="敲代码" />敲代码<br/>
</div>
如果放在中间,那么就只有在汇总的上面的栏目有效,这一点一定要注意,具体原因笔者也不太清楚,等明白了再来更
15、filter,这个属性现在在edge中不支持,真可惜。但是幸运的是在大多数的手机浏览器还是支持的,所以在做一些处理图片的移动端的时候,这个还是很不错的
/*blur高斯模糊,这个值越大,越模糊,默认为0*/
filter: blur(2px);

/*brightness亮度调整,默认为100%,大于100,变亮,小于100,变暗*/
filter: brightness(20%);

/*contrast对比度调整,默认值为100,大于100,增加对比度,小于100,降低对比度*/
filter: contrast(130%);

/*grayscale灰度调整,默认值为0,如果大于0,那么增加灰度,100就是全灰,如果再增大,那么就无效*/
filter: grayscale(50%);

/*filter透明度调整,默认为0*/
filter: opacity(100%);

/*saturate,饱和度调整,默认为100%,低于100降低饱和度,高于100增加饱和度*/
filter: saturate(120%);
16、@font-face引入字体文件,并为该字体取名
@font-face {
    font-family: myFont;
    src: url('Sansation_Light.ttf');
}
17、font-variant,主要使用与英文,看下面的对比就明白了
/*css*/
div p:last-child {
    font-variant: small-caps;
}

/*html*/
<div>
    <p>My name is xiaoD</p>
    <p>My name is xiaoD</p>
</div>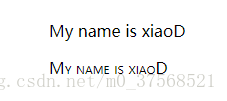


 204
204

 被折叠的 条评论
为什么被折叠?
被折叠的 条评论
为什么被折叠?
 到【灌水乐园】发言


