


资源tailwind css:Tailwind CSS Templates - Tailwind UITailwind CSS Templates - Tailwind UITailwind CSS Templates - Tailwind UI
1、安装tailwindcss
npm install -D tailwindcss postcss autoprefixer
2、安装配置:
npx tailwindcss init -p运行后会在目录下创建:tailwind.config.js 和postcss.config.js 文件,文件内容如下:
export default {
  plugins: {
    tailwindcss: {},
    autoprefixer: {},
  },
}
/** @type {import('tailwindcss').Config} */
export default {
content: ['./index.html', './src/**/*.{vue,js,ts,jsx,tsx}'],
theme: {
extend: {},
},
plugins: [],
}
3、这样,就完成了VUE3项目引入tailwindcss 动态样式了。
接下来样式的使用测试:
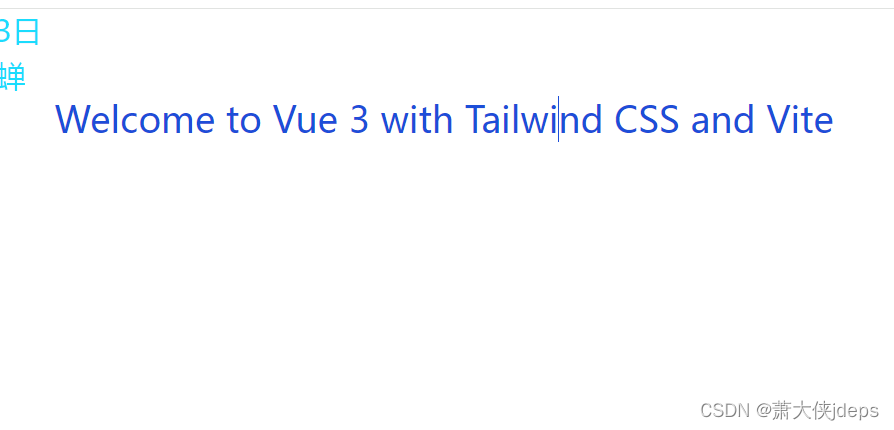
<div class="text-center text-blue-700">
    <h1 class="text-4xl">Welcome to Vue 3 with Tailwind CSS and Vite</h1>
  </div>
看看是否运行的效果:
4、添加暗黑主题:
1)修改tailwind.config.js,修改后如下。
const colors = require('tailwindcss/colors')
const plugin = require('tailwindcss/plugin')
const selectorParser = require('postcss-selector-parser')


module.exports = {
  purge: ['./index.html', './src/**/*.{vue,js,ts,jsx,tsx}'],
  darkMode: "class", // or 'media' or 'class'
  theme: {
    colors,
    extend: {},
  },
  variants: {
    extend: {
      backgroundColor: ['dark'],
      textColor: ['dark'],
    },
  },
  plugins: [
    plugin(function ({ addVariant, prefix, e }) {
      addVariant('dark', ({ modifySelectors, separator }) => {
        modifySelectors(({ selector }) => {
          return selectorParser((selectors) => {
            selectors.walkClasses((sel) => {
              sel.value = `dark${separator}${sel.value}`
              sel.parent.insertBefore(sel, selectorParser().astSync(prefix('.dark-mode ')))
            })
          }).processSync(selector)
        })
      })
    })
  ],
}
2)页面配置:修改{project}/index.html, 在<div id="app" 添加class="text-gray-700 dark:text-gray-300 dark:bg-gray-900 w-full h-full">
<!DOCTYPE html>
<html lang="en">

<head>
  <meta charset="UTF-8" />
  <link rel="icon" type="image/svg+xml" href="/vite.svg" />
  <meta name="viewport" content="width=device-width, initial-scale=1.0" />
  <title>Vite + Vue</title>
</head>

<body>
  <div id="app" class="text-gray-700 dark:text-gray-300 dark:bg-gray-900 w-full h-full"></div>
  <script type="module" src="/src/main.js"></script>
</body>

</html>
3)动态添加 html 头部样式,参考页面:
 <button @click="lightMode" class="border-2 p-1 m-1">普通模式</button>
 <button @click="darkMode" class="border-2 p-1 m-1">暗黑模式</button>
/**
 * 黑色主题
 */
const darkMode = () => {
    const clsList = document.documentElement.classList;
    console.log('clsList', clsList);
    if (!clsList.contains('dark-mode')) {
        document.documentElement.classList.add('dark');
        // Whenever the user explicitly chooses dark mode
        localStorage.theme = 'dark'

        // Whenever the user explicitly chooses to respect the OS preference
        // localStorage.removeItem('theme')
    }
}
/**高亮主题 */
const lightMode = () => {
    document.documentElement.classList.remove('dark')
    localStorage.theme = 'light'
}
4)Element-plus 同步黑色主题:需要在main.js 添加引入:
import 'element-plus/theme-chalk/dark/css-vars.css'效果如图
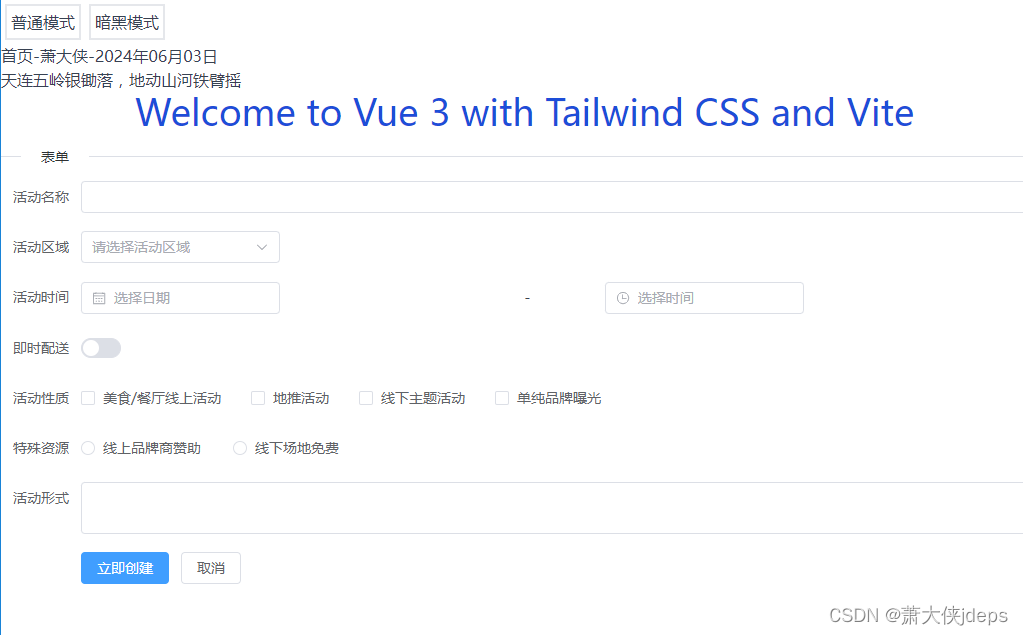
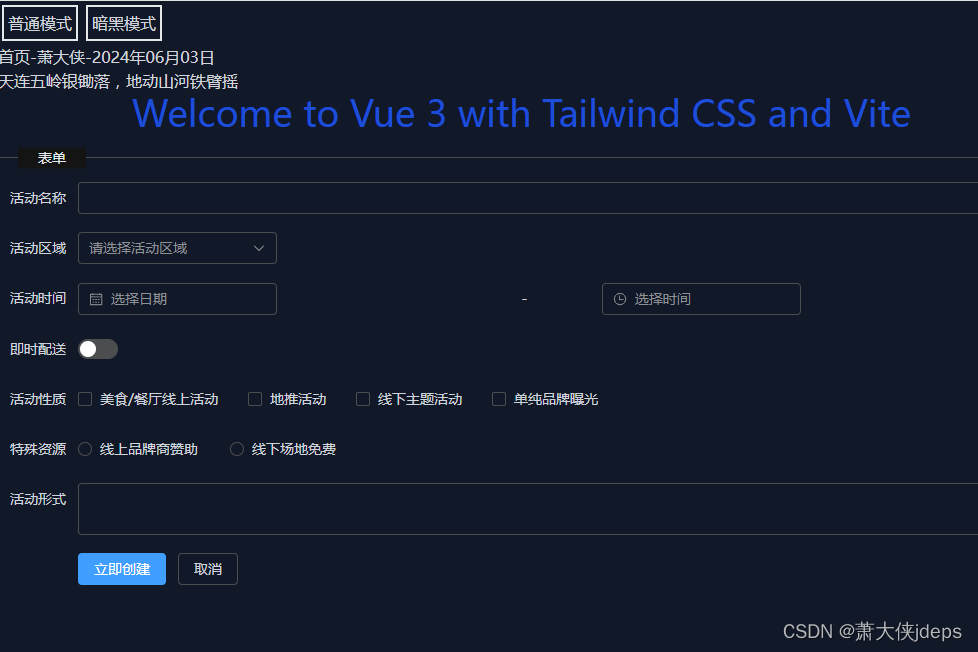
测试完整代码:
<template>
<div>
<button @click="lightMode" class="border-2 p-1 m-1">普通模式</button>
<button @click="darkMode" class="border-2 p-1 m-1">暗黑模式</button>
<div class="title">
首页-{{vo.name}}-{{hooks.getDate().date}}
<h2 v-if="gushi">{{gushi || ''}}</h2>
</div>
<div class="text-center text-blue-700">
<h1 class="text-4xl">Welcome to Vue 3 with Tailwind CSS and Vite</h1>
</div>
<div>
<el-divider content-position="left">表单</el-divider>
<el-form ref="vo.form" :model="vo.form" label-width="80px">
<el-form-item label="活动名称"><el-input v-model="vo.form.name"></el-input></el-form-item>
<el-form-item label="活动区域">
<el-select v-model="vo.form.region" placeholder="请选择活动区域"> <el-option label="区域一" value="shanghai"></el-option>
<el-option label="区域二" value="beijing"></el-option> </el-select></el-form-item>
<el-form-item label="活动时间">
<el-col :span="11"> <el-date-picker type="date" placeholder="选择日期" v-model="vo.form.date1" style="width: 100%;"></el-date-picker></el-col>
<el-col class="line" :span="2">-</el-col>
<el-col :span="11"><el-time-picker placeholder="选择时间" v-model="vo.form.date2" style="width: 100%;"></el-time-picker></el-col>
</el-form-item>
<el-form-item label="即时配送"><el-switch v-model="vo.form.delivery"></el-switch></el-form-item>
<el-form-item label="活动性质">
<el-checkbox-group v-model="vo.form.type">
<el-checkbox label="美食/餐厅线上活动" name="type"></el-checkbox>
<el-checkbox label="地推活动" name="type"></el-checkbox>
<el-checkbox label="线下主题活动" name="type"></el-checkbox>
<el-checkbox label="单纯品牌曝光" name="type"></el-checkbox>
</el-checkbox-group>
</el-form-item>
<el-form-item label="特殊资源">
<el-radio-group v-model="vo.form.resource">
<el-radio label="线上品牌商赞助"></el-radio>
<el-radio label="线下场地免费"></el-radio>
</el-radio-group>
</el-form-item>
<el-form-item label="活动形式"><el-input type="textarea" v-model="vo.form.desc"></el-input></el-form-item>
<el-form-item><el-button type="primary" @click="onSubmit">立即创建</el-button><el-button>取消</el-button></el-form-item>
</el-form>
</div>
</div>
</template>
<script setup>
// 导入 store 仓库
import { useStore } from '@/store/index'
import { ref, reactive, computed, onMounted } from 'vue'
// 导入路由
import { useRouter } from 'vue-router'
import { hooks, http } from '@/common'
const router = useRouter()
const store = useStore()
const vo = reactive({ name: '萧大侠', form: {} });
const state = reactive({});
// 调接口的示例
const gushi = ref('')
const getData = async () => {
const res = await http.get('/dev-api/shici/api.php')
console.log('古诗', res);
gushi.value = res?.hitokoto || ''
}
getData()
/**
* 黑色主题
*/
const darkMode = () => {
const clsList = document.documentElement.classList;
console.log('clsList', clsList);
if (!clsList.contains('dark-mode')) {
document.documentElement.classList.add('dark');
// Whenever the user explicitly chooses dark mode
localStorage.theme = 'dark'
// Whenever the user explicitly chooses to respect the OS preference
// localStorage.removeItem('theme')
}
}
/**高亮主题 */
const lightMode = () => {
document.documentElement.classList.remove('dark')
localStorage.theme = 'light'
}
</script>
<style lang="scss" scoped>
$color: #1bdcfd;
.page {
width: 100%;
height: 100%;
.title {
color: $color;
font-size: 30px;
}
}
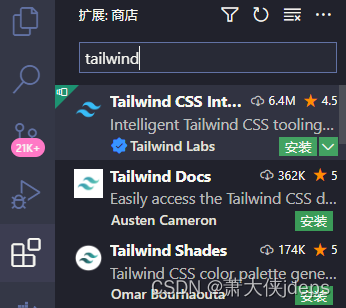
</style>5、vscode 安装编辑插件:
接下来列出简单的语法规则:
列出资源:
1、组件库:Tailwind CSS Component Playground - Tailwind UI
2、文档:Aspect Ratio - Tailwind CSS
最后附上完整的源代码(gitee):


 776
776


 被折叠的 条评论
为什么被折叠?
被折叠的 条评论
为什么被折叠?
 到【灌水乐园】发言


