


⭐ 作者简介:码上言
⭐ 代表教程:Spring Boot + vue-element 开发个人博客项目实战教程
⭐专栏内容:个人博客系统
⭐我的文档网站:http://xyhwh-nav.cn/
文章目录
Redis相关配置
redis.conf 配置文件介绍在Redis的使用过程,除了知道对Redis五种数据类型的操作方法之外,最主要的就是对redis.conf进行配置。
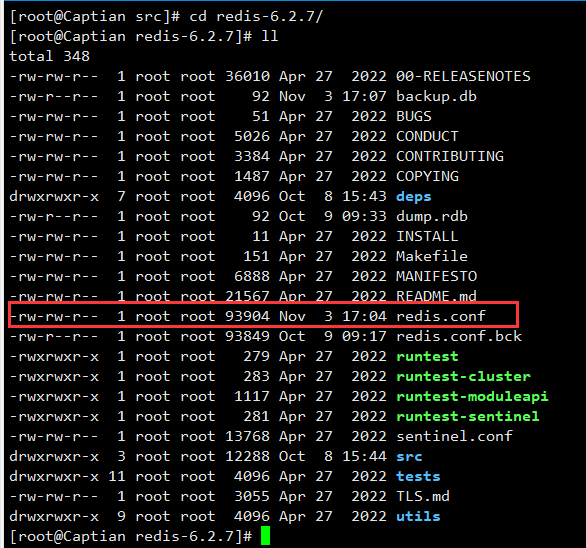
Redis 的配置文件位于 Redis 安装目录下,
1、units
配置大小单位,开头定义了一些基本的度量单位,只支持bytes,不支持bit
表明unit的单位是不分大小写的。
# Note on units: when memory size is needed, it is possible to specify
# it in the usual form of 1k 5GB 4M and so forth:
#
# 1k => 1000 bytes
# 1kb => 1024 bytes
# 1m => 1000000 bytes
# 1mb => 1024*1024 bytes
# 1g => 1000000000 bytes
# 1gb => 1024*1024*1024 bytes
#
# units are case insensitive so 1GB 1Gb 1gB are all the same.
2、Include
表明我们可以通过命令将多个.conf文件进行合并,格式:include /path/to/other.conf
和Spring配置文件类似,可以通过includes包含,redis.conf 可以作为总文件,可以包含其他文件!
# Note that option "include" won't be rewritten by command "CONFIG REWRITE"
# from admin or Redis Sentinel. Since Redis always uses the last processed
# line as value of a configuration directive, you'd better put includes
# at the beginning of this file to avoid overwriting config change at runtime.
#
# If instead you are interested in using includes to override configuration
# options, it is better to use include as the last line.
#
# include /path/to/local.conf
# include /path/to/other.conf
3、loadmodule 加载模块
通过这里的 loadmodule 配置将引入自定义模块来新增一些功能。
# Load modules at startup. If the server is not able to load modules
# it will abort. It is possible to use multiple loadmodule directives.
#
# loadmodule /path/to/my_module.so
# loadmodule /path/to/other_module.so
4、NETWORK 网络设置
  ################################## NETWORK #####################################
  .......
  # IF YOU ARE SURE YOU WANT YOUR INSTANCE TO LISTEN TO ALL THE INTERFACES
  # JUST COMMENT OUT THE FOLLOWING LINE.
  # ~~~~~~~~~~~~~~~~~~~~~~~~~~~~~~~~~~~~~~~~~~~~~~~~~~~~~~~~~~~~~~~~~~~~~~~~
  # 默认只能本机访问,如果是远程调用或者虚拟机调用,需要将其注释掉
  bind 127.0.0.1 -::1
  ......
  # By default protected mode is enabled. You should disable it only if
  # you are sure you want clients from other hosts to connect to Redis
  # even if no authentication is configured, nor a specific set of interfaces
  # are explicitly listed using the "bind" directive.
  # 如果你想要通过其他主机连接redis,那么你需要将protected-mode设为no
  protected-mode yes

  # Accept connections on the specified port, default is 6379 (IANA #815344).
  # If port 0 is specified Redis will not listen on a TCP socket.
  # 6379是redis的默认端口号,你可以在这里修改redis的端口号
  port 6379
  ......
  # Close the connection after a client is idle for N seconds (0 to disable)
  # 超时设置
  timeout 0
5、GENERAL 通用
# By default Redis does not run as a daemon. Use 'yes' if you need it.
# Note that Redis will write a pid file in /var/run/redis.pid when daemonized.
# When Redis is supervised by upstart or systemd, this parameter has no impact.
daemonize yes # 默认情况下,Redis不作为守护进程运行。需要开启的话,改为 yes

# Note: these supervision methods only signal "process is ready."
#       They do not enable continuous pings back to your supervisor.
#
# The default is "no". To run under upstart/systemd, you can simply uncomment
# the line below:
#
supervised no # 可通过upstart和systemd管理Redis守护进程

# Note that on modern Linux systems "/run/redis.pid" is more conforming
# and should be used instead.
pidfile /var/run/redis_6379.pid # 以后台进程方式运行redis,则需要指定pid 文件

loglevel notice # 日志级别。可选项有:
# debug(记录大量日志信息,适用于开发、测试阶段);
# verbose(较多日志信息);
# notice(适量日志信息,使用于生产环境);
# warning(仅有部分重要、关键信息才会被记录)。

logfile "" # 日志文件的位置,当指定为空字符串时,为标准输出

# Set the number of databases. The default database is DB 0, you can select
# a different one on a per-connection basis using SELECT <dbid> where
# dbid is a number between 0 and 'databases'-1
databases 16 # 设置数据库的数目。默认的数据库是DB 0

# However it is possible to force the pre-4.0 behavior and always show a
# ASCII art logo in startup logs by setting the following option to yes.
always-show-logo yes # 是否总是显示logo
6、SNAPSHOPTING 快照
# 900秒(15分钟)内至少1个key值改变,才会进行保存(则进行数据库保存--持久化)
save 900 1

# 300秒(5分钟)内至少10个key值改变,才会进行保存(则进行数据库保存--持久化)
save 300 10

# 60秒(1分钟)内至少10000个key值改变,才会进行保存(则进行数据库保存--持久化)
save 60 10000

stop-writes-on-bgsave-error yes # 持久化出现错误后,是否依然进行继续进行工作

rdbcompression yes # 使用压缩rdb文件 yes:压缩,但是需要一些cpu的消耗。no:不压缩,需要更多的磁盘空间

rdbchecksum yes # 是否校验rdb文件,更有利于文件的容错性,但是在保存rdb文件的时候,会有大概10%的性能损耗

dbfilename dump.rdb # dbfilenamerdb文件名称

dir ./ # dir 数据目录,数据库的写入会在这个目录。rdb、aof文件也会写在这个目录(默认为当前目录)
7、REPLICATION 主从复制
# When a replica loses its connection with the master, or when the replication
# is still in progress, the replica can act in two different ways:
#
# 1) if replica-serve-stale-data is set to 'yes' (the default) the replica will
#    still reply to client requests, possibly with out of date data, or the
#    data set may just be empty if this is the first synchronization.
#
# 2) If replica-serve-stale-data is set to 'no' the replica will reply with
#    an error "SYNC with master in progress" to all commands except:
#    INFO, REPLICAOF, AUTH, PING, SHUTDOWN, REPLCONF, ROLE, CONFIG, SUBSCRIBE,
#    UNSUBSCRIBE, PSUBSCRIBE, PUNSUBSCRIBE, PUBLISH, PUBSUB, COMMAND, POST,
#    HOST and LATENCY.
#
replica-serve-stale-data yes

# Note: read only replicas are not designed to be exposed to untrusted clients
# on the internet. It's just a protection layer against misuse of the instance.
# Still a read only replica exports by default all the administrative commands
# such as CONFIG, DEBUG, and so forth. To a limited extent you can improve
# security of read only replicas using 'rename-command' to shadow all the
# administrative / dangerous commands.
replica-read-only yes

# With slow disks and fast (large bandwidth) networks, diskless replication
# works better.
repl-diskless-sync no

# The delay is specified in seconds, and by default is 5 seconds. To disable
# it entirely just set it to 0 seconds and the transfer will start ASAP.
repl-diskless-sync-delay 5
......
8、SECURITY 安全
# ACL LOG
#
# The ACL Log tracks failed commands and authentication events associated
# with ACLs. The ACL Log is useful to troubleshoot failed commands blocked
# by ACLs. The ACL Log is stored in memory. You can reclaim memory with
# ACL LOG RESET. Define the maximum entry length of the ACL Log below.
acllog-max-len 128
9、CLIENTS 限制
# IMPORTANT: When Redis Cluster is used, the max number of connections is also
# shared with the cluster bus: every node in the cluster will use two
# connections, one incoming and another outgoing. It is important to size the
# limit accordingly in case of very large clusters.
#
# 设置客户端的最大连接数
# maxclients 10000
10、MEMORY MANAGEMENT内存管理
# In short... if you have replicas attached it is suggested that you set a lower
# limit for maxmemory so that there is some free RAM on the system for replica
# output buffers (but this is not needed if the policy is 'noeviction').
#
# 你可以设置redis的最大内存(redis在未进行持久化之前,数据是存在内存中的,断电即失)
# maxmemory <bytes>

# Note: with any of the above policies, when there are no suitable keys for
# eviction, Redis will return an error on write operations that require
# more memory. These are usually commands that create new keys, add data or
# modify existing keys. A few examples are: SET, INCR, HSET, LPUSH, SUNIONSTORE,
# SORT (due to the STORE argument), and EXEC (if the transaction includes any
# command that requires memory).
#
# The default is:
#
# 设置key过期的策略
# maxmemory-policy noeviction
maxmemory-policy 六种策略
- volatile-lru:只最近最少使用算法,从设置了过期时间的键中选择空转时间最长的键值对清除掉;
- allkeys-lru : 最近最少使用算法,从所有的键中选择空转时间最长的键值对清除;
- volatile-random:从设置了过期时间的键中,随机选择键进行清除;
- allkeys-random:所有的键中,随机选择键进行删除;
- volatile-ttl : 从设置了过期时间的键中选择过期时间最早的键值对清除;
- noeviction : 不做任何的清理工作,在redis的内存超过限制之后,所有的写入操作都会返回错误;但是读操作都能正常的进行;
11、append only模式
appendonly no # 是否以append only模式作为持久化方式,默认使用的是rdb方式持久化,这种方式在许多应用中已经足够用了

appendfilename "appendonly.aof" # appendfilename AOF 文件名称

appendfsync everysec # appendfsync aof持久化策略的配置
# no表示不执行fsync,由操作系统保证数据同步到磁盘,速度最快。
# always表示每次写入都执行fsync,以保证数据同步到磁盘。
# everysec表示每秒执行一次fsync,可能会导致丢失这1s数据。
AOF :Redis 默认不开启。它的出现是为了弥补RDB的不足(数据的不一致性),所以它采用日志的形式来记录每个写操作,并追加到文件中。Redis 重启的会根据日志文件的内容将写指令从前到后执行一次以完成数据的恢复工作。
12、常见配置
- Redis默认不是以守护进程的方式运行,可以通过该配置项修改,使用yes启用守护进程
daemonize no
- 当 Redis 以守护进程方式运行时,Redis 默认会把 pid 写入 /var/run/redis.pid 文件,可以通过 pidfile 指定
pidfile /var/run/redis.pid
- 指定 Redis 监听端口,默认端口为 6379
port 6379
- 绑定的主机地址
bind 127.0.0.1
- 当客户端闲置多长秒后关闭连接,如果指定为 0 ,表示关闭该功能
timeout 300
- 指定日志记录级别,Redis 总共支持四个级别:debug、verbose、notice、warning,默认为 notice
loglevel notice
- 日志记录方式,默认为标准输出,如果配置 Redis 为守护进程方式运行,而这里又配置为日志记录方式为标准输出,则日志将会发送给 /dev/null
logfile stdout
- 设置数据库的数量,默认数据库为0,可以使用SELECT 命令在连接上指定数据库id
databases 16
- 指定在多长时间内,有多少次更新操作,就将数据同步到数据文件,可以多个条件配合
save <seconds> <changes>
Redis 默认配置文件中提供了三个条件:
save 900 1
save 300 10
save 60 10000
分别表示 900 秒(15 分钟)内有 1 个更改,300 秒(5 分钟)内有 10 个更改以及 60 秒内有 10000 个更改。
- 指定存储至本地数据库时是否压缩数据,默认为 yes,Redis 采用 LZF 压缩,如果为了节省 CPU 时间,可以关闭该选项,但会导致数据库文件变的巨大
rdbcompression yes
- 指定本地数据库文件名,默认值为 dump.rdb
dbfilename dump.rdb
- 指定本地数据库存放目录
dir ./
- 设置当本机为 slave 服务时,设置 master 服务的 IP 地址及端口,在 Redis 启动时,它会自动从 master 进行数据同步
slaveof <masterip> <masterport>
- 当 master 服务设置了密码保护时,slave 服务连接 master 的密码
masterauth <master-password>
- 设置 Redis 连接密码,如果配置了连接密码,客户端在连接 Redis 时需要通过
AUTH <password>命令提供密码,默认关闭
requirepass foobared
- 设置同一时间最大客户端连接数,默认无限制,Redis 可以同时打开的客户端连接数为 Redis 进程可以打开的最大文件描述符数,如果设置 maxclients 0,表示不作限制。当客户端连接数到达限制时,Redis 会关闭新的连接并向客户端返回 max number of clients reached 错误信息
maxclients 128
- 指定 Redis 最大内存限制,Redis 在启动时会把数据加载到内存中,达到最大内存后,Redis 会先尝试清除已到期或即将到期的 Key,当此方法处理 后,仍然到达最大内存设置,将无法再进行写入操作,但仍然可以进行读取操作。Redis 新的 vm 机制,会把 Key 存放内存,Value 会存放在 swap 区
maxmemory <bytes>
- 指定是否在每次更新操作后进行日志记录,Redis 在默认情况下是异步的把数据写入磁盘,如果不开启,可能会在断电时导致一段时间内的数据丢失。因为 redis 本身同步数据文件是按上面 save 条件来同步的,所以有的数据会在一段时间内只存在于内存中。默认为 no
appendonly no
- 指定更新日志文件名,默认为 appendonly.aof
appendfilename appendonly.aof
- 指定更新日志条件,共有 3 个可选值:
- no:表示等操作系统进行数据缓存同步到磁盘(快)
- always:表示每次更新操作后手动调用 fsync() 将数据写到磁盘(慢,安全)
- everysec:表示每秒同步一次(折中,默认值)
appendfsync everysec
- 指定是否启用虚拟内存机制,默认值为 no,简单的介绍一下,VM 机制将数据分页存放,由 Redis 将访问量较少的页即冷数据 swap 到磁盘上,访问多的页面由磁盘自动换出到内存中(在后面的文章我会仔细分析 Redis 的 VM 机制)
vm-enabled no
- 虚拟内存文件路径,默认值为 /tmp/redis.swap,不可多个 Redis 实例共享
vm-swap-file /tmp/redis.swap
- 将所有大于 vm-max-memory 的数据存入虚拟内存,无论 vm-max-memory 设置多小,所有索引数据都是内存存储的(Redis 的索引数据 就是 keys),也就是说,当 vm-max-memory 设置为 0 的时候,其实是所有 value 都存在于磁盘。默认值为 0
vm-max-memory 0
- Redis swap 文件分成了很多的 page,一个对象可以保存在多个 page 上面,但一个 page 上不能被多个对象共享,vm-page-size 是要根据存储的 数据大小来设定的,作者建议如果存储很多小对象,page 大小最好设置为 32 或者 64bytes;如果存储很大大对象,则可以使用更大的 page,如果不确定,就使用默认值。
vm-page-size 32
- 设置 swap 文件中的 page 数量,由于页表(一种表示页面空闲或使用的 bitmap)是在放在内存中的,,在磁盘上每 8 个 pages 将消耗 1byte 的内存
vm-pages 134217728
- 设置访问swap文件的线程数,最好不要超过机器的核数,如果设置为0,那么所有对swap文件的操作都是串行的,可能会造成比较长时间的延迟。默认值为4
vm-max-threads 4
- 设置在向客户端应答时,是否把较小的包合并为一个包发送,默认为开启
glueoutputbuf yes
- 指定在超过一定的数量或者最大的元素超过某一临界值时,采用一种特殊的哈希算法
hash-max-zipmap-entries 64
hash-max-zipmap-value 512
- 指定是否激活重置哈希,默认为开启(后面在介绍 Redis 的哈希算法时具体介绍)
activerehashing yes
- 指定包含其它的配置文件,可以在同一主机上多个Redis实例之间使用同一份配置文件,而同时各个实例又拥有自己的特定配置文件
include /path/to/local.conf


 16万+
16万+


 被折叠的 条评论
为什么被折叠?
被折叠的 条评论
为什么被折叠?
 到【灌水乐园】发言


